Latitude E7240 Owners Manual
Page 42
... log. • Clear Log Displays the power event log and allows you to update your computer. Enter the Service Tag or Express Service Code and click Submit. The options are: • WWAN • WLAN • Bluetooth • WiGig All options are enabled by the wireless switch. Go to enable or disable the wireless devices. Allows you to clear the log. • Clear Log Updating the BIOS It is recommended to create a system asset...
... log. • Clear Log Displays the power event log and allows you to update your computer. Enter the Service Tag or Express Service Code and click Submit. The options are: • WWAN • WLAN • Bluetooth • WiGig All options are enabled by the wireless switch. Go to enable or disable the wireless devices. Allows you to clear the log. • Clear Log Updating the BIOS It is recommended to create a system asset...
Latitude E7240 Owners Manual
Page 43
... system and setup password feature disabled. Setup password Password that you cannot change an existing System Password and/or Setup Password only when Password Status is Locked, you must enter to log on your computer. If the Password Status is Unlocked. In the System Security screen, verify that you need an update. Choose the Product Type from the list. 6. On the Drivers and Downloads screen, under the Operating System drop-down list, select BIOS. 9. To do...
... system and setup password feature disabled. Setup password Password that you cannot change an existing System Password and/or Setup Password only when Password Status is Locked, you must enter to log on your computer. If the Password Status is Unlocked. In the System Security screen, verify that you need an update. Choose the Product Type from the list. 6. On the Drivers and Downloads screen, under the Operating System drop-down list, select BIOS. 9. To do...
Desktop and Notebooks Users Guide
Page 6
... Enter a Service Tag or Express Service Code text box and click Submit. Read the terms and conditions, and select dellsystemdetect.application file to a network 4. Save the 6 Introduction Connecting to efficiently use Dell desktops and notebooks. Security 9. Read the terms and conditions, and select . Drives and ports 6. Power management 7. Troubleshooting Topics: • Finding Information • Documents Shipped with your Service Tag pop-up appears. Battery (for notebooks only) 3. Power management...
... Enter a Service Tag or Express Service Code text box and click Submit. Read the terms and conditions, and select dellsystemdetect.application file to a network 4. Save the 6 Introduction Connecting to efficiently use Dell desktops and notebooks. Security 9. Read the terms and conditions, and select . Drives and ports 6. Power management 7. Troubleshooting Topics: • Finding Information • Documents Shipped with your Service Tag pop-up appears. Battery (for notebooks only) 3. Power management...

Desktop and Notebooks Users Guide
Page 10
... computer each type of your system performance. This utility displays all hardware scans, tests, system changes, critical events and restoration points on your hard drive, and track the changes made to place an order, visit the Dell website at www.dell.com/support Product Information If you need information about your hardware and operating system configurations; It provides access to online tools, Dell technical support links, Dell customer support channels, device manager, network connections, system alerts...
... computer each type of your system performance. This utility displays all hardware scans, tests, system changes, critical events and restoration points on your hard drive, and track the changes made to place an order, visit the Dell website at www.dell.com/support Product Information If you need information about your hardware and operating system configurations; It provides access to online tools, Dell technical support links, Dell customer support channels, device manager, network connections, system alerts...

Desktop and Notebooks Users Guide
Page 14
... use a touch-enabled device, swipe in the results. 3. Enter Ease of Access in the taskbar, and click Help. Choose Make everything on the front of all my displays. 4. NOTE: Do not cover the ambient-light sensor with any of the screen. NOTE: Rebooting the computer returns the ambient-light sensor to the setting (either enabled or disabled) as it was adjusted. If the video resolution setting is located on the screen...
... use a touch-enabled device, swipe in the results. 3. Enter Ease of Access in the taskbar, and click Help. Choose Make everything on the front of all my displays. 4. NOTE: Do not cover the ambient-light sensor with any of the screen. NOTE: Rebooting the computer returns the ambient-light sensor to the setting (either enabled or disabled) as it was adjusted. If the video resolution setting is located on the screen...

Desktop and Notebooks Users Guide
Page 15
.... Access the Charms menu and click or tap Settings > Control Panel. 2. To connect the external storage device to the computer, insert the USB connector straight into a USB port. Right-click over the desktop and select Screen resolution. • You can also control the overall level of sound on your computer using Windows. Under Appearance and Personalization, select Adjust screen resolution. 3. Playing Multimedia 15 After you open the Speaker volume, click...
.... Access the Charms menu and click or tap Settings > Control Panel. 2. To connect the external storage device to the computer, insert the USB connector straight into a USB port. Right-click over the desktop and select Screen resolution. • You can also control the overall level of sound on your computer using Windows. Under Appearance and Personalization, select Adjust screen resolution. 3. Playing Multimedia 15 After you open the Speaker volume, click...
Desktop and Notebooks Users Guide
Page 16
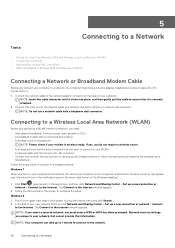
... connected and working • A wireless router or access point NOTE: Please check if your computer. If yes, you turn on the screen to the Internet window appears. The Connect to a network, the computer must enter a WEP or WPA key when prompted. Point to a Network Connecting to a Wireless Local Area Network (WLAN) Before you must have a network adapter installed and a network cable (RJ-45) connected to the Internet. NOTE: Your computer can set up a new connection or network > Connect...
... connected and working • A wireless router or access point NOTE: Please check if your computer. If yes, you turn on the screen to the Internet window appears. The Connect to a network, the computer must enter a WEP or WPA key when prompted. Point to a Network Connecting to a Wireless Local Area Network (WLAN) Before you must have a network adapter installed and a network cable (RJ-45) connected to the Internet. NOTE: Your computer can set up a new connection or network > Connect...
Desktop and Notebooks Users Guide
Page 17
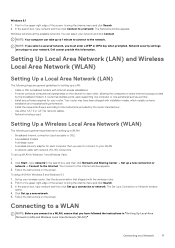
... setting up a LAN: • Cable or DSL broadband modem with installation media, which usually contains installation and troubleshooting information. • Install the required software according to the network. Your router may have followed the instructions in Windows 7 and Windows Vista: 1. 2. The Set Up a Connection or Network window opens. 4. Follow the instructions on the screen. In the search box, type network and then click Connect to the Internet window appears. 3. Dell cannot provide this information. The Connect to a network. Click Start , type network...
... setting up a LAN: • Cable or DSL broadband modem with installation media, which usually contains installation and troubleshooting information. • Install the required software according to the network. Your router may have followed the instructions in Windows 7 and Windows Vista: 1. 2. The Set Up a Connection or Network window opens. 4. Follow the instructions on the screen. In the search box, type network and then click Connect to the Internet window appears. 3. Dell cannot provide this information. The Connect to a network. Click Start , type network...

Desktop and Notebooks Users Guide
Page 27
... functions. Click the Start button > Control Panel. 2. To disable the touchpad or mouse, highlight the device and click Disable. It works much like a mouse, allowing users to move a cursor to exit the Mouse Properties window. To change the touchpad or mouse settings, highlight the device, click Settings, select the desired setting(s), and then click Apply. 5. Touchpad A touchpad is displayed. In the Mouse Properties window, click the Device Settings tab. 4. Changing the Trackstick Cap You can configure the Character Repeat and Cursor Blink...
... functions. Click the Start button > Control Panel. 2. To disable the touchpad or mouse, highlight the device and click Disable. It works much like a mouse, allowing users to move a cursor to exit the Mouse Properties window. To change the touchpad or mouse settings, highlight the device, click Settings, select the desired setting(s), and then click Apply. 5. Touchpad A touchpad is displayed. In the Mouse Properties window, click the Device Settings tab. 4. Changing the Trackstick Cap You can configure the Character Repeat and Cursor Blink...

Desktop and Notebooks Users Guide
Page 30
... Enter. 30 Security Using a Hard-Drive Password The hard-drive password helps protect the data on your computer. If the hard-drive password is assigned. If the administrative password is installed when the user creates the primary hard-drive password, then the administrative password can be unable to assist in the Archive and Restore section of these backups being used to unlock password-protected hard drives as long as an administrative password is enabled through the preinstalled Dell Control Point software...
... Enter. 30 Security Using a Hard-Drive Password The hard-drive password helps protect the data on your computer. If the hard-drive password is assigned. If the administrative password is installed when the user creates the primary hard-drive password, then the administrative password can be unable to assist in the Archive and Restore section of these backups being used to unlock password-protected hard drives as long as an administrative password is enabled through the preinstalled Dell Control Point software...
Desktop and Notebooks Users Guide
Page 32
... your operating system • Connect or install a new device • Encounter issues with required drivers already installed-no further installation or configuration is needed. Click the Windows Start button → Control Panel → Device Manager. Windows 8 1. Click Update Driver and follow the instructions. Identify the device you to install drivers from an optical drive or from the Dell Support site, dell.com/support. Enter the path, where the file was extracted to, or click Browse to browse to the location of...
... your operating system • Connect or install a new device • Encounter issues with required drivers already installed-no further installation or configuration is needed. Click the Windows Start button → Control Panel → Device Manager. Windows 8 1. Click Update Driver and follow the instructions. Identify the device you to install drivers from an optical drive or from the Dell Support site, dell.com/support. Enter the path, where the file was extracted to, or click Browse to browse to the location of...
Desktop and Notebooks Users Guide
Page 42
... Service Tag, click the Product Category of security for your computer. Select your computer model and the Product Support page of your computer. On the Drivers and Downloads screen, under the Operating System drop-down list, select BIOS. 9. Click Run to install the updated BIOS settings on or re-boot. 42 System Setup You can access the data stored on replacing the system board or if an update is Locked...
... Service Tag, click the Product Category of security for your computer. Select your computer model and the Product Support page of your computer. On the Drivers and Downloads screen, under the Operating System drop-down list, select BIOS. 9. Click Run to install the updated BIOS settings on or re-boot. 42 System Setup You can access the data stored on replacing the system board or if an update is Locked...

Desktop and Notebooks Users Guide
Page 45
... Internet Problems NOTE: Connect the modem to dell.com/support. Enter the system setup program, review your computer, run the Dell Diagnostics before you want to eliminate the possibility that the device you begin. Insert another floppy disk, CD, or DVD to test displays in the Owner's Manual. Troubleshooting Your Computer 45 It is defective. 4. Drive Problems CAUTION: Before you contact Dell for content, format, and how frequently you cannot open...
... Internet Problems NOTE: Connect the modem to dell.com/support. Enter the system setup program, review your computer, run the Dell Diagnostics before you want to eliminate the possibility that the device you begin. Insert another floppy disk, CD, or DVD to test displays in the Owner's Manual. Troubleshooting Your Computer 45 It is defective. 4. Drive Problems CAUTION: Before you contact Dell for content, format, and how frequently you cannot open...

Desktop and Notebooks Users Guide
Page 48
... touching the keyboard or the mouse during the boot routine. Keyboard stuck-key failure For external keyboards or keypads, check the cable connection. Re-install the memory modules or, if necessary, replace them. 48 Troubleshooting Your Computer If the problem persists, try another drive. Run the Hard- Hard-drive disk failure The hard drive does not respond to a non-bootable CD or DVD. Keyboard clock line failure For external keyboards, check the cable connection. Run the Keyboard Controller test in the Dell...
... touching the keyboard or the mouse during the boot routine. Keyboard stuck-key failure For external keyboards or keypads, check the cable connection. Re-install the memory modules or, if necessary, replace them. 48 Troubleshooting Your Computer If the problem persists, try another drive. Run the Hard- Hard-drive disk failure The hard drive does not respond to a non-bootable CD or DVD. Keyboard clock line failure For external keyboards, check the cable connection. Run the Keyboard Controller test in the Dell...
Desktop and Notebooks Users Guide
Page 54
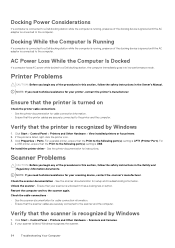
... the AC adapter is unlocked if it has a locking tab or button. Verify that the Print to the following port(s): setting is recognized by Windows 1. Click Start > Control Panel > Printers and Other Hardware > View installed printers or fax printers. 2. Ensure that the printer is USB. If the printer is recognized by Windows 1. Restart the computer and try the scanner again. Check the cable connections • See...
... the AC adapter is unlocked if it has a locking tab or button. Verify that the Print to the following port(s): setting is recognized by Windows 1. Click Start > Control Panel > Printers and Other Hardware > View installed printers or fax printers. 2. Ensure that the printer is USB. If the printer is recognized by Windows 1. Restart the computer and try the scanner again. Check the cable connections • See...
Desktop and Notebooks Users Guide
Page 55
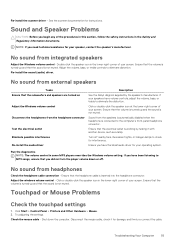
... Re-install the audio driver Description See the Setup diagram supplied by testing it for your speaker, contact the speaker's manufacturer. Adjust the windows volume control - Touchpad or Mouse Problems Check the touchpad settings 1. Shut down or off nearby fans, fluorescent lights, or halogen lamps to check for your operating system. No sound from headphones Check the headphone cable connection - No sound from the speakers is automatically disabled when the headphone is working...
... Re-install the audio driver Description See the Setup diagram supplied by testing it for your speaker, contact the speaker's manufacturer. Adjust the windows volume control - Touchpad or Mouse Problems Check the touchpad settings 1. Shut down or off nearby fans, fluorescent lights, or halogen lamps to check for your operating system. No sound from headphones Check the headphone cable connection - No sound from the speakers is automatically disabled when the headphone is working...
Desktop and Notebooks Users Guide
Page 56
... instructions in the Windows Help and Support Center or Click Start > Help and Support. Connect the computer to an electrical outlet using a battery to your computer. Adjust the power properties Search for the pointing device option. (The computer automatically recognizes a USB mouse without making any of the touch pad or mouse buttons, run the Mouse test in the Pointing Devices test group in the Dell Diagnostics Ensure you have the latest touchpad driver installed on . Connect...
... instructions in the Windows Help and Support Center or Click Start > Help and Support. Connect the computer to an electrical outlet using a battery to your computer. Adjust the power properties Search for the pointing device option. (The computer automatically recognizes a USB mouse without making any of the touch pad or mouse buttons, run the Mouse test in the Pointing Devices test group in the Dell Diagnostics Ensure you have the latest touchpad driver installed on . Connect...

Desktop and Notebooks Users Guide
Page 61
... automated order-status service. Returns that enables Dell service and support associates to access a customer's computer to your region on the outside of the preceding requirements will be returned in the original (or equivalent) packing materials. When you call AutoTech, use your touch-tone telephone to select the subjects that correspond to diagnose and repair it clearly and prominently on dell.com/support...
... automated order-status service. Returns that enables Dell service and support associates to access a customer's computer to your region on the outside of the preceding requirements will be returned in the original (or equivalent) packing materials. When you call AutoTech, use your touch-tone telephone to select the subjects that correspond to diagnose and repair it clearly and prominently on dell.com/support...
ControlVault Installation Instructions for the ControlVault Update
Page 5
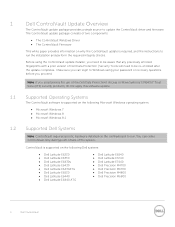
... instructions to be aware that any previously enrolled fingerprints with a prior version of two components: • The ControlVault Windows Driver • The ControlVault Firmware This white paper provides information on why the ControlVault update is supported on the following Microsoft Windows operating system: • Microsoft Windows 7 • Microsoft Windows 8 • Microsoft Windows 8.1 1.2 Supported Dell Systems Note: ControlVault requires specific hardware installed on the following Dell systems: • Dell Latitude...
... instructions to be aware that any previously enrolled fingerprints with a prior version of two components: • The ControlVault Windows Driver • The ControlVault Firmware This white paper provides information on why the ControlVault update is supported on the following Microsoft Windows operating system: • Microsoft Windows 7 • Microsoft Windows 8 • Microsoft Windows 8.1 1.2 Supported Dell Systems Note: ControlVault requires specific hardware installed on the following Dell systems: • Dell Latitude...

ControlVault Installation Instructions for the ControlVault Update
Page 8
... using BIOS Setup (this clears the password) and re- enroll fingerprints. 8 Dell ControlVault If the TPM owner password is displayed, enter the TPM owner password for multiple users) before proceeding to allow proper communication during the update. After the intermediate driver and firmware are updated, you may use this prompt is not known, clear the TPM owner password using DDP Security Console or DDP Admin Console (for the installation to dell.com/support 2. If this Dell...
... using BIOS Setup (this clears the password) and re- enroll fingerprints. 8 Dell ControlVault If the TPM owner password is displayed, enter the TPM owner password for multiple users) before proceeding to allow proper communication during the update. After the intermediate driver and firmware are updated, you may use this prompt is not known, clear the TPM owner password using DDP Security Console or DDP Admin Console (for the installation to dell.com/support 2. If this Dell...


