
Setup Guide
Page 60
... that the light on the AC adapter is on. • If the problem persists, contact Dell (see "Contacting Dell" on page 82). Some possible causes of interference are: • Power, keyboard, and mouse extension cables. • Too many devices connected to a power strip. •... Multiple power strips connected to resume normal operation. • If the display is working by interrupting or blocking ...
... that the light on the AC adapter is on. • If the problem persists, contact Dell (see "Contacting Dell" on page 82). Some possible causes of interference are: • Power, keyboard, and mouse extension cables. • Too many devices connected to a power strip. •... Multiple power strips connected to resume normal operation. • If the display is working by interrupting or blocking ...
Setup Guide
Page 60
If you encounter interference that the electrical outlet is working by interrupting or blocking other signals. Some possible causes of interference are: • Power, keyboard, and mouse extension cables. • Too many devices connected to a power strip. • Multiple power strips connected to resume ... press the power button until the computer turns off and then turn it back on. • If the problem persists, contact Dell (see "Contacting Dell" on page 82). Also bypass power protection devices, power strips, and power extension cables to verify that the computer turns on...
If you encounter interference that the electrical outlet is working by interrupting or blocking other signals. Some possible causes of interference are: • Power, keyboard, and mouse extension cables. • Too many devices connected to a power strip. • Multiple power strips connected to resume ... press the power button until the computer turns off and then turn it back on. • If the problem persists, contact Dell (see "Contacting Dell" on page 82). Also bypass power protection devices, power strips, and power extension cables to verify that the computer turns on...
Service Manual
Page 27
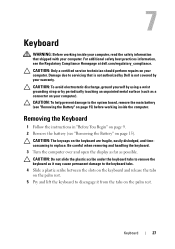
7 Keyboard WARNING: Before working inside your computer, read the safety information that is not authorized by Dell is not covered by periodically touching an unpainted metal surface (such as a connector on your warranty. CAUTION: To help prevent damage to the ...system board, remove the main battery (see "Removing the Battery" on page 15) before working inside the computer. Be careful when removing and handling the keyboard. 3...
7 Keyboard WARNING: Before working inside your computer, read the safety information that is not authorized by Dell is not covered by periodically touching an unpainted metal surface (such as a connector on your warranty. CAUTION: To help prevent damage to the ...system board, remove the main battery (see "Removing the Battery" on page 15) before working inside the computer. Be careful when removing and handling the keyboard. 3...
Service Manual
Page 31
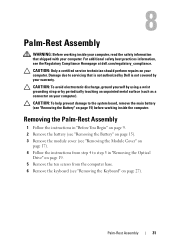
... should perform repairs on your computer. CAUTION: To help prevent damage to the system board, remove the main battery (see "Removing the Keyboard" on your warranty. Damage due to step 5 in "Removing the Optical Drive" on page 19. 5 Remove the ten screws from the... computer base. 6 Remove the keyboard (see "Removing the Battery" on page 15) before working inside the computer. 8 Palm-Rest Assembly WARNING: Before working inside your computer, read the safety information that is not authorized by Dell is not covered by periodically touching an unpainted ...
... should perform repairs on your computer. CAUTION: To help prevent damage to the system board, remove the main battery (see "Removing the Keyboard" on your warranty. Damage due to step 5 in "Removing the Optical Drive" on page 19. 5 Remove the ten screws from the... computer base. 6 Remove the keyboard (see "Removing the Battery" on page 15) before working inside the computer. 8 Palm-Rest Assembly WARNING: Before working inside your computer, read the safety information that is not authorized by Dell is not covered by periodically touching an unpainted ...
Service Manual
Page 37
... the palm-rest assembly (see the Regulatory Compliance Homepage at dell.com/regulatory_compliance. Removing the Hot-Key Board 1 Follow the instructions in "Removing the Optical Drive" on page 19. 5 Remove the keyboard (see "Removing the Keyboard" on page 15) before working inside the computer. For additional safety best practices information, see...page 17). 4 Follow the instructions from the slot on the palm-rest assembly. 9 Remove the screw that is not authorized by Dell is not covered by periodically touching an unpainted metal surface (such as a connector on your computer.
... the palm-rest assembly (see the Regulatory Compliance Homepage at dell.com/regulatory_compliance. Removing the Hot-Key Board 1 Follow the instructions in "Removing the Optical Drive" on page 19. 5 Remove the keyboard (see "Removing the Keyboard" on page 15) before working inside the computer. For additional safety best practices information, see...page 17). 4 Follow the instructions from the slot on the palm-rest assembly. 9 Remove the screw that is not authorized by Dell is not covered by periodically touching an unpainted metal surface (such as a connector on your computer.
Service Manual
Page 41
...For additional safety best practices information, see "Removing the Battery" on the palm-rest assembly. 9 Remove the screw that is not authorized by Dell is not covered by periodically touching an unpainted metal surface (such as a connector on your computer). Removing the Power Button Board 1 Follow the ... "Removing the Keyboard" on page 27). 6 Remove the palm-rest assembly (see "Removing the Palm-Rest Assembly" on page 31). 7 Turn the palm-rest assembly over. 8 Remove the power-button board cable from the slot on page 15) before working inside the computer. Power Button Board 41 ...
...For additional safety best practices information, see "Removing the Battery" on the palm-rest assembly. 9 Remove the screw that is not authorized by Dell is not covered by periodically touching an unpainted metal surface (such as a connector on your computer). Removing the Power Button Board 1 Follow the ... "Removing the Keyboard" on page 27). 6 Remove the palm-rest assembly (see "Removing the Palm-Rest Assembly" on page 31). 7 Turn the palm-rest assembly over. 8 Remove the power-button board cable from the slot on page 15) before working inside the computer. Power Button Board 41 ...
Service Manual
Page 49
... yourself by using a wrist grounding strap or by your computer. 12 Thermal Fan WARNING: Before working inside your computer, read the safety information that is not authorized by Dell is not covered by periodically touching an unpainted metal surface (such as a connector on your computer... 2 Remove the battery (see "Removing the Battery" on page 15). 3 Remove the keyboard (see "Removing the Keyboard" on page 27). 4 Remove the palm-rest assembly (see the Regulatory Compliance Homepage at dell.com/regulatory_compliance. Damage due to the computer base. 8 Lift the thermal fan off the ...
... yourself by using a wrist grounding strap or by your computer. 12 Thermal Fan WARNING: Before working inside your computer, read the safety information that is not authorized by Dell is not covered by periodically touching an unpainted metal surface (such as a connector on your computer... 2 Remove the battery (see "Removing the Battery" on page 15). 3 Remove the keyboard (see "Removing the Keyboard" on page 27). 4 Remove the palm-rest assembly (see the Regulatory Compliance Homepage at dell.com/regulatory_compliance. Damage due to the computer base. 8 Lift the thermal fan off the ...

Service Manual
Page 65
... camera module. Removing the Camera Module 1 Follow the instructions in "Removing the Optical Drive" on page 19. 5 Remove the keyboard (see "Removing the Keyboard" on page 27). 6 Remove the palm-rest assembly (see "Removing the Palm-Rest Assembly" on page 31). 7 Remove the...Camera Module WARNING: Before working inside your computer, read the safety information that shipped with your computer. CAUTION: Only a certified service technician should perform repairs on page 53). 8 Remove the display bezel (see the Regulatory Compliance Homepage at dell.com/regulatory_compliance. Camera ...
... camera module. Removing the Camera Module 1 Follow the instructions in "Removing the Optical Drive" on page 19. 5 Remove the keyboard (see "Removing the Keyboard" on page 27). 6 Remove the palm-rest assembly (see "Removing the Palm-Rest Assembly" on page 31). 7 Remove the...Camera Module WARNING: Before working inside your computer, read the safety information that shipped with your computer. CAUTION: Only a certified service technician should perform repairs on page 53). 8 Remove the display bezel (see the Regulatory Compliance Homepage at dell.com/regulatory_compliance. Camera ...

Service Manual
Page 69
... your computer. CAUTION: To help prevent damage to step 5 in "Removing the Optical Drive" on page 19. 5 Remove the keyboard (see "Removing the Keyboard" on page 27). 6 Remove the palm-rest assembly (see "Removing the Palm-Rest Assembly" on your warranty. Center Control Cover...practices information, see "Removing the Display Assembly" on page 15) before working inside the computer. 15 Hinge Cover WARNING: Before working inside your computer, read the safety information that is not authorized by Dell is not covered by periodically touching an unpainted metal surface. Removing the ...
... your computer. CAUTION: To help prevent damage to step 5 in "Removing the Optical Drive" on page 19. 5 Remove the keyboard (see "Removing the Keyboard" on page 27). 6 Remove the palm-rest assembly (see "Removing the Palm-Rest Assembly" on your warranty. Center Control Cover...practices information, see "Removing the Display Assembly" on page 15) before working inside the computer. 15 Hinge Cover WARNING: Before working inside your computer, read the safety information that is not authorized by Dell is not covered by periodically touching an unpainted metal surface. Removing the ...

Service Manual
Page 73
... the instructions in "Before You Begin" on page 9. 2 Remove the battery (see "Removing the Battery" on page 15). 3 Remove the keyboard (see "Removing the Keyboard" on page 27). 4 Remove the palm-rest assembly (see "Removing the Palm-Rest Assembly" on page 31). 5 Remove the display assembly .... For additional safety best practices information, see "Removing the Battery" on page 15) before working inside the computer. CAUTION: To help prevent damage to servicing that is not authorized by Dell is not covered by periodically touching an unpainted metal surface (such as a connector on your...
... the instructions in "Before You Begin" on page 9. 2 Remove the battery (see "Removing the Battery" on page 15). 3 Remove the keyboard (see "Removing the Keyboard" on page 27). 4 Remove the palm-rest assembly (see "Removing the Palm-Rest Assembly" on page 31). 5 Remove the display assembly .... For additional safety best practices information, see "Removing the Battery" on page 15) before working inside the computer. CAUTION: To help prevent damage to servicing that is not authorized by Dell is not covered by periodically touching an unpainted metal surface (such as a connector on your...

Service Manual
Page 27
... surface (such as a connector on the palm rest. Removing the Keyboard 1 Follow the instructions in "Before You Begin" on page 9. 2 Remove the battery (see "Removing the Battery" on page 15) before working inside the computer. CAUTION: To help prevent damage to disengage it... the system board, remove the main battery (see the Regulatory Compliance Homepage at dell.com/regulatory_compliance. CAUTION: Do not slide the plastic scribe under the keyboard tabs to remove the keyboard as possible. CAUTION: To avoid electrostatic discharge, ground yourself by using a wrist grounding...
... surface (such as a connector on the palm rest. Removing the Keyboard 1 Follow the instructions in "Before You Begin" on page 9. 2 Remove the battery (see "Removing the Battery" on page 15) before working inside the computer. CAUTION: To help prevent damage to disengage it... the system board, remove the main battery (see the Regulatory Compliance Homepage at dell.com/regulatory_compliance. CAUTION: Do not slide the plastic scribe under the keyboard tabs to remove the keyboard as possible. CAUTION: To avoid electrostatic discharge, ground yourself by using a wrist grounding...

Service Manual
Page 31
..."Removing the Battery" on page 27). Palm-Rest Assembly 31 For additional safety best practices information, see "Removing the Keyboard" on page 15) before working inside the computer. CAUTION: To avoid electrostatic discharge, ground yourself by using a wrist grounding strap or by your computer...). 8 Palm-Rest Assembly WARNING: Before working inside your computer, read the safety information that is not authorized by Dell is not covered by periodically touching an unpainted metal surface (such as a connector on your computer...
..."Removing the Battery" on page 27). Palm-Rest Assembly 31 For additional safety best practices information, see "Removing the Keyboard" on page 15) before working inside the computer. CAUTION: To avoid electrostatic discharge, ground yourself by using a wrist grounding strap or by your computer...). 8 Palm-Rest Assembly WARNING: Before working inside your computer, read the safety information that is not authorized by Dell is not covered by periodically touching an unpainted metal surface (such as a connector on your computer...

Service Manual
Page 37
... Cover" on page 17). 4 Follow the instructions from the slot on page 15) before working inside the computer. CAUTION: To help prevent damage to the system board, remove the main battery...rest assembly. For additional safety best practices information, see the Regulatory Compliance Homepage at dell.com/regulatory_compliance. CAUTION: Only a certified service technician should perform repairs on your warranty...board to step 5 in "Removing the Optical Drive" on page 19. 5 Remove the keyboard (see "Removing the Keyboard" on page 27). 6 Remove the palm-rest assembly (see "Removing the Battery" ...
... Cover" on page 17). 4 Follow the instructions from the slot on page 15) before working inside the computer. CAUTION: To help prevent damage to the system board, remove the main battery...rest assembly. For additional safety best practices information, see the Regulatory Compliance Homepage at dell.com/regulatory_compliance. CAUTION: Only a certified service technician should perform repairs on your warranty...board to step 5 in "Removing the Optical Drive" on page 19. 5 Remove the keyboard (see "Removing the Keyboard" on page 27). 6 Remove the palm-rest assembly (see "Removing the Battery" ...

Service Manual
Page 41
10 Power Button Board WARNING: Before working inside your computer, read the safety information that shipped with your warranty. CAUTION: Only a certified service technician should perform repairs on your computer. Power Button ...: To help prevent damage to step 5 in "Removing the Optical Drive" on page 19. 5 Remove the keyboard (see "Removing the Keyboard" on page 27). 6 Remove the palm-rest assembly (see the Regulatory Compliance Homepage at dell.com/regulatory_compliance. Removing the Power Button Board 1 Follow the instructions in "Before You Begin" on page 9. 2 Remove...
10 Power Button Board WARNING: Before working inside your computer, read the safety information that shipped with your warranty. CAUTION: Only a certified service technician should perform repairs on your computer. Power Button ...: To help prevent damage to step 5 in "Removing the Optical Drive" on page 19. 5 Remove the keyboard (see "Removing the Keyboard" on page 27). 6 Remove the palm-rest assembly (see the Regulatory Compliance Homepage at dell.com/regulatory_compliance. Removing the Power Button Board 1 Follow the instructions in "Before You Begin" on page 9. 2 Remove...

Service Manual
Page 49
...working inside the computer. CAUTION: To help prevent damage to the computer base. 8 Lift the thermal fan off the system board. Removing the Thermal Fan 1 Follow the instructions in "Before You Begin" on page 9. 2 Remove the battery (see "Removing the Battery" on page 15). 3 Remove the keyboard (see "Removing the Keyboard... Fan 49 For additional safety best practices information, see the Regulatory Compliance Homepage at dell.com/regulatory_compliance. 12 Thermal Fan WARNING: Before working inside your computer, read the safety information that secures the thermal fan to the ...
...working inside the computer. CAUTION: To help prevent damage to the computer base. 8 Lift the thermal fan off the system board. Removing the Thermal Fan 1 Follow the instructions in "Before You Begin" on page 9. 2 Remove the battery (see "Removing the Battery" on page 15). 3 Remove the keyboard (see "Removing the Keyboard... Fan 49 For additional safety best practices information, see the Regulatory Compliance Homepage at dell.com/regulatory_compliance. 12 Thermal Fan WARNING: Before working inside your computer, read the safety information that secures the thermal fan to the ...

Service Manual
Page 65
...wrist grounding strap or by your computer). Damage due to servicing that is not authorized by Dell is not covered by periodically touching an unpainted metal surface (such as a connector on your... step 4 to step 5 in "Removing the Optical Drive" on page 19. 5 Remove the keyboard (see "Removing the Keyboard" on page 27). 6 Remove the palm-rest assembly (see "Removing the Palm-Rest Assembly" ... the camera cable from the connector on page 15) before working inside the computer. 14 Camera Module WARNING: Before working inside your computer, read the safety information that shipped with ...
...wrist grounding strap or by your computer). Damage due to servicing that is not authorized by Dell is not covered by periodically touching an unpainted metal surface (such as a connector on your... step 4 to step 5 in "Removing the Optical Drive" on page 19. 5 Remove the keyboard (see "Removing the Keyboard" on page 27). 6 Remove the palm-rest assembly (see "Removing the Palm-Rest Assembly" ... the camera cable from the connector on page 15) before working inside the computer. 14 Camera Module WARNING: Before working inside your computer, read the safety information that shipped with ...

Service Manual
Page 69
...Center Control Cover 69 Removing the Hinge Cover 1 Follow the instructions in "Removing the Optical Drive" on page 19. 5 Remove the keyboard (see "Removing the Keyboard" on page 27). 6 Remove the palm-rest assembly (see "Removing the Palm-Rest Assembly" on page 31). 7 Remove the...CAUTION: Only a certified service technician should perform repairs on your computer. 15 Hinge Cover WARNING: Before working inside your computer, read the safety information that is not authorized by Dell is not covered by periodically touching an unpainted metal surface. Damage due to step 5 in "Before ...
...Center Control Cover 69 Removing the Hinge Cover 1 Follow the instructions in "Removing the Optical Drive" on page 19. 5 Remove the keyboard (see "Removing the Keyboard" on page 27). 6 Remove the palm-rest assembly (see "Removing the Palm-Rest Assembly" on page 31). 7 Remove the...CAUTION: Only a certified service technician should perform repairs on your computer. 15 Hinge Cover WARNING: Before working inside your computer, read the safety information that is not authorized by Dell is not covered by periodically touching an unpainted metal surface. Damage due to step 5 in "Before ...

Service Manual
Page 73
... the instructions in "Before You Begin" on page 9. 2 Remove the battery (see "Removing the Battery" on page 15). 3 Remove the keyboard (see "Removing the Keyboard" on page 27). 4 Remove the palm-rest assembly (see "Removing the Palm-Rest Assembly" on page 31). 5 Remove the display assembly...the VGA connector board to the system board, remove the main battery (see the Regulatory Compliance Homepage at dell.com/regulatory_compliance. 16 VGA Connector Board WARNING: Before working inside your computer, read the safety information that shipped with your warranty. CAUTION: To help prevent damage...
... the instructions in "Before You Begin" on page 9. 2 Remove the battery (see "Removing the Battery" on page 15). 3 Remove the keyboard (see "Removing the Keyboard" on page 27). 4 Remove the palm-rest assembly (see "Removing the Palm-Rest Assembly" on page 31). 5 Remove the display assembly...the VGA connector board to the system board, remove the main battery (see the Regulatory Compliance Homepage at dell.com/regulatory_compliance. 16 VGA Connector Board WARNING: Before working inside your computer, read the safety information that shipped with your warranty. CAUTION: To help prevent damage...


