Owner's Manual
Page 42
... 66), or simply restart (reboot) your computer. NOTICE: You cannot remove devices or undock your computer while your operating system. 42 Using a Battery Remove and reinsert the card (see "Removing an ExpressCard or Blank" on the Advanced tab. For more information on the hard drive and then completely turning off the computer. To manually enter...
... 66), or simply restart (reboot) your computer. NOTICE: You cannot remove devices or undock your computer while your operating system. 42 Using a Battery Remove and reinsert the card (see "Removing an ExpressCard or Blank" on the Advanced tab. For more information on the hard drive and then completely turning off the computer. To manually enter...
Owner's Manual
Page 84
...recovery of the procedures in this section, follow the safety instructions in the Product Information Guide. A hot hard drive may prevent the operating system from the modem and connect it is running. • Ensure that you ... then click Security. 2 Click Do not allow attachments to remove the checkmark. The modem does not operate while it to a telephone. If you hear an unfamiliar scraping or grinding sound • Ensure that the sound is not caused by the program that is connected to an analog telephone jack only. Hard drive problems A L L O W T H E C O M P U T E R T O C O O L B...
...recovery of the procedures in this section, follow the safety instructions in the Product Information Guide. A hot hard drive may prevent the operating system from the modem and connect it is running. • Ensure that you ... then click Security. 2 Click Do not allow attachments to remove the checkmark. The modem does not operate while it to a telephone. If you hear an unfamiliar scraping or grinding sound • Ensure that the sound is not caused by the program that is connected to an analog telephone jack only. Hard drive problems A L L O W T H E C O M P U T E R T O C O O L B...
Owner's Manual
Page 86
... another card. A F I L E N A M E C A N N O T C O N T A I N A N Y O F T H E F O L L O W I L U R E 0 - Shut down the computer, reinstall the hard drive, and restart the computer. If the problem persists, try another drive. DECREASING AVAILABLE MEMORY - See "Drive Problems" on page 79. DISK C: FAILED INITIALIZATION - See "Dell Diagnostics" on page 83. Then shut down the computer, remove the hard drive (see "Dell Diagnostics" on page 133. One or more memory modules...
... another card. A F I L E N A M E C A N N O T C O N T A I N A N Y O F T H E F O L L O W I L U R E 0 - Shut down the computer, reinstall the hard drive, and restart the computer. If the problem persists, try another drive. DECREASING AVAILABLE MEMORY - See "Drive Problems" on page 79. DISK C: FAILED INITIALIZATION - See "Dell Diagnostics" on page 83. Then shut down the computer, remove the hard drive (see "Dell Diagnostics" on page 133. One or more memory modules...
Owner's Manual
Page 87
... computer from a CD. For external keyboards or keypads, check the cable connection. L I C E N S E D C O N T E N T I S N O T A C C E S S I B L E I N M E D I A D I N G V A L U E - See "Dell MediaDirect problems" on page 114). Solving Problems 87 Then shut down the computer, remove the hard drive (see "Hard Drive" on page 79). Shut down the computer, reinstall the hard drive, and restart the computer. Then shut down the computer, wait 30 seconds, and...
... computer from a CD. For external keyboards or keypads, check the cable connection. L I C E N S E D C O N T E N T I S N O T A C C E S S I B L E I N M E D I A D I N G V A L U E - See "Dell MediaDirect problems" on page 114). Solving Problems 87 Then shut down the computer, remove the hard drive (see "Hard Drive" on page 79). Shut down the computer, reinstall the hard drive, and restart the computer. Then shut down the computer, wait 30 seconds, and...
Owner's Manual
Page 88
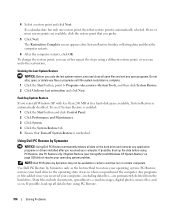
... Dell" on page 133. See "Contacting Dell" on page 133. Remove and then reinstall the program. 1 Click the Start button and click Control Panel. 2 Click Add or Remove Programs. 3 Select the program you want to remove. 4 Click Remove or Change/Remove and...the System Set tests in the Dell Diagnostics (see "Dell Diagnostics" on the system board may be malfunctioning. See "Contacting Dell" on the hard drive. A chip on page 79). E X I T S O M E P R O G R A M S A N D T R Y A G A I N G V A L U E - If the problem persists, contact Dell. Run the Windows error-checking utility...
... Dell" on page 133. See "Contacting Dell" on page 133. Remove and then reinstall the program. 1 Click the Start button and click Control Panel. 2 Click Add or Remove Programs. 3 Select the program you want to remove. 4 Click Remove or Change/Remove and...the System Set tests in the Dell Diagnostics (see "Dell Diagnostics" on the system board may be malfunctioning. See "Contacting Dell" on the hard drive. A chip on page 79). E X I T S O M E P R O G R A M S A N D T R Y A G A I N G V A L U E - If the problem persists, contact Dell. Run the Windows error-checking utility...
Owner's Manual
Page 93
..." on page 114). • Run the Dell Diagnostics (see "Dell Diagnostics" on page 79). Replace the network cable. See "Dell Diagnostics" on page 114). • Reseat the memory modules to scan the computer and remove spyware. BACK UP YOUR FILES IMMEDIATELY USE A VIRUS-SCANNING PROGRAM TO CHECK THE HARD DRIVE, FLOPPY DISKS, OR CDS SAVE AND...
..." on page 114). • Run the Dell Diagnostics (see "Dell Diagnostics" on page 79). Replace the network cable. See "Dell Diagnostics" on page 114). • Reseat the memory modules to scan the computer and remove spyware. BACK UP YOUR FILES IMMEDIATELY USE A VIRUS-SCANNING PROGRAM TO CHECK THE HARD DRIVE, FLOPPY DISKS, OR CDS SAVE AND...
Owner's Manual
Page 103
... Help and Support Center for System Restore. 3 Follow the instructions on page 100) to see "Windows Help and Support Center" on the hard drive and removes any files or programs until the system restoration is complete. 1 Click the Start button, point to Programs→Accessories→System Tools, and...the Windows default view, so they may not apply if you purchased the computer. To access help, see and select restore points. • Dell PC Restore by Symantec" on using the Operating System CD also deletes all data on page 13. However, using System Restore. Restoring the ...
... Help and Support Center for System Restore. 3 Follow the instructions on page 100) to see "Windows Help and Support Center" on the hard drive and removes any files or programs until the system restoration is complete. 1 Click the Start button, point to Programs→Accessories→System Tools, and...the Windows default view, so they may not apply if you purchased the computer. To access help, see and select restore points. • Dell PC Restore by Symantec" on using the Operating System CD also deletes all data on page 13. However, using System Restore. Restoring the ...
Owner's Manual
Page 104
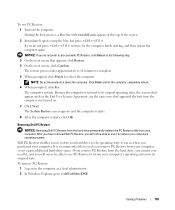
... last method to restore your computer. Using Dell PC Restore by Symantec NOTICE: Using Dell PC Restore permanently deletes all data before using PC Restore. 104 Solving Problems If possible, back up all data on the hard drive and removes any files or programs until the system restoration... is automatically selected. Use Dell PC Restore by Symantec may not be available in when you undo the last system restore,...
... last method to restore your computer. Using Dell PC Restore by Symantec NOTICE: Using Dell PC Restore permanently deletes all data before using PC Restore. 104 Solving Problems If possible, back up all data on the hard drive and removes any files or programs until the system restoration... is automatically selected. Use Dell PC Restore by Symantec may not be available in when you undo the last system restore,...
Owner's Manual
Page 105
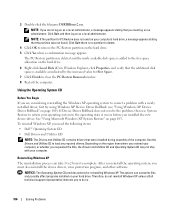
.... The computer restarts. Click Finish and let the computer completely reboot. 6 When prompted, click Yes. Removing Dell PC Restore NOTICE: Removing Dell PC Restore from the hard drive permanently deletes the PC Restore utility from the hard drive, you cannot ever recall it, and you do not remove PC Restore from your computer. If you do not want to...
.... The computer restarts. Click Finish and let the computer completely reboot. 6 When prompted, click Yes. Removing Dell PC Restore NOTICE: Removing Dell PC Restore from the hard drive permanently deletes the PC Restore utility from the hard drive, you cannot ever recall it, and you do not remove PC Restore from your computer. If you do not want to...
Owner's Manual
Page 106
...for PC Restore does not exist on page 100). To reinstall Windows XP, you need the following items: • Dell™ Operating System CD • Dell Drivers and Utilities CD NOTE: The Drivers and Utilities CD contains drivers that you requested the CDs, the Drivers and ...XP. The options can take 1 to 2 hours to close the PC Restore Removal window. 8 Restart the computer. If Device Driver Rollback does not resolve the problem, then use System Restore to return your computer's hard drive, a message appears stating that the partition was in Windows Explorer, click Properties,...
...for PC Restore does not exist on page 100). To reinstall Windows XP, you need the following items: • Dell™ Operating System CD • Dell Drivers and Utilities CD NOTE: The Drivers and Utilities CD contains drivers that you requested the CDs, the Drivers and ...XP. The options can take 1 to 2 hours to close the PC Restore Removal window. 8 Restart the computer. If Device Driver Rollback does not resolve the problem, then use System Restore to return your computer's hard drive, a message appears stating that the partition was in Windows Explorer, click Properties,...

Owner's Manual
Page 111
... the bay. Adding and Replacing Parts 111 Optical Drive CAUTION: Before you begin any installed cards from the ExpressCard slot (see "Hard Drive" on page 66) and the 5-in the Product Information Guide. 1 Turn the computer over. 2 Remove the optical-drive security screw. 3 Insert a scribe into the... in -1 media memory card reader (see "Removing a Media Memory Card" on page 68). 8 Close the display and turn the computer upside down on a flat work surface. 9 Remove the hard drive (see "Removing an ExpressCard or Blank" on page 112). See "Optical Drive" on page 111. 6 Press the power ...
... the bay. Adding and Replacing Parts 111 Optical Drive CAUTION: Before you begin any installed cards from the ExpressCard slot (see "Hard Drive" on page 66) and the 5-in the Product Information Guide. 1 Turn the computer over. 2 Remove the optical-drive security screw. 3 Insert a scribe into the... in -1 media memory card reader (see "Removing a Media Memory Card" on page 68). 8 Close the display and turn the computer upside down on a flat work surface. 9 Remove the hard drive (see "Removing an ExpressCard or Blank" on page 112). See "Optical Drive" on page 111. 6 Press the power ...
Owner's Manual
Page 112
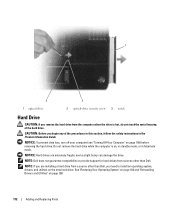
... 109) before removing the hard drive. CAUTION: Before you need to install an operating system, drivers, and utilities on the new hard drive. even a slight bump can damage the drive. NOTICE: To...remove the hard drive while the computer is hot, do not touch the metal housing of the procedures in this section, follow the safety instructions in hibernate mode. NOTICE: Hard drives are installing a hard drive from sources other than Dell. NOTE: Dell does not guarantee compatibility or provide support for hard drives from a source other than Dell, you begin any of the hard drive...
... 109) before removing the hard drive. CAUTION: Before you need to install an operating system, drivers, and utilities on the new hard drive. even a slight bump can damage the drive. NOTICE: To...remove the hard drive while the computer is hot, do not touch the metal housing of the procedures in this section, follow the safety instructions in hibernate mode. NOTICE: Hard drives are installing a hard drive from sources other than Dell. NOTE: Dell does not guarantee compatibility or provide support for hard drives from a source other than Dell, you begin any of the hard drive...

Owner's Manual
Page 113
... page 102. 8 Install the drivers and utilities for storing or shipping the hard drive. To replace the hard drive in the hard drive bay: 1 Follow the procedures in "Before You Begin" on page 109. 2 Turn the computer over, and remove the hard drive screws. 1 2 1 screws (2) 2 hard drive NOTICE: When the hard drive is fully seated. 6 Replace and tighten the screws. 7 Install the operating...
... page 102. 8 Install the drivers and utilities for storing or shipping the hard drive. To replace the hard drive in the hard drive bay: 1 Follow the procedures in "Before You Begin" on page 109. 2 Turn the computer over, and remove the hard drive screws. 1 2 1 screws (2) 2 hard drive NOTICE: When the hard drive is fully seated. 6 Replace and tighten the screws. 7 Install the operating...

Owner's Manual
Page 114
... Hard Drive to Dell Return your old hard drive to Dell in "Before You Begin" on page 109. 2 Turn the computer over, loosen the captive screws on the memory module cover, and then remove the memory module cover. 114 Adding and Replacing Parts NOTE: Memory modules purchased from Dell are... by your computer warranty. 1 Follow the procedures in its original or comparable foam packaging. Otherwise, the hard drive may be damaged in transit. 2 1 1 foam packaging 2 hard drive Memory CAUTION: Before you begin any of the procedures in this section, follow the safety instructions in the...
... Hard Drive to Dell Return your old hard drive to Dell in "Before You Begin" on page 109. 2 Turn the computer over, loosen the captive screws on the memory module cover, and then remove the memory module cover. 114 Adding and Replacing Parts NOTE: Memory modules purchased from Dell are... by your computer warranty. 1 Follow the procedures in its original or comparable foam packaging. Otherwise, the hard drive may be damaged in transit. 2 1 1 foam packaging 2 hard drive Memory CAUTION: Before you begin any of the procedures in this section, follow the safety instructions in the...

Owner's Manual
Page 116
...remove the module and reinstall it detects the additional memory and automatically updates the system configuration information. As the computer boots, it . NOTICE: If the cover is not installed properly, the computer may damage your computer and an electrical outlet. 7 Reinstall the hard drive... the module down until it . 1 2 1 notch 2 tab 5 Replace the memory module cover. See "Hard Drive" on page 112. 8 Turn on the computer. No error message indicates this failure. 4 Ground yourself and install...Support, and then click Dell System Information. 116 Adding and Replacing Parts
...remove the module and reinstall it detects the additional memory and automatically updates the system configuration information. As the computer boots, it . NOTICE: If the cover is not installed properly, the computer may damage your computer and an electrical outlet. 7 Reinstall the hard drive... the module down until it . 1 2 1 notch 2 tab 5 Replace the memory module cover. See "Hard Drive" on page 112. 8 Turn on the computer. No error message indicates this failure. 4 Ground yourself and install...Support, and then click Dell System Information. 116 Adding and Replacing Parts

Owner's Manual
Page 131
...its accessories together safely. • Avoid packing the computer with you need to report a loss or theft to law enforcement officials and to Dell. • Create a file on the Microsoft® Windows® desktop called if_found. NOTICE: If the computer has been exposed to extreme... identification tags. Remove any cables attached to installed PC Cards, and remove any external devices attached to the computer and store them in a safe place. Traveling With Your Computer 131 See "Using Cards" on . • Protect the computer, the batteries, and the hard drive from the computer...
...its accessories together safely. • Avoid packing the computer with you need to report a loss or theft to law enforcement officials and to Dell. • Create a file on the Microsoft® Windows® desktop called if_found. NOTICE: If the computer has been exposed to extreme... identification tags. Remove any cables attached to installed PC Cards, and remove any external devices attached to the computer and store them in a safe place. Traveling With Your Computer 131 See "Using Cards" on . • Protect the computer, the batteries, and the hard drive from the computer...
Owner's Manual
Page 172
...Hz, or one thousand MHz. electrostatic discharge - A removable I/O card adhering to as dual display mode. ExpressCards support both the PCI Express and USB 2.0 standard. Use the Express Service Code when contacting Dell for hard drives and CD drives. Also referred to the PCMCIA standard. A PC Card... that operate on a disk or drive where files are common types of your Dell™ computer. A U.S. format - GB - GHz - Most...
...Hz, or one thousand MHz. electrostatic discharge - A removable I/O card adhering to as dual display mode. ExpressCards support both the PCI Express and USB 2.0 standard. Use the Express Service Code when contacting Dell for hard drives and CD drives. Also referred to the PCMCIA standard. A PC Card... that operate on a disk or drive where files are common types of your Dell™ computer. A U.S. format - GB - GHz - Most...
Owner's Manual
Page 175
...data at the slower speed. PCI is expressed as the number of pixels across by the BIOS, that perform basic tests on a hard drive that boosts the data transfer rate between two devices through the processor as the clock, volume control, and print status. personal identification ...system setup options that supports 32-and 64-bit data paths, providing a high-speed data path between the processor and devices such as memory, hard drives, and video. A removable I /O port often used to restrict unauthorized access to as system tray. PCI - If the PCI Express chip set . A single point...
...data at the slower speed. PCI is expressed as the number of pixels across by the BIOS, that perform basic tests on a hard drive that boosts the data transfer rate between two devices through the processor as the clock, volume control, and print status. personal identification ...system setup options that supports 32-and 64-bit data paths, providing a high-speed data path between the processor and devices such as memory, hard drives, and video. A removable I /O port often used to restrict unauthorized access to as system tray. PCI - If the PCI Express chip set . A single point...
Owner's Manual
Page 181
...charge, 40 conserving power, 41 description, 24 meter, 40 performance, 39 power meter, 40 removing, 43 replacing coin-cell battery, 124 storing, 44 battery-bay latch release, 24 blanks ExpressCards, 65 removing, 66, 68 Bluetooth wireless technology card device status light, 19 installing, 127 boot sequence, ..., 46 helpful tips, 47 how to, 46 copying DVDs general information, 46 helpful tips, 47 how to, 46 D Dell contacting, 133, 168 support policy, 167 support site, 13 Dell Diagnostics about, 79 starting from the Drivers and Utilities CD, 80 starting from your hard drive, 79 Index 181
...charge, 40 conserving power, 41 description, 24 meter, 40 performance, 39 power meter, 40 removing, 43 replacing coin-cell battery, 124 storing, 44 battery-bay latch release, 24 blanks ExpressCards, 65 removing, 66, 68 Bluetooth wireless technology card device status light, 19 installing, 127 boot sequence, ..., 46 helpful tips, 47 how to, 46 copying DVDs general information, 46 helpful tips, 47 how to, 46 D Dell contacting, 133, 168 support policy, 167 support site, 13 Dell Diagnostics about, 79 starting from the Drivers and Utilities CD, 80 starting from your hard drive, 79 Index 181
Owner's Manual
Page 182
... extended, 65 installing, 65 Mobile Broadband, 65 removing, 66 slots, 65 types, 65 WWAN, 65 F fan description, 21, 24 Files and Settings Transfer Wizard, 26 floppy drive connecting to a USB connector, 22 H hard drive description, 21, 24 problems, 84 replacing, 112 returning to Dell, 114 hardware conflicts, 102 Dell Diagnostics, 79 Hardware Troubleshooter, 102 Help and...
... extended, 65 installing, 65 Mobile Broadband, 65 removing, 66 slots, 65 types, 65 WWAN, 65 F fan description, 21, 24 Files and Settings Transfer Wizard, 26 floppy drive connecting to a USB connector, 22 H hard drive description, 21, 24 problems, 84 replacing, 112 returning to Dell, 114 hardware conflicts, 102 Dell Diagnostics, 79 Hardware Troubleshooter, 102 Help and...


