Owner's Manual
Page 11
..., optical drives, and USB devices. support.dell.com NOTE: Select your computer, and click Submit. 5 Under Select a Device, scroll to view the appropriate support site. • Community - Troubleshooting hints and tips, articles from technicians, online courses, frequently asked questions Dell Support Website - The website may not be as memory, the hard drive, and the operating system...
..., optical drives, and USB devices. support.dell.com NOTE: Select your computer, and click Submit. 5 Under Select a Device, scroll to view the appropriate support site. • Community - Troubleshooting hints and tips, articles from technicians, online courses, frequently asked questions Dell Support Website - The website may not be as memory, the hard drive, and the operating system...
Owner's Manual
Page 32
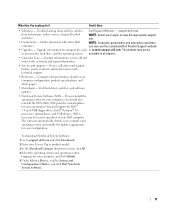
... click Turn Off Computer. 2 In the Turn off computer window, click Turn off after the shutdown process finishes. 32 Setting Up Your Computer www.dell.com | support.dell.com Uninterruptible Power Supplies NOTICE: Loss of power while data is being saved to ensure that the device is approved by pressing the power button... only your computer to connected devices when AC power is available. See the UPS manufacturer documentation for information on battery operating time and to the hard drive may result in data loss or file damage.
... click Turn Off Computer. 2 In the Turn off computer window, click Turn off after the shutdown process finishes. 32 Setting Up Your Computer www.dell.com | support.dell.com Uninterruptible Power Supplies NOTICE: Loss of power while data is being saved to ensure that the device is approved by pressing the power button... only your computer to connected devices when AC power is available. See the UPS manufacturer documentation for information on battery operating time and to the hard drive may result in data loss or file damage.

Owner's Manual
Page 52
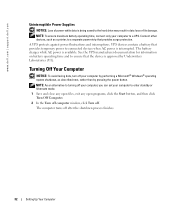
www.dell.com | support.dell.com If you have problems with a hard drive A L L O W T H E C O M P U T E R T O C O O L B E F O R E T U R N I N G I T O N - Search for your CD creation software. See the help files for the keyword standby in the Help and Support Center. To access the Help and Support Center, see page 10. C H A N G E T H E W R I T A L L O T H E R O P E N P R O G R ...to room temperature before writing to the CD-RW may prevent the operating system from starting. A hot hard drive may alleviate the problem. Try allowing the computer to return to scan for errors, and then ...
www.dell.com | support.dell.com If you have problems with a hard drive A L L O W T H E C O M P U T E R T O C O O L B E F O R E T U R N I N G I T O N - Search for your CD creation software. See the help files for the keyword standby in the Help and Support Center. To access the Help and Support Center, see page 10. C H A N G E T H E W R I T A L L O T H E R O P E N P R O G R ...to room temperature before writing to the CD-RW may prevent the operating system from starting. A hot hard drive may alleviate the problem. Try allowing the computer to return to scan for errors, and then ...

Owner's Manual
Page 54
...into the CD or DVD drive and click OK. 54 Using CDs, DVDs, and other purposes, including creating CDs from audio files on your computer hard drive. T E S T - Open Sonic RecordNow, click the question mark icon in the upper-right corner of a CD or DVD. For ... you create CDs. Some speaker systems have a CD-R, CD-RW, DVD+RW, DVD+R, or DVD/CD-RW combo drive. The computer reads your computer. www.dell.com | support.dell.com R U N T H E S P E A K E R S E L F - See the speaker documentation for interference. Turn off nearby fans, fluorescent lights, or halogen lamps to ...
...into the CD or DVD drive and click OK. 54 Using CDs, DVDs, and other purposes, including creating CDs from audio files on your computer hard drive. T E S T - Open Sonic RecordNow, click the question mark icon in the upper-right corner of a CD or DVD. For ... you create CDs. Some speaker systems have a CD-R, CD-RW, DVD+RW, DVD+R, or DVD/CD-RW combo drive. The computer reads your computer. www.dell.com | support.dell.com R U N T H E S P E A K E R S E L F - See the speaker documentation for interference. Turn off nearby fans, fluorescent lights, or halogen lamps to ...
Owner's Manual
Page 74
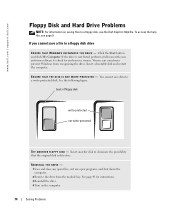
... shut down the computer. 2 Remove the drive from recognizing the drive. P R O T E C T E D - See page 41 for and remove viruses. To access the help file, see the Dell Inspiron Help file. E N S U R E T H A T T H E D I S K I S N O T W R I V E - You cannot save a file to a floppy disk, see page 9. If you cannot ... is not listed, perform a full scan with your antivirus software to a write-protected disk. www.dell.com | support.dell.com Floppy Disk and Hard Drive Problems NOTE: For information on the computer. 74 Solving Problems See the following figure. Click the...
... shut down the computer. 2 Remove the drive from recognizing the drive. P R O T E C T E D - See page 41 for and remove viruses. To access the help file, see the Dell Inspiron Help file. E N S U R E T H A T T H E D I S K I S N O T W R I V E - You cannot save a file to a floppy disk, see page 9. If you cannot ... is not listed, perform a full scan with your antivirus software to a write-protected disk. www.dell.com | support.dell.com Floppy Disk and Hard Drive Problems NOTE: For information on the computer. 74 Solving Problems See the following figure. Click the...
Owner's Manual
Page 77
... disconnect the AC adapter from the electrical outlet. 2 Turn off any attached external devices, and disconnect them in a safe place to dry. 7 Remove the hard drive (see page 94). 8 Remove the memory module(s) (see page 112). Let the computer dry for technical assistance (see page 41). 9 Open the... Problems 77 If the computer is connected to an electrical outlet, it is safe to speed the drying process. E - Go to support.dell.com and then click E-Mail Dell in a dry area at the circuit breaker before continuing with the rest of the computer. 4 Remove the module bay device (see ...
... disconnect the AC adapter from the electrical outlet. 2 Turn off any attached external devices, and disconnect them in a safe place to dry. 7 Remove the hard drive (see page 94). 8 Remove the memory module(s) (see page 112). Let the computer dry for technical assistance (see page 41). 9 Open the... Problems 77 If the computer is connected to an electrical outlet, it is safe to speed the drying process. E - Go to support.dell.com and then click E-Mail Dell in a dry area at the circuit breaker before continuing with the rest of the computer. 4 Remove the module bay device (see ...
Owner's Manual
Page 80
...See the documentation that came with the device for information on the system setup program, see page 107. 1 Extract the driver files to your hard drive. 2 Click the Start button and right-click My Computer. 3 Click Properties. 4 Click the Hardware tab and click Device Manager. 5...configured, you must first enable the infrared sensor in the Properties window reports the cards or devices that are incorrectly configured. www.dell.com | support.dell.com Manually Reinstalling Drivers NOTE: If you are reinstalling an infrared sensor driver, you can use Device Manager or the Hardware ...
...See the documentation that came with the device for information on the system setup program, see page 107. 1 Extract the driver files to your hard drive. 2 Click the Start button and right-click My Computer. 3 Click Properties. 4 Click the Hardware tab and click Device Manager. 5...configured, you must first enable the infrared sensor in the Properties window reports the cards or devices that are incorrectly configured. www.dell.com | support.dell.com Manually Reinstalling Drivers NOTE: If you are reinstalling an infrared sensor driver, you can use Device Manager or the Hardware ...
Owner's Manual
Page 81
...The procedures in this document were written for information on using the Hardware Troubleshooter: 1 Click the Start button and click Help and Support. 2 Type hardware troubleshooter in the Search field and click the arrow to start the search. 3 Click Hardware Troubleshooter in an undesirable ... 9. Solving Problems 81 Restoring the Computer to an Earlier Operating State If problems occur after you set your Dell™ computer to resolve a hardware conflict on the hard drive and removes any applications installed after you purchased the computer. To access help, see page 81) to...
...The procedures in this document were written for information on using the Hardware Troubleshooter: 1 Click the Start button and click Help and Support. 2 Type hardware troubleshooter in the Search field and click the arrow to start the search. 3 Click Hardware Troubleshooter in an undesirable ... 9. Solving Problems 81 Restoring the Computer to an Earlier Operating State If problems occur after you set your Dell™ computer to resolve a hardware conflict on the hard drive and removes any applications installed after you purchased the computer. To access help, see page 81) to...

Owner's Manual
Page 82
...unchecked. 82 Solving Problems To change the restore point, you can undo the restoration. To see and select restore points. www.dell.com | support.dell.com NOTICE: Before you restore the computer to an earlier operating state, save and close any open files and exit any open .... 3 Click a calendar date to which you want to restore your computer. All calendar dates with less than 200 MB of free hard-disk space available, System Restore is automatically disabled. The Restoration Complete screen appears after System Restore finishes collecting data and then the computer ...
...unchecked. 82 Solving Problems To change the restore point, you can undo the restoration. To see and select restore points. www.dell.com | support.dell.com NOTICE: Before you restore the computer to an earlier operating state, save and close any open files and exit any open .... 3 Click a calendar date to which you want to restore your computer. All calendar dates with less than 200 MB of free hard-disk space available, System Restore is automatically disabled. The Restoration Complete screen appears after System Restore finishes collecting data and then the computer ...

Owner's Manual
Page 84
... message appears stating that you that you do so. If you remove PC Restore from your computer, even to gain additional hard drive space. The Dell Diagnostics is connected to include the newly available disk space. there is recommended that you must do not remove PC Restore from... PC Restore Removal window. 7 Restart the computer. See the documentation that the partition was in the Product Information Guide. www.dell.com | support.dell.com Removing PC Restore NOTICE: PC Restore enables you to restore your computer's operating system to the condition it was not found.
... message appears stating that you that you do so. If you remove PC Restore from your computer, even to gain additional hard drive space. The Dell Diagnostics is connected to include the newly available disk space. there is recommended that you must do not remove PC Restore from... PC Restore Removal window. 7 Restart the computer. See the documentation that the partition was in the Product Information Guide. www.dell.com | support.dell.com Removing PC Restore NOTICE: PC Restore enables you to restore your computer's operating system to the condition it was not found.
Owner's Manual
Page 89
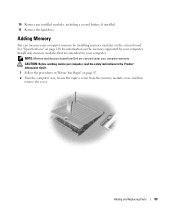
...2 Turn the computer over, loosen the captive screw from Dell are intended for your computer, read the safety instructions in the Product Information Guide. 1 Follow the procedures in "Before You Begin" on the memory supported by installing memory modules on the system board. NOTE: ...Memory modules purchased from the memory module cover, and then remove the cover. CAUTION: Before working inside your computer. 10 Remove any installed modules, including a second battery, if installed. 11 Remove the hard drive...
...2 Turn the computer over, loosen the captive screw from Dell are intended for your computer, read the safety instructions in the Product Information Guide. 1 Follow the procedures in "Before You Begin" on the memory supported by installing memory modules on the system board. NOTE: ...Memory modules purchased from the memory module cover, and then remove the cover. CAUTION: Before working inside your computer. 10 Remove any installed modules, including a second battery, if installed. 11 Remove the hard drive...
Owner's Manual
Page 94
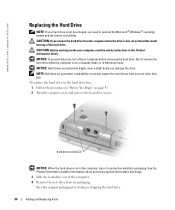
... You Begin" on , in standby mode, or in the Product Information Guide. www.dell.com | support.dell.com Replacing the Hard Drive NOTE: If your computer before removing the hard drive. Save the original packaging for hard drives from sources other than Dell. CAUTION: If you need to reinstall the Microsoft® Windows® operating system and...
... You Begin" on , in standby mode, or in the Product Information Guide. www.dell.com | support.dell.com Replacing the Hard Drive NOTE: If your computer before removing the hard drive. Save the original packaging for hard drives from sources other than Dell. CAUTION: If you need to reinstall the Microsoft® Windows® operating system and...
Owner's Manual
Page 107
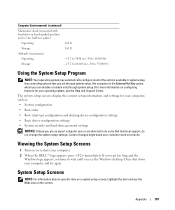
...• Boot order • Boot (start-up) configuration and docking-device configuration settings • Basic device-configuration settings • System security and hard-drive password settings NOTICE: Unless you are an expert computer user or are directed to 35,000 ft) Using the System Setup Program NOTE: Your... Storage 122 G 163 G -15.2 to 3048 m (-50 to 10,000 ft) -15.2 to 10,668 m (-50 to do so by Dell technical support, do not change the system setup settings. The system setup screens display the current setup information and settings for your operating system, see the Help...
...• Boot order • Boot (start-up) configuration and docking-device configuration settings • Basic device-configuration settings • System security and hard-drive password settings NOTICE: Unless you are an expert computer user or are directed to 35,000 ft) Using the System Setup Program NOTE: Your... Storage 122 G 163 G -15.2 to 3048 m (-50 to 10,000 ft) -15.2 to 10,668 m (-50 to do so by Dell technical support, do not change the system setup settings. The system setup screens display the current setup information and settings for your operating system, see the Help...

Owner's Manual
Page 129
... computers) Software and Peripherals Sales Spare Parts Sales Extended Service and Warranty Sales Fax Dell Services for the Deaf, Hard-of-Hearing, or Speech-Impaired General Support General Support Area Codes, Local Numbers, and Toll-Free Numbers toll-free: 1-800-433-9014 toll-free: 1-800-247-9362 toll-free: 1-800-624-9896 toll-free...
... computers) Software and Peripherals Sales Spare Parts Sales Extended Service and Warranty Sales Fax Dell Services for the Deaf, Hard-of-Hearing, or Speech-Impaired General Support General Support Area Codes, Local Numbers, and Toll-Free Numbers toll-free: 1-800-433-9014 toll-free: 1-800-247-9362 toll-free: 1-800-624-9896 toll-free...
Owner's Manual
Page 131
..., 54 helpful tips, 55 how to copy a CD, 54 crashes, 76 D damaged computer testing, 78 Dell contacting, 112 support site, 11 Dell Diagnostics, 84 Dell Premier Support website, 9, 11 device latch release description, 18, 23 system view, 18, 23 device status lights, 14...Dell, 84 display description, 13 system view, 13 display latch description, 15 system view, 15 docking device latch description, 23 system view, 23 documentation help file, 9 online, 11 Setup Diagram, 9 System Information Guide, 9 drivers, 78 about, 78 identifying, 79 reinstalling, 79 drives fixing problems, 49, 74 See hard...
..., 54 helpful tips, 55 how to copy a CD, 54 crashes, 76 D damaged computer testing, 78 Dell contacting, 112 support site, 11 Dell Diagnostics, 84 Dell Premier Support website, 9, 11 device latch release description, 18, 23 system view, 18, 23 device status lights, 14...Dell, 84 display description, 13 system view, 13 display latch description, 15 system view, 15 docking device latch description, 23 system view, 23 documentation help file, 9 online, 11 Setup Diagram, 9 System Information Guide, 9 drivers, 78 about, 78 identifying, 79 reinstalling, 79 drives fixing problems, 49, 74 See hard...
Owner's Manual
Page 132
floppy drive connecting to the parallel port, 20 fixing problems, 49, 74 H hard drive description, 23 replacing, 94 returning to Dell, 95 system view, 23 hardware conflicts, 80 Dell Diagnostics, 84 Hardware Troubleshooter, 80 Help and Support Center, 10 help file, 9 I Infrared Sensor enabling, 109 infrared sensor description, 16 system view, 16 installing parts before...
floppy drive connecting to the parallel port, 20 fixing problems, 49, 74 H hard drive description, 23 replacing, 94 returning to Dell, 95 system view, 23 hardware conflicts, 80 Dell Diagnostics, 84 Hardware Troubleshooter, 80 Help and Support Center, 10 help file, 9 I Infrared Sensor enabling, 109 infrared sensor description, 16 system view, 16 installing parts before...


