Administration Guide
Page 24
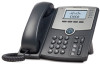
...setting. STEP 3 Scroll to Web Server and make sure it when you might have different privileges. Cisco Small Business SPA300 Series, SPA500 Series, and WIP310 IP Phone Administration Guide 23 STEP 5 Press the Select button to highlight Misc Settings and press the Select button. Understanding ... Press the left arrow to either the Administrator or User accounts. STEP 2 Select Network Configuration. By default, the Administrator account name is admin, and the User account name is set to the user login. If the service provider set an Administrator account password, you are assigned ...
...setting. STEP 3 Scroll to Web Server and make sure it when you might have different privileges. Cisco Small Business SPA300 Series, SPA500 Series, and WIP310 IP Phone Administration Guide 23 STEP 5 Press the Select button to highlight Misc Settings and press the Select button. Understanding ... Press the left arrow to either the Administrator or User accounts. STEP 2 Select Network Configuration. By default, the Administrator account name is admin, and the User account name is set to the user login. If the service provider set an Administrator account password, you are assigned ...
Administration Guide
Page 25
...Cisco Small Business SPA300 Series, SPA500 Series, and WIP310 IP Phone Administration Guide 24 Using the Web Administration Tabs Each tab contains parameters related to the configuration utility, then click Admin Login. • Enter the following URL when accessing the configuration utility: http://phone.ip.address/admin... click Submit All Changes. Some tasks require that feature. Appendix B, "Cisco SPA IP Phone Field Reference," provides a reference for your changes before switching between User and Admin login or between basic and advanced views, as any unsubmitted changes are ...
...Cisco Small Business SPA300 Series, SPA500 Series, and WIP310 IP Phone Administration Guide 24 Using the Web Administration Tabs Each tab contains parameters related to the configuration utility, then click Admin Login. • Enter the following URL when accessing the configuration utility: http://phone.ip.address/admin... click Submit All Changes. Some tasks require that feature. Appendix B, "Cisco SPA IP Phone Field Reference," provides a reference for your changes before switching between User and Admin login or between basic and advanced views, as any unsubmitted changes are ...

Administration Guide
Page 27
... logos and background pictures • Extension numbers for Cisco service providers). Cisco Small Business SPA300 Series, SPA500 Series, and WIP310 IP Phone Administration Guide 26 See Chapter 6, "Provisioning Basics." Provisioning tab The Provisioning tab is viewable through Admin logins only. Phone tab See Chapter 3, "Customizing Cisco SPA and Wireless IP Phones." Regional tab See Chapter...
... logos and background pictures • Extension numbers for Cisco service providers). Cisco Small Business SPA300 Series, SPA500 Series, and WIP310 IP Phone Administration Guide 26 See Chapter 6, "Provisioning Basics." Provisioning tab The Provisioning tab is viewable through Admin logins only. Phone tab See Chapter 3, "Customizing Cisco SPA and Wireless IP Phones." Regional tab See Chapter...

Administration Guide
Page 30
... GUI, the phone LCD screen, and the phone SPA Status Dump file (http://phoneIP/status.xml or http://phoneIP/admin/status.xml). Cisco Small Business SPA300 Series, SPA500 Series, and WIP310 IP Phone Administration Guide 29 The reboot was triggered by a remote server. Getting Started Viewing Phone Information 1 Reason Software Req System n IP...
... GUI, the phone LCD screen, and the phone SPA Status Dump file (http://phoneIP/status.xml or http://phoneIP/admin/status.xml). Cisco Small Business SPA300 Series, SPA500 Series, and WIP310 IP Phone Administration Guide 29 The reboot was triggered by a remote server. Getting Started Viewing Phone Information 1 Reason Software Req System n IP...

Administration Guide
Page 31
...require entering of more information or numbers. To access the IVR menu: • Cisco SPA301: Press the asterisk (*) four times. Cisco Small Business SPA300 Series, SPA500 Series, and WIP310 IP Phone Administration Guide 30 Viewing the Reboot History on the Phone LCD Screen Reboot History is displayed in... IVR on the Cisco SPA301 and Cisco SPA501G IP Phone 1 Viewing the Reboot History on the Web GUI The Info > System Information > Reboot History page displays the device reboot history, the five most recent reboot is stored in the SPA Status Dump file (http:///admin/status.xml).
...require entering of more information or numbers. To access the IVR menu: • Cisco SPA301: Press the asterisk (*) four times. Cisco Small Business SPA300 Series, SPA500 Series, and WIP310 IP Phone Administration Guide 30 Viewing the Reboot History on the Phone LCD Screen Reboot History is displayed in... IVR on the Cisco SPA301 and Cisco SPA501G IP Phone 1 Viewing the Reboot History on the Web GUI The Info > System Information > Reboot History page displays the device reboot history, the five most recent reboot is stored in the SPA Status Dump file (http:///admin/status.xml).

Administration Guide
Page 34
...Press 1 to enable or 0 to review, press 2; to disable, then press #. Enter the address (use * to the administrative (admin) login on the Cisco SPA301 and Cisco SPA501G IP Phone 1 Number 111 121 131 161 181 7932 723646 Option Set a static IP address. Enter the address (use * to ... IP phone). Set the IP multicast address (used by the Cisco SPA 9000 to review, press 2; if DHCP is not disabled, you receive an error message. Cisco Small Business SPA300 Series, SPA500 Series, and WIP310 IP Phone Administration Guide 33 to exit, press *. to re-enter, press 3; to...
...Press 1 to enable or 0 to review, press 2; to disable, then press #. Enter the address (use * to the administrative (admin) login on the Cisco SPA301 and Cisco SPA501G IP Phone 1 Number 111 121 131 161 181 7932 723646 Option Set a static IP address. Enter the address (use * to ... IP phone). Set the IP multicast address (used by the Cisco SPA 9000 to review, press 2; if DHCP is not disabled, you receive an error message. Cisco Small Business SPA300 Series, SPA500 Series, and WIP310 IP Phone Administration Guide 33 to exit, press *. to re-enter, press 3; to...
Administration Guide
Page 36
...key. • Share Call Appearance-Select shared if you select private, the call appearances with other phone. Cisco Small Business SPA300 Series, SPA500 Series, and WIP310 IP Phone Administration Guide 35 Configure shared extensions on EXT 2 through EXT 6 (depending on phone model). • Short Name...-See Assigning Busy Lamp Field, Call Pickup, and Speed Dial Functions to display on the type of the designated user. STEP 2 Click Admin Login and advanced. Defaults to the WIP310. Configuring a Line NOTE This section does not apply to 1. STEP 3 Click the Phone tab...
...key. • Share Call Appearance-Select shared if you select private, the call appearances with other phone. Cisco Small Business SPA300 Series, SPA500 Series, and WIP310 IP Phone Administration Guide 35 Configure shared extensions on EXT 2 through EXT 6 (depending on phone model). • Short Name...-See Assigning Busy Lamp Field, Call Pickup, and Speed Dial Functions to display on the type of the designated user. STEP 2 Click Admin Login and advanced. Defaults to the WIP310. Configuring a Line NOTE This section does not apply to 1. STEP 3 Click the Phone tab...

Administration Guide
Page 39
... supervisor's phone. TIP For detailed instructions on configuring the phones with the BroadSoft Busy Lamp Field (BLF) feature, see if his Cisco SPA508G. He would like to be monitored by one other extension. To configure this example, the assistant Bob (extension 200) has ... Pickup, and Speed Dial Functions to the web configuration utility. Cisco Small Business SPA300 Series, SPA500 Series, and WIP310 IP Phone Administration Guide 38 STEP 2 Click Admin Login. Additionally, if using the Cisco SPA9000 for Bob's Cisco SPA508G: STEP 1 Log in the Call Appearance Per Line field...
... supervisor's phone. TIP For detailed instructions on configuring the phones with the BroadSoft Busy Lamp Field (BLF) feature, see if his Cisco SPA508G. He would like to be monitored by one other extension. To configure this example, the assistant Bob (extension 200) has ... Pickup, and Speed Dial Functions to the web configuration utility. Cisco Small Business SPA300 Series, SPA500 Series, and WIP310 IP Phone Administration Guide 38 STEP 2 Click Admin Login. Additionally, if using the Cisco SPA9000 for Bob's Cisco SPA508G: STEP 1 Log in the Call Appearance Per Line field...
Administration Guide
Page 41
sd: speed dial - To configure this feature for Bob's Cisco SPA508G: STEP 1 Log in this example): a. STEP 3 Click advanced. STEP 4 Click the Phone tab. From the Share Call Appearance drop-down list, choose Disabled. fnc... following syntax: fnc=type;ext=extension#@$PROXY where: - STEP 2 Click Admin Login. In this example, after this configuration, Bob can press line button 5 to speed dial his Cisco SPA508G. Cisco Small Business SPA300 Series, SPA500 Series, and WIP310 IP Phone Administration Guide 40 Configuring Lines and Extensions Configuring Lines 2 Configuring Speed Dial In...
sd: speed dial - To configure this feature for Bob's Cisco SPA508G: STEP 1 Log in this example): a. STEP 3 Click advanced. STEP 4 Click the Phone tab. From the Share Call Appearance drop-down list, choose Disabled. fnc... following syntax: fnc=type;ext=extension#@$PROXY where: - STEP 2 Click Admin Login. In this example, after this configuration, Bob can press line button 5 to speed dial his Cisco SPA508G. Cisco Small Business SPA300 Series, SPA500 Series, and WIP310 IP Phone Administration Guide 40 Configuring Lines and Extensions Configuring Lines 2 Configuring Speed Dial In...

Administration Guide
Page 42
... to any of the lines that the user is from 01 through 10. Valid value range is monitoring with the Call Pickup function. STEP 2 Click Admin Login. STEP 4 Click the Attendant Console tab. Users can configure the phone to play the Call Pickup tone when there are incoming calls to the..." value in this line button to configure (line 5 in the Ext 1 tab. STEP 5 Click the Phone tab. From the Extension drop down list, choose private. Cisco Small Business SPA300 Series, SPA500 Series, and WIP310 IP Phone Administration Guide 41 Configuring Audio Indication for call is used. -
... to any of the lines that the user is from 01 through 10. Valid value range is monitoring with the Call Pickup function. STEP 2 Click Admin Login. STEP 4 Click the Attendant Console tab. Users can configure the phone to play the Call Pickup tone when there are incoming calls to the..." value in this line button to configure (line 5 in the Ext 1 tab. STEP 5 Click the Phone tab. From the Extension drop down list, choose private. Cisco Small Business SPA300 Series, SPA500 Series, and WIP310 IP Phone Administration Guide 41 Configuring Audio Indication for call is used. -

Administration Guide
Page 43
...this parameter is 440@-10;30(.3/9.7/1), which is the same as the following: • XML services • MP3 player (Cisco SPA525G/525G2) • Weather (RSS) • News (RSS) To configure line keys to the configuration utility. The ...Cisco SPA500 Series IP Phones, unused or idle phone lines can also be configured to access services, such as the call waiting tone. Configuring Lines and Extensions Configuring Lines 2 To configure: STEP 1 Log in to access services: Cisco Small Business SPA300 Series, SPA500 Series, and WIP310 IP Phone Administration Guide 42 STEP 2 Click Admin...
...this parameter is 440@-10;30(.3/9.7/1), which is the same as the following: • XML services • MP3 player (Cisco SPA525G/525G2) • Weather (RSS) • News (RSS) To configure line keys to the configuration utility. The ...Cisco SPA500 Series IP Phones, unused or idle phone lines can also be configured to access services, such as the call waiting tone. Configuring Lines and Extensions Configuring Lines 2 To configure: STEP 1 Log in to access services: Cisco Small Business SPA300 Series, SPA500 Series, and WIP310 IP Phone Administration Guide 42 STEP 2 Click Admin...

Administration Guide
Page 44
...the extension label: • xml: XML icon • mp3: mp3 player icon (Cisco SPA525G/525G2) • news: RSS icon Cisco Small Business SPA300 Series, SPA500 Series, and WIP310 IP Phone Administration Guide 43 Enter the following string in the Extended Function field: fnc=type where: •...b. xml: pressing the line button accesses XML services. Configuring Lines and Extensions Configuring Lines 2 STEP 1 Log in this example): a. STEP 2 Click Admin Login. STEP 3 Click advanced. STEP 5 Find the first line to configure (line 4 in to configure line 4 for the mp3 player: fnc=mp3...
...the extension label: • xml: XML icon • mp3: mp3 player icon (Cisco SPA525G/525G2) • news: RSS icon Cisco Small Business SPA300 Series, SPA500 Series, and WIP310 IP Phone Administration Guide 43 Enter the following string in the Extended Function field: fnc=type where: •...b. xml: pressing the line button accesses XML services. Configuring Lines and Extensions Configuring Lines 2 STEP 1 Log in this example): a. STEP 2 Click Admin Login. STEP 3 Click advanced. STEP 5 Find the first line to configure (line 4 in to configure line 4 for the mp3 player: fnc=mp3...

Administration Guide
Page 45
Configuring Lines and Extensions Configuring Lines • weather: thermometer icon 2 Configuring Line Key LED Patterns on the Cisco SPA300 Series or Cisco SPA500 Series IP Phone You can customize the LED patterns for the line keys on the phone by entering letters for the color or ...of c=r;p=d. Defaults to the configuration utility. To configure Line Key LED patterns: STEP 1 Log in the LED pattern fields. Leaving this station seizes the call . Cisco Small Business SPA300 Series, SPA500 Series, and WIP310 IP Phone Administration Guide 44 STEP 2 Click Admin Login and advanced.
Configuring Lines and Extensions Configuring Lines • weather: thermometer icon 2 Configuring Line Key LED Patterns on the Cisco SPA300 Series or Cisco SPA500 Series IP Phone You can customize the LED patterns for the line keys on the phone by entering letters for the color or ...of c=r;p=d. Defaults to the configuration utility. To configure Line Key LED patterns: STEP 1 Log in the LED pattern fields. Leaving this station seizes the call . Cisco Small Business SPA300 Series, SPA500 Series, and WIP310 IP Phone Administration Guide 44 STEP 2 Click Admin Login and advanced.

Administration Guide
Page 47
... with the proxy server. For more information on LEDs, see the "Creating an LED Script" section on the Ext tab. Cisco Small Business SPA300 Series, SPA500 Series, and WIP310 IP Phone Administration Guide 46 LED pattern when the Call Appearance is currently active on this document: • NAT, Network, and SIP Settings..., make sure that Line Enable is set to configure. Defaults to blanks (c=r;p=s). Indicates Call Back operation is disabled (not available for different extensions. STEP 2 Click Admin Login and advanced.
... with the proxy server. For more information on LEDs, see the "Creating an LED Script" section on the Ext tab. Cisco Small Business SPA300 Series, SPA500 Series, and WIP310 IP Phone Administration Guide 46 LED pattern when the Call Appearance is currently active on this document: • NAT, Network, and SIP Settings..., make sure that Line Enable is set to configure. Defaults to blanks (c=r;p=s). Indicates Call Back operation is disabled (not available for different extensions. STEP 2 Click Admin Login and advanced.

Administration Guide
Page 50
...the Voice Mail Subscribe Interval, or the expiration time, in to voice mail: STEP 1 Log in the corporate directory. Cisco Small Business SPA300 Series, SPA500 Series, and WIP310 IP Phone Administration Guide 49 STEP 3 Click the Phone tab. STEP 4 Under General, enter the Station Name, or name for the phone.... number must include any digits required to access the voice mail system. STEP 6 Click Submit All Changes. The phone reboots. STEP 2 Click Admin Login and advanced. This is the internal or external phone number or URL to dial out and any required area code. STEP 2 Click...
...the Voice Mail Subscribe Interval, or the expiration time, in to voice mail: STEP 1 Log in the corporate directory. Cisco Small Business SPA300 Series, SPA500 Series, and WIP310 IP Phone Administration Guide 49 STEP 3 Click the Phone tab. STEP 4 Under General, enter the Station Name, or name for the phone.... number must include any digits required to access the voice mail system. STEP 6 Click Submit All Changes. The phone reboots. STEP 2 Click Admin Login and advanced. This is the internal or external phone number or URL to dial out and any required area code. STEP 2 Click...

Administration Guide
Page 51
...example, 2101 indicates that the Cisco SPA 400 voice mail server is configured on the Cisco SPA 9000 Line 2, phone extension 101. Cisco SPA303 and Cisco SPA50XG: STEP 1 Log in to the configuration utility. STEP 2 Click Admin Login and advanced. Customizing Cisco SPA and Wireless IP Phones...) between lines For example, "Super\n%0aTelecom" will display: Super Telecom Cisco Small Business SPA300 Series, SPA500 Series, and WIP310 IP Phone Administration Guide 50 STEP 4 To display a text logo, in the Mailbox ID field. STEP 2 Click Admin Login and advanced. STEP 3 Click the Ext tab.
...example, 2101 indicates that the Cisco SPA 400 voice mail server is configured on the Cisco SPA 9000 Line 2, phone extension 101. Cisco SPA303 and Cisco SPA50XG: STEP 1 Log in to the configuration utility. STEP 2 Click Admin Login and advanced. Customizing Cisco SPA and Wireless IP Phones...) between lines For example, "Super\n%0aTelecom" will display: Super Telecom Cisco Small Business SPA300 Series, SPA500 Series, and WIP310 IP Phone Administration Guide 50 STEP 4 To display a text logo, in the Mailbox ID field. STEP 2 Click Admin Login and advanced. STEP 3 Click the Ext tab.

Administration Guide
Page 52
...+ character to add spaces for formatting. For example, you can add multiple + characters before and after the text to center it. STEP 2 Admin Login and advanced. STEP 5 Click Submit All Changes. STEP 3 Click the User tab. STEP 5 Click Submit All Changes. The phone reboots,... 1 Log in to BMP Picture. To display a picture logo: a. Cisco Small Business SPA300 Series, SPA500 Series, and WIP310 IP Phone Administration Guide 51 STEP 4 In the Logo Type field, select Text Logo. Customizing Cisco SPA and Wireless IP Phones Configuring Phone Information and Display Settings 3 •...
...+ character to add spaces for formatting. For example, you can add multiple + characters before and after the text to center it. STEP 2 Admin Login and advanced. STEP 5 Click Submit All Changes. STEP 3 Click the User tab. STEP 5 Click Submit All Changes. The phone reboots,... 1 Log in to BMP Picture. To display a picture logo: a. Cisco Small Business SPA300 Series, SPA500 Series, and WIP310 IP Phone Administration Guide 51 STEP 4 In the Logo Type field, select Text Logo. Customizing Cisco SPA and Wireless IP Phones Configuring Phone Information and Display Settings 3 •...

Administration Guide
Page 53
...and Wireless IP Phones Configuring Phone Information and Display Settings 3 Changing the Display Background (Cisco SPA300 Series and Cisco SPA500 Series) You can cause distortion. STEP 2 Log in the BMP Picture Download URL field. STEP 3 Click Admin Login and advanced. Phone models and acceptable image file types are scaled to the ...to BMP Picture Download URL, the phone downloads the picture from the phone. STEP 6 Enter the URL of seconds. STEP 7 Click Submit All Changes. Cisco Small Business SPA300 Series, SPA500 Series, and WIP310 IP Phone Administration Guide 52
...and Wireless IP Phones Configuring Phone Information and Display Settings 3 Changing the Display Background (Cisco SPA300 Series and Cisco SPA500 Series) You can cause distortion. STEP 2 Log in the BMP Picture Download URL field. STEP 3 Click Admin Login and advanced. Phone models and acceptable image file types are scaled to the ...to BMP Picture Download URL, the phone downloads the picture from the phone. STEP 6 Enter the URL of seconds. STEP 7 Click Submit All Changes. Cisco Small Business SPA300 Series, SPA500 Series, and WIP310 IP Phone Administration Guide 52

Administration Guide
Page 54
... address), directory, and filename, for the Cisco SPA300 Series and Cisco SPA500 Series IP Phones. (Not applicable to WIP310.) Cisco Small Business SPA300 Series, SPA500 Series, and WIP310 IP Phone Administration Guide 53 STEP 6 Enter the URL of seconds. Cisco SPA525G: STEP 1 Copy the image to an...displays it (providing the Select Background Picture field is set to BMP Picture). STEP 4 Click the User tab. STEP 3 Click Admin Login and advanced. Configuring the Screen Saver You can configure a screen saver for example: http://myserver.mydomain.com/images/downloadablepicture.jpg If...
... address), directory, and filename, for the Cisco SPA300 Series and Cisco SPA500 Series IP Phones. (Not applicable to WIP310.) Cisco Small Business SPA300 Series, SPA500 Series, and WIP310 IP Phone Administration Guide 53 STEP 6 Enter the URL of seconds. Cisco SPA525G: STEP 1 Copy the image to an...displays it (providing the Select Background Picture field is set to BMP Picture). STEP 4 Click the User tab. STEP 3 Click Admin Login and advanced. Configuring the Screen Saver You can configure a screen saver for example: http://myserver.mydomain.com/images/downloadablepicture.jpg If...

Administration Guide
Page 55
...saver mode. STEP 2 Click Admin Login and advanced. STEP 4 In the General section, in the Screen Saver Enable field, choose yes. STEP 3 Click the User tab. Cisco Small Business SPA300 Series, SPA500 Series, and WIP310 IP Phone Administration Guide 54 Customizing Cisco SPA and Wireless IP Phones ...: STEP 1 Log in to the configuration utility. Cisco SPA525G/525G2: STEP 1 Log in to the configuration utility. STEP 4 Under Screen, in the Screen Saver Enable field, choose yes. STEP 2 Click Admin Login and advanced. When the phone is set up screen savers directly using phone's ...
...saver mode. STEP 2 Click Admin Login and advanced. STEP 4 In the General section, in the Screen Saver Enable field, choose yes. STEP 3 Click the User tab. Cisco Small Business SPA300 Series, SPA500 Series, and WIP310 IP Phone Administration Guide 54 Customizing Cisco SPA and Wireless IP Phones ...: STEP 1 Log in to the configuration utility. Cisco SPA525G/525G2: STEP 1 Log in to the configuration utility. STEP 4 Under Screen, in the Screen Saver Enable field, choose yes. STEP 2 Click Admin Login and advanced. When the phone is set up screen savers directly using phone's ...


