
User Guide
Page 6
... to a Computer 2 INTRODUCTION 5 Manuals for the CR-135i II/CR-190i II 5 Symbols Used in This Manual 5 Important Safety Instructions 8 Handling 8 Installation Location 9 Power Supply 10 Moving the Scanner 10 Introduction to the CR-135i II/CR-190i II 11 Features of the CR-135i II/CR-190i II 11 Features 11 Packaging: What Is in the Box...ON and OFF the Power 20 Turning ON the Power 20 Turning OFF the Power 21 Preparing the Ink Cartridge 22 About the Ink Cartridge 22 Setting the Ink Cartridge and Adjusting the Print Position ..... 22 Software 24 How to Use the Software 24 How to...
... to a Computer 2 INTRODUCTION 5 Manuals for the CR-135i II/CR-190i II 5 Symbols Used in This Manual 5 Important Safety Instructions 8 Handling 8 Installation Location 9 Power Supply 10 Moving the Scanner 10 Introduction to the CR-135i II/CR-190i II 11 Features of the CR-135i II/CR-190i II 11 Features 11 Packaging: What Is in the Box...ON and OFF the Power 20 Turning ON the Power 20 Turning OFF the Power 21 Preparing the Ink Cartridge 22 About the Ink Cartridge 22 Setting the Ink Cartridge and Adjusting the Print Position ..... 22 Software 24 How to Use the Software 24 How to...

User Guide
Page 7
Maintenance 42 Daily Cleaning 42 Cleaning the Main Unit 42 Cleaning the Feed Path 42 Cleaning the Scanning Glass and Rollers 44 Cleaning the Magnetic Heads 47 Cleaning the Ink Jet Nozzles 48 Cleaning with the Cleaning Cards (United States Only) ........ 49 Maintenance 50 Replacing the Ink Cartridge 50 Replacing the Ink Disposal Tank 51 Replacing the Rollers 53 Adjusting the Separation Roller Gap 56 Specifications 57 Scanner Specifications 57 Index 58 7
Maintenance 42 Daily Cleaning 42 Cleaning the Main Unit 42 Cleaning the Feed Path 42 Cleaning the Scanning Glass and Rollers 44 Cleaning the Magnetic Heads 47 Cleaning the Ink Jet Nozzles 48 Cleaning with the Cleaning Cards (United States Only) ........ 49 Maintenance 50 Replacing the Ink Cartridge 50 Replacing the Ink Disposal Tank 51 Replacing the Rollers 53 Adjusting the Separation Roller Gap 56 Specifications 57 Scanner Specifications 57 Index 58 7

User Guide
Page 9
...outlet clear of time, disconnect the power cord from the power outlet by the power plug head. The ink may cause a fire or electrical shock. ■ When the scanner is operating (CR-190i II/CR-190i II UV only) or documents are loading a document or clearing a paper jam. It is possible that ... (18.3") 706 mm (27.8") For operation, maintenance, and ventilation, make sure that could become entangled, immediately disconnect the power plug from the ink disposal tank. ■ When you are being used for a long period of all obstacles so you can disconnect the power cord easily at all...
...outlet clear of time, disconnect the power cord from the power outlet by the power plug head. The ink may cause a fire or electrical shock. ■ When the scanner is operating (CR-190i II/CR-190i II UV only) or documents are loading a document or clearing a paper jam. It is possible that ... (18.3") 706 mm (27.8") For operation, maintenance, and ventilation, make sure that could become entangled, immediately disconnect the power plug from the ink disposal tank. ■ When you are being used for a long period of all obstacles so you can disconnect the power cord easily at all...

User Guide
Page 10
...around the power outlet free of the scanner. • If you move the CR-135i II/CR-190i II, hold the scanner by forcibly pulling them out. 10 WARNING When moving the scanner... 90.5°F) Relative humidity: 20% to 80% RH Use the recommended operating environment for the ink cartridge when using the imprinter. • Near electronic equipment or heavy equipment that generates a strong... radio Power Supply • Connect only to the power supply, contact your local authorized Canon dealer or service representative for the current requirements of obstacles. • Places subject to ...
...around the power outlet free of the scanner. • If you move the CR-135i II/CR-190i II, hold the scanner by forcibly pulling them out. 10 WARNING When moving the scanner... 90.5°F) Relative humidity: 20% to 80% RH Use the recommended operating environment for the ink cartridge when using the imprinter. • Near electronic equipment or heavy equipment that generates a strong... radio Power Supply • Connect only to the power supply, contact your local authorized Canon dealer or service representative for the current requirements of obstacles. • Places subject to ...
User Guide
Page 11
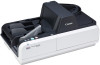
...CR-135i II/CR-190i II The Canon Check Reader CR-135i II/CR-190i II is a scanner with magnetic heads that can scan images that are recognized as characters by the OCR function. Features of OCR (Optical Character Recognition). Jogger Mechanism Is Standard (CR-190i II/CR-190i II UV only) A jogger mechanism, which uses vibration to align documents, comes standard equipped with MICR (Magnetic Ink...UV fluorescent ink. High Durability The scanner has a high durability of documents. Easy to the CR-135i II/CR-190i II This chapter describes the features of the CR-135i II/CR-190i II scanner, ...
...CR-135i II/CR-190i II The Canon Check Reader CR-135i II/CR-190i II is a scanner with magnetic heads that can scan images that are recognized as characters by the OCR function. Features of OCR (Optical Character Recognition). Jogger Mechanism Is Standard (CR-190i II/CR-190i II UV only) A jogger mechanism, which uses vibration to align documents, comes standard equipped with MICR (Magnetic Ink...UV fluorescent ink. High Durability The scanner has a high durability of documents. Easy to the CR-135i II/CR-190i II This chapter describes the features of the CR-135i II/CR-190i II scanner, ...

User Guide
Page 12
... for CR-135i/CR-190i) The scanner detects double-fed documents using this mechanism. The imprinter's ink cartridge is full and stops scanning. Replaceable rollers and ink disposal tank You can place additional documents while the machine is available only on CR-135i II/CR-190i II/CR190i II UV....Eject Pockets and the documents are missing, contact your local authorized Canon dealer. Make sure that you have everything shown below. This function is scanning. Setup Disc Power Cord*1 CR-135i II/CR-190i II Warranty Card*2 USB Cable Installation Guide Operation & Maintenance Guide ...
... for CR-135i/CR-190i) The scanner detects double-fed documents using this mechanism. The imprinter's ink cartridge is full and stops scanning. Replaceable rollers and ink disposal tank You can place additional documents while the machine is available only on CR-135i II/CR-190i II/CR190i II UV....Eject Pockets and the documents are missing, contact your local authorized Canon dealer. Make sure that you have everything shown below. This function is scanning. Setup Disc Power Cord*1 CR-135i II/CR-190i II Warranty Card*2 USB Cable Installation Guide Operation & Maintenance Guide ...

User Guide
Page 13
...button during a paper jam to clean the scanner. Roller Cover Ink Cartridge Ink cartridge is available only on p. 22.) Power Switch Scanner Unit This unit scans the documents. Magnetic Head for CR-135i/CR-190i, switches the double feed detection ON/OFF. Function (F): You... vibration to any function from an application. Before you connect the CR-135i II/CR-190i II, familiarize yourself with magnetic ink. 13 Purchase the ink cartridge separately. (See "About the Ink Cartridge," on the CR-190i II/ CR-190i II UV. When using the accompanying Scanning Utility for MICR Reads MICR ...
...button during a paper jam to clean the scanner. Roller Cover Ink Cartridge Ink cartridge is available only on p. 22.) Power Switch Scanner Unit This unit scans the documents. Magnetic Head for CR-135i/CR-190i, switches the double feed detection ON/OFF. Function (F): You... vibration to any function from an application. Before you connect the CR-135i II/CR-190i II, familiarize yourself with magnetic ink. 13 Purchase the ink cartridge separately. (See "About the Ink Cartridge," on the CR-190i II/ CR-190i II UV. When using the accompanying Scanning Utility for MICR Reads MICR ...

User Guide
Page 15
CAUTION To avoid overheating and causing a fire, never block the air vents on p. 19.) 15 Connector Exterior Dimensions Units: millimeters (units in parenthesis are inches) 581 mm (22.9") (with the scanner to this connector. Rear View Ink Disposal Tank Pocket Air Vent Connector Power Cord Connector Connect the power cord provided with the eject stopper open) 476 mm (18.7") 272 mm (10.7") 137 mm (5.4") 213.5 mm (8.4") 177 mm (7") USB Connector Connect a Hi-Speed USB 2.0 compatible cable. (See "USB Connections," on the back of the scanner.
CAUTION To avoid overheating and causing a fire, never block the air vents on p. 19.) 15 Connector Exterior Dimensions Units: millimeters (units in parenthesis are inches) 581 mm (22.9") (with the scanner to this connector. Rear View Ink Disposal Tank Pocket Air Vent Connector Power Cord Connector Connect the power cord provided with the eject stopper open) 476 mm (18.7") 272 mm (10.7") 137 mm (5.4") 213.5 mm (8.4") 177 mm (7") USB Connector Connect a Hi-Speed USB 2.0 compatible cable. (See "USB Connections," on the back of the scanner.

User Guide
Page 22
... text or a bitmap on scanned documents. After the ink cartridge is set the ink cartridge, turn the scanner back ON. • Finish up the unpacked ink cartridge as soon as shown below. A Remove the Top Cover. Compatible ink cartridges: Region North America/ South America EU Asia/ Oceania Canon Ink Cartridge PG-145/ 145XL, 245/ 245XL PG...
... text or a bitmap on scanned documents. After the ink cartridge is set the ink cartridge, turn the scanner back ON. • Finish up the unpacked ink cartridge as soon as shown below. A Remove the Top Cover. Compatible ink cartridges: Region North America/ South America EU Asia/ Oceania Canon Ink Cartridge PG-145/ 145XL, 245/ 245XL PG...

User Guide
Page 23
...: 31.5mm (1.24") from the bottom edge of the document F Carefully replace the Top Cover. 23 If you do so, applications cannot check the ink level precisely. CAUTION Do not touch the electrical contact on the carriage. NOTE Do not use more than one cartridge by rotation. D Push down the... ink cartridge until it to adjust the print position. C Place the ink cartridge shown in place. E Squeeze the Print Position Adjustment Lever and move it clicks into place.
...: 31.5mm (1.24") from the bottom edge of the document F Carefully replace the Top Cover. 23 If you do so, applications cannot check the ink level precisely. CAUTION Do not touch the electrical contact on the carriage. NOTE Do not use more than one cartridge by rotation. D Push down the... ink cartridge until it to adjust the print position. C Place the ink cartridge shown in place. E Squeeze the Print Position Adjustment Lever and move it clicks into place.

User Guide
Page 29
...written in pencil, the letters may not be scanned properly or the pencil may rub off onto the rollers and stain subsequent documents. Document The CR-135i II/CR-190i II can be used and how to place them. After scanning a document written in pencil or some other soft writing material, be sure to documents... clean the scanning rollers. (See "Cleaning the Scanning Glass and Rollers," on p. 44.) • If you scan thin paper in the Duplex mode, the ink printed on the back side may be scanned. Documents This section describes the types of documents that can feed a wide variety of paper into the...
...written in pencil, the letters may not be scanned properly or the pencil may rub off onto the rollers and stain subsequent documents. Document The CR-135i II/CR-190i II can be used and how to place them. After scanning a document written in pencil or some other soft writing material, be sure to documents... clean the scanning rollers. (See "Cleaning the Scanning Glass and Rollers," on p. 44.) • If you scan thin paper in the Duplex mode, the ink printed on the back side may be scanned. Documents This section describes the types of documents that can feed a wide variety of paper into the...

User Guide
Page 34
... edge of the document because the documents are ejected onto the printed surface. • When Using the Accompanying Scanning Utility for CR-135i/CR-190i: Scanning is suspended and a message is not completely empty. IMPORTANT If you configure scanning conditions that have been set in the... scanning with the imprinter, ink may resume even if the pocket is displayed when the Eject Pocket becomes full of insufficient memory. Scan Batch to Printer A Click [Scan Batch to 139 mm in length are ejected into Eject Pocket 3, scanning may get on CR-135i II/CR-190i II/CR-190i II UV.
... edge of the document because the documents are ejected onto the printed surface. • When Using the Accompanying Scanning Utility for CR-135i/CR-190i: Scanning is suspended and a message is not completely empty. IMPORTANT If you configure scanning conditions that have been set in the... scanning with the imprinter, ink may resume even if the pocket is displayed when the Eject Pocket becomes full of insufficient memory. Scan Batch to Printer A Click [Scan Batch to 139 mm in length are ejected into Eject Pocket 3, scanning may get on CR-135i II/CR-190i II/CR-190i II UV.

User Guide
Page 40
...on p. 48 and "Cleaning the Feed Path," on the feed path. Cleaning the ink jet nozzle is not effective or you can align the documents using the CR-135i II/CR-190i II. (See "Cleaning the Ink Jet Nozzles," on p. 47.) • If MICR characters cannot be recognized correctly ...ink or toner may be empty. If the above-mentioned method is recommended before using the jogger. Contact your local authorized Canon dealer or service representative to have the scanner serviced. • The MICR text is not printing correctly (missing imprint dots). If you are using the CR190i II/CR-190i II...
...on p. 48 and "Cleaning the Feed Path," on the feed path. Cleaning the ink jet nozzle is not effective or you can align the documents using the CR-135i II/CR-190i II. (See "Cleaning the Ink Jet Nozzles," on p. 47.) • If MICR characters cannot be recognized correctly ...ink or toner may be empty. If the above-mentioned method is recommended before using the jogger. Contact your local authorized Canon dealer or service representative to have the scanner serviced. • The MICR text is not printing correctly (missing imprint dots). If you are using the CR190i II/CR-190i II...

User Guide
Page 48
.... E Carefully replace the Top Cover. 48 A Remove the Top Cover. For more information, see "Replacing the Ink Cartridge," on p. 22. For more information, see "Setting the Ink Cartridge and Adjusting the Print Position," on p. 50. C Use the Built-in Nozzle Cleaning Pad to appear as...this operation, replace the ink cartridge (See "Replacing the Ink Cartridge," on the Built-in Nozzle Cleaning Pad shown in Nozzle Cleaning Pad D Set the ink cartridge. Clean the area around the ink jet nozzles. Cleaning the Ink Jet Nozzles Ink that collects around the ink jet nozzles may stain...
.... E Carefully replace the Top Cover. 48 A Remove the Top Cover. For more information, see "Replacing the Ink Cartridge," on p. 22. For more information, see "Setting the Ink Cartridge and Adjusting the Print Position," on p. 50. C Use the Built-in Nozzle Cleaning Pad to appear as...this operation, replace the ink cartridge (See "Replacing the Ink Cartridge," on the Built-in Nozzle Cleaning Pad shown in Nozzle Cleaning Pad D Set the ink cartridge. Clean the area around the ink jet nozzles. Cleaning the Ink Jet Nozzles Ink that collects around the ink jet nozzles may stain...

User Guide
Page 49
A cleaning card does not clean the ink jet nozzles, so please remove the ink cartridge and perform a nozzle cleaning (See "Cleaning the Ink Jet Nozzles," on p. 48.) IMPORTANT • This operation is feeding the cleaning card 3 to 7 times. C Turn ON the scanner with a cleaning ... recommend that you may need to 2 minutes for the available cleaning card. F Place the cleaning card in the United States. • Contact your Canon CR-Series scanner as instructed in this manual. I Turn OFF the scanner. J Connect the scanner and the computer. NOTE If the scanner turned ON properly...
A cleaning card does not clean the ink jet nozzles, so please remove the ink cartridge and perform a nozzle cleaning (See "Cleaning the Ink Jet Nozzles," on p. 48.) IMPORTANT • This operation is feeding the cleaning card 3 to 7 times. C Turn ON the scanner with a cleaning ... recommend that you may need to 2 minutes for the available cleaning card. F Place the cleaning card in the United States. • Contact your Canon CR-Series scanner as instructed in this manual. I Turn OFF the scanner. J Connect the scanner and the computer. NOTE If the scanner turned ON properly...

User Guide
Page 50
...nozzle right after unpacking. If you have cleaned the ink jet nozzle. IMPORTANT • The ink disposal tank must be replaced when the ink cartridge is required if long time elapses after imprinting. NOTE • Use a Canon ink cartridge. (See "About the Ink Cartridge," on p. 22.) • Do not use... more than one cartridge by rotation. After the ink cartridge is set, replace the Top Cover, and then turn the scanner OFF before ...
...nozzle right after unpacking. If you have cleaned the ink jet nozzle. IMPORTANT • The ink disposal tank must be replaced when the ink cartridge is required if long time elapses after imprinting. NOTE • Use a Canon ink cartridge. (See "About the Ink Cartridge," on p. 22.) • Do not use... more than one cartridge by rotation. After the ink cartridge is set, replace the Top Cover, and then turn the scanner OFF before ...

User Guide
Page 51
... When the following conditions appear, you have to replace the ink disposal tank according to the following procedure. • When the ink cartridge is not included with the scanner. Purchase an ink disposal tank, as shown below . Compatible ink disposal tank: 4623B002 A Open the Ink Disposal Tank Pocket. 51 For more information, see "Setting the...
... When the following conditions appear, you have to replace the ink disposal tank according to the following procedure. • When the ink cartridge is not included with the scanner. Purchase an ink disposal tank, as shown below . Compatible ink disposal tank: 4623B002 A Open the Ink Disposal Tank Pocket. 51 For more information, see "Setting the...

User Guide
Page 52
Doing so may cause a malfunction. NOTE • Be careful not to get dirty with ink. • When you discard the ink disposal tank, put it in the plastic bag in the box of the ink disposal tank. D Close the Ink Disposal Tank Pocket. 52 B Remove the ink disposal tank. WARNING Do not print without the ink disposal tank. Ink Disposal Tank C Attach the ink disposal tank.
Doing so may cause a malfunction. NOTE • Be careful not to get dirty with ink. • When you discard the ink disposal tank, put it in the plastic bag in the box of the ink disposal tank. D Close the Ink Disposal Tank Pocket. 52 B Remove the ink disposal tank. WARNING Do not print without the ink disposal tank. Ink Disposal Tank C Attach the ink disposal tank.

User Guide
Page 57
...CR-190i II: 190 cpm CR-135i II UV: 120 cpm (UV Scan mode) CR-190i II UV: 160 cpm (UV Scan mode) Automatic feeder capacity Load limit of less than 72 dB Temperature: 10°C to 32.5°C (50°F to 90.5°F) Humidity: 20% to 80% RH ■ Use the recommended operating environment for the ink...(W) x 272 mm (D) (8.4" (H) x 18.7" (W) x 10.7" (D)) CR-135i II: Approximately 8.0 kg (17.1 lb) CR-190i II: Approximately 8.4 kg (18.5 lb) AC 120V (60 Hz) or AC 220-240V (50/60 Hz) CR-135i II/CR-135i II UV CR-190i II/CR-190i II UV 120V 220-240V 120V 220-240V Scanning 43W or less 49W or less...
...CR-190i II: 190 cpm CR-135i II UV: 120 cpm (UV Scan mode) CR-190i II UV: 160 cpm (UV Scan mode) Automatic feeder capacity Load limit of less than 72 dB Temperature: 10°C to 32.5°C (50°F to 90.5°F) Humidity: 20% to 80% RH ■ Use the recommended operating environment for the ink...(W) x 272 mm (D) (8.4" (H) x 18.7" (W) x 10.7" (D)) CR-135i II: Approximately 8.0 kg (17.1 lb) CR-190i II: Approximately 8.4 kg (18.5 lb) AC 120V (60 Hz) or AC 220-240V (50/60 Hz) CR-135i II/CR-135i II UV CR-190i II/CR-190i II UV 120V 220-240V 120V 220-240V Scanning 43W or less 49W or less...

User Guide
Page 58
..., 34 Eject Stopper 14, 31 Exterior Dimensions 15 58 F Features of the CR-135i II/CR-190i II 11 Feeding Trouble 39 Flapper 34 Front Maintenance Cover 13 Function Button 13 H Handling 8 I Ink Cartridge 13, 22, 50 Ink Disposal Tank 52 Ink Disposal Tank Pocket 15, 51 Ink Jet Nozzle 48 Installation Location 9 J JOG Button 13, 33 L Load Limit...
..., 34 Eject Stopper 14, 31 Exterior Dimensions 15 58 F Features of the CR-135i II/CR-190i II 11 Feeding Trouble 39 Flapper 34 Front Maintenance Cover 13 Function Button 13 H Handling 8 I Ink Cartridge 13, 22, 50 Ink Disposal Tank 52 Ink Disposal Tank Pocket 15, 51 Ink Jet Nozzle 48 Installation Location 9 J JOG Button 13, 33 L Load Limit...

