
User Manual
Page 2
COPYRIGHT WARNING: Unauthorized recording of copyrighted materials may infringe on the rights of Contents Menus Index Important Usage Instructions WARNING 2 TO REDUCE THE RISK OF ELECTRIC SHOCK AND TO REDUCE ANNOYING INTERFERENCE, USE THE RECOMMENDED ACCESSORIES ONLY. Table of copyright owners and be contrary to copyright laws.
COPYRIGHT WARNING: Unauthorized recording of copyrighted materials may infringe on the rights of Contents Menus Index Important Usage Instructions WARNING 2 TO REDUCE THE RISK OF ELECTRIC SHOCK AND TO REDUCE ANNOYING INTERFERENCE, USE THE RECOMMENDED ACCESSORIES ONLY. Table of copyright owners and be contrary to copyright laws.

User Manual
Page 3
... MPEG-4 standard. and other countries and is used under the AT&T patents to provide MPEG-4 compliant video. 3 Trademark Acknowledgements • SD, SDHC and SDXC Logos are trademarks of SD-3C, LLC. • Canon is an authorized licensee of the CFast 2.0™ trademark, which may be ...This device incorporates exFAT technology licensed from Microsoft. • This product is licensed under AT&T patents for the MPEG-4 standard and may be used for encoding MPEG-4 compliant video and/or decoding MPEG-4 compliant video that was encoded only (1) for a personal and noncommercial purpose or (2) by...
... MPEG-4 standard. and other countries and is used under the AT&T patents to provide MPEG-4 compliant video. 3 Trademark Acknowledgements • SD, SDHC and SDXC Logos are trademarks of SD-3C, LLC. • Canon is an authorized licensee of the CFast 2.0™ trademark, which may be ...This device incorporates exFAT technology licensed from Microsoft. • This product is licensed under AT&T patents for the MPEG-4 standard and may be used for encoding MPEG-4 compliant video and/or decoding MPEG-4 compliant video that was encoded only (1) for a personal and noncommercial purpose or (2) by...

User Manual
Page 4
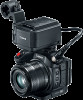
... supplied MA-400 Microphone Adapter, you may even want to take highquality photos and the XC15 has you can use the optional RC-6 Remote Controller (A 40). Highlights of the XC15 The Canon 4K Camcorder XC15 embodies many elements the discerning cinematographer looks for in a camera, with its ability to ... format You have the versatility to record in low-light conditions due to your maneuverability by using the Canon XF Utility software (A 122). CMOS sensor and DIGIC DV 5 image processor The XC15 excels at x1200 speed. In "run and gun" situations, the articulated touch-screen LCD ...
... supplied MA-400 Microphone Adapter, you may even want to take highquality photos and the XC15 has you can use the optional RC-6 Remote Controller (A 40). Highlights of the XC15 The Canon 4K Camcorder XC15 embodies many elements the discerning cinematographer looks for in a camera, with its ability to ... format You have the versatility to record in low-light conditions due to your maneuverability by using the Canon XF Utility software (A 122). CMOS sensor and DIGIC DV 5 image processor The XC15 excels at x1200 speed. In "run and gun" situations, the articulated touch-screen LCD ...

User Manual
Page 5
...to better capture your subject in the desired depth of field (A 140). • Push AF While the camcorder is in manual focus mode, you can use Push AF to switch the camcorder 5 temporarily to autofocus mode (A 79). • HD playback from the HDMI OUT terminal (A 84). Other Functions •...; Assistance functions Peaking and magnification (A 77) can be helpful when you use manual focus, onscreen markers (A 82) can be customized so that time code and user bit from 4K video When you play back a 4K clip, you...
...to better capture your subject in the desired depth of field (A 140). • Push AF While the camcorder is in manual focus mode, you can use Push AF to switch the camcorder 5 temporarily to autofocus mode (A 79). • HD playback from the HDMI OUT terminal (A 84). Other Functions •...; Assistance functions Peaking and magnification (A 77) can be helpful when you use manual focus, onscreen markers (A 82) can be customized so that time code and user bit from 4K video When you play back a 4K clip, you...

User Manual
Page 6
... 61 Automatic Gain and ISO Limits 63 Exposure 65 Exposure Lock 65 Touch Exposure 66 AE Shift 67 Light Metering Mode 68 White Balance 69 Using Looks 71 Selecting a Pre-installed Look 71 Creating a User-defined Look 72 Zooming 73 Table of Parts 12 MA-400 Microphone Adapter 17 Viewfinder ...Rate 53 Shooting Modes 55 Manual Exposure (n) 55 Aperture Priority AE (") 58 Shutter Priority AE (,) 58 Program AE (') 59 Auto (N) 59 Special Scene (ƒ) 59 Using the FUNC. Recording 41 Recording Video and Taking Photos 41 Preparing to Record 41 Basic Recording 42 Selecting the Photo Size and Aspect Ratio 44...
... 61 Automatic Gain and ISO Limits 63 Exposure 65 Exposure Lock 65 Touch Exposure 66 AE Shift 67 Light Metering Mode 68 White Balance 69 Using Looks 71 Selecting a Pre-installed Look 71 Creating a User-defined Look 72 Zooming 73 Table of Parts 12 MA-400 Microphone Adapter 17 Viewfinder ...Rate 53 Shooting Modes 55 Manual Exposure (n) 55 Aperture Priority AE (") 58 Shutter Priority AE (,) 58 Program AE (') 59 Auto (N) 59 Special Scene (ƒ) 59 Using the FUNC. Recording 41 Recording Video and Taking Photos 41 Preparing to Record 41 Basic Recording 42 Selecting the Photo Size and Aspect Ratio 44...

User Manual
Page 7
...Setup 128 Viewing and Changing Wi-Fi Settings 129 Browser Remote: Controlling the Camcorder from an SD Card 107 5. Menu 104 Assignable Buttons 105 Using an Assignable Button 106 Saving and Loading Menu Settings 107 Saving Menu Settings to an SD Card 107 Loading Menu Settings from a Network Device ...On Faces (Face Detection & Tracking) 79 Image Stabilizer 81 Onscreen Markers and Zebra Patterns 82 Displaying Onscreen Markers 82 Displaying Zebra Patterns 82 Using the Waveform Monitor 83 Setting the Time Code 84 Selecting the Time Code Mode 84 Selecting Drop or Non-Drop Frame 85 Setting the User...
...Setup 128 Viewing and Changing Wi-Fi Settings 129 Browser Remote: Controlling the Camcorder from an SD Card 107 5. Menu 104 Assignable Buttons 105 Using an Assignable Button 106 Saving and Loading Menu Settings 107 Saving Menu Settings to an SD Card 107 Loading Menu Settings from a Network Device ...On Faces (Face Detection & Tracking) 79 Image Stabilizer 81 Onscreen Markers and Zebra Patterns 82 Displaying Onscreen Markers 82 Displaying Zebra Patterns 82 Using the Waveform Monitor 83 Setting the Time Code 84 Selecting the Time Code Mode 84 Selecting Drop or Non-Drop Frame 85 Setting the User...

User Manual
Page 9
...refers to record video clips and take photos. In this manual, when you are recording video clips, this manual carefully before you use the camcorder and retain it is referred to CFast cards and SD cards. • Photographs in this Manual • IMPORTANT: ...the LCD screen. "Screen" refers to Troubleshooting (A 146). Conventions Used in the manual are shooting photos, it for purchasing the Canon XC15. when you for future reference. 1 Introduction 9 About this manual. Please read . • This camcorder uses the same button to an SD, SDHC or SDXC memory card...
...refers to record video clips and take photos. In this manual, when you are recording video clips, this manual carefully before you use the camcorder and retain it is referred to CFast cards and SD cards. • Photographs in this Manual • IMPORTANT: ...the LCD screen. "Screen" refers to Troubleshooting (A 146). Conventions Used in the manual are shooting photos, it for purchasing the Canon XC15. when you for future reference. 1 Introduction 9 About this manual. Please read . • This camcorder uses the same button to an SD, SDHC or SDXC memory card...

User Manual
Page 10
...information you want to menu options as they are listed within or after the procedure. Takes you to abbreviate menu selections. Brackets [ ] are used to refer to find the function by selecting the [ System Setup] menu, the third submenu "page", and then the [Fan] menu item....Camcorder (A 28) Selecting the Resolution (Recording in the operating mode shown; About this Manual The arrow > is used to the summary of menu options and settings. Takes you can be used. For a concise summary of all available menu options and settings, refer to the alphabetical index. a light icon ...
...information you want to menu options as they are listed within or after the procedure. Takes you to abbreviate menu selections. Brackets [ ] are used to refer to find the function by selecting the [ System Setup] menu, the third submenu "page", and then the [Fan] menu item....Camcorder (A 28) Selecting the Resolution (Recording in the operating mode shown; About this Manual The arrow > is used to the summary of menu options and settings. Takes you can be used. For a concise summary of all available menu options and settings, refer to the alphabetical index. a light icon ...

User Manual
Page 19
.... ባ ቢ ቤ DC IN terminal 4 Slide the BATT. OPEN switch in ብ place. 6 Close the battery compartment cover. • Push the cover until you use the camcorder, charge the battery pack. For approximate charging times and recording/playback times with a battery pack or directly...
.... ባ ቢ ቤ DC IN terminal 4 Slide the BATT. OPEN switch in ብ place. 6 Close the battery compartment cover. • Push the cover until you use the camcorder, charge the battery pack. For approximate charging times and recording/playback times with a battery pack or directly...

User Manual
Page 21
... camcorder's DC IN terminal or to the AC adapter any electrical equipment that you prepare battery packs to last 2 to voltage converters for use the AC adapter to power the camcorder from a power outlet so the battery pack will be consumed. • Charged battery packs continue ...to discharge naturally. If either the ambient temperature or the battery pack's temperature is outside the range of use, or the day before, to ensure a full charge. • We recommend that is not expressly recommended for overseas travels or special power ...
... camcorder's DC IN terminal or to the AC adapter any electrical equipment that you prepare battery packs to last 2 to voltage converters for use the AC adapter to power the camcorder from a power outlet so the battery pack will be consumed. • Charged battery packs continue ...to discharge naturally. If either the ambient temperature or the battery pack's temperature is outside the range of use, or the day before, to ensure a full charge. • We recommend that is not expressly recommended for overseas travels or special power ...

User Manual
Page 22
... Lens Hood Attach the lens hood to deform the lens hood. • Make sure that the lens hood is aligned with the thread. ባ ቢ Using the Viewfinder Unit Attaching the Viewfinder Unit 1 Open the viewfinder unit latch and remove the viewfinder unit cover. ቤ 2 Turn the LCD panel upward. 3 Hook...
... Lens Hood Attach the lens hood to deform the lens hood. • Make sure that the lens hood is aligned with the thread. ባ ቢ Using the Viewfinder Unit Attaching the Viewfinder Unit 1 Open the viewfinder unit latch and remove the viewfinder unit cover. ቤ 2 Turn the LCD panel upward. 3 Hook...

User Manual
Page 24
Attaching the MA-400 Microphone Adapter By attaching the microphone adapter to the camcorder, you are not using the viewfinder unit, make sure to attach the viewfinder unit cover to record audio from commercially available microphones or analog line in sources with an ... tighten the lock screw (ብ). ብ ቤ Table of the cover and then fasten the latch. 24 ቢ ባ ቤ NOTES • When you can use the INPUT terminals to the unit.
Attaching the MA-400 Microphone Adapter By attaching the microphone adapter to the camcorder, you are not using the viewfinder unit, make sure to attach the viewfinder unit cover to record audio from commercially available microphones or analog line in sources with an ... tighten the lock screw (ብ). ብ ቤ Table of the cover and then fasten the latch. 24 ቢ ባ ቤ NOTES • When you can use the INPUT terminals to the unit.

User Manual
Page 25
Preparing the Camcorder 3 Using the supplied unit cable, connect the microphone adapter's AUDIO terminal to the camcorder's AUDIO terminal (ቦ). • Align the Í marks on the unit cable's ...
Preparing the Camcorder 3 Using the supplied unit cable, connect the microphone adapter's AUDIO terminal to the camcorder's AUDIO terminal (ቦ). • Align the Í marks on the unit cable's ...

User Manual
Page 26
Table of the microphone adapter (ብ) and then remove the cable clamp (ቦ). 26 ብ ቦ Using the LCD Panel Pull out the LCD panel and adjust it to a comfortable viewing angle. • You can adjust the angle also for high- Preparing the Camcorder 4 Unscrew the lock screw at the back of Contents Menus Index and low-angle shooting.
Table of the microphone adapter (ብ) and then remove the cable clamp (ቦ). 26 ብ ቦ Using the LCD Panel Pull out the LCD panel and adjust it to a comfortable viewing angle. • You can adjust the angle also for high- Preparing the Camcorder 4 Unscrew the lock screw at the back of Contents Menus Index and low-angle shooting.

User Manual
Page 27
... than 0.01% of the pixels may cause damage to drop the camcorder when attaching or adjusting the shoulder strap. Using a Tripod You can adjust the brightness using extremely high-precision manufacturing techniques, with a mounting screw of Contents Menus Index IMPORTANT • Be careful not to ...the camcorder. 6.5 mm Table of 6.5 mm (0.26 in.) or smaller. Using tripods with longer mounting screws may occasionally misfire or appear as black, red, blue or green dots. While firmly holding the camcorder, rotate...
... than 0.01% of the pixels may cause damage to drop the camcorder when attaching or adjusting the shoulder strap. Using a Tripod You can adjust the brightness using extremely high-precision manufacturing techniques, with a mounting screw of Contents Menus Index IMPORTANT • Be careful not to ...the camcorder. 6.5 mm Table of 6.5 mm (0.26 in.) or smaller. Using tripods with longer mounting screws may occasionally misfire or appear as black, red, blue or green dots. While firmly holding the camcorder, rotate...

User Manual
Page 29
... in an index screen, to the index screen. Basic Operation of Contents Menus Index With the intuitive touch screen interface you are performing. Used to scroll menus, to browse through index screen pages or to indicate the recording and playback modes for video clips and photos. 29 Icon... Description Video clip shooting mode. Also used during playback. Pinch your fingers out to start playing back a recording in on the operating mode and the task you have all the ...
... in an index screen, to the index screen. Basic Operation of Contents Menus Index With the intuitive touch screen interface you are performing. Used to scroll menus, to browse through index screen pages or to indicate the recording and playback modes for video clips and photos. 29 Icon... Description Video clip shooting mode. Also used during playback. Pinch your fingers out to start playing back a recording in on the operating mode and the task you have all the ...

User Manual
Page 30
... or hard-tipped objects, such as ballpoint pens. - Applying excessive force or forcefully scratching the touch screen. - Using the MENU Button and Joystick You can be adjusted using the touch panel. Joystick When making a menu selection, push the joystick (Ý/Þ) to close the menu after...settings. Menu and Setup Menus The camcorder's functions and settings can navigate some of the camcorder's menus and screens using the MENU button and joystick instead of using the FUNC. menu and setup menus. If necessary, refer back to this manual, navigating the menus is attached ...
... or hard-tipped objects, such as ballpoint pens. - Applying excessive force or forcefully scratching the touch screen. - Using the MENU Button and Joystick You can be adjusted using the touch panel. Joystick When making a menu selection, push the joystick (Ý/Þ) to close the menu after...settings. Menu and Setup Menus The camcorder's functions and settings can navigate some of the camcorder's menus and screens using the MENU button and joystick instead of using the FUNC. menu and setup menus. If necessary, refer back to this manual, navigating the menus is attached ...

User Manual
Page 31
...then press the joystick. • Menu items not available appear grayed out. 3 Adjust the function. • Check the function's description for details. To use the touch panel controls 1 Touch [FUNC.]. • The FUNC. menu appears. 2 Push the joystick (Ý/Þ) to select the icon of the screen.... NOTES • An adjustment dial will still require touch operations. Menu The FUNC. Setup Menus Operating modes: To use the joystick, first press the joystick itself so that can drag your finger left/right to move the adjustment dial to the desired setting...
...then press the joystick. • Menu items not available appear grayed out. 3 Adjust the function. • Check the function's description for details. To use the touch panel controls 1 Touch [FUNC.]. • The FUNC. menu appears. 2 Push the joystick (Ý/Þ) to select the icon of the screen.... NOTES • An adjustment dial will still require touch operations. Menu The FUNC. Setup Menus Operating modes: To use the joystick, first press the joystick itself so that can drag your finger left/right to move the adjustment dial to the desired setting...

User Manual
Page 32
If you can push the joystick (Ý/Þ) to select [MENU] and then press the joystick. • The setup menus appear. To use the joystick 1 and modes only: Push the joystick (Ý/Þ) to select [FUNC.] and then press the joystick. 2 Press the MENU button. • Alternatively, you ...
If you can push the joystick (Ý/Þ) to select [MENU] and then press the joystick. • The setup menus appear. To use the joystick 1 and modes only: Push the joystick (Ý/Þ) to select [FUNC.] and then press the joystick. 2 Press the MENU button. • Alternatively, you ...

User Manual
Page 33
... lithium battery (A 157) and set , the [Date/Time] 33 screen will appear automatically with the [ System Setup] > [1] > [Date/Time] setting. • When you do not use 12-hour clock (AM/PM). • You can also push the joystick (Þ) to move between the fields and then press the joystick to make... fields and then press the joystick to make your selection. When the camcorder's clock is not set the time zone, date and time again. • Using the optional GP-E2 GPS Receiver, you can also push the joystick (Þ) to move between the fields and then press the joystick to make...
... lithium battery (A 157) and set , the [Date/Time] 33 screen will appear automatically with the [ System Setup] > [1] > [Date/Time] setting. • When you do not use 12-hour clock (AM/PM). • You can also push the joystick (Þ) to move between the fields and then press the joystick to make... fields and then press the joystick to make your selection. When the camcorder's clock is not set the time zone, date and time again. • Using the optional GP-E2 GPS Receiver, you can also push the joystick (Þ) to move between the fields and then press the joystick to make...


