VIXIA HV40 Instruction Manual
Page 8
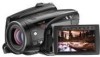
... Pre-marked Position 33 Locating the End of contents Introduction Enjoying High-Definition Video 7 About this Manual 11 Getting to Know the Camcorder Supplied Accessories 13 Components Guide 14 Screen Displays 17 Preparations Getting Started Charging the Battery Pack 20 Inserting and Removing a Tape 22 ...Inserting and Removing a Memory Card 22 Preparing the Camcorder 23 The Wireless Controller 23 Adjusting the LCD Screen 24 Using the Menus Selecting an Option from the Setup Menus 25 First Time Settings Changing the Language 26 Changing the Time Zone 26...
... Pre-marked Position 33 Locating the End of contents Introduction Enjoying High-Definition Video 7 About this Manual 11 Getting to Know the Camcorder Supplied Accessories 13 Components Guide 14 Screen Displays 17 Preparations Getting Started Charging the Battery Pack 20 Inserting and Removing a Tape 22 ...Inserting and Removing a Memory Card 22 Preparing the Camcorder 23 The Wireless Controller 23 Adjusting the LCD Screen 24 Using the Menus Selecting an Option from the Setup Menus 25 First Time Settings Changing the Language 26 Changing the Time Zone 26...

VIXIA HV40 Instruction Manual
Page 11
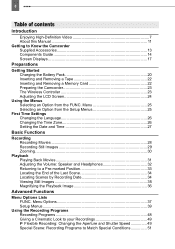
...and press ( ). Setting the Date and Time DATE/TIME SETUP DATE/TIME JAN. 1, 2009 12:00 AM FUNC. ( 25) 1 Press FUNC.. 2 Select ( ) the icon and press ( ) to close the menu. IMPORTANT If you do not use the camcorder and retain it for future reference. You can also change... About this manual carefully before you for example [ON], [OFF]). The photos included in boldface indicate the default setting (for purchasing the Canon VIXIA HV40. Menu options in the manual are indicated within a "button" frame (for example FUNC. ). Names of buttons and switches other than the...
...and press ( ). Setting the Date and Time DATE/TIME SETUP DATE/TIME JAN. 1, 2009 12:00 AM FUNC. ( 25) 1 Press FUNC.. 2 Select ( ) the icon and press ( ) to close the menu. IMPORTANT If you do not use the camcorder and retain it for future reference. You can also change... About this manual carefully before you for example [ON], [OFF]). The photos included in boldface indicate the default setting (for purchasing the Canon VIXIA HV40. Menu options in the manual are indicated within a "button" frame (for example FUNC. ). Names of buttons and switches other than the...

VIXIA HV40 Instruction Manual
Page 25
... out. 4 Press FUNC. Using the Menus 25 Using the Menus Using the Menus Many of the camcorder's functions can be highlighted in light blue. icon, Selecting an Option from the Setup Menus Selecting an Option from the left side column. 3 Select ( ) the desired setting from the... ( FUNC. ). The title of the selected menu appears on 1 Press FUNC. . 2 Select ( ) the icon and press ( ) to open directly the setup menus screen. 3 Select ( ) the desired menu from the FUNC. For details about the available menu options and settings, refer to change from the left side...
... out. 4 Press FUNC. Using the Menus 25 Using the Menus Using the Menus Many of the camcorder's functions can be highlighted in light blue. icon, Selecting an Option from the Setup Menus Selecting an Option from the left side column. 3 Select ( ) the desired setting from the... ( FUNC. ). The title of the selected menu appears on 1 Press FUNC. . 2 Select ( ) the icon and press ( ) to open directly the setup menus screen. 3 Select ( ) the desired menu from the FUNC. For details about the available menu options and settings, refer to change from the left side...

VIXIA HV40 Instruction Manual
Page 26
... FUNC. The displays and that appear in some menu screens refer to another time zone. Select the time zone referring to open the setup menus. 3 Select ( ) [DATE/TIME SETUP] and press ( ). 4 Select ( ) [T.ZONE/DST] and press ( ). The time zone setting appears. The default setting is New York.... Time Zone DATE/TIME SETUP Default value T.ZONE/DST NEW YORK FUNC. ( 25) DISPLAY SETUP/ Default value LANGUAGE ENGLISH FUNC. ( 25) 1 Press FUNC. . 2 Select ( ) the icon and press ( ) to the date and time displayed on the camcorder and will not change ...
... FUNC. The displays and that appear in some menu screens refer to another time zone. Select the time zone referring to open the setup menus. 3 Select ( ) [DATE/TIME SETUP] and press ( ). 4 Select ( ) [T.ZONE/DST] and press ( ). The time zone setting appears. The default setting is New York.... Time Zone DATE/TIME SETUP Default value T.ZONE/DST NEW YORK FUNC. ( 25) DISPLAY SETUP/ Default value LANGUAGE ENGLISH FUNC. ( 25) 1 Press FUNC. . 2 Select ( ) the icon and press ( ) to the date and time displayed on the camcorder and will not change ...

VIXIA HV40 Instruction Manual
Page 27
IMPORTANT If you do not use the camcorder for about 3 months, the built-in lithium battery ( 98) and set the time zone, date and time again. You can also change the date format ( 47). Setting the Date and Time DATE/TIME SETUP DATE/TIME JAN. 1, 2009 12:00 AM FUNC. ( 25) 1...first field of the date and time and move ( ) to the next field. 6 Press ( ) to start the clock. 7 Press FUNC. to open the setup menus. 3 Select ( ) [DATE/TIME SETUP] and press ( ). 4 Select ( ) [DATE/TIME] and press ( ). In such case, recharge the built-in rechargeable lithium battery may discharge completely and...
IMPORTANT If you do not use the camcorder for about 3 months, the built-in lithium battery ( 98) and set the time zone, date and time again. You can also change the date format ( 47). Setting the Date and Time DATE/TIME SETUP DATE/TIME JAN. 1, 2009 12:00 AM FUNC. ( 25) 1...first field of the date and time and move ( ) to the next field. 6 Press ( ) to start the clock. 7 Press FUNC. to open the setup menus. 3 Select ( ) [DATE/TIME SETUP] and press ( ). 4 Select ( ) [DATE/TIME] and press ( ). In such case, recharge the built-in rechargeable lithium battery may discharge completely and...

VIXIA HV40 Instruction Manual
Page 32
..., press ( ) to display it. 2 Push the joystick ( ) toward + or - Adjusting the Volume: Speaker and Headphones The camcorder plays the sound with the built-in playback pause ( ) mode for both the headphones and the audio/video output. You can press .../OUT SETUP2 ( 12) Default value 1 If the joystick guide does not appear on screen, the following special playback modes are connected to open the setup menus. 3 Select ( ) [ PLAY/OUT SETUP2]* and press ( ). 4 Select ( ) [AV/PHONES] and press ( ). 5 Select ( ) [ PHONES] and press ( ). AV/PHONES AV 1 Press FUNC...
..., press ( ) to display it. 2 Push the joystick ( ) toward + or - Adjusting the Volume: Speaker and Headphones The camcorder plays the sound with the built-in playback pause ( ) mode for both the headphones and the audio/video output. You can press .../OUT SETUP2 ( 12) Default value 1 If the joystick guide does not appear on screen, the following special playback modes are connected to open the setup menus. 3 Select ( ) [ PLAY/OUT SETUP2]* and press ( ). 4 Select ( ) [AV/PHONES] and press ( ). 5 Select ( ) [ PHONES] and press ( ). AV/PHONES AV 1 Press FUNC...

VIXIA HV40 Instruction Manual
Page 33
... during playback, press ZERO SET MEMORY on the screen. If you turn off the camcorder, the [AV/PHONES] setting in mode will return to hide the joystick guide. * In mode, select [ PLAY/ OUT SETUP] instead. Playback 33 Basic Functions 6 Press FUNC. . When you connect the headphones... while the terminal is set the camcorder to the AV/ terminal or when the AV/ terminal is set memory may not work...
... during playback, press ZERO SET MEMORY on the screen. If you turn off the camcorder, the [AV/PHONES] setting in mode will return to hide the joystick guide. * In mode, select [ PLAY/ OUT SETUP] instead. Playback 33 Basic Functions 6 Press FUNC. . When you connect the headphones... while the terminal is set the camcorder to the AV/ terminal or when the AV/ terminal is set memory may not work...

VIXIA HV40 Instruction Manual
Page 39
...digitally processed, so the image resolution will operate. With [ INSTANT AF] the autofocus adjusts quickly to [ NORMAL AF]. When activated, the camcorder will appear in light blue from 10x up to 40x and dark blue from a near subject to a far subject in the background, or...with [ HDV(PF30)], 1/12 in with insufficient lighting. Menu Options Lists 39 Setup Menus CAMERA SETUP A.SL SHUTTER Mode switch: or P (only in the [ PROGRAM AE] recording program) [ ON], [ OFF] The camcorder automatically uses slow shutter speeds to obtain brighter recordings in places with cinema effect ...
...digitally processed, so the image resolution will operate. With [ INSTANT AF] the autofocus adjusts quickly to [ NORMAL AF]. When activated, the camcorder will appear in light blue from 10x up to 40x and dark blue from a near subject to a far subject in the background, or...with [ HDV(PF30)], 1/12 in with insufficient lighting. Menu Options Lists 39 Setup Menus CAMERA SETUP A.SL SHUTTER Mode switch: or P (only in the [ PROGRAM AE] recording program) [ ON], [ OFF] The camcorder automatically uses slow shutter speeds to obtain brighter recordings in places with cinema effect ...

VIXIA HV40 Instruction Manual
Page 40
... video standards on the screen.) [ DV(WIDE)]: Standard-definition video with 16:9 aspect ratio. [ DV(NORMAL)]: Standard-definition video with a native progressive frame rate of camcorder shake. SELF TIMER ( 64) [ ON], [ OFF] [ HDV], [ HDV(PF30)], [ HDV(PF24)], [ HDV(24F)], [ DV(WIDE)], [ DV(NORMAL)]... be turned off when the mode switch is designed to . The image stabilizer is set to compensate for camcorder shake even at full telephoto. 40 Menu Options Lists AF AST LAMP ( 63) REC/IN SETUP [ AUTO], [ OFF] HD STANDARD FOCUS PRI. ( 59) Mode switch: [ ON:AiAF], [ ...
... video standards on the screen.) [ DV(WIDE)]: Standard-definition video with 16:9 aspect ratio. [ DV(NORMAL)]: Standard-definition video with a native progressive frame rate of camcorder shake. SELF TIMER ( 64) [ ON], [ OFF] [ HDV], [ HDV(PF30)], [ HDV(PF24)], [ HDV(24F)], [ DV(WIDE)], [ DV(NORMAL)]... be turned off when the mode switch is designed to . The image stabilizer is set to compensate for camcorder shake even at full telephoto. 40 Menu Options Lists AF AST LAMP ( 63) REC/IN SETUP [ AUTO], [ OFF] HD STANDARD FOCUS PRI. ( 59) Mode switch: [ ON:AiAF], [ ...

VIXIA HV40 Instruction Manual
Page 42
...drive mode ( 60) is set to be used when you insert a new memory card. [ CONTINUOUS]: Image numbers will be indicated with the camcorder. this will continue to (continuous shooting), (highspeed continuous shooting) or (auto exposure bracketing). while reviewing a still image, it will be assigned ...a number one higher than that of the last image on the memory card. INITIALIZE ( 70) [CANCEL], [INITIALIZE], [COMPL.INIT.] PLAY/OUT SETUP* * In mode, the following that of the last image recorded with the respective menu icon. PLAYBACK STD [ AUTO], [ HDV], [ DV] Select...
...drive mode ( 60) is set to be used when you insert a new memory card. [ CONTINUOUS]: Image numbers will be indicated with the camcorder. this will continue to (continuous shooting), (highspeed continuous shooting) or (auto exposure bracketing). while reviewing a still image, it will be assigned ...a number one higher than that of the last image on the memory card. INITIALIZE ( 70) [CANCEL], [INITIALIZE], [COMPL.INIT.] PLAY/OUT SETUP* * In mode, the following that of the last image recorded with the respective menu icon. PLAYBACK STD [ AUTO], [ HDV], [ DV] Select...
VIXIA HV40 Instruction Manual
Page 45
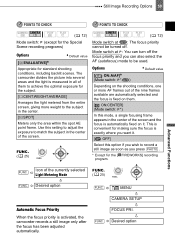
... display a grid or a horizontal line at the bottom of the LCD display with the joystick. DISPLAY SETUP BRIGHTNESS Adjust ( ) the brightness of the [ PLAY/OUT SETUP2] menu screen in mode ([ PLAY/OUT SETUP] menu in white or gray. Advanced Functions NOTES About the [HDMI OUT] display [HDMI OUT] appears... not affect that are available in other modes). This function can also be changed while a DV cable is connected to [ ON], the camcorder's on-screen displays will appear over areas of the picture that of the viewfinder or the recordings. This function can also be emphasized in ...
... display a grid or a horizontal line at the bottom of the LCD display with the joystick. DISPLAY SETUP BRIGHTNESS Adjust ( ) the brightness of the [ PLAY/OUT SETUP2] menu screen in mode ([ PLAY/OUT SETUP] menu in white or gray. Advanced Functions NOTES About the [HDMI OUT] display [HDMI OUT] appears... not affect that are available in other modes). This function can also be changed while a DV cable is connected to [ ON], the camcorder's on-screen displays will appear over areas of the picture that of the viewfinder or the recordings. This function can also be emphasized in ...

VIXIA HV40 Instruction Manual
Page 46
... off , the message " AUTO POWER OFF" will accompany some operations like turning on the camcorder, the selftimer countdown, etc. CUSTOM KEY ( 61) [ ], [DEUTSCH], [ ], [ENGLISH], [ESPAÑOL], [FRANÇAIS], [ITALIANO], [MAGYAR], [NEDERLNDS], [POLSKI], [ ], [TÜRKÇE], [ ], [ ], [ ], [ ], [ ], [ ], [ ], [ ], [ ] SYSTEM SETUP WL.REMOTE [ OFF], [ ASST.FUNC.], [ MARKERS], [ BLC], [ MAGNIFY] MAGN.REC [ ON], [ OFF] When...
... off , the message " AUTO POWER OFF" will accompany some operations like turning on the camcorder, the selftimer countdown, etc. CUSTOM KEY ( 61) [ ], [DEUTSCH], [ ], [ENGLISH], [ESPAÑOL], [FRANÇAIS], [ITALIANO], [MAGYAR], [NEDERLNDS], [POLSKI], [ ], [TÜRKÇE], [ ], [ ], [ ], [ ], [ ], [ ], [ ], [ ], [ ] SYSTEM SETUP WL.REMOTE [ OFF], [ ASST.FUNC.], [ MARKERS], [ BLC], [ MAGNIFY] MAGN.REC [ ON], [ OFF] When...

VIXIA HV40 Instruction Manual
Page 47
DATE/TIME SETUP T.ZONE/DST ( 26) DATE/TIME ( 27) DATE FORMAT [Y.M.D (2009.1.1 AM 12:00)], [M.D,Y (JAN. 1, 2009 12:00 AM)], [D.M.Y (1.JAN.2009 12:00 AM)] Changes the date format for on-screen displays and for date printing. Menu Options Lists 47 Advanced Functions This menu option is usually grayed out. FIRMWARE You can verify the current version of the camcorder's firmware.
DATE/TIME SETUP T.ZONE/DST ( 26) DATE/TIME ( 27) DATE FORMAT [Y.M.D (2009.1.1 AM 12:00)], [M.D,Y (JAN. 1, 2009 12:00 AM)], [D.M.Y (1.JAN.2009 12:00 AM)] Changes the date format for on-screen displays and for date printing. Menu Options Lists 47 Advanced Functions This menu option is usually grayed out. FIRMWARE You can verify the current version of the camcorder's firmware.

VIXIA HV40 Instruction Manual
Page 49
... POINTS TO CHECK ( 12) Mode switch: Set the recording program to [ CINE MODE], as described in the previous section. MENU REC/IN SETUP HD STANDARD HDV(PF24) or HDV(24F) YES NOTES Do not move the mode switch to during the actual recording of the currently selected Recording...the cinematic look of your recordings. Mode switch: Advanced Functions Using the [ CINE MODE] Recording Program With the [ CINE MODE] recording program, the camcorder adjusts various image settings to give priority to the exposure value or the shutter speed. FUNC. POINTS TO CHECK * ( 12) * : Only ...
... POINTS TO CHECK ( 12) Mode switch: Set the recording program to [ CINE MODE], as described in the previous section. MENU REC/IN SETUP HD STANDARD HDV(PF24) or HDV(24F) YES NOTES Do not move the mode switch to during the actual recording of the currently selected Recording...the cinematic look of your recordings. Mode switch: Advanced Functions Using the [ CINE MODE] Recording Program With the [ CINE MODE] recording program, the camcorder adjusts various image settings to give priority to the exposure value or the shutter speed. FUNC. POINTS TO CHECK * ( 12) * : Only ...
VIXIA HV40 Instruction Manual
Page 59
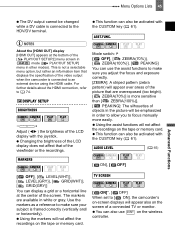
... switch: (except for the Special Scene recording programs) Options Default value [ EVALUATIVE] Appropriate for the [ FIREWORKS] recording program. The camcorder divides the picture into several areas and the light is measured in all of the screen and the focus is activated, the... camcorder records a still image only after the focus has been adjusted automatically. FUNC. ( 25) ( 12) Mode switch at : You can turn off . MENU CAMERA SETUP Automatic Focus Priority When the focus priority is automatically fixed on ...
... switch: (except for the Special Scene recording programs) Options Default value [ EVALUATIVE] Appropriate for the [ FIREWORKS] recording program. The camcorder divides the picture into several areas and the light is measured in all of the screen and the focus is activated, the... camcorder records a still image only after the focus has been adjusted automatically. FUNC. ( 25) ( 12) Mode switch at : You can turn off . MENU CAMERA SETUP Automatic Focus Priority When the focus priority is automatically fixed on ...
VIXIA HV40 Instruction Manual
Page 61
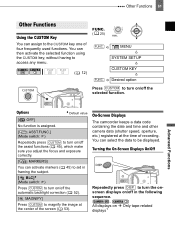
... the following sequence. , All displays on /off the selected function. Turning the On-Screen Displays On/Off Repeatedly press DISP. MENU SYSTEM SETUP CUSTOM KEY Desired option Press CUSTOM to turn on Æ Only tape-related displays1 Other Functions 61 Other Functions Other Functions Using the CUSTOM ...Key You can assign to the CUSTOM key one of the screen ( 53). On-Screen Displays The camcorder keeps a data code containing the date and time and other camera data (shutter speed, aperture, etc.) registered at the center of four ...
... the following sequence. , All displays on /off the selected function. Turning the On-Screen Displays On/Off Repeatedly press DISP. MENU SYSTEM SETUP CUSTOM KEY Desired option Press CUSTOM to turn on Æ Only tape-related displays1 Other Functions 61 Other Functions Other Functions Using the CUSTOM ...Key You can assign to the CUSTOM key one of the screen ( 53). On-Screen Displays The camcorder keeps a data code containing the date and time and other camera data (shutter speed, aperture, etc.) registered at the center of four ...

VIXIA HV40 Instruction Manual
Page 62
... icons of all the functions used when recording the image. while one whose histogram skews to the right of recording. Options Default value DISPLAY SETUP/ DATA CODE FUNC. For details on Æ All displays off (during playback) FUNC. ( 25) FUNC. 62 Other Functions On-screen displays + Data code2 on Æ...
... icons of all the functions used when recording the image. while one whose histogram skews to the right of recording. Options Default value DISPLAY SETUP/ DATA CODE FUNC. For details on Æ All displays off (during playback) FUNC. ( 25) FUNC. 62 Other Functions On-screen displays + Data code2 on Æ...

VIXIA HV40 Instruction Manual
Page 64
...you want a more powerful video light the built-in public places such as restaurants or theaters. ON appears. : Press START/STOP . MENU CAMERA SETUP Press LIGHT . • appears on the VL-3 to record the still image. To use the built-in mini video light, set the switch ...manual of the AF-assist lamp could be disabled automatically when you can turn the mini video light off the camcorder. The brightness of the VL-3. FUNC. ( 25) FUNC. The camcorder starts recording after a 10-second countdown*. NOTES Once the countdown has begun, you attach the optional VL-3 Video...
...you want a more powerful video light the built-in public places such as restaurants or theaters. ON appears. : Press START/STOP . MENU CAMERA SETUP Press LIGHT . • appears on the VL-3 to record the still image. To use the built-in mini video light, set the switch ...manual of the AF-assist lamp could be disabled automatically when you can turn the mini video light off the camcorder. The brightness of the VL-3. FUNC. ( 25) FUNC. The camcorder starts recording after a 10-second countdown*. NOTES Once the countdown has begun, you attach the optional VL-3 Video...

VIXIA HV40 Instruction Manual
Page 66
... Be careful when attaching a very long external microphone; In such case, we recommend using an external microphone. MENU DISPLAY SETUP/ AUDIO LEVEL OTHER MICROPHONES You can connect almost any commercially available microphone compatible with the advanced accessory shoe, by connecting the... external microphone to the advanced accessory shoe on the screen. When a video accessory is attached to the instruction manual of the camcorder's internal machinery. Use commercially available condenser microphones with a ∅ 3.5 mm plug but the audio recording level may pick up...
... Be careful when attaching a very long external microphone; In such case, we recommend using an external microphone. MENU DISPLAY SETUP/ AUDIO LEVEL OTHER MICROPHONES You can connect almost any commercially available microphone compatible with the advanced accessory shoe, by connecting the... external microphone to the advanced accessory shoe on the screen. When a video accessory is attached to the instruction manual of the camcorder's internal machinery. Use commercially available condenser microphones with a ∅ 3.5 mm plug but the audio recording level may pick up...
VIXIA HV40 Instruction Manual
Page 74
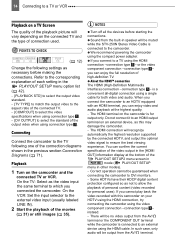
... (High-Definition Multimedia Interface) connection -connection type 3 - When you connect the camcorder to DVI monitors. - You can confirm the current specification of the PLAY/OUT SETUP2 menu screen in mode ( PLAY/OUT SETUP menu in speaker will be output from the built-in other modes). - Some HDTVs... have their HDCP digital content protection configured so as this camcorder on your HDTV using the HDMI connection, try connecting the camcorder using a single cable for both ...
... (High-Definition Multimedia Interface) connection -connection type 3 - When you connect the camcorder to DVI monitors. - You can confirm the current specification of the PLAY/OUT SETUP2 menu screen in mode ( PLAY/OUT SETUP menu in speaker will be output from the built-in other modes). - Some HDTVs... have their HDCP digital content protection configured so as this camcorder on your HDTV using the HDMI connection, try connecting the camcorder using a single cable for both ...


