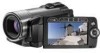
VIXIA HF20/HF200 Instruction Manual
Page 92
S 640x480: To send photos as a reference for the [Photo Review Time] option (or immediately after recording it, if [Photo Review Time] is required. If the joystick guide wasn't displayed while reviewing the photo, it within the time set for selecting the print size. - Press again. 2 Select ( ) [Yes]...corner indicates the approximate number of photos that can delete the photo recorded last while reviewing it will vary depending on the subject and shooting conditions. • The camcorder retains the last setting used even if you set to move back and forth between...
VIXIA HF20/HF200 Instruction Manual
Page 139
...( 71). • When face detection is set correctly but the audio still sounds distorted. [Wind Screen]: The camcorder automatically reduces the background sound of wind when recording outdoors. • Some low-frequency sounds will magnify the face ...your subject is activated, appears on the screen. / Camera Setup 3 Menu item [Self Timer] [ [Focus Assist [ Functions] [Onscreen Markers] [ [ [ [Audio Level [ Indicator] [Photo Review Time] [ [ Setting options On ], [ Off] On], [ Off] Off], [ Level (White)], Level (Gray)], [ Grid (White)], Grid (Gray)] On], [ Off] Off], [ 2...
VIXIA HF20/HF200 Instruction Manual
Page 140
...Displays the aperture (f-stop) and shutter speed used when recording the scene. [USB Connection Type]: Select the connection protocol to use when connecting the camcorder to an external device using the supplied USB cable. [ DVD Burner]: To connect exclusively to the optional DW-100 DVD Burner. [ Computer/... normal display. / Playback Setup Menu item Setting options [Rec Media [Built-in Mem.], [Mem. gle]. • If you press DISP. while reviewing a photo it has been recorded. • The review time can only be set when the drive mode is set to be dis- played indefinitely. [Photo...
VIXIA HF20/HF200 Instruction Manual
Page 181
... Q Quick Start function 48 R Recording Movies 45 Photos 90 Recording mode 46 Recording programs . . . . . 61, 63, 65 Recording time 47 Remote sensor 29 RESET 150 Reviewing photos 140 Rotating photos 102, 137 S Saving recordings 121 Screen icons 23 SD/SDHC memory card 41 Searching for scenes with faces . . 55 Searching scenes...
Digital Video Software (Macintosh) Version32 Instruction Manual
Page 3
Renaming Multiple Files 54 Searching for Images 55 Exporting Images ...57 Changing the File Type and Saving 57 Uploading Still Images to the camcorder 60 Using Various Functions 62 Attaching Images to E-mail Messages 62 Running a Slide Show 64 Adding Sound to a Still Image 65 Reviewing and Changing the Owner Name of the Camcorder 66 Uninstalling the Software 67 Uninstalling ImageBrowser 67 Troubleshooting ...68 Macintosh Contents 3
Digital Video Software (Macintosh) Version32 Instruction Manual
Page 22
After the installation is complete, remove the DIGITAL VIDEO Solution Disk before you connect the camcorder to the computer. 22 Installing the Digital Video Software message appears, click [Finish]. When installation is complete, restart the computer as prompted. 10 Remove the DIGITAL VIDEO Solution Disk from the CD-ROM drive. 8 Review the installation settings and click [Next]. 9 When the "Installation has finished."
Digital Video Software (Macintosh) Version32 Instruction Manual
Page 66
Reviewing and Changing the Owner Name of the Camcorder You can change and confirm the owner's name of the camcorder. 1 Connect the camcorder to the computer ( 23). 2 Click the [Set to 31 characters). 66 Using Various Functions Input the camcorder's owner's name here (up to Camera] tab and click [Confirms/changes camera settings] in the Camera Control window. 3 Enter the camcorder's owner's name and click [OK].
Digital Video Software (Windows) Version32 Instruction Manual
Page 3
Uploading Still Images to the camcorder 65 Using Various Functions 67 Attaching Still Images to E-mail Messages 67 Running a Slide Show 69 Adding Sound to a Still Image 71 Reviewing and Changing the Owner Name of the Camcorder 72 Uninstalling the Software 73 Uninstalling ZoomBrowser EX 73 Troubleshooting ...74 Windows Contents 3
Digital Video Software (Windows) Version32 Instruction Manual
Page 22
7 Review the installation settings and click [Install]. 8 Read the license agreement and click [Yes] to accept the terms and to start installation. 22 Installing the Digital Video Software
Digital Video Software (Windows) Version32 Instruction Manual
Page 72
Reviewing and Changing the Owner Name of the Camcorder You can change and confirm the owner's name of the camcorder. 1 Connect the camcorder to the computer ( 24). 2 Click the [Set to 31 characters). 72 Using Various Functions Input the camcorder's owner's name here (up to Camera] tab and click [Confirms/changes camera settings]. 3 Enter the camcorder's owner's name and click [OK].
VIXIA HF20 / HF200 Manual
Page 92
... print photos with the current quality/size setting. If the joystick guide wasn't displayed while reviewing the photo, it within the time set the cam- The number displayed on the subject and shooting conditions. • The camcorder retains the last setting used even if you set for selecting the print size. - M 1600x1200...
VIXIA HF20 / HF200 Manual
Page 139
...]: When the focus assist functions are activated, the image at the center of the screen. [Wind Screen]: The camcorder automatically reduces the background sound of wind when recording outdoors. • Some low-frequency sounds will be cancelled automatically ...( 78) is activated, appears on the screen. / Camera Setup 3 Menu item [Self Timer] [ [Focus Assist [ Functions] [Onscreen Markers] [ [ [ [Audio Level [ Indicator] [Photo Review Time] [ [ Setting options On ], [ Off] On], [ Off] Off], [ Level (White)], Level (Gray)], [ Grid (White)], Grid (Gray)] On], [ Off] Off], [ 2 ...
VIXIA HF20 / HF200 Manual
Page 140
... the aperture (f-stop) and shutter speed used when recording the scene. [USB Connection Type]: Select the connection protocol to use when connecting the camcorder to an external device using the supplied USB cable. [ DVD Burner]: To connect exclusively to the optional DW-100 DVD Burner. [ Computer/... 122 -z [ Print] - - to return to the normal display. / Playback Setup Menu item Setting options [Rec Media [Built-in Mem.], [Mem. played indefinitely. [Photo Review Time]: Selects the time to display a photo after it will continue to be set when the drive mode is set to [ Sin- while...
VIXIA HF20 / HF200 Manual
Page 181
... Q Quick Start function 48 R Recording Movies 45 Photos 90 Recording mode 46 Recording programs . . . . . 61, 63, 65 Recording time 47 Remote sensor 29 RESET 150 Reviewing photos 140 Rotating photos 102, 137 S Saving recordings 121 Screen icons 23 SD/SDHC memory card 41 Searching for scenes with faces . . 55 Searching scenes...