
Users Manual - English
Page 2
... INSTRUCTIONS" "This sewing machine is not intended for household use this sewing machine if it has a damaged cord or plug, if it is required around the sewing machine needle. 11. ... that they do not play with this sewing machine only for examination, repair, electrical or mechanical adjustment. 4. This sewing machine is intended for use a bent needle....machine to be supervised to persons: 1. Close attention is necessary when the sewing machine is being administered. 8. Use this sewing machine. Keep the ventilation openings of the sewing machine and foot controller free...
... INSTRUCTIONS" "This sewing machine is not intended for household use this sewing machine if it has a damaged cord or plug, if it is required around the sewing machine needle. 11. ... that they do not play with this sewing machine only for examination, repair, electrical or mechanical adjustment. 4. This sewing machine is intended for use a bent needle....machine to be supervised to persons: 1. Close attention is necessary when the sewing machine is being administered. 8. Use this sewing machine. Keep the ventilation openings of the sewing machine and foot controller free...

Users Manual - English
Page 6
... AND ZIGZAG STITCHING BUILT-IN STITCHES KNOWING YOUR SEWING MACHINE PRINCIPAL PARTS 1 ACCESSORIES 3 OPERATING YOUR SEWING MACHINE 5 Connecting Plugs 5 Main Power and Sewing Light Switches 6 Foot Controller 6 Inserting the Needle 7 Checking the Needle 7 Changing the Presser Foot 8 Converting to Free-Arm Style 9 Steadying the Machine 9 VARIOUS CONTROLS 10 Pattern Selection Dial 10 RECOMMENDED WIDTHS AND LENGTHS FOR STITCHES 11...
... AND ZIGZAG STITCHING BUILT-IN STITCHES KNOWING YOUR SEWING MACHINE PRINCIPAL PARTS 1 ACCESSORIES 3 OPERATING YOUR SEWING MACHINE 5 Connecting Plugs 5 Main Power and Sewing Light Switches 6 Foot Controller 6 Inserting the Needle 7 Checking the Needle 7 Changing the Presser Foot 8 Converting to Free-Arm Style 9 Steadying the Machine 9 VARIOUS CONTROLS 10 Pattern Selection Dial 10 RECOMMENDED WIDTHS AND LENGTHS FOR STITCHES 11...

Users Manual - English
Page 9
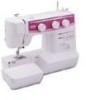
...cutter 7 6 Upper tension control dial Controls the tension of the stitches. 0 Reverse sewing lever Push for stitching in either direction to control sewing speed start and stop. CONTENTS KNOWING YOUR SEWING MACHINE STRAIGHT AND ZIGZAG STITCHING BUILT-IN STITCHES PRINCIPAL PARTS 34 62 1 1 Bobbin winding assembly Winds the thread onto the bobbin to be...fine-adjustment screw B Buttonhole lever (1 Step automatic buttonhole) C Handle D Balance wheel Turn toward you (counterclockwise) to raise and lower the needle. E Main power/sewing light switch Turns the main power and...
...cutter 7 6 Upper tension control dial Controls the tension of the stitches. 0 Reverse sewing lever Push for stitching in either direction to control sewing speed start and stop. CONTENTS KNOWING YOUR SEWING MACHINE STRAIGHT AND ZIGZAG STITCHING BUILT-IN STITCHES PRINCIPAL PARTS 34 62 1 1 Bobbin winding assembly Winds the thread onto the bobbin to be...fine-adjustment screw B Buttonhole lever (1 Step automatic buttonhole) C Handle D Balance wheel Turn toward you (counterclockwise) to raise and lower the needle. E Main power/sewing light switch Turns the main power and...

Users Manual - English
Page 33
... haber enganchado el hilo inferior en un lanzo. Raise the presser foot and the needle to its highest position. 3. CONTENTS KNOWING YOUR SEWING MACHINE STRAIGHT AND ZIGZAG STITCHING BUILT-IN STITCHES 1 2 Drawing Up Lower Thread 1. The upper thread should pass between the toes of the... large loop. 4. Levante el prensatelas y la aguja a sus posiciones más elevadas. 2. Tire unos 15 cm (6") de ambos hilos y colóquelos hacia la parte posterior de la máquina, justo detrás del prensatelas. Le fil supérieur doit alors former une boucle avec le fil infé...
... haber enganchado el hilo inferior en un lanzo. Raise the presser foot and the needle to its highest position. 3. CONTENTS KNOWING YOUR SEWING MACHINE STRAIGHT AND ZIGZAG STITCHING BUILT-IN STITCHES 1 2 Drawing Up Lower Thread 1. The upper thread should pass between the toes of the... large loop. 4. Levante el prensatelas y la aguja a sus posiciones más elevadas. 2. Tire unos 15 cm (6") de ambos hilos y colóquelos hacia la parte posterior de la máquina, justo detrás del prensatelas. Le fil supérieur doit alors former une boucle avec le fil infé...

Users Manual - English
Page 75
... Feed Dog Cleaning 59 Lever 17 Finishing a Seam 32-33 Foot Controller Connecting 5 Operating 6 Free-Arm Sewing 9 G Gathering 51 L Legs Stitch 11 Light Bulb Replacement 57 Lower Threading 19 M Main Power... Foot Replacement 8 Principal Parts 1 Q Quick Thread-setting System 24 R Repacking 66 Reverse Sewing Lever 17 S Scallop Stitching 38 Sewing Direction 32 Sewing Light Bulb Replacement 57 ...57 Spool Installing 20 Steadying the Machine 9 Stitch Length Dial 14 Straight Stitching 31 Stretch Blindhem Stitching 35 Stretch Material Sewing 33 Stretch Overlock 39 Stretch Stitching...
... Feed Dog Cleaning 59 Lever 17 Finishing a Seam 32-33 Foot Controller Connecting 5 Operating 6 Free-Arm Sewing 9 G Gathering 51 L Legs Stitch 11 Light Bulb Replacement 57 Lower Threading 19 M Main Power... Foot Replacement 8 Principal Parts 1 Q Quick Thread-setting System 24 R Repacking 66 Reverse Sewing Lever 17 S Scallop Stitching 38 Sewing Direction 32 Sewing Light Bulb Replacement 57 ...57 Spool Installing 20 Steadying the Machine 9 Stitch Length Dial 14 Straight Stitching 31 Stretch Blindhem Stitching 35 Stretch Material Sewing 33 Stretch Overlock 39 Stretch Stitching...


