
Users Guide
Page 7
...Brother MFL-Pro software suite, or other applications supporting TWAIN specifications, for scanning. Windows ® Fax and Scan Windows ® Photo Gallery You can also use the free trial version of the machine: Scan Using Web Services (Windows Vista® SP2 or Later, Windows ® 7, Windows ® 8 and Windows ® 8.1) (ADS-2500We...you can also use the Apple Image Capture application for scanning. After installing the Brother MFL-Pro software suite, you must install the ISIS ® scanner driver. Captiva ® QuickScan™ Pro Before scanning using the ISIS &#...
...Brother MFL-Pro software suite, or other applications supporting TWAIN specifications, for scanning. Windows ® Fax and Scan Windows ® Photo Gallery You can also use the free trial version of the machine: Scan Using Web Services (Windows Vista® SP2 or Later, Windows ® 7, Windows ® 8 and Windows ® 8.1) (ADS-2500We...you can also use the Apple Image Capture application for scanning. After installing the Brother MFL-Pro software suite, you must install the ISIS ® scanner driver. Captiva ® QuickScan™ Pro Before scanning using the ISIS &#...

Users Guide
Page 10
... About This Machine ...2 Control Panel Overview (ADS-2000e) ...3 Control Panel Overview (ADS-2500We)...4 Touchscreen LCD...5 Basic LCD Operations ...8 General Setup (ADS-2000e)...9 Set Sleep Mode ...9 Select Your Language ...11 Reduced Noise Mode ...13 General Setup (ADS-2500We) ...14 Set the Backlight Brightness...14 Set ...Unacceptable Documents...26 Carrier Sheet Recommendations ...27 Notes for Using Carrier Sheets...28 3 Scan Preparation 29 Set Up Your Scanner...29 Load Documents...30 Standard-size Documents ...30 Business Cards and Plastic Cards ...32 Documents Longer than Standard-size ...
... About This Machine ...2 Control Panel Overview (ADS-2000e) ...3 Control Panel Overview (ADS-2500We)...4 Touchscreen LCD...5 Basic LCD Operations ...8 General Setup (ADS-2000e)...9 Set Sleep Mode ...9 Select Your Language ...11 Reduced Noise Mode ...13 General Setup (ADS-2500We) ...14 Set the Backlight Brightness...14 Set ...Unacceptable Documents...26 Carrier Sheet Recommendations ...27 Notes for Using Carrier Sheets...28 3 Scan Preparation 29 Set Up Your Scanner...29 Load Documents...30 Standard-size Documents ...30 Business Cards and Plastic Cards ...32 Documents Longer than Standard-size ...
Users Guide
Page 12
... Set Up a Group...144 Change a Group ...144 Delete a Group ...145 Upload Scanned Documents to the Web (ADS-2500We only 146 Change Scan to PC Settings (Windows 147 Change Scan to PC Settings (Macintosh 154 Scanner Shortcuts (ADS-2500We only 160 Add a Shortcut...160 Edit, Rename or Delete a Shortcut 161 7 Managing the Machine from Your Computer... ...163 Status Monitor Indicators...163 Monitor the Machine's Status from Your Computer (Macintosh 164 Turn the AutoLoad Feature On/Off (ControlCenter2 166 Set Up the Brother Machine from Print & Fax or Print & Scan 117 Use NewSoft Presto!
... Set Up a Group...144 Change a Group ...144 Delete a Group ...145 Upload Scanned Documents to the Web (ADS-2500We only 146 Change Scan to PC Settings (Windows 147 Change Scan to PC Settings (Macintosh 154 Scanner Shortcuts (ADS-2500We only 160 Add a Shortcut...160 Edit, Rename or Delete a Shortcut 161 7 Managing the Machine from Your Computer... ...163 Status Monitor Indicators...163 Monitor the Machine's Status from Your Computer (Macintosh 164 Turn the AutoLoad Feature On/Off (ControlCenter2 166 Set Up the Brother Machine from Print & Fax or Print & Scan 117 Use NewSoft Presto!
Users Guide
Page 13
... 204 Check the Serial Number (ADS-2500We 205 WLAN Enable/Disable (ADS-2500We only 206 Reset Functions...206 Reset the Machine (ADS-2500We only 206 A Specifications 207 General ...207 Scanner ...209 Direct Scan Feature (Scan to USB)...209 Interfaces ...210 Network (ADS-2500We only)...210 Computer Requirements...211 B Appendix 212 Entering Text (ADS-2500We only) ...212 Inserting spaces ...212 Making corrections...
... 204 Check the Serial Number (ADS-2500We 205 WLAN Enable/Disable (ADS-2500We only 206 Reset Functions...206 Reset the Machine (ADS-2500We only 206 A Specifications 207 General ...207 Scanner ...209 Direct Scan Feature (Scan to USB)...209 Interfaces ...210 Network (ADS-2500We only)...210 Computer Requirements...211 B Appendix 212 Entering Text (ADS-2500We only) ...212 Inserting spaces ...212 Making corrections...

Users Guide
Page 42
a 3 2 Pull the Output Tray a out of the machine and then unfold the Document Stopper s. 2 1 29 3 Scan Preparation 3 Set Up Your Scanner 3 1 Open the Top Cover a.
a 3 2 Pull the Output Tray a out of the machine and then unfold the Document Stopper s. 2 1 29 3 Scan Preparation 3 Set Up Your Scanner 3 1 Open the Top Cover a.

Users Guide
Page 51
...Scanners and Cameras. 2 Do one that was originally registered to your computer during the installation of MFL-Pro Suite software, follow the steps below. 1 Click (Brother Utilities) on your desktop, and then click the drop-down list and select your model name (if not already selected). Prepare Your Network Before Network Scanning (ADS-2500We... only) 4 Network License (Windows ®) 4 This product includes a computer license for Windows® 4 4 If you are using a different machine than the one of the following: Windows ® XP Right-click the Scanner Device...
...Scanners and Cameras. 2 Do one that was originally registered to your computer during the installation of MFL-Pro Suite software, follow the steps below. 1 Click (Brother Utilities) on your desktop, and then click the drop-down list and select your model name (if not already selected). Prepare Your Network Before Network Scanning (ADS-2500We... only) 4 Network License (Windows ®) 4 This product includes a computer license for Windows® 4 4 If you are using a different machine than the one of the following: Windows ® XP Right-click the Scanner Device...

Users Guide
Page 55
Otherwise, add it to your network using ControlCenter2. You can set or change the address settings from the Control Panel. 1 Click the (ControlCenter2) icon in the Quick Setup Guide, your Brother machine was added to your network automatically. To use the machine as a network scanner, the machine must be configured with a TCP/IP address. Prepare Your Network Configure Network Scanning for Macintosh 4 If you followed the network installation steps in the Dock. The ControlCenter2 window appears. 4 42
Otherwise, add it to your network using ControlCenter2. You can set or change the address settings from the Control Panel. 1 Click the (ControlCenter2) icon in the Quick Setup Guide, your Brother machine was added to your network automatically. To use the machine as a network scanner, the machine must be configured with a TCP/IP address. Prepare Your Network Configure Network Scanning for Macintosh 4 If you followed the network installation steps in the Dock. The ControlCenter2 window appears. 4 42

Users Guide
Page 111
The Scanner Setup dialog box appears. 98 The Scan or Get Photo panel appears on the ribbon. Click OK. 6 Select the Display scanner dialog box check box in the Scan or Get Photo panel. 7 Click the Scan button. If you want to use the WIA driver, select the Brother driver that has "WIA" as the prefix. Scan Using Your Computer 3 Click Scan Settings from the Desktop tab on the left side of the window. 5 4 Click the Select button. 5 From the Available Scanners list, select TWAIN: TW-Brother ADS-XXXXX or TWAIN: TW-Brother ADS-XXXXX LAN (where ADS-XXXXX is the model name of your machine).
The Scanner Setup dialog box appears. 98 The Scan or Get Photo panel appears on the ribbon. Click OK. 6 Select the Display scanner dialog box check box in the Scan or Get Photo panel. 7 Click the Scan button. If you want to use the WIA driver, select the Brother driver that has "WIA" as the prefix. Scan Using Your Computer 3 Click Scan Settings from the Desktop tab on the left side of the window. 5 4 Click the Select button. 5 From the Available Scanners list, select TWAIN: TW-Brother ADS-XXXXX or TWAIN: TW-Brother ADS-XXXXX LAN (where ADS-XXXXX is the model name of your machine).

Users Guide
Page 112
Scan Using Your Computer 8 Adjust the settings in the Scanner Setup dialog box if needed (Resolution, Scan Type, Brightness, and Contrast). For more information about TWAIN Driver Settings, see page 100. For more ...
Scan Using Your Computer 8 Adjust the settings in the Scanner Setup dialog box if needed (Resolution, Scan Type, Brightness, and Contrast). For more information about TWAIN Driver Settings, see page 100. For more ...

Users Guide
Page 119
... starts scanning. 106 Do one of the following: (Windows ® Photo Gallery) 1 Click File, then Import from Camera or Scanner. 2 Select the scanner you through the scanning operations. Scan Using Your Computer Scan Using Windows® Photo Gallery or Windows® Fax and Scan 5 You can use... the WIA scanner driver. The steps below will guide you want to scan the document. The settings dialog box appears. (Windows ® Fax and ...
... starts scanning. 106 Do one of the following: (Windows ® Photo Gallery) 1 Click File, then Import from Camera or Scanner. 2 Select the scanner you through the scanning operations. Scan Using Your Computer Scan Using Windows® Photo Gallery or Windows® Fax and Scan 5 You can use... the WIA scanner driver. The steps below will guide you want to scan the document. The settings dialog box appears. (Windows ® Fax and ...

Users Guide
Page 123
Scan Using Your Computer 2 Click File > Acquire Image Data. The scanner setup dialog box appears. 5 (The Brother TWAIN screen supports languages specified in the scanner setup dialog box if needed. 4 From the Document Size pop-up menu, select your document size. This is required when cropping an image for scanning. 5 Click the Start button. The machine starts scanning. 110 NOTE After you select a document size, you can adjust the scanning area further by clicking the left mouse button and dragging it. PageManager.) 3 Adjust the settings in Presto!
Scan Using Your Computer 2 Click File > Acquire Image Data. The scanner setup dialog box appears. 5 (The Brother TWAIN screen supports languages specified in the scanner setup dialog box if needed. 4 From the Document Size pop-up menu, select your document size. This is required when cropping an image for scanning. 5 Click the Start button. The machine starts scanning. 110 NOTE After you select a document size, you can adjust the scanning area further by clicking the left mouse button and dragging it. PageManager.) 3 Adjust the settings in Presto!

Users Guide
Page 130
button from the list on the left side of the screen. NOTE If you do not see the Open Scanner button on the window, remove your machine by clicking the - NOTE (OS X v10.7.5 only) If you cannot select TIFF for the file format. Scan Using ...
button from the list on the left side of the screen. NOTE If you do not see the Open Scanner button on the window, remove your machine by clicking the - NOTE (OS X v10.7.5 only) If you cannot select TIFF for the file format. Scan Using ...
Users Guide
Page 132
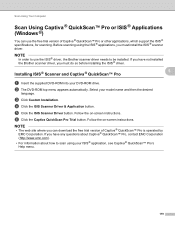
...trial version of Captiva® QuickScan™ Pro is operated by EMC Corporation. NOTE • The web site where you have not installed the Brother scanner driver, you must do so before installing the ISIS® driver. If you can use the ISIS ® driver, the... Brother scanner driver needs to be installed. Installing ISIS® Scanner and Captiva ® QuickScan™ Pro 5 5 1 Insert the supplied DVD-ROM into your model name and then the desired language. 3 Click ...
...trial version of Captiva® QuickScan™ Pro is operated by EMC Corporation. NOTE • The web site where you have not installed the Brother scanner driver, you must do so before installing the ISIS® driver. If you can use the ISIS ® driver, the... Brother scanner driver needs to be installed. Installing ISIS® Scanner and Captiva ® QuickScan™ Pro 5 5 1 Insert the supplied DVD-ROM into your model name and then the desired language. 3 Click ...

Users Guide
Page 135
NOTE • You can configure the Scan-to settings from your document. 7 Press Scan to PC. For more information, see Scanner Shortcuts (ADS-2500We only) on . 6 Press the destination computer. 7 Press Start. See Change Scan to PC Settings (Windows ®) on page 147 or Change Scan... as a shortcut, press Save as Shortcut. Scan Using the Control Panel 6 Load your computer. The machine starts the scanning process. The machine scans the document. (ADS-2500We) 1 Load your document. 2 Swipe left or right, or press d or c to display Scan 1. 3 Press to PC. 4 Swipe left or right to...
NOTE • You can configure the Scan-to settings from your document. 7 Press Scan to PC. For more information, see Scanner Shortcuts (ADS-2500We only) on . 6 Press the destination computer. 7 Press Start. See Change Scan to PC Settings (Windows ®) on page 147 or Change Scan... as a shortcut, press Save as Shortcut. Scan Using the Control Panel 6 Load your computer. The machine starts the scanning process. The machine scans the document. (ADS-2500We) 1 Load your document. 2 Swipe left or right, or press d or c to display Scan 1. 3 Press to PC. 4 Swipe left or right to...

Users Guide
Page 138
... to USB on it. 125 IMPORTANT DO NOT remove the USB flash drive while the machine is saved on page 160. For more information, see Scanner Shortcuts (ADS-2500We only) on the USB flash drive. Scan Using the Control Panel 6 Load your document. 3 Swipe left or right, or press d or c to display Scan...
... to USB on it. 125 IMPORTANT DO NOT remove the USB flash drive while the machine is saved on page 160. For more information, see Scanner Shortcuts (ADS-2500We only) on the USB flash drive. Scan Using the Control Panel 6 Load your document. 3 Swipe left or right, or press d or c to display Scan...

Users Guide
Page 140
For more information, see Scanner Shortcuts (ADS-2500We only) on the mobile device. The machine starts scanning, and then the scanned data is saved on page 160. 6 127 Press Start. NOTE If you want to restore all settings to save the settings as a shortcut, press Save as a new default, press Set New Default. • If you want to save the settings as Shortcut. Scan Using the Control Panel NOTE • If you want to the factory settings, press Factory Reset. 6.
For more information, see Scanner Shortcuts (ADS-2500We only) on the mobile device. The machine starts scanning, and then the scanned data is saved on page 160. 6 127 Press Start. NOTE If you want to restore all settings to save the settings as a shortcut, press Save as a new default, press Set New Default. • If you want to save the settings as Shortcut. Scan Using the Control Panel NOTE • If you want to the factory settings, press Factory Reset. 6.

Users Guide
Page 143
You can also change the port number used for your document will be the file name you selected plus the last 6 digits of the scanner counter plus the file extension (for example, Estimate_098765.pdf). 130 This name will be displayed on your document will be stored on the FTP server (... setting is port 21. In most cases these two settings can remain as the default. 6 1 Enter the name that you want to use for example brother\abc) (up to 15 characters. 2 The Host Address is the domain name of the FTP server. By default this setting is On. Scan Using the...
You can also change the port number used for your document will be the file name you selected plus the last 6 digits of the scanner counter plus the file extension (for example, Estimate_098765.pdf). 130 This name will be displayed on your document will be stored on the FTP server (... setting is port 21. In most cases these two settings can remain as the default. 6 1 Enter the name that you want to use for example brother\abc) (up to 15 characters. 2 The Host Address is the domain name of the FTP server. By default this setting is On. Scan Using the...

Users Guide
Page 151
...174; 8, Windows ® 8.1) in the messages displayed on the LCD may be replaced with spaces when the language settings of your OS and your Brother machine are different. 6 1 Load your document. 2 Swipe left or right, or press d or c to display Scan 1. 3 Press to PC...Scanners and Cameras. (Windows ® 7) (Start) > Control Panel > Hardware and Sound > Devices and Printers. (Windows ® 8 and Windows ® 8.1) Move your mouse to . Scan Using the Control Panel Scan Using Web Services (Windows Vista® SP2 or Later, Windows ® 7, Windows® 8 and Windows ® 8.1) (ADS-2500We...
...174; 8, Windows ® 8.1) in the messages displayed on the LCD may be replaced with spaces when the language settings of your OS and your Brother machine are different. 6 1 Load your document. 2 Swipe left or right, or press d or c to display Scan 1. 3 Press to PC...Scanners and Cameras. (Windows ® 7) (Start) > Control Panel > Hardware and Sound > Devices and Printers. (Windows ® 8 and Windows ® 8.1) Move your mouse to . Scan Using the Control Panel Scan Using Web Services (Windows Vista® SP2 or Later, Windows ® 7, Windows® 8 and Windows ® 8.1) (ADS-2500We...

Users Guide
Page 152
... Save Profile. Scan Using the Control Panel 3 Choose the scan profile you are requested to choose a software application to use. Make sure the scanner selected in Scanner is a Brother machine that supports Web Services for scanning. NOTE If you want to scan, choose Windows ® Fax and Scan or Windows ® Photo Gallery...
... Save Profile. Scan Using the Control Panel 3 Choose the scan profile you are requested to choose a software application to use. Make sure the scanner selected in Scanner is a Brother machine that supports Web Services for scanning. NOTE If you want to scan, choose Windows ® Fax and Scan or Windows ® Photo Gallery...

Users Guide
Page 153
NOTE • If you want to save the settings as a shortcut, press Save as needed. For more information, see Scanner Shortcuts (ADS-2500We only) on page 141. Select an email Address from the Address Book and enter up to 300 email addresses from the Address Book 6 1... to all settings to the factory settings, press Factory Reset. 8 Press Start. Scan Using the Control Panel Send Scanned Documents Directly to an Email Address (ADS-2500We only) 6 1 Load your document. 2 Swipe left or right, or press d or c to display Scan 2. 2 Press to E-mail Server. 3 Press Address Book. 140 ...
NOTE • If you want to save the settings as a shortcut, press Save as needed. For more information, see Scanner Shortcuts (ADS-2500We only) on page 141. Select an email Address from the Address Book and enter up to 300 email addresses from the Address Book 6 1... to all settings to the factory settings, press Factory Reset. 8 Press Start. Scan Using the Control Panel Send Scanned Documents Directly to an Email Address (ADS-2500We only) 6 1 Load your document. 2 Swipe left or right, or press d or c to display Scan 2. 2 Press to E-mail Server. 3 Press Address Book. 140 ...


