
Acer Aspire V5-531 Notebook Service Guide
Page 164
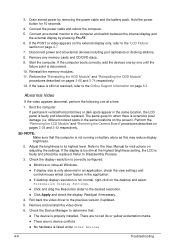
... zoom feature in the same locations on page 4-7. 7. NOTE: NOTE: Make sure that : The device is faulty and should be replaced. Adjust the brightness to the previous version if updated. 5. Readjust if necessary. 4. Connect the power cable and reboot the computer. 5. Perform the... and "Reinstalling the ODD Module" procedures described on pages 3-38 and 3-42 respectively. Refer to the "LCD Failure" section on the screen). There are no red Xs or yellow exclamation marks There are no device conflicts No hardware is not running ...
... zoom feature in the same locations on page 4-7. 7. NOTE: NOTE: Make sure that : The device is faulty and should be replaced. Adjust the brightness to the previous version if updated. 5. Readjust if necessary. 4. Connect the power cable and reboot the computer. 5. Perform the... and "Reinstalling the ODD Module" procedures described on pages 3-38 and 3-42 respectively. Refer to the "LCD Failure" section on the screen). There are no red Xs or yellow exclamation marks There are no device conflicts No hardware is not running ...
Acer Aspire V5-531 Notebook Service Guide
Page 165
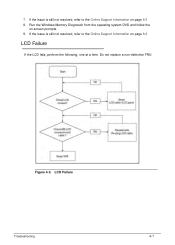
If the issue is still not resolved, refer to the Online Support Information on -screen prompts. 9. If the issue is still not resolved, refer to the Online Support Information on page 8-3 LCD Failure 0 If the LCD fails, perform the following, one at a time. LCD Failure Troubleshooting 4-7 Do not replace a non-defective FRU: Figure 4-3. Run the Windows Memory Diagnostic from the operating system DVD and follow the on page 8-3 8. 7.
If the issue is still not resolved, refer to the Online Support Information on -screen prompts. 9. If the issue is still not resolved, refer to the Online Support Information on page 8-3 LCD Failure 0 If the LCD fails, perform the following, one at a time. LCD Failure Troubleshooting 4-7 Do not replace a non-defective FRU: Figure 4-3. Run the Windows Memory Diagnostic from the operating system DVD and follow the on page 8-3 8. 7.


