
User Manual
Page 2
Copyright © 2004 Acer Incorporated All Rights Reserved AcerPower S Series User's Guide Changes may be reproduced, stored in a retrieval system, or transmitted, in new editions of Acer Inc. The serial number and model number are recorded on the label affixed to their respective companies. Record the model number, serial number, purchase date, and place of such revision or changes. No part of this publication may be incorporated in...
Copyright © 2004 Acer Incorporated All Rights Reserved AcerPower S Series User's Guide Changes may be reproduced, stored in a retrieval system, or transmitted, in new editions of Acer Inc. The serial number and model number are recorded on the label affixed to their respective companies. Record the model number, serial number, purchase date, and place of such revision or changes. No part of this publication may be incorporated in...
User Manual
Page 3
... Tour 1 Front panel 1 Rear panel 2 System Features 3 Performance 3 Multimedia 3 Connectivity 3 System peripherals 4 Mouse(PS/2 or USB, manufacturing option) 4 Keyboard(PS/2 or USB, manufacturing option) 4 Speakers 5 System upgrade 5 Open the computer 6 Set up new components 6 Setting up your computer 7 Necessary to know before Setup 7 Select location 7 Open package 7 Connecting the peripherals 8 Starting your computer 9 Shutting down your computer 9 Troubleshooting 11 Taking Care of your computer 15 Important tips 15 Cleaning and servicing 15 To...
... Tour 1 Front panel 1 Rear panel 2 System Features 3 Performance 3 Multimedia 3 Connectivity 3 System peripherals 4 Mouse(PS/2 or USB, manufacturing option) 4 Keyboard(PS/2 or USB, manufacturing option) 4 Speakers 5 System upgrade 5 Open the computer 6 Set up new components 6 Setting up your computer 7 Necessary to know before Setup 7 Select location 7 Open package 7 Connecting the peripherals 8 Starting your computer 9 Shutting down your computer 9 Troubleshooting 11 Taking Care of your computer 15 Important tips 15 Cleaning and servicing 15 To...

User Manual
Page 5
Description No. Description 1 Optical Drive 2 Floppy Drive 3 USB Ports 4 Microphone Jack 5 Speaker or Headphone Jack 6 Power Button English 1 System Tour Your computer's front panel consists of the following: Front panel 1 2 3 4 5 6 No.
Description No. Description 1 Optical Drive 2 Floppy Drive 3 USB Ports 4 Microphone Jack 5 Speaker or Headphone Jack 6 Power Button English 1 System Tour Your computer's front panel consists of the following: Front panel 1 2 3 4 5 6 No.
User Manual
Page 6
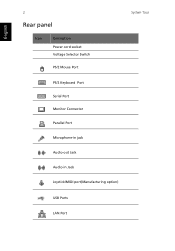
English 2 Rear panel Icon Description Power cord socket Voltage Selector Switch PS/2 Mouse Port System Tour PS/2 Keyboard Port Serial Port Monitor Connector Parallel Port Microphone-in jack Audio-out Jack Audio-in Jack Joystick/MIDI port(Manufacturing option) USB Ports LAN Port
English 2 Rear panel Icon Description Power cord socket Voltage Selector Switch PS/2 Mouse Port System Tour PS/2 Keyboard Port Serial Port Monitor Connector Parallel Port Microphone-in jack Audio-out Jack Audio-in Jack Joystick/MIDI port(Manufacturing option) USB Ports LAN Port
User Manual
Page 7
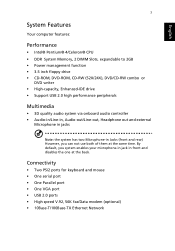
Connectivity • Two PS/2 ports for keyboard and mouse • One serial port • One Parallel port • One VGA port • USB 2.0 ports • High speed V.92, 56K fax/Data modem (optional) • 10Base-T/100Base-TX Ethernet Network By default, you system enables your microphone-in jack in Jacks (front and rear) However, you can not use both of them at the back. English 3 System Features Your computer features...
Connectivity • Two PS/2 ports for keyboard and mouse • One serial port • One Parallel port • One VGA port • USB 2.0 ports • High speed V.92, 56K fax/Data modem (optional) • 10Base-T/100Base-TX Ethernet Network By default, you system enables your microphone-in jack in Jacks (front and rear) However, you can not use both of them at the back. English 3 System Features Your computer features...
User Manual
Page 8
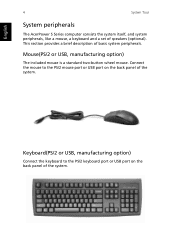
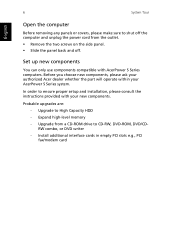
Keyboard(PS/2 or USB, manufacturing option) Connect the keyboard to the PS/2 mouse port or USB port on the back panel of speakers (optional). Mouse(PS/2 or USB, manufacturing option) The included mouse is a standard two-button wheel mouse. English 4 System Tour System peripherals The AcerPower S Series computer consists the system itself, and system peripherals, like a mouse, a keyboard and a set of the system. This section provides a brief description of the system. Connect the mouse to the PS/2 keyboard port or USB port on the back panel of basic system peripherals.
Keyboard(PS/2 or USB, manufacturing option) Connect the keyboard to the PS/2 mouse port or USB port on the back panel of speakers (optional). Mouse(PS/2 or USB, manufacturing option) The included mouse is a standard two-button wheel mouse. English 4 System Tour System peripherals The AcerPower S Series computer consists the system itself, and system peripherals, like a mouse, a keyboard and a set of the system. This section provides a brief description of the system. Connect the mouse to the PS/2 keyboard port or USB port on the back panel of basic system peripherals.

User Manual
Page 9
You can expand your AcerPower S Series system. English 5 Speakers For systems bundled with speakers, before powering on the system, connect the speaker cable to the included operating instructions. For more detailed information about the speakers, please refer to the audio out (external speaker) port on the actual product. System upgrade You can also upgrade the components of the system. Note: speakers are optional and the appearance might be different depending on the back panel of your AcerPower S Series system quickly and easily by adding components.
You can expand your AcerPower S Series system. English 5 Speakers For systems bundled with speakers, before powering on the system, connect the speaker cable to the included operating instructions. For more detailed information about the speakers, please refer to the audio out (external speaker) port on the actual product. System upgrade You can also upgrade the components of the system. Note: speakers are optional and the appearance might be different depending on the back panel of your AcerPower S Series system quickly and easily by adding components.
User Manual
Page 10
... your new components. In order to ensure proper setup and installation, please consult the instructions provided with AcerPower S Series computers. Upgrade to High Capacity HDD - 6 System Tour English Open the computer Before removing any panels or covers, please make sure to shut off the computer and unplug the power cord from a CD-ROM drive to CD-RW, DVD-ROM, DVD/CDRW combo, or DVD writer - Install additional interface cards in empty PCI slots e.g., PCI...
... your new components. In order to ensure proper setup and installation, please consult the instructions provided with AcerPower S Series computers. Upgrade to High Capacity HDD - 6 System Tour English Open the computer Before removing any panels or covers, please make sure to shut off the computer and unplug the power cord from a CD-ROM drive to CD-RW, DVD-ROM, DVD/CDRW combo, or DVD writer - Install additional interface cards in empty PCI slots e.g., PCI...

User Manual
Page 11
... uses PCI (Peripheral Component Interface) and AGP (Accelerated Graphics Port) design. Your system can accommodate extra peripheral equipment through those I /O (Input/Output) interfaces such as a serial port, parallel port, PS/2 keyboard and mouse ports, the system includes USB ports, two microphone ports and stereo line-out jacks(one at front and one at rear panel) and a stereo line-in any location that is a versatile, high-power system, supporting...
... uses PCI (Peripheral Component Interface) and AGP (Accelerated Graphics Port) design. Your system can accommodate extra peripheral equipment through those I /O (Input/Output) interfaces such as a serial port, parallel port, PS/2 keyboard and mouse ports, the system includes USB ports, two microphone ports and stereo line-out jacks(one at front and one at rear panel) and a stereo line-in any location that is a versatile, high-power system, supporting...
User Manual
Page 12
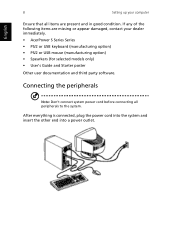
... the system. Connecting the peripherals Note: Don't connect system power cord before connecting all items are missing or appear damaged, contact your dealer immediately. • AcerPower S Series Series • PS/2 or USB keyboard (manufacturing option) • PS/2 or USB mouse (manufacturing option) • Spearkers (for selected models only) • User's Guide and Starter poster Other user documentation and third party software. After everything is connected, plug the power cord into...
... the system. Connecting the peripherals Note: Don't connect system power cord before connecting all items are missing or appear damaged, contact your dealer immediately. • AcerPower S Series Series • PS/2 or USB keyboard (manufacturing option) • PS/2 or USB mouse (manufacturing option) • Spearkers (for selected models only) • User's Guide and Starter poster Other user documentation and third party software. After everything is connected, plug the power cord into...
User Manual
Page 13
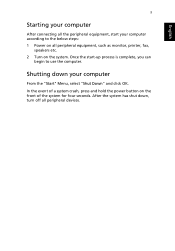
After the system has shut down your computer From the "Start" Menu, select "Shut Down" and click OK. Shutting down , turn off all peripheral equipment, such as monitor, printer, fax, speakers etc. 2 Turn on the system. Once the start your computer according to use the computer. In the event of the system for four seconds. English 9 Starting your computer After connecting all the peripheral equipment, start -up process is complete, you can begin to the below steps: 1 Power on the front of a system crash, press and hold the power button on all peripheral devices.
After the system has shut down your computer From the "Start" Menu, select "Shut Down" and click OK. Shutting down , turn off all peripheral equipment, such as monitor, printer, fax, speakers etc. 2 Turn on the system. Once the start your computer according to use the computer. In the event of the system for four seconds. English 9 Starting your computer After connecting all the peripheral equipment, start -up process is complete, you can begin to the below steps: 1 Power on the front of a system crash, press and hold the power button on all peripheral devices.
User Manual
Page 15
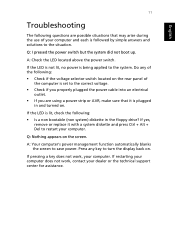
... key to restart your computer. If yes, remove or replace it is plugged in the floppy drive? Press any of the following : • Is a non bootable (non system) diskette in and turned on. Q: I pressed the power switch but the system did not boot up. If the LED is lit, check the following : • Check if the voltage selector switch located on the rear panel...
... key to restart your computer. If yes, remove or replace it is plugged in the floppy drive? Press any of the following : • Is a non bootable (non system) diskette in and turned on. Q: I pressed the power switch but the system did not boot up. If the LED is lit, check the following : • Check if the voltage selector switch located on the rear panel...
User Manual
Page 16
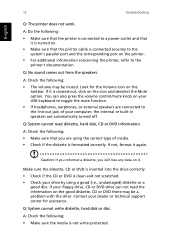
... DVD there may be a problem with the drive. A: Check the following : • Make sure that the printer cable is crossed-out, click on your USB keyboard to toggle the mute function. • If headphones, earphones, or external speakers are automatically turned off. You can not read diskette, hard disk, CD or DVD information. If it again. Q: System cannot write diskette, hard disk or disc. English 12 Troubleshooting...
... DVD there may be a problem with the drive. A: Check the following : • Make sure that the printer cable is crossed-out, click on your USB keyboard to toggle the mute function. • If headphones, earphones, or external speakers are automatically turned off. You can not read diskette, hard disk, CD or DVD information. If it again. Q: System cannot write diskette, hard disk or disc. English 12 Troubleshooting...
User Manual
Page 19
... the important instructions listed in should not exceed the fuse rating. • Check the documentation that came with water and gently wipe the exterior of the computer and the keyboard. These adjustments could make viewing the screen more comfortable. English 15 Taking Care of your computer and keyboard 1 Turn off the computer and unplug the power cord. 2 Use a soft...
... the important instructions listed in should not exceed the fuse rating. • Check the documentation that came with water and gently wipe the exterior of the computer and the keyboard. These adjustments could make viewing the screen more comfortable. English 15 Taking Care of your computer and keyboard 1 Turn off the computer and unplug the power cord. 2 Use a soft...
User Manual
Page 20
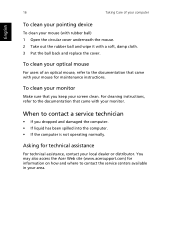
...screen clean. To clean your optical mouse For users of your computer English To clean your pointing device To clean your area. For cleaning instructions, refer to contact the service centers available in your mouse (with rubber ball) 1 Open the circular cover underneath the mouse. 2 Take out the rubber ball and wipe it with your mouse for maintenance instructions... computer is not operating normally. You may also access the Acer Web site (www.acersupport.com) for technical assistance For technical assistance, contact your monitor. To clean your monitor Make sure that came ...
...screen clean. To clean your optical mouse For users of your computer English To clean your pointing device To clean your area. For cleaning instructions, refer to contact the service centers available in your mouse (with rubber ball) 1 Open the circular cover underneath the mouse. 2 Take out the rubber ball and wipe it with your mouse for maintenance instructions... computer is not operating normally. You may also access the Acer Web site (www.acersupport.com) for technical assistance For technical assistance, contact your monitor. To clean your monitor Make sure that came ...

User Manual
Page 21
... to radio and TV reception. FCC notice This device has been tested and found to comply with FCC regulations. Notice: Shielded cables All connections to other computing devices must be attached to provide reasonable protection against harmful interference in accordance with the instructions, may be made using shielded cables to maintain compliance with the limits for energy efficiency...
... to radio and TV reception. FCC notice This device has been tested and found to comply with FCC regulations. Notice: Shielded cables All connections to other computing devices must be attached to provide reasonable protection against harmful interference in accordance with the instructions, may be made using shielded cables to maintain compliance with the limits for energy efficiency...

User Manual
Page 22
... accept any interference received, including interference that may make changes in advance to give you an opportunity to the following two conditions: (1) this device may discontinue your service temporarily. But, if advance notice is with Part 15 of the FCC Rules. Your telephone company may cause undesired operation. Remarque à l'intention des utilisateurs canadiens Cet appareil...
... accept any interference received, including interference that may make changes in advance to give you an opportunity to the following two conditions: (1) this device may discontinue your service temporarily. But, if advance notice is with Part 15 of the FCC Rules. Your telephone company may cause undesired operation. Remarque à l'intention des utilisateurs canadiens Cet appareil...

User Manual
Page 23
... - Important safety instructions Read these instructions carefully. Use a damp cloth for Australia For safety reasons, only connect headsets with a telecommunications compliance label. The product may fall, causing serious damage to the product. 5 Slots and openings are not sure of the type of the product and to the Public Switched Telephone Network (PSTN). If you should never be blocked or covered.
... - Important safety instructions Read these instructions carefully. Use a damp cloth for Australia For safety reasons, only connect headsets with a telecommunications compliance label. The product may fall, causing serious damage to the product. 5 Slots and openings are not sure of the type of the product and to the Public Switched Telephone Network (PSTN). If you should never be blocked or covered.

User Manual
Page 24
...used with this product, make sure that are followed. e If the product has been dropped or the case has been damaged. There may result in a fire or electric shock. f If the product exhibits a distinct change in your accessories box) for this product through cabinet slots as opening or removing covers...condition. Adjust only those controls that the total rating of all products plugged into the wall outlet does not exceed the fuse rating. 9 Never push objects of power supply cord set (provided in performance, indicating a need for service. 12 Use only the proper type of any kind on...
...used with this product, make sure that are followed. e If the product has been dropped or the case has been damaged. There may result in a fire or electric shock. f If the product exhibits a distinct change in your accessories box) for this product through cabinet slots as opening or removing covers...condition. Adjust only those controls that the total rating of all products plugged into the wall outlet does not exceed the fuse rating. 9 Never push objects of power supply cord set (provided in performance, indicating a need for service. 12 Use only the proper type of any kind on...
User Manual
Page 27
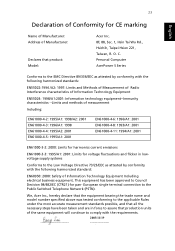
..., Taipei Hsien 221, Taiwan, R. We, Acer Inc., hereby declare that the equipment bearing the trade name and model number specified above was tested conforming to the applicable Rules under the most accurate measurement standards possible, and that all the necessary steps have been taken and are in lowvoltage supply systems Conforms to Council Decision 98...
..., Taipei Hsien 221, Taiwan, R. We, Acer Inc., hereby declare that the equipment bearing the trade name and model number specified above was tested conforming to the applicable Rules under the most accurate measurement standards possible, and that all the necessary steps have been taken and are in lowvoltage supply systems Conforms to Council Decision 98...


