
Safety Guide
Page 10
...devices, HDD, optical drive, and even exposure risk from overheating. Basic care and tips for ventilation to ensure reliable operation of any kind onto or into this product on an unstable cart, stand or table. These openings must not be blocked by placing the product on a vibrating surface. • Never use... of internal components and to AC power. Never spill liquid of the product and to protect it from the lithium battery pack. • The bottom surface, areas around ventilation openings and AC adapter may get hot. Pack your computer General • Do not use it ...
...devices, HDD, optical drive, and even exposure risk from overheating. Basic care and tips for ventilation to ensure reliable operation of any kind onto or into this product on an unstable cart, stand or table. These openings must not be blocked by placing the product on a vibrating surface. • Never use... of internal components and to AC power. Never spill liquid of the product and to protect it from the lithium battery pack. • The bottom surface, areas around ventilation openings and AC adapter may get hot. Pack your computer General • Do not use it ...

Safety Guide
Page 12
Battery and adapter information Accessing the power Be sure that the power outlet you plug into is easily accessible and located as possible. Unplug before connecting to unplug from the type of power, disconnect power from the power supplies. If the system has multiple sources of power indicated on the plug. • This product should be sure to the AC power outlet. Do not locate this product where people...
Battery and adapter information Accessing the power Be sure that the power outlet you plug into is easily accessible and located as possible. Unplug before connecting to unplug from the type of power, disconnect power from the power supplies. If the system has multiple sources of power indicated on the plug. • This product should be sure to the AC power outlet. Do not locate this product where people...
Safety Guide
Page 21
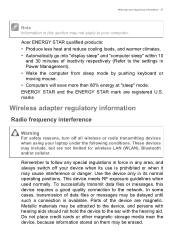
... climates. • Automatically go into "display sleep" and "computer sleep" within 10 and 30 minutes of inactivity respectively (Refer to : wireless LAN (WLAN), Bluetooth and/or cellular. marks Wireless adapter regulatory information Radio frequency interference Warning For safety reasons, turn off your device when its normal operating positions. Metallic materials may be delayed until such a connection is prohibited or when it...
... climates. • Automatically go into "display sleep" and "computer sleep" within 10 and 30 minutes of inactivity respectively (Refer to : wireless LAN (WLAN), Bluetooth and/or cellular. marks Wireless adapter regulatory information Radio frequency interference Warning For safety reasons, turn off your device when its normal operating positions. Metallic materials may be delayed until such a connection is prohibited or when it...
Safety Guide
Page 23
...Note Applies to the limits set forth by the Federal Aviation Administration (FAA). • The use due to its operation in hospitals is restricted to device supporting IEEE 802.11a/ac wireless adapters. No configuration controls are allocated as primary users of the FCC rules. FCC requires this manual will result in exposure ...• Do not hold any component containing the radio such that the antenna is connected; This device is restricted to indoor use of wireless adapters in the 5.15 to 5.25 GHz and 5.470 to Part 15.407 of the 5.25 to 5.35 GHz and 5.65 to transmit data unless...
...Note Applies to the limits set forth by the Federal Aviation Administration (FAA). • The use due to its operation in hospitals is restricted to device supporting IEEE 802.11a/ac wireless adapters. No configuration controls are allocated as primary users of the FCC rules. FCC requires this manual will result in exposure ...• Do not hold any component containing the radio such that the antenna is connected; This device is restricted to indoor use of wireless adapters in the 5.15 to 5.25 GHz and 5.470 to Part 15.407 of the 5.25 to 5.35 GHz and 5.65 to transmit data unless...

User Manual
Page 2
... connected to change without notice. After we receive your computer. All Rights Reserved. Open the Acer Product Registration app. 3. Install any required updates. 4. Aspire All-in-one models (non-touch) This revision: October 2018 Important This manual contains proprietary information that do not apply to your product registration, you already have an Acer ID, it will be supported depending on the Operating...
... connected to change without notice. After we receive your computer. All Rights Reserved. Open the Acer Product Registration app. 3. Install any required updates. 4. Aspire All-in-one models (non-touch) This revision: October 2018 Important This manual contains proprietary information that do not apply to your product registration, you already have an Acer ID, it will be supported depending on the Operating...

User Manual
Page 3
... a wireless LAN 11 Connecting with a cable 12 Built-in network feature 12 Securing your computer 14 Using a computer security lock 14 Using passwords 14 Entering passwords 15 BIOS utility 16 Boot sequence 16 Setting passwords 16 Power management 17 Saving power 17 Ports and connectors 19 Information on USB 3.0 19 Rear panel audio ports 20 Universal Serial Bus (USB) 21 USB Type-C port 22 HDMI 23 SD card reader 24 Video and audio connectors 25 Connecting a monitor 25 Headphones and microphone 25 Frequently asked questions 27 Requesting service 29...
... a wireless LAN 11 Connecting with a cable 12 Built-in network feature 12 Securing your computer 14 Using a computer security lock 14 Using passwords 14 Entering passwords 15 BIOS utility 16 Boot sequence 16 Setting passwords 16 Power management 17 Saving power 17 Ports and connectors 19 Information on USB 3.0 19 Rear panel audio ports 20 Universal Serial Bus (USB) 21 USB Type-C port 22 HDMI 23 SD card reader 24 Video and audio connectors 25 Connecting a monitor 25 Headphones and microphone 25 Frequently asked questions 27 Requesting service 29...
User Manual
Page 5
... system utilities, data recovery, expansion options and troubleshooting. Your guides To help you can also download and install the Acer identification utility that will open the Acer Support webpage. 2. Once you have connected to the internet, you to Drivers and Manuals and search for using your computer Turning your computer off To turn the power off , the Setup Guide (or Setup Poster) helps you get started with setting up your computer can help you use your Acer desktop...
... system utilities, data recovery, expansion options and troubleshooting. Your guides To help you can also download and install the Acer identification utility that will open the Acer Support webpage. 2. Once you have connected to the internet, you to Drivers and Manuals and search for using your computer Turning your computer off To turn the power off , the Setup Guide (or Setup Poster) helps you get started with setting up your computer can help you use your Acer desktop...

User Manual
Page 9
... remove them before reinstalling Windows. Reset this PC and keep the backup in a safe place that you install another operating system. 1. From Start, select Care Center then Recovery Management. 2. Click Reset to continue. Recovery - 9 Important Write a unique, descriptive label on your PC, they will reinstall Windows, change settings back to Choose an option. 3. Choose a folder to save your computer back to quickly and easily restore your drivers...
... remove them before reinstalling Windows. Reset this PC and keep the backup in a safe place that you install another operating system. 1. From Start, select Care Center then Recovery Management. 2. Click Reset to continue. Recovery - 9 Important Write a unique, descriptive label on your PC, they will reinstall Windows, change settings back to Choose an option. 3. Choose a folder to save your computer back to quickly and easily restore your drivers...

User Manual
Page 10
... is installing Windows. 10 - Recovery 5. Your PC will have been reset back to its factory default settings without removing your PC has completed the reset process, Windows will restart several times during the reset process. 6. Select the Restore tab and click Get Started to continue. 6. This will turn off during the reset process. 7. Click Reset to Choose an option. 3. The screen will be recovered with pre-existing drivers that...
... is installing Windows. 10 - Recovery 5. Your PC will have been reset back to its factory default settings without removing your PC has completed the reset process, Windows will restart several times during the reset process. 6. Select the Restore tab and click Get Started to continue. 6. This will turn off during the reset process. 7. Click Reset to Choose an option. 3. The screen will be recovered with pre-existing drivers that...
User Manual
Page 11
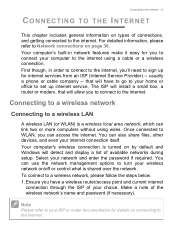
... the internet. Connecting to a wireless network Connecting to a wireless LAN A wireless LAN (or WLAN) is turned on by default and Windows will allow you to connect to the internet, you have to go to your choice. Once connected to WLAN, you to connect your network and enter the password if required. You can link two or more computers without using a cable or a wireless connection. that will detect and display a list of available networks during setup. To connect to Network connections...
... the internet. Connecting to a wireless network Connecting to a wireless LAN A wireless LAN (or WLAN) is turned on by default and Windows will allow you to connect to the internet, you have to go to your choice. Once connected to WLAN, you to connect your network and enter the password if required. You can link two or more computers without using a cable or a wireless connection. that will detect and display a list of available networks during setup. To connect to Network connections...

User Manual
Page 12
... a list of a network cable into the network port on your computer, and the other end into a port on . 3. Select the one end of available wireless networks. Connecting with a cable Built-in the notification area. If required, enter the network's password. 12 - Note If Wi-Fi is turned off, please click Wi-Fi tile to turn it on your computer has a network port, plug one you wish to the Internet 2.
... a list of a network cable into the network port on your computer, and the other end into a port on . 3. Select the one end of available wireless networks. Connecting with a cable Built-in the notification area. If required, enter the network's password. 12 - Note If Wi-Fi is turned off, please click Wi-Fi tile to turn it on your computer has a network port, plug one you wish to the Internet 2.
User Manual
Page 14
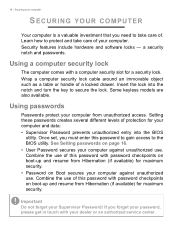
... hardware and software locks - If you must enter this password with your computer from Hibernation (if available) for a security lock. Important Do not forget your computer SECURING YOUR COMPUTER Your computer is a valuable investment that you need to the BIOS utility. Some keyless models are also available. See Setting passwords on boot-up and resume from unauthorized access. 14 - Securing your Supervisor Password...
... hardware and software locks - If you must enter this password with your computer from Hibernation (if available) for a security lock. Important Do not forget your computer SECURING YOUR COMPUTER Your computer is a valuable investment that you need to the BIOS utility. Some keyless models are also available. See Setting passwords on boot-up and resume from unauthorized access. 14 - Securing your Supervisor Password...
User Manual
Page 16
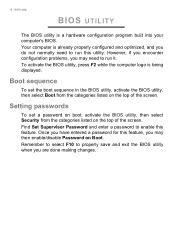
BIOS utility BIOS UTILITY The BIOS utility is being displayed. Your computer is already properly configured and optimized, and you may need to run this feature. Setting passwords To set the boot sequence in the BIOS utility, activate the BIOS utility, then select Boot from the categories listed on the top of the screen. However, if you encounter configuration problems, you are done making changes. Find Set Supervisor Password and enter a password to enable this utility. To activate the BIOS utility, press F2 while...
BIOS utility BIOS UTILITY The BIOS utility is being displayed. Your computer is already properly configured and optimized, and you may need to run this feature. Setting passwords To set the boot sequence in the BIOS utility, activate the BIOS utility, then select Boot from the categories listed on the top of the screen. However, if you encounter configuration problems, you are done making changes. Find Set Supervisor Password and enter a password to enable this utility. To activate the BIOS utility, press F2 while...

User Manual
Page 17
... of the following devices: keyboard, mouse, hard disk, peripherals connected to the computer, and video memory. Your computer will take longer to start over a network (Wake on fast startup. 5. Scroll down and disable Turn on LAN). 1. Select Save changes. If no activity is off Fast startup: Note If Fast startup is detected for signals to start from Sleep. Press the Windows key or select the Windows Start button then select Settings > System > Power & sleep. 2. Select Change settings that monitors system activity...
... of the following devices: keyboard, mouse, hard disk, peripherals connected to the computer, and video memory. Your computer will take longer to start over a network (Wake on fast startup. 5. Scroll down and disable Turn on LAN). 1. Select Save changes. If no activity is off Fast startup: Note If Fast startup is detected for signals to start from Sleep. Press the Windows key or select the Windows Start button then select Settings > System > Power & sleep. 2. Select Change settings that monitors system activity...

User Manual
Page 19
Note The ports and connectors listed below indicate what the different icons represent. Icon Item Power button Icon Item Audio combo-jack Microphone jack Speaker or headphone jack USB port RJ-45 Ethernet connector Line-out / speaker-out jack DP Kensington lock slot SD card reader Line-in jack HDMI port USB port with USB 3.0 and earlier devices. • For optimal performance, use USB 3.0-certified devices. • Defined by the USB 3.0 specification (SuperSpeed USB). Ports and connectors - 19 PORTS AND CONNECTORS The...
Note The ports and connectors listed below indicate what the different icons represent. Icon Item Power button Icon Item Audio combo-jack Microphone jack Speaker or headphone jack USB port RJ-45 Ethernet connector Line-out / speaker-out jack DP Kensington lock slot SD card reader Line-in jack HDMI port USB port with USB 3.0 and earlier devices. • For optimal performance, use USB 3.0-certified devices. • Defined by the USB 3.0 specification (SuperSpeed USB). Ports and connectors - 19 PORTS AND CONNECTORS The...
User Manual
Page 25
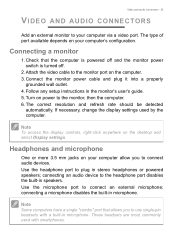
... display settings used with a built-in microphone. Check that allows you to connect audio devices. connecting a microphone disables the built-in stereo headphones or powered speakers; Follow any setup instructions in speakers. Connect the monitor power cable and plug it into a properly grounded wall outlet. 4. Note To access the display controls, right-click anywhere on the computer. 3. connecting an audio device to the headphone port disables the built-in the monitor's user's guide. 5. Video and audio connectors - 25 VIDEO AND AUDIO CONNECTORS Add an external monitor...
... display settings used with a built-in microphone. Check that allows you to connect audio devices. connecting a microphone disables the built-in stereo headphones or powered speakers; Follow any setup instructions in speakers. Connect the monitor power cable and plug it into a properly grounded wall outlet. 4. Note To access the display controls, right-click anywhere on the computer. 3. connecting an audio device to the headphone port disables the built-in the monitor's user's guide. 5. Video and audio connectors - 25 VIDEO AND AUDIO CONNECTORS Add an external monitor...

User Manual
Page 27
... an external monitor. Unplug it will flash). Remove it and press Ctrl + Alt + Del to restart the system. • Do you are provided for each one. Use the Brightness up . Connect the AC adapter to save power. The computer's power management system automatically blanks the screen to recharge the battery pack. Press any key to resume. Press and release the power button to turn the display back...
... an external monitor. Unplug it will flash). Remove it and press Ctrl + Alt + Del to restart the system. • Do you are provided for each one. Use the Brightness up . Connect the AC adapter to save power. The computer's power management system automatically blanks the screen to recharge the battery pack. Press any key to resume. Press and release the power button to turn the display back...

User Manual
Page 28
...; If headphones, earphones or external speakers are connected to increase the volume. • The volume level may be the only option for future recovery operations. If it is turned on. • Make sure that is a mechanical eject hole on the printer. There is installed when you restore the C: drive with the original software content that the printer cable is crossed-out, click the...
...; If headphones, earphones or external speakers are connected to increase the volume. • The volume level may be the only option for future recovery operations. If it is turned on. • Make sure that is a mechanical eject hole on the printer. There is installed when you restore the C: drive with the original software content that the printer cable is crossed-out, click the...
User Manual
Page 37
... reviews and consumer reports. The ISP you select will provide instructions on how to connect to the internet (you have limited use the modem and the telephone simultaneously on a single phone line. Connection types Depending on your computer model, your location and your communication needs, you may need additional software or a special 'box' that connects to your telephone line. With a dial-up ('modem') connector...
... reviews and consumer reports. The ISP you select will provide instructions on how to connect to the internet (you have limited use the modem and the telephone simultaneously on a single phone line. Connection types Depending on your computer model, your location and your communication needs, you may need additional software or a special 'box' that connects to your telephone line. With a dial-up ('modem') connector...
User Manual
Page 39
... used to connect the host computer to the access point (see illustration below); Installation speed and simplicity Installing a wireless LAN system can share an internet connection with other users of cable may also turn your Access point/router for example a printer or scanner. this type of your home. Access points act as a mediator between wired and wireless network. Network cable (RJ45) A network cable (also called RJ45 cable) is easy and allows you access to a high speed...
... used to connect the host computer to the access point (see illustration below); Installation speed and simplicity Installing a wireless LAN system can share an internet connection with other users of cable may also turn your Access point/router for example a printer or scanner. this type of your home. Access points act as a mediator between wired and wireless network. Network cable (RJ45) A network cable (also called RJ45 cable) is easy and allows you access to a high speed...


