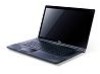
Acer Aspire 8951G Notebook Service Guide
Page 7
... MAC EEPROM Utility 2-28 CHAPTER 3 Maintenance Procedures Introduction 3-5 General Information 3-5 Recommended Equipment 3-5 Screw Table 3-5 Maintenance Flowchart 3-6 Getting Started 3-7 Dummy Card Removal 3-8 Dummy Card Installation 3-8 Logic Door Removal 3-9 Logic Door Installation 3-9 Battery Cable Removal 3-11 Battery Cable Installation 3-11 Lower Cover DIMM Module Removal 3-12 Lower Cover DIMM Module Installation 3-12 Main HDD (Hard Disk Drive) Module...
Acer Aspire 8951G Notebook Service Guide
Page 8
... Mainboard Installation 3-48 PCH Heatsink Removal 3-49 PCH Heatsink Installation 3-49 RTC Battery Removal 3-50 RTC Battery Installation 3-50 Thermal Assembly Removal 3-51 Thermal Assembly Installation 3-52 CPU Removal 3-53 CPU Installation 3-53 LCD (Liquid Crystal Display) Module Removal 3-55 LCD Module Installation 3-55 Speaker Module Removal 3-56 Speaker Module Installation 3-57 Battery Removal 3-58 Battery Installation 3-58 DC-IN Cable...
Acer Aspire 8951G Notebook Service Guide
Page 30
...removable. Hard disk bay Houses the computer's hard disk (secured with screws) 3 Ventilation slots Enable the computer to stay cool, even after prolonged use. 4 Battery release latch Slide to the disconnect battery position. NOTE: To completely power off the system (equivalent to removing the battery), slide the battery... reset switch to connect the internal battery. Base View 0 Figure 1-7.
Acer Aspire 8951G Notebook Service Guide
Page 94
... 3-5 Maintenance Flowchart 3-6 Getting Started 3-7 Dummy Card Removal 3-8 Dummy Card Installation 3-8 Logic Door Removal 3-9 Logic Door Installation 3-9 Battery Cable Removal 3-11 Battery Cable Installation 3-11 Lower Cover DIMM Module Removal 3-12 Lower Cover DIMM Module Installation 3-12 Main HDD (Hard Disk Drive) Module Removal 3-13 HDD Module Installation 3-13 HDD Brackets Removal 3-14 HDD Brackets Installation 3-14 WLAN Module...
Acer Aspire 8951G Notebook Service Guide
Page 95
PCH Heatsink Removal 3-49 PCH Heatsink Installation 3-49 RTC Battery Removal 3-50 RTC Battery Installation 3-50 Thermal Assembly Removal 3-51 Thermal Assembly Installation 3-52 CPU Removal 3-53 CPU Installation 3-53 LCD (Liquid Crystal Display) Module Removal 3-55 LCD Module Installation 3-55 Speaker Module Removal 3-56 Speaker Module Installation 3-57 Battery Removal 3-58 Battery Installation 3-58 DC-IN Cable Removal 3-59 DC-IN Cable Installation 3-59 3-3
Acer Aspire 8951G Notebook Service Guide
Page 99
... the sequence to avoid damage to remove power. (Figure 3-3) B Figure 3-3. A Figure 3-2. Remove all cables and peripherals from the system. (Figure 3-2) 2. Move battery disconnect switch (B) on a stable work surface. 4. Getting Started 0 The flowchart (Figure 3-1) identifies sections illustrating the entire removal and install sequence. Remove external power (A) from system. AC Adapter 3. Battery Disconnect Switch Machine Maintenance Procedures 3-7 Place...
Acer Aspire 8951G Notebook Service Guide
Page 103
Connect battery cable (A) to mainboard connector (F). (Figure 3-7) 2. Install logic door. Machine Maintenance Procedures 3-11 Battery Cable Installation 0 1. Lower Cover Overview 2. Battery Cable Removal 0 Prerequisite: Logic Door Removal 1. Disconnect battery cable (A) from mainboard connector (F). Locate battery cable (A) on mainboard. (Figure 3-7) FA B E C D Figure 3-7.
Acer Aspire 8951G Notebook Service Guide
Page 104
... Memory Module) module (B) on module until clips (A) lock in Lower Cover 3. Repeat steps 2 and 3 for DIMM module (B). 4. DIMM Module(s) in place. 3. Lower Cover DIMM Module Removal 0 Prerequisite: Battery Cable Removal 1. Repeat steps 2 and 3 for remaining DIMM module (C). Open module clips (A) to mainboard connector (D). (Figure 3-8) 2.
Acer Aspire 8951G Notebook Service Guide
Page 105
... lower cover. (Figure 3-9) A A B Figure 3-9. Use mylar tabs (A) to mainboard. Disconnect HDD cable (B) from HDD module connector. 4. Use caution when removing module. 2. Repeat Steps 1 through 3 for Secondary HDD Module as required. Connect HDD cable (B) to HDD module connector. (Figure 3-9) 2. Install logic door.... on lower cover. 3. Lifting Main HDD Module 3. Repeat Steps 1 through 4 for Secondary HDD Module as required. Remove HDD module. 5. Main HDD (Hard Disk Drive) Module Removal 0 Prerequisite: Battery Cable Removal 1. Machine Maintenance Procedures 3-13
Acer Aspire 8951G Notebook Service Guide
Page 107
WLAN Module Removal 0 Prerequisite: Battery Cable Removal 1. WLAN Module 3. Connect WLAN module (E) to mainboard. 3. Install and secure screw (C) to mainboard connector (D). (Figure 3-11) 2. Install logic door. Remove screw (C) from WLAN module connectors (F). (Figure 3-11) C E B F D A Figure 3-11. Disconnect WLAN main (A) and auxiliary (B) antenna cables from mainboard. 4. ID Size Quantity Screw Type C M2.5x4.0 1 ...
Acer Aspire 8951G Notebook Service Guide
Page 108
Locate touchpad removal switch (A). (Figure 3-12) A Figure 3-12. Touchpad Removal 0 Prerequisite: Battery Cable Removal 1. Figure 3-13. Removing Touchpad 3. Move and hold switch as shown in Figure 3-13. Remove touchpad. 3-16 Machine Maintenance Procedures Touchpad Removal Switch 2.
Acer Aspire 8951G Notebook Service Guide
Page 142
RTC Battery Installation 0 1. Install lower cover. 3-50 Machine Maintenance Procedures Locate RTC battery (A) on mainboard. (Figure 3-54) A B Figure 3-54. Remove RTC battery from RTC battery holder (B). + IMPORTANT: Follow local regulations for battery disposal. RTC Battery Removal 0 Prerequisite: Mainboard Removal 1. RTC Battery Removal. 2. Install RTC battery (A) to RTC battery holder (B). (Figure 3-54) 2.
Acer Aspire 8951G Notebook Service Guide
Page 150
Battery Cable 2. Push battery cable through lower cover slot (B). 3. Install battery (C) on lower cover. (Figure 3-62) 2. Push battery cable (A) through lower cover slot (B). 3. Battery Removal 0 Prerequisite: Speaker Module Removal 1. Remove battery (C) from lower cover. Install speaker module. 3-58 Machine Maintenance Procedures Battery Installation 0 1. Locate battery cable (A) in lower cover. (Figure 3-62) C B A Figure 3-62.
Acer Aspire 8951G Notebook Service Guide
Page 157
... an external monitor to the computer and switch between internal and external by pressing Fn+F5. 6. Make sure the computer has power by removing the power cable and battery. If the POST or video appears on the external display only, refer to Power On Issues. 3. Make sure that internal display is by...
Acer Aspire 8951G Notebook Service Guide
Page 158
... NOTE: NOTE: Make sure that : The device is faulty and should be replaced. Refer to Online Support Information. 4-6 Troubleshooting Remove and reinstall the video driver. 6. If the Issue is still not resolved, refer to Maintenance Flowchart. 3. Boot the computer. If... permanent vertical/horizontal lines or dark spots appear in the same location, the LCD is not running on battery alone as this may reduce display brightness. 2. Readjust if necessary. 4. Roll back the video driver to determine that the computer ...
Acer Aspire 8951G Notebook Service Guide
Page 172
... is listed under Other Devices 14. If the mouse uses a wireless connection, insert new batteries and confirm there is resolved, repeat Step 8 and select an earlier time and date. 10. Remove recently added software and reboot the computer. 8. If the issue is a good connection. ...For more information refer to Online Support Information. 4-20 Troubleshooting Restore system and file settings from a known good date using System Restore. 9. Remove and reinstall the mouse driver. 13. Use a different mouse. 2. Use a different program to verify mouse operation. There are no red Xs...
Acer Aspire 8951G Notebook Service Guide
Page 173
... inoperative. When analyzing an intermittent problem, perform the following devices: Non-Acer devices Printer, mouse, and other external devices Battery pack Hard disk drive DIMM CD-ROM/Diskette...3. Do not replace a non-defective FRU: System board LCD assembly Troubleshooting 4-21 If no more errors. Remove power from the computer. 2. Undetermined Problems 0 The diagnostic problems does not identify which adapter or device failed, which installed devices are ...
Acer Aspire 8951G Notebook Service Guide
Page 191
... in the same directory. 3. Press Power button to Getting Started. 5. 2. Insert USB HDD into USB port. 4. The Power button flashes once. 7. Jumper and Connector Locations 5-9 Remove battery power and AC power adapter. Copy ROM (read-only memory) file, ZRH.fd, to root directory of USB HDD.