eMachines M-Series Notebook User's Guide
Page 14
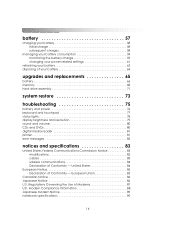
...-related settings 61 refreshing your battery 63 disposing of your battery 64 upgrades and replacements 65 battery 66 memory 68 hard drive assembly 71 system restore 73 troubleshooting 75 battery and power 76 keyboard and touchpad 77 status lights 78 display brightness and resolution 79 sound and volume 80 CDs and...
...-related settings 61 refreshing your battery 63 disposing of your battery 64 upgrades and replacements 65 battery 66 memory 68 hard drive assembly 71 system restore 73 troubleshooting 75 battery and power 76 keyboard and touchpad 77 status lights 78 display brightness and resolution 79 sound and volume 80 CDs and...
eMachines M-Series Notebook User's Guide
Page 71
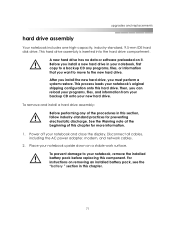
... pack before replacing this chapter. 71 To remove and install a hard drive assembly: Before performing any programs, files, or information that you must perform a system restore. This process loads your notebook and close the display. To prevent damage to the new hard drive. This hard drive assembly is inserted into the...
... pack before replacing this chapter. 71 To remove and install a hard drive assembly: Before performing any programs, files, or information that you must perform a system restore. This process loads your notebook and close the display. To prevent damage to the new hard drive. This hard drive assembly is inserted into the...

eMachines M-Series Notebook User's Guide
Page 72
... shipping configuration onto this hard drive. To remove an existing hard drive assembly, first remove the hard drive retaining screw 1. Perform a system restore to load your cables. 6. See chapter 6, "system restore," for instructions. 7. Then, grasp the hard drive and slide the assembly completely out of the hard drive compartment 2. 4. Reload the programs...
... shipping configuration onto this hard drive. To remove an existing hard drive assembly, first remove the hard drive retaining screw 1. Perform a system restore to load your cables. 6. See chapter 6, "system restore," for instructions. 7. Then, grasp the hard drive and slide the assembly completely out of the hard drive compartment 2. 4. Reload the programs...
eMachines M-Series Notebook User's Guide
Page 73
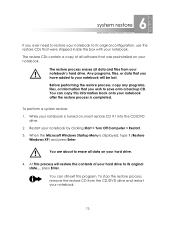
... that was preinstalled on your notebook. You can still exit this information back onto your notebook after the restore process is displayed, type 1 (Restore Windows XP) and press Enter. To perform a system restore: 1. When the Microsoft Windows Startup Menu is completed. You are about to erase all data on ,... CD/DVD drive and restart your notebook. 73 To stop the restore process, remove the restore CD from your notebook's hard drive. The restore CDs contain a copy of your hard drive to its original configuration, use the restore CDs that you have added to your notebook will be lost....
... that was preinstalled on your notebook. You can still exit this information back onto your notebook after the restore process is displayed, type 1 (Restore Windows XP) and press Enter. To perform a system restore: 1. When the Microsoft Windows Startup Menu is completed. You are about to erase all data on ,... CD/DVD drive and restart your notebook. 73 To stop the restore process, remove the restore CD from your notebook's hard drive. The restore CDs contain a copy of your hard drive to its original configuration, use the restore CDs that you have added to your notebook will be lost....

eMachines M-Series Notebook User's Guide
Page 74
...! At Insert the next media and press Enter... At Insert the next media and press Enter..., remove restore CD #2 from the CD/DVD drive, and restart your notebook. When the restore process is displayed: Caution: All data in the CD/DVD drive, the notebook will boot off the CD and the Microsoft... is still in the hard drive will be lost! Remove the CD from the drive and insert restore CD #2. getting started 5. Are you sure you want to the hard drive. 7. The restore process begins. This is erased, and then the contents of the CD are copied on your hard drive is your...
...! At Insert the next media and press Enter... At Insert the next media and press Enter..., remove restore CD #2 from the CD/DVD drive, and restart your notebook. When the restore process is displayed: Caution: All data in the CD/DVD drive, the notebook will boot off the CD and the Microsoft... is still in the hard drive will be lost! Remove the CD from the drive and insert restore CD #2. getting started 5. Are you sure you want to the hard drive. 7. The restore process begins. This is erased, and then the contents of the CD are copied on your hard drive is your...


