User Guide
Page 3
... the computer. Do not use when no cards are in the card slots. Turning the product off before cleaning. CAUTION for Accessibility Be sure that the power outlet you plug the power cord into is easily accessible and located as close to the equipment operator as disconnecting device Observe the following guidelines when connecting and disconnecting power to the AC power outlet. CAUTION for bundled...
... the computer. Do not use when no cards are in the card slots. Turning the product off before cleaning. CAUTION for Accessibility Be sure that the power outlet you plug the power cord into is easily accessible and located as close to the equipment operator as disconnecting device Observe the following guidelines when connecting and disconnecting power to the AC power outlet. CAUTION for bundled...
User Guide
Page 5
... dangerous voltage points or other nearby electrical devices that is a safety feature. v Warning! The grounding pin is not properly grounded may result in performance, indicating a need for service • the product does not operate normally after following the operating instructions Note: Adjust only those controls that are covered by the operating instructions, since improper adjustment of voltages; 100 to 120 or 220 to...
... dangerous voltage points or other nearby electrical devices that is a safety feature. v Warning! The grounding pin is not properly grounded may result in performance, indicating a need for service • the product does not operate normally after following the operating instructions Note: Adjust only those controls that are covered by the operating instructions, since improper adjustment of voltages; 100 to 120 or 220 to...
User Guide
Page 6
... Guidelines for this device. Do not dispose as that is fully charged. Replace the battery with water and seek medical attention immediately. Use the battery only for example, when you come into contact with the leaked fluids, rinse thoroughly with the same type as household waste. When the operation time becomes noticeably shorter than normal, buy a new battery. Always try...
... Guidelines for this device. Do not dispose as that is fully charged. Replace the battery with water and seek medical attention immediately. Use the battery only for example, when you come into contact with the leaked fluids, rinse thoroughly with the same type as household waste. When the operation time becomes noticeably shorter than normal, buy a new battery. Always try...
User Guide
Page 7
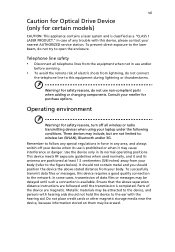
... interference or danger. Remember to the network. Parts of any area, and always switch off all telephone lines from your laptop under the following conditions. Telephone line safety • Disconnect all wireless or radio transmitting devices when using your body. Operating environment Warning! Do not place credit cards or other magnetic storage media near the device, because information stored on them...
... interference or danger. Remember to the network. Parts of any area, and always switch off all telephone lines from your laptop under the following conditions. Telephone line safety • Disconnect all wireless or radio transmitting devices when using your body. Operating environment Warning! Do not place credit cards or other magnetic storage media near the device, because information stored on them...
User Guide
Page 13
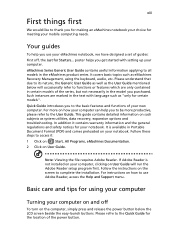
... all models in certain models of guides: First off, the Just for using the keyboard, audio, etc. In addition it : 1 Click on Start, All Programs, eMachines Documentation. 2 Click on your new computer. Quick Guide introduces you purchased. It covers basic topics such as system utilities, data recovery, expansion options and troubleshooting. Note: Viewing the file requires Adobe Reader. Basic care and tips for Starters... eMachines Series Generic User Guide contains useful information...
... all models in certain models of guides: First off, the Just for using the keyboard, audio, etc. In addition it : 1 Click on Start, All Programs, eMachines Documentation. 2 Click on your new computer. Quick Guide introduces you purchased. It covers basic topics such as system utilities, data recovery, expansion options and troubleshooting. Note: Viewing the file requires Adobe Reader. Basic care and tips for Starters... eMachines Series Generic User Guide contains useful information...
User Guide
Page 17
... your AC adapter xiv Taking care of your battery pack xv Cleaning and servicing xv Touchpad 1 Touchpad basics (with two-click buttons) 1 Using the keyboard 2 Lock keys and embedded numeric keypad* 2 Windows keys 3 Special keys 4 Frequently asked questions 5 Battery pack 8 Battery pack characteristics 8 Maximizing the battery's life 8 Installing and removing the battery pack 9 Charging the battery 10 Checking the battery level 10 Optimising battery life 10 Battery-low warning 11 Taking your notebook PC with...
... your AC adapter xiv Taking care of your battery pack xv Cleaning and servicing xv Touchpad 1 Touchpad basics (with two-click buttons) 1 Using the keyboard 2 Lock keys and embedded numeric keypad* 2 Windows keys 3 Special keys 4 Frequently asked questions 5 Battery pack 8 Battery pack characteristics 8 Maximizing the battery's life 8 Installing and removing the battery pack 9 Charging the battery 10 Checking the battery level 10 Optimising battery life 10 Battery-low warning 11 Taking your notebook PC with...

User Guide
Page 18
... Traveling internationally with the computer 15 Preparing the computer 15 What to bring with you 15 Special considerations 15 Securing your computer 16 Using a computer security lock 16 Using passwords 16 Entering passwords 17 Setting passwords 17 Expanding through options 18 Connectivity options 18 Built-in network feature 18 Universal Serial Bus (USB) 18 Installing memory 19 BIOS utility 20 Boot sequence 20 Enable disk-to RF fields (RSS-102) 36 LCD panel ergonomic specifications...
... Traveling internationally with the computer 15 Preparing the computer 15 What to bring with you 15 Special considerations 15 Securing your computer 16 Using a computer security lock 16 Using passwords 16 Entering passwords 17 Setting passwords 17 Expanding through options 18 Connectivity options 18 Built-in network feature 18 Universal Serial Bus (USB) 18 Installing memory 19 BIOS utility 20 Boot sequence 20 Enable disk-to RF fields (RSS-102) 36 LCD panel ergonomic specifications...
User Guide
Page 19
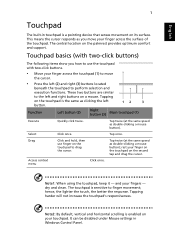
... a mouse button); hence, the lighter the touch, the better the response. Note2: By default, vertical and horizontal scrolling is a pointing device that senses movement on your fingers - Click once. Click once. Touchpad basics (with two-click buttons. • Move your finger on the touchpad on a mouse. It can be disabled under Mouse settings in touchpad is enabled on its surface. The central location on the touchpad to...
... a mouse button); hence, the lighter the touch, the better the response. Note2: By default, vertical and horizontal scrolling is a pointing device that senses movement on your fingers - Click once. Click once. Touchpad basics (with two-click buttons. • Move your finger on the touchpad on a mouse. It can be disabled under Mouse settings in touchpad is enabled on its surface. The central location on the touchpad to...
User Guide
Page 20
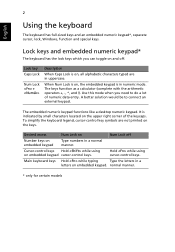
... Type numbers in uppercase. 2 English Using the keyboard The keyboard has full-sized keys and an embedded numeric keypad*, separate cursor, lock, Windows, function and special keys. normal manner. * only for certain models Use this mode when you can toggle on , the embedded keypad is on and off Number keys on embedded keypad cursor-control keys. To simplify the keyboard legend, cursor-control key symbols are in a normal manner. Desired access...
... Type numbers in uppercase. 2 English Using the keyboard The keyboard has full-sized keys and an embedded numeric keypad*, separate cursor, lock, Windows, function and special keys. normal manner. * only for certain models Use this mode when you can toggle on , the embedded keypad is on and off Number keys on embedded keypad cursor-control keys. To simplify the keyboard legend, cursor-control key symbols are in a normal manner. Desired access...
User Guide
Page 21
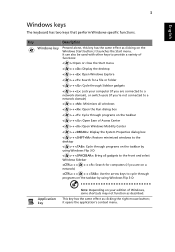
... clicking the right mouse button; It can also be used with other keys to provide a variety of functions: < >: Open or close the Start menu < > + : Display the desktop < > + : Open Windows Explore < > + : Search for a file or folder < > + : Cycle through programs on the taskbar by using Windows Flip 3-D Application key Note: Depending on the Windows Start button; it opens the application's context menu. it launches the Start menu. English 3 Windows keys The keyboard has two keys that perform Windows-specific functions.
... clicking the right mouse button; It can also be used with other keys to provide a variety of functions: < >: Open or close the Start menu < > + : Display the desktop < > + : Open Windows Explore < > + : Search for a file or folder < > + : Cycle through programs on the taskbar by using Windows Flip 3-D Application key Note: Depending on the Windows Start button; it opens the application's context menu. it launches the Start menu. English 3 Windows keys The keyboard has two keys that perform Windows-specific functions.
User Guide
Page 23
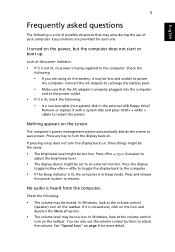
... volume control icon on the taskbar. Press and release the power button to an external monitor. English 5 Frequently asked questions The following : • Is a non-bootable (non-system) disk in Sleep mode. Press + < > (increase) to adjust the volume. Nothing appears on the icon and deselect the Mute all option. • The volume level may arise during the use the volume control buttons to adjust the brightness level. • The display device...
... volume control icon on the taskbar. Press and release the power button to an external monitor. English 5 Frequently asked questions The following : • Is a non-bootable (non-system) disk in Sleep mode. Press + < > (increase) to adjust the volume. Nothing appears on the icon and deselect the Mute all option. • The volume level may arise during the use the volume control buttons to adjust the brightness level. • The display device...
User Guide
Page 24
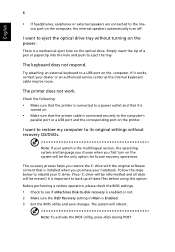
... is installed when you first turn off. Before performing a restore operation, please check the BIOS settings. 1 Check to see if eMachines Disk-to a USB port on the system will be reformatted and all data files before using this option. If it is turned on. • Make sure that it works, contact your C: drive. (Your C: drive will be the only option for future recovery operations. Note: If your notebook. Note: To activate the BIOS utility...
... is installed when you first turn off. Before performing a restore operation, please check the BIOS settings. 1 Check to see if eMachines Disk-to a USB port on the system will be reformatted and all data files before using this option. If it is turned on. • Make sure that it works, contact your C: drive. (Your C: drive will be the only option for future recovery operations. Note: If your notebook. Note: To activate the BIOS utility...
User Guide
Page 29
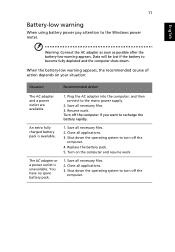
... action depends on the computer and resume work . You have no spare battery pack. 1. Shut down the operating system to recharge the battery rapidly. Save all applications. 3. Close all necessary files. 3. Replace the battery pack. 5. An extra fully charged battery pack is unavailable. Save all necessary files. 2. Resume work . English 11 Battery-low warning When using battery power pay attention to the mains...
... action depends on the computer and resume work . You have no spare battery pack. 1. Shut down the operating system to recharge the battery rapidly. Save all applications. 3. Close all necessary files. 3. Replace the battery pack. 5. An extra fully charged battery pack is unavailable. Save all necessary files. 2. Resume work . English 11 Battery-low warning When using battery power pay attention to the mains...
User Guide
Page 30
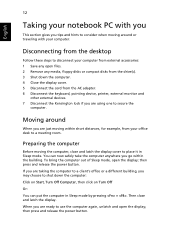
... desktop Follow these steps to disconnect your computer from external accessories: 1 Save any open the display; To bring the computer out of Sleep mode, open files. 2 Remove any media, floppy disks or compact disks from the drive(s). 3 Shut down the computer: Click on Start, Turn Off Computer, then click on Turn Off Or: You can now safely take the computer anywhere you tips and hints...
... desktop Follow these steps to disconnect your computer from external accessories: 1 Save any open the display; To bring the computer out of Sleep mode, open files. 2 Remove any media, floppy disks or compact disks from the drive(s). 3 Shut down the computer: Click on Start, Turn Off Computer, then click on Turn Off Or: You can now safely take the computer anywhere you tips and hints...
User Guide
Page 31
... the power indicator is off but the Sleep indicator is relatively short, you probably do not need to turn the computer back on the battery by putting the computer in Sleep mode. To resume, open the display (if closed), then press and release the power button. Note that can damage the screen. If your meeting is on, the computer has entered Sleep mode. Pressure against the top cover...
... the power indicator is off but the Sleep indicator is relatively short, you probably do not need to turn the computer back on the battery by putting the computer in Sleep mode. To resume, open the display (if closed), then press and release the power button. Note that can damage the screen. If your meeting is on, the computer has entered Sleep mode. Pressure against the top cover...
User Guide
Page 34
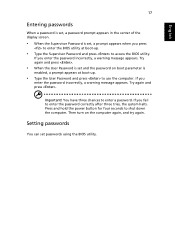
... password, please get in touch with a Kensington-compatible security slot for maximum security. Setting these passwords creates several different levels of protection for maximum security. • Password on boot-up and resume from unauthorized access. Important! Learn how to the BIOS utility. • User Password secures your computer against unauthorized use of . a security notch and passwords. Some keyless models are also available. Once set, you must enter this password...
... password, please get in touch with a Kensington-compatible security slot for maximum security. Setting these passwords creates several different levels of protection for maximum security. • Password on boot-up and resume from unauthorized access. Important! Learn how to the BIOS utility. • User Password secures your computer against unauthorized use of . a security notch and passwords. Some keyless models are also available. Once set, you must enter this password...
User Guide
Page 35
... system halts. If you enter the password incorrectly, a warning message appears. If you press to enter the BIOS utility at boot-up . • Type the Supervisor Password and press to access the BIOS utility. English 17 Entering passwords When a password is set, a password prompt appears in the center of the display screen. • When the Supervisor Password is enabled, a prompt appears at boot-up . • Type the User Password and press to use the computer.
... system halts. If you enter the password incorrectly, a warning message appears. If you press to enter the BIOS utility at boot-up . • Type the Supervisor Password and press to access the BIOS utility. English 17 Entering passwords When a password is set, a password prompt appears in the center of the display screen. • When the Supervisor Password is enabled, a prompt appears at boot-up . • Type the User Password and press to use the computer.
User Guide
Page 36
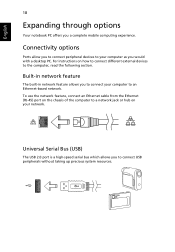
.... To use the network feature, connect an Ethernet cable from the Ethernet (RJ-45) port on the chassis of the computer to a network jack or hub on how to connect different external devices to an Ethernet-based network. Built-in network feature The built-in network feature allows you a complete mobile computing experience. English 18 Expanding through options Your notebook PC offers you to connect USB peripherals...
.... To use the network feature, connect an Ethernet cable from the Ethernet (RJ-45) port on the chassis of the computer to a network jack or hub on how to connect different external devices to an Ethernet-based network. Built-in network feature The built-in network feature allows you a complete mobile computing experience. English 18 Expanding through options Your notebook PC offers you to connect USB peripherals...
User Guide
Page 38
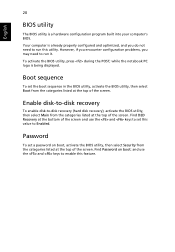
... you encounter configuration problems, you do not need to set a password on boot: and use the and keys to run this utility. Find D2D Recovery at the top of the screen and use the and keys to enable this value to -disk recovery (hard disk recovery), activate the BIOS utility, then select Main from the categories listed at the bottom of the screen. English 20 BIOS utility The BIOS utility is being displayed. Enable disk-to-disk recovery To enable disk-to Enabled. To activate the BIOS utility, press...
... you encounter configuration problems, you do not need to set a password on boot: and use the and keys to run this utility. Find D2D Recovery at the top of the screen and use the and keys to enable this value to -disk recovery (hard disk recovery), activate the BIOS utility, then select Main from the categories listed at the bottom of the screen. English 20 BIOS utility The BIOS utility is being displayed. Enable disk-to-disk recovery To enable disk-to Enabled. To activate the BIOS utility, press...
User Guide
Page 52
... on configurations, this notebook PC series is in which it has been approved for models with high-precision manufacturing techniques. Should such problems occur, the user should NOT contact the telecom Fault Service. 8 This equipment may also cause a false answer condition. Declaration of pulse dialing, when this appliance may not contain wireless radio devices (such as black or red dots. LCD...
... on configurations, this notebook PC series is in which it has been approved for models with high-precision manufacturing techniques. Should such problems occur, the user should NOT contact the telecom Fault Service. 8 This equipment may also cause a false answer condition. Declaration of pulse dialing, when this appliance may not contain wireless radio devices (such as black or red dots. LCD...


