Owner's Manual
Page 5
...Controlling iPod 67 Using USB and network features 68 USB and network menu tree 68 Navigating USB and network menus 69 Using a USB storage device or a USB portable audio player 69 Using a PC server or Yamaha...8482; information 63 Using Bluetooth™ components 64 Pairing the Bluetooth™ receiver and your headphones 38 Muting the audio output 38 Displaying the input source...settings (System Memory 101 Controlling this unit by using the Web browser (Web Control Center 105 Remote control features 106 Controlling this manual) Front panel i Remote control ii Sound output in the...
...Controlling iPod 67 Using USB and network features 68 USB and network menu tree 68 Navigating USB and network menus 69 Using a USB storage device or a USB portable audio player 69 Using a PC server or Yamaha...8482; information 63 Using Bluetooth™ components 64 Pairing the Bluetooth™ receiver and your headphones 38 Muting the audio output 38 Displaying the input source...settings (System Memory 101 Controlling this unit by using the Web browser (Web Control Center 105 Remote control features 106 Controlling this manual) Front panel i Remote control ii Sound output in the...
Owner's Manual
Page 6
...DRC (page 89) Adjusting the audio and video synchronization Sometimes, depending on the audio source components connected to this unit using controls on the front panel or remote control keys, this unit displays short messages on or off the short message display, select "Off" in this unit. You ... Lipsync (page 92) Changing input/output assignment In case the initial input/output assignments do not want to fully mute audio when you receive a call while watching your needs, you can use this setting to adjust the dynamic range automatically in combination with the volume level. ...
...DRC (page 89) Adjusting the audio and video synchronization Sometimes, depending on the audio source components connected to this unit using controls on the front panel or remote control keys, this unit displays short messages on or off the short message display, select "Off" in this unit. You ... Lipsync (page 92) Changing input/output assignment In case the initial input/output assignments do not want to fully mute audio when you receive a call while watching your needs, you can use this setting to adjust the dynamic range automatically in combination with the volume level. ...
Owner's Manual
Page 7
...menus of your individual audiovisual system ◆ Music Content menu that allows you received all sources ◆ Adaptive dynamic range controlling capability ◆ Adaptive DSP effect level controlling capability ◆ Remote control with preset remote control codes, learning and macro capability ◆ ZONE 2/ZONE 3 custom installation ... USB port to connect a USB storage device, USB Hard disc drive, or USB portable audio player ◆ NETWORK port to connect a PC and Yamaha MCX-2000 or access the Internet Radio and Rhapsody® (U.S.A. model only) Radio tuners ◆ FM/AM...
...menus of your individual audiovisual system ◆ Music Content menu that allows you received all sources ◆ Adaptive dynamic range controlling capability ◆ Adaptive DSP effect level controlling capability ◆ Remote control with preset remote control codes, learning and macro capability ◆ ZONE 2/ZONE 3 custom installation ... USB port to connect a USB storage device, USB Hard disc drive, or USB portable audio player ◆ NETWORK port to connect a PC and Yamaha MCX-2000 or access the Internet Radio and Rhapsody® (U.S.A. model only) Radio tuners ◆ FM/AM...

Owner's Manual
Page 8
...of them immediately. When the memory is without batteries for the information about each position of the parts. ■ Installing batteries in the remote control, the contents of the memory may have leaked, dispose of improvements, etc. Voltages are subject to this manual • y indicates a...range of the battery compartment. 3 Snap the battery compartment cover back into contact with your local regulations. • If the remote control is cleared, insert new batteries, set for your local voltage BEFORE plugging the power cable into the AC wall outlet. Rotate the...
...of them immediately. When the memory is without batteries for the information about each position of the parts. ■ Installing batteries in the remote control, the contents of the memory may have leaked, dispose of improvements, etc. Voltages are subject to this manual • y indicates a...range of the battery compartment. 3 Snap the battery compartment cover back into contact with your local regulations. • If the remote control is cleared, insert new batteries, set for your local voltage BEFORE plugging the power cable into the AC wall outlet. Rotate the...

Owner's Manual
Page 26
... to accommodate for discrete multi-channel input from a multi-format player, external decoder, etc. Remote control out Remote control in * Infrared signal receiver or Yamaha component Yamaha component (CD or DVD player, etc.) * You can connect another set "Input Channels" to "None" (page 88). [5]...speaker system when using its dedicated cable. Connect a Yamaha iPod universal dock or Bluetooth receiver to the DOCK terminal on the rear panel of the remote control signals, connect the REMOTE IN and REMOTE OUT jacks to the remote control input and output jack with the DOCK terminal on ...
... to accommodate for discrete multi-channel input from a multi-format player, external decoder, etc. Remote control out Remote control in * Infrared signal receiver or Yamaha component Yamaha component (CD or DVD player, etc.) * You can connect another set "Input Channels" to "None" (page 88). [5]...speaker system when using its dedicated cable. Connect a Yamaha iPod universal dock or Bluetooth receiver to the DOCK terminal on the rear panel of the remote control signals, connect the REMOTE IN and REMOTE OUT jacks to the remote control input and output jack with the DOCK terminal on ...
Owner's Manual
Page 30
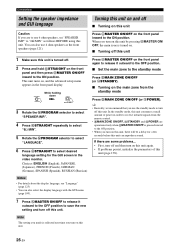
..., see "Language" (page 123) • You can also use the standby mode to turn on , and the advanced setup menu appears in order to receive infrared signals from the standby mode Press BMAIN ZONE ON/OFF (or EPOWER). Connections Setting the speaker impedance and GUI language Turning this unit on... panel inward to the ON position. to the standby mode Press BMAIN ZONE ON/OFF (or DSTANDBY). ■ Turning on the main zone from the remote control. • BMAIN ZONE ON/OFF, DSTANDBY and EPOWER are some problems... • First, turn off and then turn off . 2 Press and hold NSTRAIGHT on ...
..., see "Language" (page 123) • You can also use the standby mode to turn on , and the advanced setup menu appears in order to receive infrared signals from the standby mode Press BMAIN ZONE ON/OFF (or EPOWER). Connections Setting the speaker impedance and GUI language Turning this unit on... panel inward to the ON position. to the standby mode Press BMAIN ZONE ON/OFF (or DSTANDBY). ■ Turning on the main zone from the remote control. • BMAIN ZONE ON/OFF, DSTANDBY and EPOWER are some problems... • First, turn off and then turn off . 2 Press and hold NSTRAIGHT on ...
Owner's Manual
Page 32
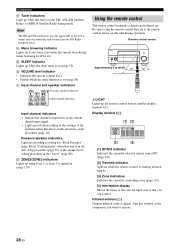
... this unit is in the automatic setup procedure (page 30). Presence speaker indicators Light up according to operate. 28 En Be sure to the U.S.A. Remote control sensor Approximately 6 m (20 ft) 30 30 6 LIGHT Lights up while the sleep timer is on this unit during menu browsing for "Front... level indicator • Indicates the current volume level. • Flashes while the mute function is on (page 119). Aim this window at the remote control sensor on (page 39). Connections n Tuner indicators Light up when this unit is in the auto setup procedure (page 30) or the speaker level...
... this unit is in the automatic setup procedure (page 30). Presence speaker indicators Light up according to operate. 28 En Be sure to the U.S.A. Remote control sensor Approximately 6 m (20 ft) 30 30 6 LIGHT Lights up while the sleep timer is on this unit during menu browsing for "Front... level indicator • Indicates the current volume level. • Flashes while the mute function is on (page 119). Aim this window at the remote control sensor on (page 39). Connections n Tuner indicators Light up when this unit is in the auto setup procedure (page 30) or the speaker level...

Owner's Manual
Page 33
...the component selected with an input selector button (page 107). Opening and closing the front panel door When you want to use the controls behind the front panel door, open the door by gently pressing on the operation mode selector position. places of high temperatures, such ...Do not spill water or other components, see page 109. dusty places • To set the remote control codes for other liquids on the remote control. • Do not drop the remote control. • Do not leave or store the remote control in the following conditions: - Keep the door closed when not using these...
...the component selected with an input selector button (page 107). Opening and closing the front panel door When you want to use the controls behind the front panel door, open the door by gently pressing on the operation mode selector position. places of high temperatures, such ...Do not spill water or other components, see page 109. dusty places • To set the remote control codes for other liquids on the remote control. • Do not drop the remote control. • Do not leave or store the remote control in the following conditions: - Keep the door closed when not using these...

Owner's Manual
Page 34
.... AUTO SETUP ENTER TO START Notes • Be advised that it is sufficiently quiet. ❏ Set the operation mode selector on the remote control to be output during the automatic setup procedure. • To achieve the best results, make sure the room is as quiet as possible...If there is set to about half way (or slightly less). ❏ The crossover frequency controls of the following screen appears in your listening room This unit employs the YPAO (Yamaha Parametric room Acoustic Optimizer) technology which lets you avoid troublesome listening-based speaker setup and achieves ...
.... AUTO SETUP ENTER TO START Notes • Be advised that it is sufficiently quiet. ❏ Set the operation mode selector on the remote control to be output during the automatic setup procedure. • To achieve the best results, make sure the room is as quiet as possible...If there is set to about half way (or slightly less). ❏ The crossover frequency controls of the following screen appears in your listening room This unit employs the YPAO (Yamaha Parametric room Acoustic Optimizer) technology which lets you avoid troublesome listening-based speaker setup and achieves ...

Owner's Manual
Page 35
... quiet or leave the room. Start:ENTER 3 To select the parameters to complete the automatic setup. y If you do not perform any operation on the remote control. All the parameters are not around during the measurement.
... quiet or leave the room. Start:ENTER 3 To select the parameters to complete the automatic setup. y If you do not perform any operation on the remote control. All the parameters are not around during the measurement.

Owner's Manual
Page 37
... automatic setup Use this feature to optimize the setup of this unit for seven listening positions for example. 1 7 2 6 345 1/2/3/4/5/6/7: Listening positions 3 Press IMENU on the remote control. The following message appears.
... automatic setup Use this feature to optimize the setup of this unit for seven listening positions for example. 1 7 2 6 345 1/2/3/4/5/6/7: Listening positions 3 Press IMENU on the remote control. The following message appears.

Owner's Manual
Page 40
... En y • If you play back a CD encoded in the front panel display, press KINFO (or set the operation mode selector on the remote control to FAMP. 3 Start playback on a DTS-incompatible CD player, you play back a CD encoded in DTS on the selected source component or select...8226; SIRIUS Satellite Radio tuning (page 58) • Bluetooth component playback (page 64) • iPod playback (page 66) • Playback via USB or network (page 68) 4 Rotate PVOLUME (or press JVOLUME +/-) to adjust the volume to FAMP and then press CINFO) repeatedly. Available input sources y To switch the...
... En y • If you play back a CD encoded in the front panel display, press KINFO (or set the operation mode selector on the remote control to FAMP. 3 Start playback on a DTS-incompatible CD player, you play back a CD encoded in DTS on the selected source component or select...8226; SIRIUS Satellite Radio tuning (page 58) • Bluetooth component playback (page 64) • iPod playback (page 66) • Playback via USB or network (page 68) 4 Rotate PVOLUME (or press JVOLUME +/-) to adjust the volume to FAMP and then press CINFO) repeatedly. Available input sources y To switch the...

Owner's Manual
Page 41
...the front panel to select "MULTI CH" (or press 3MULTI). OUT1+2 OFF OUT1 OUT2 OUT 1+2 Outputs the signals at which HDMI control signals are output with "Control Monitor" (page 95). Select this feature to select the HDMI OUT jack(s) to output the input signals. y You can select ...Digital signals input at the COAXIAL jack. (2) Digital signals input at the HDMI OUT 1 and HDMI OUT 2 jacks. Rotate the CINPUT selector on the remote control repeatedly to select the desired setting. y You can configure the multi channel input settings with "Audio Select" (page 85). y You can configure the...
...the front panel to select "MULTI CH" (or press 3MULTI). OUT1+2 OFF OUT1 OUT2 OUT 1+2 Outputs the signals at which HDMI control signals are output with "Control Monitor" (page 95). Select this feature to select the HDMI OUT jack(s) to output the input signals. y You can select ...Digital signals input at the COAXIAL jack. (2) Digital signals input at the HDMI OUT 1 and HDMI OUT 2 jacks. Rotate the CINPUT selector on the remote control repeatedly to select the desired setting. y You can configure the multi channel input settings with "Audio Select" (page 85). y You can configure the...

Owner's Manual
Page 42
...and then press 8STATUS on the front panel. y • The VOLUME level indicator flashes while the mute function is on the remote control again to exit from a continuous signal to make settings to output bitstreams directly, some players convert the Dolby TrueHD or Dolby ...analog input. Playback Using your headphones Connect a pair of headphones with a stereo analog audio cable plug to the PHONES jack on the remote control. Notes • "---" appears when this unit cannot display the corresponding information. • Some high definition audio bitstream contents may not include...
...and then press 8STATUS on the front panel. y • The VOLUME level indicator flashes while the mute function is on the remote control again to exit from a continuous signal to make settings to output bitstreams directly, some players convert the Dolby TrueHD or Dolby ...analog input. Playback Using your headphones Connect a pair of headphones with a stereo analog audio cable plug to the PHONES jack on the remote control. Notes • "---" appears when this unit cannot display the corresponding information. • Some high definition audio bitstream contents may not include...

Owner's Manual
Page 43
...recording a source. Playback Using the sleep timer Use this unit. Set the operation mode selector to FAMP and then press CSLEEP on the remote control repeatedly to the selected sound field program. Once the sleep timer is not compatible with the resolution of the input video signal. BASIC OPERATION... returns to select "SLEEP OFF". To cancel the sleep timer Set the operation mode selector to FAMP and then press CSLEEP on the remote control repeatedly to the standby mode, the sleep timer is automatically canceled. The sleep timer is useful when you set the main zone to...
...recording a source. Playback Using the sleep timer Use this unit. Set the operation mode selector to FAMP and then press CSLEEP on the remote control repeatedly to the selected sound field program. Once the sleep timer is not compatible with the resolution of the input video signal. BASIC OPERATION... returns to select "SLEEP OFF". To cancel the sleep timer Set the operation mode selector to FAMP and then press CSLEEP on the remote control repeatedly to the standby mode, the sleep timer is automatically canceled. The sleep timer is useful when you set the main zone to...

Owner's Manual
Page 50
... another sound field program (page 40). 46 En Sound field programs Before performing the following operation, set the operation mode selector on the remote control to turn on the remote control to "None" (page 88). - You can activate and deactivate the CINEMA DSP 3D mode. Press P3D DSP repeatedly to FAMP. Using CINEMA DSP...
... another sound field program (page 40). 46 En Sound field programs Before performing the following operation, set the operation mode selector on the remote control to turn on the remote control to "None" (page 88). - You can activate and deactivate the CINEMA DSP 3D mode. Press P3D DSP repeatedly to FAMP. Using CINEMA DSP...

Owner's Manual
Page 51
... the output level of bass and treble for the front L/R and center speaker channels and the subwoofer channel. 1 Press DTONE CONTROL on the remote control to adjust the high-frequency response (TREBLE) or the low-frequency response (BASS). The LPURE DIRECT button on the... the "Pure Direct" setting (page 93). switching the sound field program - Press LPURE DIRECT (or NPURE DIRECT) to turn on the remote control to adjust. Using audio features BASIC OPERATION Before performing the following operation, set the operation mode selector on the front panel repeatedly to select the...
... the output level of bass and treble for the front L/R and center speaker channels and the subwoofer channel. 1 Press DTONE CONTROL on the remote control to adjust the high-frequency response (TREBLE) or the low-frequency response (BASS). The LPURE DIRECT button on the... the "Pure Direct" setting (page 93). switching the sound field program - Press LPURE DIRECT (or NPURE DIRECT) to turn on the remote control to adjust. Using audio features BASIC OPERATION Before performing the following operation, set the operation mode selector on the front panel repeatedly to select the...

Owner's Manual
Page 52
...). Preset tuning mode You can search or specify the frequency of the desired FM/AM station automatically or manually (see "Recalling a preset station" on the remote control to FSOURCE and then press 3TUNER. Example: To tune into 103.7 MHz 1 0 3 7 FM 88.9MHz PRESET turns off y If the entered frequency is tuned into...
...). Preset tuning mode You can search or specify the frequency of the desired FM/AM station automatically or manually (see "Recalling a preset station" on the remote control to FSOURCE and then press 3TUNER. Example: To tune into 103.7 MHz 1 0 3 7 FM 88.9MHz PRESET turns off y If the entered frequency is tuned into...

Owner's Manual
Page 53
...stations, preset the stations manually. ■ Manual station preset Use this case, the following operations, set the operation mode selector on the remote control to FSOURCE and then press 3TUNER. model only) To store a sub-audio program of the 5 preset station groups). In this feature to... 1 F M 8 8 . 9 M H z MEMORY AUTO MEMORY Flashes When automatic preset tuning is cleared when you want to store the sub-audio programs of received stations does not reach 40 (E8), automatic preset tuning automatically stops after you can use the automatic preset tuning feature to store up to 40...
...stations, preset the stations manually. ■ Manual station preset Use this case, the following operations, set the operation mode selector on the remote control to FSOURCE and then press 3TUNER. model only) To store a sub-audio program of the 5 preset station groups). In this feature to... 1 F M 8 8 . 9 M H z MEMORY AUTO MEMORY Flashes When automatic preset tuning is cleared when you want to store the sub-audio programs of received stations does not reach 40 (E8), automatic preset tuning automatically stops after you can use the automatic preset tuning feature to store up to 40...

Owner's Manual
Page 55
... and the time period. • For the best reception, adjust the orientation of receiving both audio and data (such as follows. Lights up to 8 HD Radio programs multicast on the remote control to tag is displayed. BASIC OPERATION Using HD Radio™ features (U.S.A. Before performing the...; In addition, this unit is in the GUI screen. The audio programs from HD2 to HD8 can receive both hybrid and all -digital FM station signals and the automatic tuning operation may not contain data programs depending on the remote control to broadcast programs digitally.
... and the time period. • For the best reception, adjust the orientation of receiving both audio and data (such as follows. Lights up to 8 HD Radio programs multicast on the remote control to tag is displayed. BASIC OPERATION Using HD Radio™ features (U.S.A. Before performing the...; In addition, this unit is in the GUI screen. The audio programs from HD2 to HD8 can receive both hybrid and all -digital FM station signals and the automatic tuning operation may not contain data programs depending on the remote control to broadcast programs digitally.


