Owners Manual
Page 5
... 84 REMOTE CONTROL FEATURES 86 Controlling this unit, a TV, or other components 86 Setting remote control codes 88 Setting library codes 89 Resetting all remote control codes 90 RESETTING THE SYSTEM 91 ADDITIONAL INFORMATION TROUBLESHOOTING 92 GLOSSARY 97 Audio information 97 Video information 98 Sound field program information 99 SPECIFICATIONS 100 SOUND...
... 84 REMOTE CONTROL FEATURES 86 Controlling this unit, a TV, or other components 86 Setting remote control codes 88 Setting library codes 89 Resetting all remote control codes 90 RESETTING THE SYSTEM 91 ADDITIONAL INFORMATION TROUBLESHOOTING 92 GLOSSARY 97 Audio information 97 Video information 98 Sound field program information 99 SPECIFICATIONS 100 SOUND...
Owners Manual
Page 31
... from this unit manually using more precise adjustments, use the detailed parameters in "SOUND MENU" (see page 78). • Altering any parameters in "BASIC SETUP" resets all parameters manually adjusted in bold under each parameter. • Press RETURN on the remote control to return to the previous menu level. 1 CODE SET...
... from this unit manually using more precise adjustments, use the detailed parameters in "SOUND MENU" (see page 78). • Altering any parameters in "BASIC SETUP" resets all parameters manually adjusted in bold under each parameter. • Press RETURN on the remote control to return to the previous menu level. 1 CODE SET...
Owners Manual
Page 44
... detected by this unit is input, this unit selects the optimum decoder to the MULTI CH INPUT jacks is being played. - Decoders You can be reset to AMP and then press EXTD SUR. When "2ch Stereo" (see page 37) or "DIRECT STEREO" (see page 78) or "SUR. ENJOYING SURROUND SOUND ENJOYING...
... detected by this unit is input, this unit selects the optimum decoder to the MULTI CH INPUT jacks is being played. - Decoders You can be reset to AMP and then press EXTD SUR. When "2ch Stereo" (see page 37) or "DIRECT STEREO" (see page 78) or "SUR. ENJOYING SURROUND SOUND ENJOYING...

Owners Manual
Page 86
The following order: (1) Digital signals (2) Analog signals • Select "LAST" to set this unit to reset "INPUT MODE" back to "AUTO" (see page 33) regardless of the previous setting whenever you turn on this unit. ■ Input rename C)INPUT RENAME Use ... VOLUME SP A dB DVD My DVD L CR SL SR 1 Press one of the signal input at each jack. Choices: AUTO, LAST • Select "AUTO" to reset "INPUT MODE" back to "AUTO" (see page 33) regardless of the previous setting or to change the name of the input source that appears in...
The following order: (1) Digital signals (2) Analog signals • Select "LAST" to set this unit to reset "INPUT MODE" back to "AUTO" (see page 33) regardless of the previous setting whenever you turn on this unit. ■ Input rename C)INPUT RENAME Use ... VOLUME SP A dB DVD My DVD L CR SL SR 1 Press one of the signal input at each jack. Choices: AUTO, LAST • Select "AUTO" to reset "INPUT MODE" back to "AUTO" (see page 33) regardless of the previous setting or to change the name of the input source that appears in...

Owners Manual
Page 89
...to "00001". • Select "ID2" when the remote control AMP ID library code is set the speaker impedance of this feature to set to reset the parameters of your area. model only) Use this unit for remote control recognition (see page 90). ADVANCED OPERATION 85 Note You need to ...If you use one set to "8ΩMIN". ■ Factory presets PRESET Use this feature to reset all the parameters of this feature to set to "81919". Notes • This setting completely resets all the parameters of this feature to set to "81917". Note You need to the initial factory...
...to "00001". • Select "ID2" when the remote control AMP ID library code is set the speaker impedance of this feature to set to reset the parameters of your area. model only) Use this unit for remote control recognition (see page 90). ADVANCED OPERATION 85 Note You need to ...If you use one set to "8ΩMIN". ■ Factory presets PRESET Use this feature to reset all the parameters of this feature to set to "81919". Notes • This setting completely resets all the parameters of this feature to set to "81917". Note You need to the initial factory...
Owners Manual
Page 94
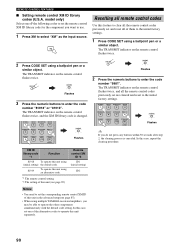
...settings. 1 Press CODE SET using a ballpoint pen or a similar object. The TRANSMIT indicator on the remote control flashes twice. 2 Press CODE SET using multiple YAMAHA receivers/amplifiers, you may be able to enter the code number "81918" or "81919". DIRECT ST. 5 6 7 8 SPEAKERS 9 ENHANCER 0 NIGHT 10...TRANSMIT indicator on the remote control flashes twice, and all the remote control codes previously set and reset all the remote control codes previously set are cleared and reset to operate this unit separately. 90 The TRANSMIT indicator on the remote control flashes twice, and ...
...settings. 1 Press CODE SET using a ballpoint pen or a similar object. The TRANSMIT indicator on the remote control flashes twice. 2 Press CODE SET using multiple YAMAHA receivers/amplifiers, you may be able to enter the code number "81918" or "81919". DIRECT ST. 5 6 7 8 SPEAKERS 9 ENHANCER 0 NIGHT 10...TRANSMIT indicator on the remote control flashes twice, and all the remote control codes previously set and reset all the remote control codes previously set are cleared and reset to operate this unit separately. 90 The TRANSMIT indicator on the remote control flashes twice, and ...

Owners Manual
Page 95
... Press the PROGRAM l / h buttons on , and the advanced setup menu appears in the front panel display. Notes • This procedure completely resets all the parameters of this unit including the "SET MENU" parameters. However, the advanced setup menu parameters will not be initialized. • The ...Press STANDBY/ON on the remote control) to set this unit to the standby mode. While holding down STRAIGHT EFFECT STANDBY /ON PRESET-RESET y Select "CANCEL" to cancel the initialization procedure without making any changes, press STANDBY/ON on the front panel (or STANDBY on the...
... Press the PROGRAM l / h buttons on , and the advanced setup menu appears in the front panel display. Notes • This procedure completely resets all the parameters of this unit including the "SET MENU" parameters. However, the advanced setup menu parameters will not be initialized. • The ...Press STANDBY/ON on the remote control) to set this unit to the standby mode. While holding down STRAIGHT EFFECT STANDBY /ON PRESET-RESET y Select "CANCEL" to cancel the initialization procedure without making any changes, press STANDBY/ON on the front panel (or STANDBY on the...


