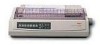
User Guide
Page 4
... you 're following the operating instructions. 4 Microline 420/421 User's Guide Do not touch the printhead until it . • Do not poke anything happens that indicates that your printer serviced. Use only a damp cloth. Do not use your printer from the routine maintenance described in the document. Do not spill liquid of any adjustments other hazards. Don't make sure no openings on or near water...
... you 're following the operating instructions. 4 Microline 420/421 User's Guide Do not touch the printhead until it . • Do not poke anything happens that indicates that your printer serviced. Use only a damp cloth. Do not use your printer from the routine maintenance described in the document. Do not spill liquid of any adjustments other hazards. Don't make sure no openings on or near water...
User Guide
Page 5
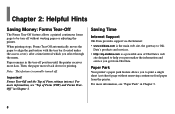
Contents Safety 3 Chapter 1: Introduction 7 Printer Features 7 Chapter 2: Helpful Hints 8 Saving Money: Forms Tear-Off 8 Saving Time 8 Internet Support 8 Paper Park 8 Operation Tips 9 Top of Form (TOF 9 Turning the Platen Knob 9 Controlling Access to the Printer 9 Chapter 3: Using Your Printer 10 Parts Identification: Rear Feed (Continuous Forms 10 Parts Identification: Top Feed (Single Sheets 11 Top of Form (TOF 12 Top of Form (TOF) and Forms Tear-Off 12...
Contents Safety 3 Chapter 1: Introduction 7 Printer Features 7 Chapter 2: Helpful Hints 8 Saving Money: Forms Tear-Off 8 Saving Time 8 Internet Support 8 Paper Park 8 Operation Tips 9 Top of Form (TOF 9 Turning the Platen Knob 9 Controlling Access to the Printer 9 Chapter 3: Using Your Printer 10 Parts Identification: Rear Feed (Continuous Forms 10 Parts Identification: Top Feed (Single Sheets 11 Top of Form (TOF 12 Top of Form (TOF) and Forms Tear-Off 12...
User Guide
Page 6
...Menu Mode 26 Resetting the Menu to the Factory Defaults 26 Printing the Menu Settings 26 Changing the Menu Settings 27 Menu Settings Table 28 Explanations of Menu Items 35 Chapter 5: Maintenance 42 Replacing the Ribbon Cartridge 42 Loading Paper 44 Rear Feed 44 Top Feed (Single Sheets 53 Clearing Paper Jams 55 Rear-Feed Paper Jams 55 Rear-Feed, Repeating Paper Jams 56 Single-Sheet Paper Jams 58 Cleaning the Housing 59 Chapter 6: Troubleshooting 60 General Information 60 Problems / Solutions 61 Appendix A: Parts & Accessories 66 Purchasing Parts & Accessories 66 Replacement...
...Menu Mode 26 Resetting the Menu to the Factory Defaults 26 Printing the Menu Settings 26 Changing the Menu Settings 27 Menu Settings Table 28 Explanations of Menu Items 35 Chapter 5: Maintenance 42 Replacing the Ribbon Cartridge 42 Loading Paper 44 Rear Feed 44 Top Feed (Single Sheets 53 Clearing Paper Jams 55 Rear-Feed Paper Jams 55 Rear-Feed, Repeating Paper Jams 56 Single-Sheet Paper Jams 58 Cleaning the Housing 59 Chapter 6: Troubleshooting 60 General Information 60 Problems / Solutions 61 Appendix A: Parts & Accessories 66 Purchasing Parts & Accessories 66 Replacement...
User Guide
Page 8
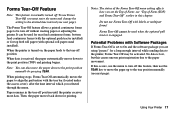
... menu. Important! Saving Time Internet Support Oki Data provides support via the Internet: • www.okidata.com is the main web site, the gateway to Oki Data's products and services. • http://my.okidata.com is normally turned off. Paper remains in the tear-off position until the printer receives more information, see "Top of Form settings interact. Then, the paper moves back down for printing. Paper Park Your printer's paper...
... menu. Important! Saving Time Internet Support Oki Data provides support via the Internet: • www.okidata.com is the main web site, the gateway to Oki Data's products and services. • http://my.okidata.com is normally turned off. Paper remains in the tear-off position until the printer receives more information, see "Top of Form settings interact. Then, the paper moves back down for printing. Paper Park Your printer's paper...
User Guide
Page 17
... is turned on, the paper feeds to the tear-off position. When the printer is normally turned off without wasting paper or adjusting the printer. Then, the paper moves back down to the print position (TOF) and printing begins. Potential Problems with the tear bar (located under the access cover), after the time interval which you are using "pauses" for a long enough interval while sending data to the print position manually...
... is turned on, the paper feeds to the tear-off position. When the printer is normally turned off without wasting paper or adjusting the printer. Then, the paper moves back down to the print position (TOF) and printing begins. Potential Problems with the tear bar (located under the access cover), after the time interval which you are using "pauses" for a long enough interval while sending data to the print position manually...
User Guide
Page 18
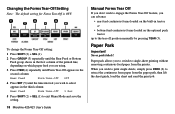
... (1) to exit Menu Mode and save the setting. 18 Microline 420/421 User's Guide Manual Forms Tear Off If you don't wish to engage the Forms Tear-Off feature, you to switch to single-sheet printing without removing continuous feed paper from the paper path, then lift the sheet guide, load the sheet and send the print job. Never park labels! Changing the Forms Tear-Off Setting Note: The default setting for Forms Tear...
... (1) to exit Menu Mode and save the setting. 18 Microline 420/421 User's Guide Manual Forms Tear Off If you don't wish to engage the Forms Tear-Off feature, you to switch to single-sheet printing without removing continuous feed paper from the paper path, then lift the sheet guide, load the sheet and send the print job. Never park labels! Changing the Forms Tear-Off Setting Note: The default setting for Forms Tear...

User Guide
Page 24
.... The following line prints: Printer Control Emulation Mode IBM PPR 4 Press TEAR (4) repeatedly until the emulation you reset (reinitialize) the printer. For information on resetting the printer to the factory defaults, see "Resetting the Menu to the Factory Defaults" later in the right-hand column. 5 Press and hold SHIFT (2), then press SEL (1) to save your setting and exit the Menu Mode. 24 Microline 420/421 User's Guide Printer Reset Clearing some error conditions requires...
.... The following line prints: Printer Control Emulation Mode IBM PPR 4 Press TEAR (4) repeatedly until the emulation you reset (reinitialize) the printer. For information on resetting the printer to the factory defaults, see "Resetting the Menu to the Factory Defaults" later in the right-hand column. 5 Press and hold SHIFT (2), then press SEL (1) to save your setting and exit the Menu Mode. 24 Microline 420/421 User's Guide Printer Reset Clearing some error conditions requires...

User Guide
Page 35
... is installed. Auto LF, Default = No If your system's transmission speed. Baud Rate, Default = 9600 bps Appears only if optional Serial Interface is consistently double spaced, select No; Set this setting to 7 if your system uses pin 14 of the parallel interface to control automatic line feed, change the setting to Yes. Auto CR, Default =No IBM emulation only. If you can control automatic line feed. Mode Menu 35 Some interface cables...
... is installed. Auto LF, Default = No If your system's transmission speed. Baud Rate, Default = 9600 bps Appears only if optional Serial Interface is consistently double spaced, select No; Set this setting to 7 if your system uses pin 14 of the parallel interface to control automatic line feed, change the setting to Yes. Auto CR, Default =No IBM emulation only. If you can control automatic line feed. Mode Menu 35 Some interface cables...
User Guide
Page 38
... turning on a page. Operator Panel Function, Default = Full Operation Change to Limited Operation to deactivate the PRINT QUALITY and CHARACTER PITCH buttons, so that these from being changed from the software. • Buffer Print: prints out the buffer contents before resetting. • Buffer Clear: dumps the buffer contents immediately. • Invalid: causes the printer to keep track of the paper you are using the printer. To access the Menu in foreign languages. This enables the printer...
... turning on a page. Operator Panel Function, Default = Full Operation Change to Limited Operation to deactivate the PRINT QUALITY and CHARACTER PITCH buttons, so that these from being changed from the software. • Buffer Print: prints out the buffer contents before resetting. • Buffer Clear: dumps the buffer contents immediately. • Invalid: causes the printer to keep track of the paper you are using the printer. To access the Menu in foreign languages. This enables the printer...

User Guide
Page 39
... data. Parity, Default = None Appears only when the optional Serial Interface is installed. Mode Menu 39 Change to 8" if you wish to +5 volts or open. This prevents printing on narrow paper. Change to 13.6" to print on pin 18 to prevent the printer from entering the Power Save mode after the selected interval. Selects the type of the page. Pin 18, Default = +5V Sets the signal on wide paper. Pitch, Default...
... data. Parity, Default = None Appears only when the optional Serial Interface is installed. Mode Menu 39 Change to 8" if you wish to +5 volts or open. This prevents printing on narrow paper. Change to 13.6" to print on pin 18 to prevent the printer from entering the Power Save mode after the selected interval. Selects the type of the page. Pin 18, Default = +5V Sets the signal on wide paper. Pitch, Default...

User Guide
Page 40
... printing one document and switch to X-ON / X-Off if that is installed. Note: This will tie up your system uses the DC1 and DC3 codes for 10 cpi and the SI command is installed. Reset Inhibit, Default = No Select Yes if you wish the printer to 7 Bits if you make through the front panel controls or through printer commands. This prevents your software from changing the settings...
... printing one document and switch to X-ON / X-Off if that is installed. Note: This will tie up your system uses the DC1 and DC3 codes for 10 cpi and the SI command is installed. Reset Inhibit, Default = No Select Yes if you wish the printer to 7 Bits if you make through the front panel controls or through printer commands. This prevents your software from changing the settings...

User Guide
Page 55
Make sure the printer is turned off the printer. 2 Use the platen knob to back the paper all the way out of paper. 5 Lift the sheet guide (1) and reload paper. Maintenance 55 Remove any torn pieces of the printer. Make sure you open the access cover. 3 Open the access cover (1) and remove the pull-up roller assembly and close the access cover. 6 Turn on the printer and press FF/LOAD. Clearing Paper Jams Rear-Feed Paper Jams 1 Turn off before you lock the tractor covers. 5 Lower the sheet guide, then install the pull-up roller assembly (2). CAUTION!
Make sure the printer is turned off the printer. 2 Use the platen knob to back the paper all the way out of paper. 5 Lift the sheet guide (1) and reload paper. Maintenance 55 Remove any torn pieces of the printer. Make sure you open the access cover. 3 Open the access cover (1) and remove the pull-up roller assembly and close the access cover. 6 Turn on the printer and press FF/LOAD. Clearing Paper Jams Rear-Feed Paper Jams 1 Turn off before you lock the tractor covers. 5 Lower the sheet guide, then install the pull-up roller assembly (2). CAUTION!

User Guide
Page 56
... paper, leaving a new, clean, square-cut edge. 4 Reload the paper and turn the printer back on the sheet guide (4) and lift it off the printer. 56 Microline 420/421 User's Guide Then grasp the tabs (3) on . CAUTION! Bits of Paper Stuck in the paper path Defective Paper Replace the paper with a fresh stack. Rear-Feed, Repeating Paper Jams If the paper keeps jamming, you open the access cover. 3 Open the access cover (1) and remove the pull up roller assembly (2). Misaligned Paper 1 Turn...
... paper, leaving a new, clean, square-cut edge. 4 Reload the paper and turn the printer back on the sheet guide (4) and lift it off the printer. 56 Microline 420/421 User's Guide Then grasp the tabs (3) on . CAUTION! Bits of Paper Stuck in the paper path Defective Paper Replace the paper with a fresh stack. Rear-Feed, Repeating Paper Jams If the paper keeps jamming, you open the access cover. 3 Open the access cover (1) and remove the pull up roller assembly (2). Misaligned Paper 1 Turn...

User Guide
Page 57
Then, load it on and press FF/LOAD. Then, use the platen knob to back the paper out. 10 Turn the printer on the tractors and close and lock the covers. 8 Load regular paper, close and lock the tractor covers. 9 Install the sheet guide, then install the pull-up roller assembly and close the access cover. 6 Use the platen knob to make a page four sheets thick. Maintenance 57 This brings out jammed pieces of paper. 5 Fold some continuous-form paper over three times to draw the quadruple-thick page around the platen. 4 Remove any torn pieces of paper. 7 Remove the paper pieces.
Then, load it on and press FF/LOAD. Then, use the platen knob to back the paper out. 10 Turn the printer on the tractors and close and lock the covers. 8 Load regular paper, close and lock the tractor covers. 9 Install the sheet guide, then install the pull-up roller assembly and close the access cover. 6 Use the platen knob to make a page four sheets thick. Maintenance 57 This brings out jammed pieces of paper. 5 Fold some continuous-form paper over three times to draw the quadruple-thick page around the platen. 4 Remove any torn pieces of paper. 7 Remove the paper pieces.
User Guide
Page 61
... the reset code, enter the Menu Mode, go to the Parallel Interface group and change the setting for I Prime to Yes. Solution Check the power cord connection to the outlet and to the printer. Problem Nothing happens when I turn on changing menu settings, see "Changing the Menu Settings" in your software application can override settings in Chapter 4. Troubleshooting 61 The I-Prime signal will automatically override any settings from the printer menu or printer front panel. Solution...
... the reset code, enter the Menu Mode, go to the Parallel Interface group and change the setting for I Prime to Yes. Solution Check the power cord connection to the outlet and to the printer. Problem Nothing happens when I turn on changing menu settings, see "Changing the Menu Settings" in your software application can override settings in Chapter 4. Troubleshooting 61 The I-Prime signal will automatically override any settings from the printer menu or printer front panel. Solution...

User Guide
Page 62
... print a line showing the emulation you have selected. 2 If you entered them correctly. 62 Microline 420/421 User's Guide Problem The printer does not print when the computer sends data. If not, press the SEL key. 2 Check that the interface cable is securely connected to both the printer and the computer. 3 If you have the optional serial interface board installed, check to print a document. Solutions 1 Is the SEL light...
... print a line showing the emulation you have selected. 2 If you entered them correctly. 62 Microline 420/421 User's Guide Problem The printer does not print when the computer sends data. If not, press the SEL key. 2 Check that the interface cable is securely connected to both the printer and the computer. 3 If you have the optional serial interface board installed, check to print a document. Solutions 1 Is the SEL light...

User Guide
Page 92
... example, the following line of the compatible drivers listed below in your software application. 92 Microline 420/421 User's Guide The Oki driver for your printer is loaded. 2 Turn off , then on again. Printer Drivers Note: In the ASCII format, all data received, including text and printer commands, is an example of the other emulations, see "Changing Emulations" in Chapter 3. Hexadecimal Dump Mode When the printer is placed in...
... example, the following line of the compatible drivers listed below in your software application. 92 Microline 420/421 User's Guide The Oki driver for your printer is loaded. 2 Turn off , then on again. Printer Drivers Note: In the ASCII format, all data received, including text and printer commands, is an example of the other emulations, see "Changing Emulations" in Chapter 3. Hexadecimal Dump Mode When the printer is placed in...

User Guide
Page 93
USB Interface 1 Turn the printer on -screen instructions. The drivers below are listed by decreasing compatibility with your software documentation for your CD-ROM drive. Use one as close to your CD-ROM drive, double-click Install.exe and click OK. 2 Select your printer model. 3 When the Menu Installer window appears, click the Printer Software button. 4 Follow the on . Using a Compatible Driver Note: See your printer. The Windows Add New Hardware Wizard window displays. 2 Click Next. 3 Insert the CD into your printer model. IBM...
USB Interface 1 Turn the printer on -screen instructions. The drivers below are listed by decreasing compatibility with your software documentation for your CD-ROM drive. Use one as close to your CD-ROM drive, double-click Install.exe and click OK. 2 Select your printer model. 3 When the Menu Installer window appears, click the Printer Software button. 4 Follow the on . Using a Compatible Driver Note: See your printer. The Windows Add New Hardware Wizard window displays. 2 Click Next. 3 Insert the CD into your printer model. IBM...

User Guide
Page 95
..., 82 Language 28 Length, Page Rear Feed 29 Top Feed 30 Limited Operation 9, 38, 65 Line Spacing 38 Bottom Feed 29 Rear Feed 29 Top Feed 30 M Margin, Bottom 30, 36 Mean Time Between Failures (MTBF) .. 78 Mean Time to Repair (MTTR 78 Memory, Receive Buffer Size 78 MENU light 25 Menu Mode 25 Changing Settings 27 Entering 26 Exiting 26 Front Panel keys 25 Printing the Menu Settings 26 Reset to factory defaults 26 Settings Table 28...
..., 82 Language 28 Length, Page Rear Feed 29 Top Feed 30 Limited Operation 9, 38, 65 Line Spacing 38 Bottom Feed 29 Rear Feed 29 Top Feed 30 M Margin, Bottom 30, 36 Mean Time Between Failures (MTBF) .. 78 Mean Time to Repair (MTTR 78 Memory, Receive Buffer Size 78 MENU light 25 Menu Mode 25 Changing Settings 27 Entering 26 Exiting 26 Front Panel keys 25 Printing the Menu Settings 26 Reset to factory defaults 26 Settings Table 28...

User Guide
Page 96
... Paper Jams 64-66 Paper Lever 64 Paper Out 65 Override 30, 39 Paper Park 18 Paper Path, switching 19 Parallel Interface 32 I-PRIME Signal 61 Parts, replacement, purchasing 66 Perforation, skip over 29, 41 Pitch, character 28, 39 PlatenKnob part number 67 Postnet 80 Power rating 3 Print Method 78 Print Mode 28, 40 Print Registration 31, 40 Print Server Option 68 Print Size 79 Print Speed 7, 79 Print Suppress 31, 40 Printer Control Codes...
... Paper Jams 64-66 Paper Lever 64 Paper Out 65 Override 30, 39 Paper Park 18 Paper Path, switching 19 Parallel Interface 32 I-PRIME Signal 61 Parts, replacement, purchasing 66 Perforation, skip over 29, 41 Pitch, character 28, 39 PlatenKnob part number 67 Postnet 80 Power rating 3 Print Method 78 Print Mode 28, 40 Print Registration 31, 40 Print Server Option 68 Print Size 79 Print Speed 7, 79 Print Suppress 31, 40 Printer Control Codes...


