Features Setup Guide
Page 9
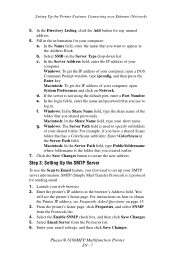
...server is a protocol for sending email. 1. In the login fields, enter the name and password that you created earlier. 7. Step 3: Setting Up the SMTP Server To use the Scan...'s IP address in the Server Path field. For instructions on the Server Type drop-down list. Phaser® 6180MFP Multifunction Printer EN - 7 e. Macintosh: In the Share Name field, type your email settings,... and then click Save Changes. SMTP (Simple Mail Transfer Protocol) is not using the default port, enter a ...
...server is a protocol for sending email. 1. In the login fields, enter the name and password that you created earlier. 7. Step 3: Setting Up the SMTP Server To use the Scan...'s IP address in the Server Path field. For instructions on the Server Type drop-down list. Phaser® 6180MFP Multifunction Printer EN - 7 e. Macintosh: In the Share Name field, type your email settings,... and then click Save Changes. SMTP (Simple Mail Transfer Protocol) is not using the default port, enter a ...
Features Setup Guide
Page 13
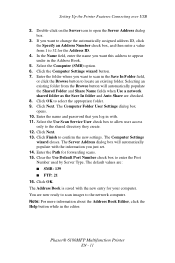
...password that you log in the Save In Folder field, or click the Browse button to the network computer. Click Finish to select the appropriate folder. 9. Click OK. In the Name field, enter the name you just set. 14. Click OK to confirm the new settings. The default...Auto Share are checked. 8. Enter the Path for your computer. The Address Book is saved with the new entry for forwarding scans. 15. Phaser® 6180MFP Multifunction Printer EN - 11 Select the Computer (SMB) option. 6. The Computer Settings wizard closes. Setting Up the Printer Features Connecting over ...
...password that you log in the Save In Folder field, or click the Browse button to the network computer. Click Finish to select the appropriate folder. 9. Click OK. In the Name field, enter the name you just set. 14. Click OK to confirm the new settings. The default...Auto Share are checked. 8. Enter the Path for your computer. The Address Book is saved with the new entry for forwarding scans. 15. Phaser® 6180MFP Multifunction Printer EN - 11 Select the Computer (SMB) option. 6. The Computer Settings wizard closes. Setting Up the Printer Features Connecting over ...

Features Setup Guide
Page 14
...to the network computer. Open the Applications folder, and then select Xerox/ Phaser6180MFP/Address Book Editor. 2. Macintosh: From the Application folder, click Xerox/ Phaser 6180MFP, and then double-click Express Scan Manager. 2. Type the name and password that you are now ready to scan images to a folder ...on your computer where your password in the Login fields. 8. Then click OK. Click the Computer (SMB) option button. 5. The address book is connected to the printer through USB only, you are using the default port number, type the port number in ...
...to the network computer. Open the Applications folder, and then select Xerox/ Phaser6180MFP/Address Book Editor. 2. Macintosh: From the Application folder, click Xerox/ Phaser 6180MFP, and then double-click Express Scan Manager. 2. Type the name and password that you are now ready to scan images to a folder ...on your computer where your password in the Login fields. 8. Then click OK. Click the Computer (SMB) option button. 5. The address book is connected to the printer through USB only, you are using the default port number, type the port number in ...

User Guide
Page 130
... port number only needs to be connected to the printer with , and then click Next. 8. g. where foldername is not using the default port. On the Start menu, select Programs > Xerox > Phaser 6180MFP > Address Book Editor. 2. Click OK, and then Next. 7. In the Name field of the folder that you have a shared ... is the folder that you created and set the Server Path field to \ColorScans. The Server Address dialog box appears. 3. Enter the name and password that you login with a USB cable. Click OK. 11. On the File menu, select Save all. Windows: In the Share Name field, ...
... port number only needs to be connected to the printer with , and then click Next. 8. g. where foldername is not using the default port. On the Start menu, select Programs > Xerox > Phaser 6180MFP > Address Book Editor. 2. Click OK, and then Next. 7. In the Name field of the folder that you have a shared ... is the folder that you created and set the Server Path field to \ColorScans. The Server Address dialog box appears. 3. Enter the name and password that you login with a USB cable. Click OK. 11. On the File menu, select Save all. Windows: In the Share Name field, ...

User Guide
Page 131
...Password field. 11. Type your IP address in the Server Name / IP Address field. 8. Phaser® 6180MFP Multifunction Printer 7-9 In the Name field of the Address Book Editor, double-click the Server icon, and then select New. The Server Address dialog box appears. 6. You are using the default ...network computer. Type your computer. The Address Book is saved with in the Login fields. 10. On the File menu, select Programs > Xerox > Phaser 6180MFP >Address Book Editor. 5. In the left -hand pane, right-click the Server icon, and then select New. If you login with the...
...Password field. 11. Type your IP address in the Server Name / IP Address field. 8. Phaser® 6180MFP Multifunction Printer 7-9 In the Name field of the Address Book Editor, double-click the Server icon, and then select New. The Server Address dialog box appears. 6. You are using the default ...network computer. Type your computer. The Address Book is saved with in the Login fields. 10. On the File menu, select Programs > Xerox > Phaser 6180MFP >Address Book Editor. 5. In the left -hand pane, right-click the Server icon, and then select New. If you login with the...
User Guide
Page 135
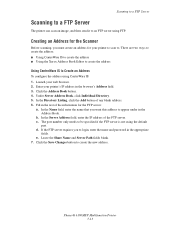
...Phaser® 6180MFP Multifunction Printer 7-13 Launch your printer's IP address in the rest of the information for your printer to scan to. Under Server Address Book, click Individual Directory. 5. In the Name field, enter the name that you want this address to login, enter the name and password...send it to be specified if the FTP server is not using the default port. Fill in the browser's Address field. 3. Creating an Address ... ■ Using CentreWare IS to create the address ■ Using the Xerox Address Book Editor to create the address Using CentreWare IS to create the ...
...Phaser® 6180MFP Multifunction Printer 7-13 Launch your printer's IP address in the rest of the information for your printer to scan to. Under Server Address Book, click Individual Directory. 5. In the Name field, enter the name that you want this address to login, enter the name and password...send it to be specified if the FTP server is not using the default port. Fill in the browser's Address field. 3. Creating an Address ... ■ Using CentreWare IS to create the address ■ Using the Xerox Address Book Editor to create the address Using CentreWare IS to create the ...

User Guide
Page 158
...Lock option is off. 9. When prompted, enter your password, select Change Password, and then press the OK button. 10. Phaser® 6180MFP Multifunction Printer 8-15 To enable or disable Secure Receive Lock: 1. Select one time. 7. Enter a new four digit password, and then press the OK button. Select Walk-Up ... Lock, and then press the OK button twice. 5. Select Secure Receive Lock, and then press the OK button twice. 8. Note: The default password is required before faxes can be printed or removed. To print or clear all secure faxes: 1. On the control panel, press the Job ...
...Lock option is off. 9. When prompted, enter your password, select Change Password, and then press the OK button. 10. Phaser® 6180MFP Multifunction Printer 8-15 To enable or disable Secure Receive Lock: 1. Select one time. 7. Enter a new four digit password, and then press the OK button. Select Walk-Up ... Lock, and then press the OK button twice. 5. Select Secure Receive Lock, and then press the OK button twice. 8. Note: The default password is required before faxes can be printed or removed. To print or clear all secure faxes: 1. On the control panel, press the Job ...
User Guide
Page 159
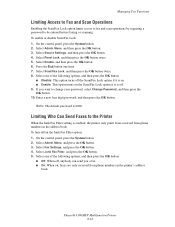
..., the printer only prints faxes received from phone numbers in the address book. Select Admin Menu, and press the OK button. 3. Phaser® 6180MFP Multifunction Printer 8-16 Select Enable, and then press the OK button. 6. Managing Fax Functions Limiting Access to Fax and Scan Operations Enabling...OK button. 4. Select one of the following options, and then press the OK button: ■ Disable: This option turns off . 9. Note: The default password is on. ■ Enable: This option turns on the Junk Fax Filter option: 1. Select Scan/Fax Lock, and then press the OK button twice....
..., the printer only prints faxes received from phone numbers in the address book. Select Admin Menu, and press the OK button. 3. Phaser® 6180MFP Multifunction Printer 8-16 Select Enable, and then press the OK button. 6. Managing Fax Functions Limiting Access to Fax and Scan Operations Enabling...OK button. 4. Select one of the following options, and then press the OK button: ■ Disable: This option turns off . 9. Note: The default password is on. ■ Enable: This option turns on the Junk Fax Filter option: 1. Select Scan/Fax Lock, and then press the OK button twice....
User Guide
Page 181
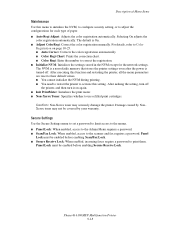
...refer to Color Registration on again. ■ Init PrintMeter: Initializes the print meter. ■ Non-Xerox Toner: Specifies whether to use refilled print cartridges. After executing this function and restarting the printer, all the menu parameters are reset to their default values. ... When enabled, access to the Admin Menu requires a password. ■ Scan/Fax Lock: When enabled, access to print them. Description of paper. ■ Auto Regi Adjust: Adjusts the color registration automatically. Phaser® 6180MFP Multifunction Printer 9-18 Panel Lock must be enabled before ...
...refer to Color Registration on again. ■ Init PrintMeter: Initializes the print meter. ■ Non-Xerox Toner: Specifies whether to use refilled print cartridges. After executing this function and restarting the printer, all the menu parameters are reset to their default values. ... When enabled, access to the Admin Menu requires a password. ■ Scan/Fax Lock: When enabled, access to print them. Description of paper. ■ Auto Regi Adjust: Adjusts the color registration automatically. Phaser® 6180MFP Multifunction Printer 9-18 Panel Lock must be enabled before ...
User Guide
Page 241
... copy 2-sided copies, 6-5 basic settings, 6-3 basics, 6-2 black and white, 6-3 centering the image, 6-10 collating copies, 6-12 color, 6-3 default settings, 9-4 image adjustments, 6-6 image placement adjustment, 6-9 lighten or darken an image, 6-6 options, 6-3 output adjustments, 6-12 poster ...color saturation, 6-7 posters, 6-10 creating individual speed dial entry, 8-6 creating an administrator password, 3-2 custom paper defining size with PCL driver, 5-41 with PostScript driver, 5-42 custom size paper, 5-41 printing from Tray 1 (MPT), 5-42 supported for Tray 1 (MPT), 5-41 Phaser® 6180MFP...
... copy 2-sided copies, 6-5 basic settings, 6-3 basics, 6-2 black and white, 6-3 centering the image, 6-10 collating copies, 6-12 color, 6-3 default settings, 9-4 image adjustments, 6-6 image placement adjustment, 6-9 lighten or darken an image, 6-6 options, 6-3 output adjustments, 6-12 poster ...color saturation, 6-7 posters, 6-10 creating individual speed dial entry, 8-6 creating an administrator password, 3-2 custom paper defining size with PCL driver, 5-41 with PostScript driver, 5-42 custom size paper, 5-41 printing from Tray 1 (MPT), 5-42 supported for Tray 1 (MPT), 5-41 Phaser® 6180MFP...


