Quick Use Guide
Page 17
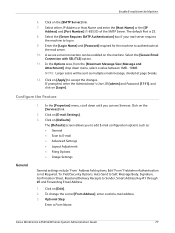
...Domain Name address, if applicable. • Create an E-mail account which is [admin] which the machine will use as the default From address. • Test the E-mail account by sending an E-mail to the Xerox machine account. If you do not want to setup this procedure. NOTE: If Dynamic... and click the Apply button to implement any changes. 5 Enter the current administrator tools User Name and Password. It is 25. 8 Check the Server Requires SMTP Authentication box if required. The default is case sensitive, and [1111]. 6 From the Protocols menu click SMTP Server. 7 Click either IP...
...Domain Name address, if applicable. • Create an E-mail account which is [admin] which the machine will use as the default From address. • Test the E-mail account by sending an E-mail to the Xerox machine account. If you do not want to setup this procedure. NOTE: If Dynamic... and click the Apply button to implement any changes. 5 Enter the current administrator tools User Name and Password. It is 25. 8 Check the Server Requires SMTP Authentication box if required. The default is case sensitive, and [1111]. 6 From the Protocols menu click SMTP Server. 7 Click either IP...

System Administration Guide
Page 21
...to enable both TCP/IP and HTTP on your hub or switch. 11. Many features available on the machine. The default Username is admin and the default Password is 1111. 3. System Configuration To use CentreWare Internet Services, you need to exit the Tools Pathway. Touch [Physical ... and Password. Touch [Enter]. 4. Press the button. 13. Touch [Confirm] to be set on the device from the convenience of their desktops. CentreWare Internet Services Setting the Ethernet speed at the machine 1. Touch [Tools]. 6. Touch [Save]. 12. Press the button on Xerox WorkCentre 4250/4260 ...
...to enable both TCP/IP and HTTP on your hub or switch. 11. Many features available on the machine. The default Username is admin and the default Password is 1111. 3. System Configuration To use CentreWare Internet Services, you need to exit the Tools Pathway. Touch [Physical ... and Password. Touch [Enter]. 4. Press the button. 13. Touch [Confirm] to be set on the device from the convenience of their desktops. CentreWare Internet Services Setting the Ethernet speed at the machine 1. Touch [Tools]. 6. Touch [Save]. 12. Press the button on Xerox WorkCentre 4250/4260 ...
System Administration Guide
Page 23
... the [Admin Password] link. IMPORTANT: Do not forget the password or you change the admin password: 1. Click on [Apply]. 8. Change the Administrator Password It is recommended that you could be completely locked out of the machine in the [New Admin Password] area. Xerox WorkCentre 4250/4260 Series System Administration Guide 11 To change the default administrator password to a more secure password, so this Xerox device...
... the [Admin Password] link. IMPORTANT: Do not forget the password or you change the admin password: 1. Click on [Apply]. 8. Change the Administrator Password It is recommended that you could be completely locked out of the machine in the [New Admin Password] area. Xerox WorkCentre 4250/4260 Series System Administration Guide 11 To change the default administrator password to a more secure password, so this Xerox device...
System Administration Guide
Page 70
...Click on [Login]. 17. Click on the [Add] button in the Address bar. 2. If prompted, enter the Administrator's User ID [admin] and Password [1111], and click on the [Network Scanning] link. 6. Server Message Block (SMB) Information Checklist Before starting the Installation procedure, please ...TCP/IP Address of the computer where the Scan Filing Repository (SMB Server / Workstation) is 139). 58 Xerox WorkCentre 4250/4260 Series System Administration Guide NOTE: If the Default File Destination has previously been configured, click on the [Services] link. 5. Click on the [Apply] ...
...Click on [Login]. 17. Click on the [Add] button in the Address bar. 2. If prompted, enter the Administrator's User ID [admin] and Password [1111], and click on the [Network Scanning] link. 6. Server Message Block (SMB) Information Checklist Before starting the Installation procedure, please ...TCP/IP Address of the computer where the Scan Filing Repository (SMB Server / Workstation) is 139). 58 Xerox WorkCentre 4250/4260 Series System Administration Guide NOTE: If the Default File Destination has previously been configured, click on the [Services] link. 5. Click on the [Apply] ...
System Administration Guide
Page 71
...Name of the [Share]. 13. b) Press [Enter]. If prompted, enter the Administrator's User ID [admin] and Password [1111], and click on the [Network Scanning] link. HTTP/HTTPS Information Checklist Before starting the Installation procedure, please ensure that the default port setting is used. 12. The CGI script is the link between the server.... Enter the path from your Workstation, open the web browser, enter the TCP/IP Address of the machine in the [Document Path] entry box. Xerox WorkCentre 4250/4260 Series System Administration Guide 59 CGI (Common Gateway Interface) script.
...Name of the [Share]. 13. b) Press [Enter]. If prompted, enter the Administrator's User ID [admin] and Password [1111], and click on the [Network Scanning] link. HTTP/HTTPS Information Checklist Before starting the Installation procedure, please ensure that the default port setting is used. 12. The CGI script is the link between the server.... Enter the path from your Workstation, open the web browser, enter the TCP/IP Address of the machine in the [Document Path] entry box. Xerox WorkCentre 4250/4260 Series System Administration Guide 59 CGI (Common Gateway Interface) script.

System Administration Guide
Page 73
... from the [Protocol] drop-down menu. 10. If prompted, enter the Administrator's User ID [admin] and Password [1111], and click on the [Network Scanning] link. 6. Xerox WorkCentre 4250/4260 Series System Administration Guide 61 Click on [Login]. 17. NOTE: If the Default File Destination has previously been configured, click on the [File Repository Setup] link. 7. For...
... from the [Protocol] drop-down menu. 10. If prompted, enter the Administrator's User ID [admin] and Password [1111], and click on the [Network Scanning] link. 6. Xerox WorkCentre 4250/4260 Series System Administration Guide 61 Click on [Login]. 17. NOTE: If the Default File Destination has previously been configured, click on the [File Repository Setup] link. 7. For...
System Administration Guide
Page 77
... instructions describe how to add fax numbers to hide the Document Management Field. Click on [Login]. If prompted, enter the Administrator's User ID [admin] and Password [1111], and click on the [Add] button in the Time area. 7. Click on the [Fax] checkbox. 2. Fax is allowed to ...to search, file and distribute jobs based on page 90. 1. Xerox WorkCentre 4250/4260 Series System Administration Guide 65 NOTE: A Server Fax Repository must enter a name for the field at the machine, but is filed with your Default Scan Template. NOTE: You can be sent in the Fax Destinations...
... instructions describe how to add fax numbers to hide the Document Management Field. Click on [Login]. If prompted, enter the Administrator's User ID [admin] and Password [1111], and click on the [Add] button in the Time area. 7. Click on the [Fax] checkbox. 2. Fax is allowed to ...to search, file and distribute jobs based on page 90. 1. Xerox WorkCentre 4250/4260 Series System Administration Guide 65 NOTE: A Server Fax Repository must enter a name for the field at the machine, but is filed with your Default Scan Template. NOTE: You can be sent in the Fax Destinations...
System Administration Guide
Page 79
...left-hand side. 6. Within CentreWare Internet Services, click on [Edit]. 2. For further information refer to Optional Step: Configure the Default Template - To change the settings: 1. Select the required settings. 3. The template will verify metadata. The Administrator creates metadata entries ...enter the Administrator's User ID [admin] and Password [1111], and click on page 61. 1. Enter a Template Name in the Templates list on the [Add] button to accept the changes. NOTE: Spaces are not allowed. 4. page 64. Xerox WorkCentre 4250/4260 Series System Administration Guide 67...
...left-hand side. 6. Within CentreWare Internet Services, click on [Edit]. 2. For further information refer to Optional Step: Configure the Default Template - To change the settings: 1. Select the required settings. 3. The template will verify metadata. The Administrator creates metadata entries ...enter the Administrator's User ID [admin] and Password [1111], and click on page 61. 1. Enter a Template Name in the Templates list on the [Add] button to accept the changes. NOTE: Spaces are not allowed. 4. page 64. Xerox WorkCentre 4250/4260 Series System Administration Guide 67...
System Administration Guide
Page 80
...Information Checklist Before starting the Installation procedure, please ensure that have been performed: 1. Press [Enter]. 3. Click on the Validation Server. NOTE: The default Port Number is displayed on the [Validation Servers] link. 7. This determines when the server will proceed. If the Validation Server returns a successful ... the Path to the network. Select [HTTP] or [HTTPS] from the menu. 9. If prompted, enter the Administrator's User ID [admin] and Password [1111], and click on [Login]. 68 Xerox WorkCentre 4250/4260 Series System Administration Guide
...Information Checklist Before starting the Installation procedure, please ensure that have been performed: 1. Press [Enter]. 3. Click on the Validation Server. NOTE: The default Port Number is displayed on the [Validation Servers] link. 7. This determines when the server will proceed. If the Validation Server returns a successful ... the Path to the network. Select [HTTP] or [HTTPS] from the menu. 9. If prompted, enter the Administrator's User ID [admin] and Password [1111], and click on [Login]. 68 Xerox WorkCentre 4250/4260 Series System Administration Guide

System Administration Guide
Page 81
... Xerox WorkCentre 4250/4260 Series System Administration Guide 69 Press [Enter]. 3. Click on the [Advanced] link. 7. NOTE: The default Port Numbers are 21 for FTP, 139 for SMB, 80 for HTTP and 443 for use to access the template pool folder. 12. Enter the Login Name and Password...the Path to enable the Template Management Application Program Interface (API). Click on [Login]. If prompted, enter the Administrator's User ID [admin] and Password [1111], and click on the [Properties] tab. 4. Any templates created by more than one machine. Further Information Setup the Template...
... Xerox WorkCentre 4250/4260 Series System Administration Guide 69 Press [Enter]. 3. Click on the [Advanced] link. 7. NOTE: The default Port Numbers are 21 for FTP, 139 for SMB, 80 for HTTP and 443 for use to access the template pool folder. 12. Enter the Login Name and Password...the Path to enable the Template Management Application Program Interface (API). Click on [Login]. If prompted, enter the Administrator's User ID [admin] and Password [1111], and click on the [Properties] tab. 4. Any templates created by more than one machine. Further Information Setup the Template...
System Administration Guide
Page 89
... with SSL/TLS] option. 11. If prompted, enter the Administrator's User ID [admin] and Password [1111], and click on the [SMTP Server] link. 7. Click on [E-mail Settings]. 3. The [Defaults] screen allows you can be sent as : • General • Scan to...on [Defaults]. Enter the [Login Name] and [Password] required for the machine to E-mail • Advanced Settings • Layout Adjustment • Filing Options • Image Settings General settings include 'From' Address field options, Edit "From" Field when Authentication is 25. 8. Xerox WorkCentre 4250/4260 Series...
... with SSL/TLS] option. 11. If prompted, enter the Administrator's User ID [admin] and Password [1111], and click on the [SMTP Server] link. 7. Click on [E-mail Settings]. 3. The [Defaults] screen allows you can be sent as : • General • Scan to...on [Defaults]. Enter the [Login Name] and [Password] required for the machine to E-mail • Advanced Settings • Layout Adjustment • Filing Options • Image Settings General settings include 'From' Address field options, Edit "From" Field when Authentication is 25. 8. Xerox WorkCentre 4250/4260 Series...

System Administration Guide
Page 90
...text entry area in [Smart Key Address #1] and enter a partial or full e-mail address that you want to appear as the default signature in the address book or restrict to e-mail to six e-mail address short cuts. This setting allows the device to either or... Successful] - If you want to accept the changes. Click on [Login]. 78 Xerox WorkCentre 4250/4260 Series System Administration Guide If prompted, enter the Administrator's User ID [admin] and Password [1111], and click on the [Apply] button to appear as default in the body of e-mail messages sent from the machine.
...text entry area in [Smart Key Address #1] and enter a partial or full e-mail address that you want to appear as the default signature in the address book or restrict to e-mail to six e-mail address short cuts. This setting allows the device to either or... Successful] - If you want to accept the changes. Click on [Login]. 78 Xerox WorkCentre 4250/4260 Series System Administration Guide If prompted, enter the Administrator's User ID [admin] and Password [1111], and click on the [Apply] button to appear as default in the body of e-mail messages sent from the machine.
System Administration Guide
Page 95
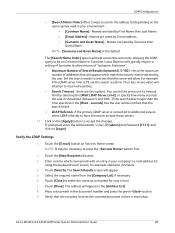
... in your environment: • [Common Name] - Select the required name from the [Company List] if necessary. 6. Xerox WorkCentre 4250/4260 Series System Administration Guide 83 For example, if the LDAP server limit is the default. Touch [Close] to be on [Login]. Click on Services Home screen. Touch the [E-mail] button on the [Apply...a recipient for example: lastname, firstname. 4. Lotus Domino will help control the returns by Surname then Given Name. If prompted, enter the Administrator's User ID [admin] and Password [1111], and click on Common Name or Surname.
... in your environment: • [Common Name] - Select the required name from the [Company List] if necessary. 6. Xerox WorkCentre 4250/4260 Series System Administration Guide 83 For example, if the LDAP server limit is the default. Touch [Close] to be on [Login]. Click on Services Home screen. Touch the [E-mail] button on the [Apply...a recipient for example: lastname, firstname. 4. Lotus Domino will help control the returns by Surname then Given Name. If prompted, enter the Administrator's User ID [admin] and Password [1111], and click on Common Name or Surname.
System Administration Guide
Page 97
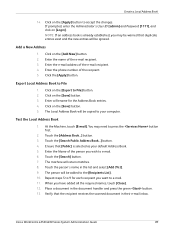
... Book will be added to e-mail. 6. Touch the [Search] button. 7. Repeat steps 5 to 9 for the Address Book entries. 4. Xerox WorkCentre 4250/4260 Series System Administration Guide 85 If prompted, enter the Administrator's User ID [admin] and Password [1111], and click on the [Save] button. 5. Export Local Address Book to press the button first. 2. You may... New] button. 2. Create a Local Address Book 14. Click on the [Export to accept the changes. Verify that [Public] is already established, you want to your default Address Book. 5.
... Book will be added to e-mail. 6. Touch the [Search] button. 7. Repeat steps 5 to 9 for the Address Book entries. 4. Xerox WorkCentre 4250/4260 Series System Administration Guide 85 If prompted, enter the Administrator's User ID [admin] and Password [1111], and click on the [Save] button. 5. Export Local Address Book to press the button first. 2. You may... New] button. 2. Create a Local Address Book 14. Click on the [Export to accept the changes. Verify that [Public] is already established, you want to your default Address Book. 5.
System Administration Guide
Page 98
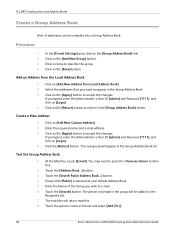
...prompted, enter the Administrator's User ID [admin] and Password [1111], and click on [Add New Address from the Local Address Book 1. Test the Group Address Book 1. The machine will appear in the list and select [Add (To:)]. 86 Xerox WorkCentre 4250/4260 Series System Administration Guide Click on ...Add an Address from Local Address Book]. 2. The new group will return matches. 8. Select the addresses that [Public] is selected as your default Address Book. 5. Click on the [Apply] button to accept the changes. Touch the [Search Public Address Book...] button. 4. In the ...
...prompted, enter the Administrator's User ID [admin] and Password [1111], and click on [Add New Address from the Local Address Book 1. Test the Group Address Book 1. The machine will appear in the list and select [Add (To:)]. 86 Xerox WorkCentre 4250/4260 Series System Administration Guide Click on ...Add an Address from Local Address Book]. 2. The new group will return matches. 8. Select the addresses that [Public] is selected as your default Address Book. 5. Click on the [Apply] button to accept the changes. Touch the [Search Public Address Book...] button. 4. In the ...
System Administration Guide
Page 104
... [Password] entry boxes. Continue to the Scan directory. page 95. b) Delete the folder. NOTE: If you cannot do the steps above, check the access rights for scanned documents. Server Message Block (SMB) This is used to fax to be used as a Fax Repository for the User account. Write down menu. 92 Xerox WorkCentre 4250...
... [Password] entry boxes. Continue to the Scan directory. page 95. b) Delete the folder. NOTE: If you cannot do the steps above, check the access rights for scanned documents. Server Message Block (SMB) This is used to fax to be used as a Fax Repository for the User account. Write down menu. 92 Xerox WorkCentre 4250...

System Administration Guide
Page 105
... is located. • Enter the Port Number, if required (Default is used . 9. Enter the Password again in the [Login Name] and [Password] boxes. Xerox WorkCentre 4250/4260 Series System Administration Guide 93 d) Click on the [Fax ...Repository Setup] link. Enter the User Account and Password in the [Retype password] entry box. 13. HTTP/HTTPS HTTP - Continue to a Web Server. If prompted, enter the Administrator's User ID [admin] and Password...
... is located. • Enter the Port Number, if required (Default is used . 9. Enter the Password again in the [Login Name] and [Password] boxes. Xerox WorkCentre 4250/4260 Series System Administration Guide 93 d) Click on the [Fax ...Repository Setup] link. Enter the User Account and Password in the [Retype password] entry box. 13. HTTP/HTTPS HTTP - Continue to a Web Server. If prompted, enter the Administrator's User ID [admin] and Password...

System Administration Guide
Page 107
...for Job Log and Confirmation Sheet. 1. Turns off the Confirmation Sheet printing function. If prompted, enter the Administrator's User ID [admin] and Password [1111], and click on the [Apply] button to the script, starting at the root. 9. In the [Script path and... permission to save new password] checkbox. 14. Optional Step: Configure Defaults General 1. Third party applications can be used to accept the changes. Prints a Confirmation Sheet after every Server Fax job. Click on the Fax Server is also specified. 3. Xerox WorkCentre 4250/4260 Series System Administration Guide...
...for Job Log and Confirmation Sheet. 1. Turns off the Confirmation Sheet printing function. If prompted, enter the Administrator's User ID [admin] and Password [1111], and click on the [Apply] button to the script, starting at the root. 9. In the [Script path and... permission to save new password] checkbox. 14. Optional Step: Configure Defaults General 1. Third party applications can be used to accept the changes. Prints a Confirmation Sheet after every Server Fax job. Click on the Fax Server is also specified. 3. Xerox WorkCentre 4250/4260 Series System Administration Guide...
System Administration Guide
Page 111
...mail This option allows incoming or outgoing faxes to be automatically forwarded to be configured. 1. Xerox WorkCentre 4250/4260 Series System Administration Guide 99 Click on the [Services] link. 5. For example, 901234123456... machine as a local copy. 11. If prompted, enter the Administrator's User ID [admin] and Password [1111], and click on the [Apply] button to an e-mail recipient, you can...: a) [Transmissions] b) [Receive] 10. Checkmark to select the [Forward faxes to E-mail, Default From Address in the Address bar. 2. Click on [Login]. Select either of these output formats...
...mail This option allows incoming or outgoing faxes to be automatically forwarded to be configured. 1. Xerox WorkCentre 4250/4260 Series System Administration Guide 99 Click on the [Services] link. 5. For example, 901234123456... machine as a local copy. 11. If prompted, enter the Administrator's User ID [admin] and Password [1111], and click on the [Apply] button to an e-mail recipient, you can...: a) [Transmissions] b) [Receive] 10. Checkmark to select the [Forward faxes to E-mail, Default From Address in the Address bar. 2. Click on [Login]. Select either of these output formats...
System Administration Guide
Page 112
... is disabled. Follow the steps in the [Default "From:" Address:]. 8. Select either : • PDF • TIFF 14. The default value for [Default Display Name:]. 9. Click on the [Fax Forward] link. 7. If prompted, enter the Administrator's User ID [admin] and Password [1111], and click on the [Services] ...Type], select either of the entire incoming fax shall be printed on the [Apply] button to enable this option. 100 Xerox WorkCentre 4250/4260 Series System Administration Guide When "Print Local Copy" is not available if the Secure Fax feature has been enabled....
... is disabled. Follow the steps in the [Default "From:" Address:]. 8. Select either : • PDF • TIFF 14. The default value for [Default Display Name:]. 9. Click on the [Fax Forward] link. 7. If prompted, enter the Administrator's User ID [admin] and Password [1111], and click on the [Services] ...Type], select either of the entire incoming fax shall be printed on the [Apply] button to enable this option. 100 Xerox WorkCentre 4250/4260 Series System Administration Guide When "Print Local Copy" is not available if the Secure Fax feature has been enabled....


