
Dimension Guide
Page 1
... 208 volts) require a separate 40-amp circuit. Connect directly to top of cabinet door F. 41-1/4" (104.8 cm) cutout height Because Whirlpool Corporation policy includes a continuous commitment to floor D. 25-1/2" (64.8 cm) cutout width E. 1-1/2" (3.8 cm) min. bottom of cutout ...volts) require a separate 30-amp circuit. Model/serial number plate CABINET OPENING DIMENSIONS Side View A B Cabinet Recessed Oven Oven Front A. 23-1/4" 59.1 cm) min. Ref. Instructions packed with grounding wire). cabinet width B. 1" (2.5 cm) top of cutout to bottom of upper cabinet door C....
... 208 volts) require a separate 40-amp circuit. Connect directly to top of cabinet door F. 41-1/4" (104.8 cm) cutout height Because Whirlpool Corporation policy includes a continuous commitment to floor D. 25-1/2" (64.8 cm) cutout width E. 1-1/2" (3.8 cm) min. bottom of cutout ...volts) require a separate 30-amp circuit. Model/serial number plate CABINET OPENING DIMENSIONS Side View A B Cabinet Recessed Oven Oven Front A. 23-1/4" 59.1 cm) min. Ref. Instructions packed with grounding wire). cabinet width B. 1" (2.5 cm) top of cutout to bottom of upper cabinet door C....

Installation Instructions
Page 1
... read and obey all safety messages. IMPORTANT : À conserver pour consultation par l'inspecteur local des installations électriques. INSTALLATION INSTRUCTIONS 27" (68.6 CM) AND 30" (76.2 CM) ELECTRIC BUILT-IN MICROWAVE/OVEN COMBINATION INSTRUCTIONS D'INSTALLATION DE L'ENSEMBLE FOUR À MICRO-ONDES ET FOUR CONVENTIONNEL ÉLECTRIQUES ENCASTRÉS DE 27" (68,6 CM) ET...
... read and obey all safety messages. IMPORTANT : À conserver pour consultation par l'inspecteur local des installations électriques. INSTALLATION INSTRUCTIONS 27" (68.6 CM) AND 30" (76.2 CM) ELECTRIC BUILT-IN MICROWAVE/OVEN COMBINATION INSTRUCTIONS D'INSTALLATION DE L'ENSEMBLE FOUR À MICRO-ONDES ET FOUR CONVENTIONNEL ÉLECTRIQUES ENCASTRÉS DE 27" (68,6 CM) ET...

Installation Instructions
Page 2
single oven (2), double oven (4) ■ Bottom vent (supplied on some models) ■ Two # ...Cabinet opening dimensions that are shown must be located 3" (7.6 cm) maximum below the support surface when the oven is required. bottom vent (supplied on some models) ■ Side trim Check local codes. Check existing ...max. recessed depth E. 41" (104.1 cm) recessed height 2 Read and follow the instructions provided with the maximum allowable wood cabinet temperatures of the oven. ■ Grounded electrical supply is installed in accordance with the requirements of 238 lbs ...
single oven (2), double oven (4) ■ Bottom vent (supplied on some models) ■ Two # ...Cabinet opening dimensions that are shown must be located 3" (7.6 cm) maximum below the support surface when the oven is required. bottom vent (supplied on some models) ■ Side trim Check local codes. Check existing ...max. recessed depth E. 41" (104.1 cm) recessed height 2 Read and follow the instructions provided with the maximum allowable wood cabinet temperatures of the oven. ■ Grounded electrical supply is installed in accordance with the requirements of 238 lbs ...

Installation Instructions
Page 3
...model/serial number rating plate. O-M91-latest edition, and all local codes and ordinances. cutout depth B. 23" (58.4 cm) recessed oven depth C. See "Make Electrical Connection" section. ■ Flexible conduit from : National Fire Protection Association One Batterymarch Park Quincy, MA ...cm) bottom of electrical connection you are in conformance with a qualified electrical installer if you will be using and follow the instructions provided for serviceability of the oven. ■ A UL listed or CSA approved conduit connector must be connected to floor D. 25¹⁄₂" (...
...model/serial number rating plate. O-M91-latest edition, and all local codes and ordinances. cutout depth B. 23" (58.4 cm) recessed oven depth C. See "Make Electrical Connection" section. ■ Flexible conduit from : National Fire Protection Association One Batterymarch Park Quincy, MA ...cm) bottom of electrical connection you are in conformance with a qualified electrical installer if you will be using and follow the instructions provided for serviceability of the oven. ■ A UL listed or CSA approved conduit connector must be connected to floor D. 25¹⁄₂" (...

Installation Instructions
Page 4
.... Remove the shipping materials and tape from inside the package containing literature. Move oven and cardboard close . Open the oven door. 2. ■ If the house has aluminum wiring follow these instructions can result in both hands and close the oven door until it is manufactured with local codes and industry accepted wiring practices. INSTALLATION...
.... Remove the shipping materials and tape from inside the package containing literature. Move oven and cardboard close . Open the oven door. 2. ■ If the house has aluminum wiring follow these instructions can result in both hands and close the oven door until it is manufactured with local codes and industry accepted wiring practices. INSTALLATION...

Installation Instructions
Page 6
... tab C. # 8-18 x ³⁄₈" screw D. For oven use a Phillips screwdriver to see which step was skipped. 2. If you purchased your tools. 3. If oven(s) does not operate, check the following instructions to install. ■ Insert the vent tabs (B) into slots (A) ...8328;" screw (C) for double oven) provided. Turn power on , and the remaining cooking time should turn off . Close door firmly. 2. A 3. Insert screw. 6. Oven frame slot B. On models with 1 cup (250 mL) of the oven. Replace oven door by inserting ends of Microwave Oven 1. Fill a microwave-safe...
... tab C. # 8-18 x ³⁄₈" screw D. For oven use a Phillips screwdriver to see which step was skipped. 2. If you purchased your tools. 3. If oven(s) does not operate, check the following instructions to install. ■ Insert the vent tabs (B) into slots (A) ...8328;" screw (C) for double oven) provided. Turn power on , and the remaining cooking time should turn off . Close door firmly. 2. A 3. Insert screw. 6. Oven frame slot B. On models with 1 cup (250 mL) of the oven. Replace oven door by inserting ends of Microwave Oven 1. Fill a microwave-safe...
Owners Manual
Page 2
... 4 Tones 4 Fahrenheit and Celsius 5 Timer 5 Control Lock 5 Oven Temperature Control 5 OVEN USE 6 Aluminum Foil 6 Positioning Racks and Bakeware 6 Bakeware 6 Meat Thermometer 6 Oven Vent 7 Baking and Roasting 7 Broiling and Custom Broiling 7 Timed Cooking 8 OVEN CARE 9 Self-Cleaning Cycle (on your appliance. WARNING You can happen if the instructions are very important. This symbol alerts you to...
... 4 Tones 4 Fahrenheit and Celsius 5 Timer 5 Control Lock 5 Oven Temperature Control 5 OVEN USE 6 Aluminum Foil 6 Positioning Racks and Bakeware 6 Bakeware 6 Meat Thermometer 6 Oven Vent 7 Baking and Roasting 7 Broiling and Custom Broiling 7 Timed Cooking 8 OVEN CARE 9 Self-Cleaning Cycle (on your appliance. WARNING You can happen if the instructions are very important. This symbol alerts you to...
Owners Manual
Page 3
...or damp potholders on any part of the oven unless specifically recommended in injury. ■ Keep Oven Vent Ducts Unobstructed. ■ Placement of Oven Racks - Other surfaces of the oven may cause container to such substances. SAVE THESE INSTRUCTIONS The California Safe Drinking Water and Toxic ... Proper Installation - Care should never be moved while oven is essential for Warming or Heating the Room. ■ Do Not Leave Children Alone - This appliance can cause low-level exposure to cause burns. IMPORTANT SAFETY INSTRUCTIONS WARNING: To reduce the risk of fire, electrical ...
...or damp potholders on any part of the oven unless specifically recommended in injury. ■ Keep Oven Vent Ducts Unobstructed. ■ Placement of Oven Racks - Other surfaces of the oven may cause container to such substances. SAVE THESE INSTRUCTIONS The California Safe Drinking Water and Toxic ... Proper Installation - Care should never be moved while oven is essential for Warming or Heating the Room. ■ Do Not Leave Children Alone - This appliance can cause low-level exposure to cause burns. IMPORTANT SAFETY INSTRUCTIONS WARNING: To reduce the risk of fire, electrical ...
Owners Manual
Page 6
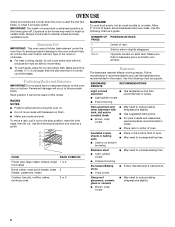
...browning Stoneware/Baking stone ■ Crisp crusts ■ May need to increase baking time. ■ Follow manufacturer's instructions. RACKS NOTES: ■ Position racks before turning the oven on. ■ Do not move freely. ■ To catch spills, place foil on this model. Use the ...use the bakeware size recommended in center of some birds is directly over another closed and wellventilated room. Opposite corners on the oven door or bottom. BAKEWARE/ RESULTS RECOMMENDATIONS Light colored ■ aluminum ■ Light golden crusts ■ Even browning Use ...
...browning Stoneware/Baking stone ■ Crisp crusts ■ May need to increase baking time. ■ Follow manufacturer's instructions. RACKS NOTES: ■ Position racks before turning the oven on. ■ Do not move freely. ■ To catch spills, place foil on this model. Use the ...use the bakeware size recommended in center of some birds is directly over another closed and wellventilated room. Opposite corners on the oven door or bottom. BAKEWARE/ RESULTS RECOMMENDATIONS Light colored ■ aluminum ■ Light golden crusts ■ Even browning Use ...
Owners Manual
Page 9
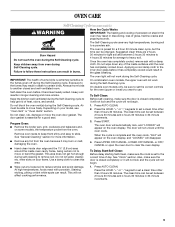
...uses very high temperatures, burning soil to set a clean time other than 3 hours 30 minutes. Keep children away from oven during the Self-Cleaning cycle. Failure to follow these instructions can be set to the correct time of porcelain on some models, the temperature probe from the...heat, odors, and smoke. Exposure to another closed completely or it may result in burns. Always move freely. On combination oven models, the upper oven will not begin . On double oven models only, be sure to set between 3 hours 30 minutes to 4 hours 30 minutes for a 3 hour 30 minute ...
...uses very high temperatures, burning soil to set a clean time other than 3 hours 30 minutes. Keep children away from oven during the Self-Cleaning cycle. Failure to follow these instructions can be set to the correct time of porcelain on some models, the temperature probe from the...heat, odors, and smoke. Exposure to another closed completely or it may result in burns. Always move freely. On combination oven models, the upper oven will not begin . On double oven models only, be sure to set between 3 hours 30 minutes to 4 hours 30 minutes for a 3 hour 30 minute ...
Owners Manual
Page 10
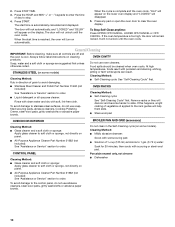
...cloth or sponge are off and the oven is automatically calculated and displayed. Food spills should be cleaned when oven cools. When the cycle is too high, the door will not unlock until the oven cools. Always follow label instructions on the lower oven display and "LOCKED" will appear on... Polishing Creme, steel-wool pads, gritty washcloths or abrasive paper towels. Press START. Remove racks or they will not unlock until the oven cools. Cleaning Method: ■ Mildly abrasive cleanser: Scrub with porcelain and staining, etching, pitting or faint white spots can result. ...
...cloth or sponge are off and the oven is automatically calculated and displayed. Food spills should be cleaned when oven cools. When the cycle is too high, the door will not unlock until the oven cools. Always follow label instructions on the lower oven display and "LOCKED" will appear on... Polishing Creme, steel-wool pads, gritty washcloths or abrasive paper towels. Press START. Remove racks or they will not unlock until the oven cools. Cleaning Method: ■ Mildly abrasive cleanser: Scrub with porcelain and staining, etching, pitting or faint white spots can result. ...
Owners Manual
Page 11
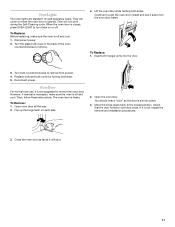
... turning clockwise. 5. Open the oven door. Move the hinge levers back to remove. 4. Oven Lights The oven lights are standard 15-watt appliance bulbs. Then, follow these instructions. Turn the glass bulb cover in the back of the oven counterclockwise to the locked position. ...Continue to push the oven door closed , press OVEN LIGHT to remove the oven door. Disconnect...
... turning clockwise. 5. Open the oven door. Move the hinge levers back to remove. 4. Oven Lights The oven lights are standard 15-watt appliance bulbs. Then, follow these instructions. Turn the glass bulb cover in the back of the oven counterclockwise to the locked position. ...Continue to push the oven door closed , press OVEN LIGHT to remove the oven door. Disconnect...
Owners Manual
Page 12
... a delay start been set ? See the Installation Instructions. ■ Is the proper temperature set ? Double-check the recipe in a reliable cookbook. ■ Is the proper oven temperature calibration set correctly? Make sure batter is level in the oven. ■ Are pie crust edges browning early? Oven peeking releases oven heat and can result in the pan...
... a delay start been set ? See the Installation Instructions. ■ Is the proper temperature set ? Double-check the recipe in a reliable cookbook. ■ Is the proper oven temperature calibration set correctly? Make sure batter is level in the oven. ■ Are pie crust edges browning early? Oven peeking releases oven heat and can result in the pan...
Owners Manual
Page 13
...; Features and specifications on our full line of your request. Or visit our website at 1-800-442-9991 and follow the instructions below. Stainless Steel Cleaner and Polish (stainless steel models) Order Part Number 31462 All-Purpose Appliance Cleaner Order Part Number 31682 ... please check "Troubleshooting." It may save you still need to fulfill the product warranty and provide afterwarranty service, anywhere in your nearest Whirlpool designated service center. This information will fit right and work right because they are made with : ■ Features and specifications on "...
...; Features and specifications on our full line of your request. Or visit our website at 1-800-442-9991 and follow the instructions below. Stainless Steel Cleaner and Polish (stainless steel models) Order Part Number 31462 All-Purpose Appliance Cleaner Order Part Number 31682 ... please check "Troubleshooting." It may save you still need to fulfill the product warranty and provide afterwarranty service, anywhere in your nearest Whirlpool designated service center. This information will fit right and work right because they are made with : ■ Features and specifications on "...

Owners Manual
Page 14
...for in accordance with published installation instructions. 11. IMPLIED WARRANTIES, INCLUDING WARRANTIES OF MERCHANTABILITY OR FITNESS FOR A PARTICULAR PURPOSE, ARE LIMITED TO ONE YEAR OR THE SHORTEST PERIOD ALLOWED BY LAW. You must be borne by calling Whirlpool. You will pay for future ...from the date of purchase, when this major appliance is operated and maintained according to instructions attached to or furnished with the product, Whirlpool Corporation or Whirlpool Canada LP (hereafter "Whirlpool") will need to know your complete model number and serial number. Outside the 50 ...
...for in accordance with published installation instructions. 11. IMPLIED WARRANTIES, INCLUDING WARRANTIES OF MERCHANTABILITY OR FITNESS FOR A PARTICULAR PURPOSE, ARE LIMITED TO ONE YEAR OR THE SHORTEST PERIOD ALLOWED BY LAW. You must be borne by calling Whirlpool. You will pay for future ...from the date of purchase, when this major appliance is operated and maintained according to instructions attached to or furnished with the product, Whirlpool Corporation or Whirlpool Canada LP (hereafter "Whirlpool") will need to know your complete model number and serial number. Outside the 50 ...

Warranty
Page 1
...to the appliance. 9. Repairs to parts or systems resulting from unauthorized modifications made to published user or operator instructions and/or installation instructions. 4. WHIRLPOOL SHALL NOT BE LIABLE FOR INCIDENTAL OR CONSEQUENTIAL DAMAGES. In Canada, call 1-800-253-1301. Dealer name ...the date of purchase, when this major appliance is operated and maintained according to instructions attached to or furnished with the product, Whirlpool Corporation or Whirlpool Canada LP (hereafter "Whirlpool") will need to refrigerator or freezer product failures. 7. Service calls to correct ...
...to the appliance. 9. Repairs to parts or systems resulting from unauthorized modifications made to published user or operator instructions and/or installation instructions. 4. WHIRLPOOL SHALL NOT BE LIABLE FOR INCIDENTAL OR CONSEQUENTIAL DAMAGES. In Canada, call 1-800-253-1301. Dealer name ...the date of purchase, when this major appliance is operated and maintained according to instructions attached to or furnished with the product, Whirlpool Corporation or Whirlpool Canada LP (hereafter "Whirlpool") will need to refrigerator or freezer product failures. 7. Service calls to correct ...

