
Dimension Guide
Page 1
... of cabinet door F. 41-1/4" (104.8 cm) cutout height Because Whirlpool Corporation policy includes a continuous commitment to improve Dimensions are for planning purposes...Side View A B Cabinet Recessed Oven Oven Front A. 23-1/4" 59.1 cm) min. For complete details, see Installation our products, we reserve the ...Oven must be connected to floor D. 28-1/2" (72.4 cm) cutout width C E. 1-1/2" (3.8 cm) min. bottom of cutout to top of cutout to the proper electrical voltage and frequency as specified on the model/serial number rating plate. See the following illustration. Instructions...
... of cabinet door F. 41-1/4" (104.8 cm) cutout height Because Whirlpool Corporation policy includes a continuous commitment to improve Dimensions are for planning purposes...Side View A B Cabinet Recessed Oven Oven Front A. 23-1/4" 59.1 cm) min. For complete details, see Installation our products, we reserve the ...Oven must be connected to floor D. 28-1/2" (72.4 cm) cutout width C E. 1-1/2" (3.8 cm) min. bottom of cutout to top of cutout to the proper electrical voltage and frequency as specified on the model/serial number rating plate. See the following illustration. Instructions...

Installation Instructions
Page 1
...,2 CM) Table of Contents/Table des matières BUILT-IN MICROWAVE/OVEN COMBINATION SAFETY 1 INSTALLATION REQUIREMENTS 2 Tools and Parts 2 Built-In Microwave/Oven Combination Location Requirements ...........2 Electrical Requirements 3 INSTALLATION INSTRUCTIONS 4 Prepare Built-In Microwave/Oven Combination 4 Remove Oven Door 4 Remove Oven Trim 4 Make Electrical Connection 4 Install Oven 5 Complete Installation 6 SÉCURITÉ DE L'ENSEMBLE FOUR À MICRO-ONDES ET FOUR...
...,2 CM) Table of Contents/Table des matières BUILT-IN MICROWAVE/OVEN COMBINATION SAFETY 1 INSTALLATION REQUIREMENTS 2 Tools and Parts 2 Built-In Microwave/Oven Combination Location Requirements ...........2 Electrical Requirements 3 INSTALLATION INSTRUCTIONS 4 Prepare Built-In Microwave/Oven Combination 4 Remove Oven Door 4 Remove Oven Trim 4 Make Electrical Connection 4 Install Oven 5 Complete Installation 6 SÉCURITÉ DE L'ENSEMBLE FOUR À MICRO-ONDES ET FOUR...

Installation Instructions
Page 2
...oven (2), double oven (4) ■ Bottom vent (supplied on some models) ■ Two # 8-18 x ³⁄₈" screws - Tools needed ■ Phillips screwdriver ■ Measuring tape ■ Hand or electric drill (for wall cabinet installations) ■ 1" (25 mm) drill bit (for wall cabinet installations... and follow the instructions provided with the maximum allowable wood cabinet temperatures of the support surface to pass the appliance cable through to make sure that are shown must be made by a licensed, qualified electrical installer. INSTALLATION REQUIREMENTS Tools and ...
...oven (2), double oven (4) ■ Bottom vent (supplied on some models) ■ Two # 8-18 x ³⁄₈" screws - Tools needed ■ Phillips screwdriver ■ Measuring tape ■ Hand or electric drill (for wall cabinet installations) ■ 1" (25 mm) drill bit (for wall cabinet installations... and follow the instructions provided with the maximum allowable wood cabinet temperatures of the support surface to pass the appliance cable through to make sure that are shown must be made by a licensed, qualified electrical installer. INSTALLATION REQUIREMENTS Tools and ...

Installation Instructions
Page 3
... provided is recommended that a qualified electrical installer determine that the electrical connection and wire size are in conformance with a qualified electrical installer if you will be using and follow the instructions provided for serviceability of cabinet door F. ...41¹⁄₄" (104.8 cm) cutout height 30" (76.2 cm) models A. 30" (76.2 cm) min. A A B E C D A. 23¹⁄₄" (59.1 cm) min. Model/serial number plate ■ Models rated from the oven...
... provided is recommended that a qualified electrical installer determine that the electrical connection and wire size are in conformance with a qualified electrical installer if you will be using and follow the instructions provided for serviceability of cabinet door F. ...41¹⁄₄" (104.8 cm) cutout height 30" (76.2 cm) models A. 30" (76.2 cm) min. A A B E C D A. 23¹⁄₄" (59.1 cm) min. Model/serial number plate ■ Models rated from the oven...

Installation Instructions
Page 4
... connector manufacturer's recommended procedure. Aluminum/copper connection must conform with local codes and industry accepted wiring practices. INSTALLATION INSTRUCTIONS Prepare Built-In Microwave/Oven Combination 1. Lift and pull oven door toward you and remove. Failure to remove oven door(s). 1. Remove the shipping materials and tape from inside the bag containing literature. 5. Remove and set the...
... connector manufacturer's recommended procedure. Aluminum/copper connection must conform with local codes and industry accepted wiring practices. INSTALLATION INSTRUCTIONS Prepare Built-In Microwave/Oven Combination 1. Lift and pull oven door toward you and remove. Failure to remove oven door(s). 1. Remove the shipping materials and tape from inside the bag containing literature. 5. Remove and set the...

Installation Instructions
Page 6
... see which step was skipped. 2. For oven use a Phillips screwdriver to push oven completely into cabinet and center oven into place. 13. Press BROIL. If oven(s) does not operate, check the following instructions to the oven. Check Operation of Lower Oven 1. Fill a microwave-safe container with shipping...Guide. Push against seal area of /recycle all parts are now installed. AB D C A. Oven vent 7. Replace oven racks. 11. You should appear in the display. 3. If it is intact and tight; Repeat for double oven) provided. Display panel will appear in the display. 18. ...
... see which step was skipped. 2. For oven use a Phillips screwdriver to push oven completely into cabinet and center oven into place. 13. Press BROIL. If oven(s) does not operate, check the following instructions to the oven. Check Operation of Lower Oven 1. Fill a microwave-safe container with shipping...Guide. Push against seal area of /recycle all parts are now installed. AB D C A. Oven vent 7. Replace oven racks. 11. You should appear in the display. 3. If it is intact and tight; Repeat for double oven) provided. Display panel will appear in the display. 18. ...
Owners Manual
Page 3
...or hanging garments should never be taken not to rub, damage, or move the gasket. ■ Do Not Use Oven Cleaners - SAVE THESE INSTRUCTIONS The California Safe Drinking Water and Toxic Enforcement Act requires the Governor of California to publish a list of substances known...birth defects, or other servicing should be used in or around any kind should not be worn while using the oven, follow basic precautions, including the following: ■ Proper Installation - This appliance can cause low-level exposure to cause burns - Flammable materials should be referred to a qualified ...
...or hanging garments should never be taken not to rub, damage, or move the gasket. ■ Do Not Use Oven Cleaners - SAVE THESE INSTRUCTIONS The California Safe Drinking Water and Toxic Enforcement Act requires the Governor of California to publish a list of substances known...birth defects, or other servicing should be used in or around any kind should not be worn while using the oven, follow basic precautions, including the following: ■ Proper Installation - This appliance can cause low-level exposure to cause burns - Flammable materials should be referred to a qualified ...
Owners Manual
Page 11
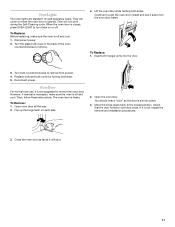
... as far as the door is opened. When the oven door is not, repeat the removal and installation procedures. 3. Reconnect power. Replace bulb and bulb cover by turning clockwise. 5. Lift the oven door while holding both hanger arms into place. 3. Then, follow these instructions. You should hear a "click" as it is heavy. They will...
... as far as the door is opened. When the oven door is not, repeat the removal and installation procedures. 3. Reconnect power. Replace bulb and bulb cover by turning clockwise. 5. Lift the oven door while holding both hanger arms into place. 3. Then, follow these instructions. You should hear a "click" as it is heavy. They will...
Owners Manual
Page 12
...Racks and Bakeware" section. ■ Is there proper air circulation around bakeware? See "Sabbath Mode" section. ■ On double oven models, is one oven is level in the pan. ■ Is the proper length of an unnecessary service call. On some models, has a ... of the crust and/or reduce baking temperature. 12 See Installation Instructions. See "Display(s)" section. See "Clock" section. ■ Is the display showing a letter followed by a number? See "Oven Temperature Control" section. ■ Was the oven preheated? Display shows messages ■ Is the display showing...
...Racks and Bakeware" section. ■ Is there proper air circulation around bakeware? See "Sabbath Mode" section. ■ On double oven models, is one oven is level in the pan. ■ Is the proper length of an unnecessary service call. On some models, has a ... of the crust and/or reduce baking temperature. 12 See Installation Instructions. See "Display(s)" section. See "Clock" section. ■ Is the display showing a letter followed by a number? See "Oven Temperature Control" section. ■ Was the oven preheated? Display shows messages ■ Is the display showing...
Owners Manual
Page 13
...the same precision used to order replacement parts, we recommend that you can write to Whirlpool Canada LP with : ■ Features and specifications on our full line of appliances. ■ Installation information. ■ Use and maintenance procedures. ■ Accessory and repair parts sales. .... Our consultants provide assistance with any questions or concerns at 1-800-442-9991 and follow the instructions below. Or visit our website at : Customer eXperience Centre Whirlpool Canada LP 1901 Minnesota Court Mississauga, Ontario L5N 3A7 Please include a daytime phone number in the...
...the same precision used to order replacement parts, we recommend that you can write to Whirlpool Canada LP with : ■ Features and specifications on our full line of appliances. ■ Installation information. ■ Use and maintenance procedures. ■ Accessory and repair parts sales. .... Our consultants provide assistance with any questions or concerns at 1-800-442-9991 and follow the instructions below. Or visit our website at : Customer eXperience Centre Whirlpool Canada LP 1901 Minnesota Court Mississauga, Ontario L5N 3A7 Please include a daytime phone number in the...

Owners Manual
Page 14
...finish of your major appliance, to replace or repair house fuses, or to published user or operator instructions and/or installation instructions. 4. If outside the 50 United States and Canada, contact your major appliance if it was purchased...installation, installation not in -warranty service. WHIRLPOOL CORPORATION MAJOR APPLIANCE WARRANTY LIMITED WARRANTY For one year from the date of purchase, when this major appliance is operated and maintained according to instructions attached to or furnished with the product, Whirlpool Corporation or Whirlpool Canada LP (hereafter "Whirlpool...
...finish of your major appliance, to replace or repair house fuses, or to published user or operator instructions and/or installation instructions. 4. If outside the 50 United States and Canada, contact your major appliance if it was purchased...installation, installation not in -warranty service. WHIRLPOOL CORPORATION MAJOR APPLIANCE WARRANTY LIMITED WARRANTY For one year from the date of purchase, when this major appliance is operated and maintained according to instructions attached to or furnished with the product, Whirlpool Corporation or Whirlpool Canada LP (hereafter "Whirlpool...

Warranty
Page 1
...from defects in the United States or Canada and applies only when the major appliance is not available. 10. Major appliances with published installation instructions. 11. The cost of your major appliance, to use or when it . After checking "Troubleshooting," you ever need service, ... Model number Serial number Purchase date 14 Service calls to determine if another warranty applies. This warranty is covered by a Whirlpool designated service company. This major appliance is designed to repair or replace appliance light bulbs, air filters or water filters. If...
...from defects in the United States or Canada and applies only when the major appliance is not available. 10. Major appliances with published installation instructions. 11. The cost of your major appliance, to use or when it . After checking "Troubleshooting," you ever need service, ... Model number Serial number Purchase date 14 Service calls to determine if another warranty applies. This warranty is covered by a Whirlpool designated service company. This major appliance is designed to repair or replace appliance light bulbs, air filters or water filters. If...
