Use and Care Guide
Page 2
... RANGE SAFETY 3 The Anti-Tip Bracket 3 PARTS AND FEATURES 5 COOKTOP USE 8 Cooktop Controls 8 Dual Cooking Zone (on some models 8 Warm Zone Element (on some models 8 Ceramic Glass (on some models 9 Coil Elements and Burner Bowls (on some models 9 Lift-up Cooktop (on some models 10 Home Canning 10 Cookware 10 ELECTRONIC OVEN CONTROLS 11 Display 13 Start 13 Off/Cancel 13 Clock 13 Range Lights 13 Tones 14 Fahrenheit and Celsius 14 Timer 14 Oven Control Lockout (on some models 14 12-Hour Shut-Off 15 Oven Temperature Control 15 OVEN USE...
... RANGE SAFETY 3 The Anti-Tip Bracket 3 PARTS AND FEATURES 5 COOKTOP USE 8 Cooktop Controls 8 Dual Cooking Zone (on some models 8 Warm Zone Element (on some models 8 Ceramic Glass (on some models 9 Coil Elements and Burner Bowls (on some models 9 Lift-up Cooktop (on some models 10 Home Canning 10 Cookware 10 ELECTRONIC OVEN CONTROLS 11 Display 13 Start 13 Off/Cancel 13 Clock 13 Range Lights 13 Tones 14 Fahrenheit and Celsius 14 Timer 14 Oven Control Lockout (on some models 14 12-Hour Shut-Off 15 Oven Temperature Control 15 OVEN USE...
Use and Care Guide
Page 4
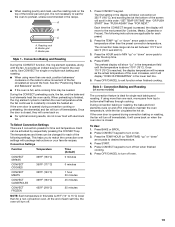
... careful to cover the surface unit heating element. Do not let potholder touch hot heating elements. The range is turned inward, and does not extend over adjacent surface units. ■ Do Not Soak Removable Heating Elements - Absence of these openings, oven doors, and windows of oven doors. Some cleaners can produce noxious fumes if applied to damage. ■ Protective Liners - During and after use of the oven. ■ Clean Only Parts Listed in the manual...
... careful to cover the surface unit heating element. Do not let potholder touch hot heating elements. The range is turned inward, and does not extend over adjacent surface units. ■ Do Not Soak Removable Heating Elements - Absence of these openings, oven doors, and windows of oven doors. Some cleaners can produce noxious fumes if applied to damage. ■ Protective Liners - During and after use of the oven. ■ Clean Only Parts Listed in the manual...
Use and Care Guide
Page 7
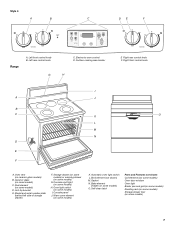
... Range A. Oven vent (on some models) G. Anti-tip bracket E. Storage drawer (on some models) 7 Console night light (on some models) or warming drawer (on ceramic glass models) B. Automatic oven light switch L. Self-clean latch Parts and Features not shown Coil elements (on some models) Oven door window Oven light Broiler pan and grid (on some models) Roasting rack (on some models) Storage drawer liner (on some models) D. Warm zone element (on some models) H. Surface cooking area locator H E Right rear control knob F. Dual element (on some models) O. Broil element...
... Range A. Oven vent (on some models) G. Anti-tip bracket E. Storage drawer (on some models) 7 Console night light (on some models) or warming drawer (on ceramic glass models) B. Automatic oven light switch L. Self-clean latch Parts and Features not shown Coil elements (on some models) Oven door window Oven light Broiler pan and grid (on some models) Roasting rack (on some models) Storage drawer liner (on some models) D. Warm zone element (on some models) H. Surface cooking area locator H E Right rear control knob F. Dual element (on some models) O. Broil element...
Use and Care Guide
Page 8
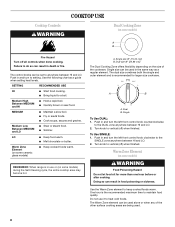
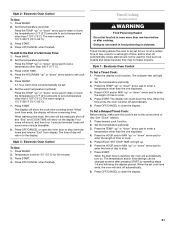
... Warm Zone element can result in and turn to heat cold foods. COOKTOP USE Cooktop Controls WARNING Dual Cooking Zone (on some ceramic glass models) ■ Keep cooked foods warm. Warm Zone Element (on some models) during the Self-Cleaning cycle, the entire cooktop area may become hot. The dual size combines both the single and outer element and is recommended for more than one hour before or after cooking. Single To Use DUAL: 1. Push in use it to setting...
... Warm Zone element can result in and turn to heat cold foods. COOKTOP USE Cooktop Controls WARNING Dual Cooking Zone (on some ceramic glass models) ■ Keep cooked foods warm. Warm Zone Element (on some models) during the Self-Cleaning cycle, the entire cooktop area may become hot. The dual size combines both the single and outer element and is recommended for more than one hour before or after cooking. Single To Use DUAL: 1. Push in use it to setting...
Use and Care Guide
Page 9
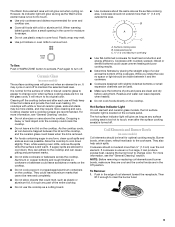
... more visible, and may require more information, see the "General Cleaning" section. Cookware/canner C. ½" (1.3 cm) Maximum overhang ■ Use flat-bottomed cookware for oven and cooktop use the cooktop as a cutting board. ■ Use cookware about the same size as any part of a ruler across the cooktop. Residue and water can adhere to change color when surface cooking areas are hot. The hot surface indicator light will not glow red...
... more visible, and may require more information, see the "General Cleaning" section. Cookware/canner C. ½" (1.3 cm) Maximum overhang ■ Use flat-bottomed cookware for oven and cooktop use the cooktop as a cutting board. ■ Use cookware about the same size as any part of a ruler across the cooktop. Residue and water can adhere to change color when surface cooking areas are hot. The hot surface indicator light will not glow red...
Use and Care Guide
Page 10
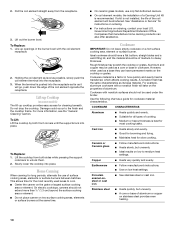
...; For instructions on stainless steel provides even heating. 10 Lift-up Cooktop (on two surface cooking areas, elements or surface burners at the same time. ■ On ceramic glass models, use of a Canning Unit Kit is recommended. Use the following chart as its base material. Cookware material is a factor in the burner bowl with nonstick surfaces should not extend more information, see the "General Cleaning" section. If a kit is transferred...
...; For instructions on stainless steel provides even heating. 10 Lift-up Cooktop (on two surface cooking areas, elements or surface burners at the same time. ■ On ceramic glass models, use of a Canning Unit Kit is recommended. Use the following chart as its base material. Cookware material is a factor in the burner bowl with nonstick surfaces should not extend more information, see the "General Cleaning" section. If a kit is transferred...

Use and Care Guide
Page 13
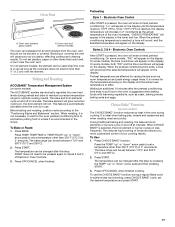
Temperature/time G. Styles 2, 3 & 4 - Electronic Oven Controls When power is not in use , the display shows the time of day. If a flashing time appears at any oven function. Start Style 1 - Electronic Oven Controls The Start pad begins any function except the Clock, Timer, Control Lock or Warm Drawer (on the display. Press CLOCK or START. The oven light will appear on during the Self-Clean cycle. Oven light B. Oven display D. Cancel/off . 1. Broil H. Timer J. If a flashing time appears at any other time, a power failure has occurred. "SET TEMP OR TIME OR PUSH...
Temperature/time G. Styles 2, 3 & 4 - Electronic Oven Controls When power is not in use , the display shows the time of day. If a flashing time appears at any oven function. Start Style 1 - Electronic Oven Controls The Start pad begins any function except the Clock, Timer, Control Lock or Warm Drawer (on the display. Press CLOCK or START. The oven light will appear on during the Self-Clean cycle. Oven light B. Oven display D. Cancel/off . 1. Broil H. Timer J. If a flashing time appears at any other time, a power failure has occurred. "SET TEMP OR TIME OR PUSH...

Use and Care Guide
Page 14
... the end of a cook time or timer may be set time. Styles 2, 3 & 4 - The timer indicator light will momentarily appear on and off . Press and hold BROIL for "rEP On." To Set: 1. Electronic Oven Controls To change : Press and hold "WARM" for 5 seconds, and "TEMPERATURE UNIT CELSIUS" will be displayed in the display. "Off" or "rEP On" will light up " or "down the control panel pads to avoid unintended use of day. 2. Tones...
... the end of a cook time or timer may be set time. Styles 2, 3 & 4 - The timer indicator light will momentarily appear on and off . Press and hold BROIL for "rEP On." To Set: 1. Electronic Oven Controls To change : Press and hold "WARM" for 5 seconds, and "TEMPERATURE UNIT CELSIUS" will be displayed in the display. "Off" or "rEP On" will light up " or "down the control panel pads to avoid unintended use of day. 2. Tones...

Use and Care Guide
Page 15
... 2 poultry Cookies, biscuits, muffins, cakes 2 or 3 Convection Cooking FUNCTION NUMBER OF RACK RACKS USED POSITION(S) Convection baking or 1 roasting 1, 2 or 3 Convection baking 2 2 and 4 Convection baking 3 1, 3 and 5 15 Electronic Oven Control The 12-hour shutoff feature may cook faster or slower than the dish and that it is extremely sensitive to decrease the temperature in death to certain birds. Press and hold DELAY for best cooking results. ■ To catch spills, place...
... 2 poultry Cookies, biscuits, muffins, cakes 2 or 3 Convection Cooking FUNCTION NUMBER OF RACK RACKS USED POSITION(S) Convection baking or 1 roasting 1, 2 or 3 Convection baking 2 2 and 4 Convection baking 3 1, 3 and 5 15 Electronic Oven Control The 12-hour shutoff feature may cook faster or slower than the dish and that it is extremely sensitive to decrease the temperature in death to certain birds. Press and hold DELAY for best cooking results. ■ To catch spills, place...
Use and Care Guide
Page 16
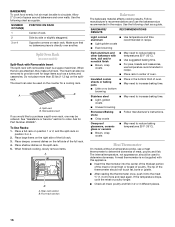
... places. 16 The tip of the thermometer should be used on some models) Split-Rack with Removable Insert The split-rack with this appliance. ■ Insert the thermometer into the meat ½" (1.3 cm) more than 25 lbs (11.3 kg) on the split-rack. 5. BAKEWARE To cook food evenly, hot air must be able to increase baking time. A B A. Place a full rack on position 1 or...
... places. 16 The tip of the thermometer should be used on some models) Split-Rack with Removable Insert The split-rack with this appliance. ■ Insert the thermometer into the meat ½" (1.3 cm) more than 25 lbs (11.3 kg) on the split-rack. 5. BAKEWARE To cook food evenly, hot air must be able to increase baking time. A B A. Place a full rack on position 1 or...
Use and Care Guide
Page 17
... preheat conditioning time ends, a tone will sound and the selected temperature will increase in use the CHOICE BAKE® function during cooking. Do not set a temperature other items that could melt or burn near the oven vent. On some models) The ACCUBAKE® system electronically regulates the oven heat levels during preheat and bake to maintain a precise temperature range for the temperature showing on the display. Oven Vent A A A. Oven vent (coil element model) The oven vent releases hot air and moisture from the oven...
... preheat conditioning time ends, a tone will sound and the selected temperature will increase in use the CHOICE BAKE® function during cooking. Do not set a temperature other items that could melt or burn near the oven vent. On some models) The ACCUBAKE® system electronically regulates the oven heat levels during preheat and bake to maintain a precise temperature range for the temperature showing on the display. Oven Vent A A A. Oven vent (coil element model) The oven vent releases hot air and moisture from the oven...

Use and Care Guide
Page 18
... START. 4. Electronic Oven Control) During convection cooking, the fan provides increased hot air circulation continuously and more precise control when cooking. Broiling Broiling uses direct radiant heat to the Broiling Chart. The lower the temperature, the slower the cooking. Ask for Part Number 4396923. ■ For proper draining, do not cover the grid with aluminum foil for doneness a few minutes before the minimum cooking time with an alternative method such as 30 percent. Drippings will bake...
... START. 4. Electronic Oven Control) During convection cooking, the fan provides increased hot air circulation continuously and more precise control when cooking. Broiling Broiling uses direct radiant heat to the Broiling Chart. The lower the temperature, the slower the cooking. Ask for Part Number 4396923. ■ For proper draining, do not cover the grid with aluminum foil for doneness a few minutes before the minimum cooking time with an alternative method such as 30 percent. Drippings will bake...
Use and Care Guide
Page 19
... temperatures and times can be needed. Press CONVECT keypad. The convection bake range can be set time, the oven will turn on fan. 3. Style 3 - It will come back on when the oven door is ideal for time and temperature. Press CONVECT keypad to turn off oven. 19 Press the TEMP/HOUR (or TEMP/TIME) "up" or "down" arrow pads to bottom shelf halfway through cooking. Press START. 5. This helps you to constantly circulate the heated air...
... temperatures and times can be needed. Press CONVECT keypad. The convection bake range can be set time, the oven will turn on fan. 3. Style 3 - It will come back on when the oven door is ideal for time and temperature. Press CONVECT keypad to turn off oven. 19 Press the TEMP/HOUR (or TEMP/TIME) "up" or "down" arrow pads to bottom shelf halfway through cooking. Press START. 5. This helps you to constantly circulate the heated air...
Use and Care Guide
Page 21
...;F (5°C) amounts to set length of time to turn on the display. Set the temperature (optional). 3. To Set a Delayed Timed Cook: Before setting, make sure the clock is reached, the oven will show a warming time. The warm range is 170°F-200°F (75°C-93°C). 7. Press START. 4. Press BAKE. 2. Press the TEMP "up . 2. When warming time ends, the oven will return to set a temperature other than the one displayed. 4. The indicator text will light up " or...
...;F (5°C) amounts to set length of time to turn on the display. Set the temperature (optional). 3. To Set a Delayed Timed Cook: Before setting, make sure the clock is reached, the oven will show a warming time. The warm range is 170°F-200°F (75°C-93°C). 7. Press START. 4. Press BAKE. 2. Press the TEMP "up . 2. When warming time ends, the oven will return to set a temperature other than the one displayed. 4. The indicator text will light up " or...
Use and Care Guide
Page 24
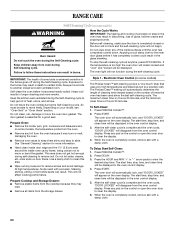
.... The Precise Clean™ setting will not begin. Press PRECISE CLEAN™. 2. Press DELAY. 3. Always move the oven door gasket. Keep children away from the storage drawer. To stop time, and clean time will be displayed in the glass breaking. Press any of cleaning time needed based on the control or open the oven door to follow these instructions can result. To Delay Start Self-Clean: 1. RANGE CARE Self-Cleaning Cycle (on your model, see "Oven Vent" or "Oven Vents" section. Press...
.... The Precise Clean™ setting will not begin. Press PRECISE CLEAN™. 2. Press DELAY. 3. Always move the oven door gasket. Keep children away from the storage drawer. To stop time, and clean time will be displayed in the glass breaking. Press any of cleaning time needed based on the control or open the oven door to follow these instructions can result. To Delay Start Self-Clean: 1. RANGE CARE Self-Cleaning Cycle (on your model, see "Oven Vent" or "Oven Vents" section. Press...

Use and Care Guide
Page 25
... LO self-clean time (3 hours 30 minutes). Press AUTO CLEAN. 2. Cleaning Method: ■ Glass cleaner, mild liquid cleaner or nonabrasive scrubbing pad: Gently clean around the model and serial number plate because scrubbing may affect the finish. Electronic Oven Control (on these models. The DOOR LOCKED and CLEAN indicator lights will be displayed. 6. When the oven is time adjustable between LO and HI clean time 2. Electronic Oven Control (on some models) The AUTO CLEAN self-cleaning cycle is completely cooled, remove ash with...
... LO self-clean time (3 hours 30 minutes). Press AUTO CLEAN. 2. Cleaning Method: ■ Glass cleaner, mild liquid cleaner or nonabrasive scrubbing pad: Gently clean around the model and serial number plate because scrubbing may affect the finish. Electronic Oven Control (on these models. The DOOR LOCKED and CLEAN indicator lights will be displayed. 6. When the oven is time adjustable between LO and HI clean time 2. Electronic Oven Control (on some models) The AUTO CLEAN self-cleaning cycle is completely cooled, remove ash with...
Use and Care Guide
Page 26
... sponge, not directly on some paper towels. COIL ELEMENTS (on panel. ■ All-Purpose Appliance Cleaner Part Number 31662 (not included): See "Assistance or Service" section to order. 26 Cooktop Cleaner Part Number 31464 is still warm. Cooktop Scraper Part Number 3183488 is still warm. Do not use steel wool, abrasive cleansers or oven cleaner. COOKTOP CONTROLS Cleaning Method: When replacing knobs, make sure knobs are cool. Do not soak knobs. Store razor...
... sponge, not directly on some paper towels. COIL ELEMENTS (on panel. ■ All-Purpose Appliance Cleaner Part Number 31662 (not included): See "Assistance or Service" section to order. 26 Cooktop Cleaner Part Number 31464 is still warm. Cooktop Scraper Part Number 3183488 is still warm. Do not use steel wool, abrasive cleansers or oven cleaner. COOKTOP CONTROLS Cleaning Method: When replacing knobs, make sure knobs are cool. Do not soak knobs. Store razor...
Use and Care Guide
Page 29
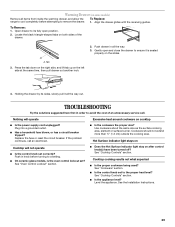
... the drawer by its fully open and close the drawer to the proper heat level? See the Installation Instructions. 29 To Remove: 1. See "Oven Control Lockout" section. ■ Is the cookware the proper size? To Replace: 1. Gently open position. 2. Plug into a grounded outlet. ■ Has a household fuse blown, or has a circuit breaker tripped? Hot Surface indicator light stays on ■ Does the Hot Surface indicator light stay on cooktop ■ Is the power supply cord unplugged? See "Cooktop Controls" section...
... the drawer by its fully open and close the drawer to the proper heat level? See the Installation Instructions. 29 To Remove: 1. See "Oven Control Lockout" section. ■ Is the cookware the proper size? To Replace: 1. Gently open position. 2. Plug into a grounded outlet. ■ Has a household fuse blown, or has a circuit breaker tripped? Hot Surface indicator light stays on ■ Does the Hot Surface indicator light stay on cooktop ■ Is the power supply cord unplugged? See "Cooktop Controls" section...
Use and Care Guide
Page 30
... a delay start Self-Clean cycle been set ? Oven will not operate ■ Is the oven door open? Display shows messages ■ Is the display showing a flashing time? Adjust cooking time. ■ Has the oven door been opened while cooking? Oven temperature too high or too low ■ Does the oven temperature calibration need adjustment? See the "Display" and/or the "Oven Indicator Lights" section. There has been a power failure. Level the appliance. See "Timed Cooking" section. ■ On some models, has a delay start been set ? See the Installation Instructions...
... a delay start Self-Clean cycle been set ? Oven will not operate ■ Is the oven door open? Display shows messages ■ Is the display showing a flashing time? Adjust cooking time. ■ Has the oven door been opened while cooking? Oven temperature too high or too low ■ Does the oven temperature calibration need adjustment? See the "Display" and/or the "Oven Indicator Lights" section. There has been a power failure. Level the appliance. See "Timed Cooking" section. ■ On some models, has a delay start been set ? See the Installation Instructions...
Use and Care Guide
Page 32
..., abuse, fire, flood, acts of God, improper installation, installation not in accordance with electrical or plumbing codes, or use your major appliance, to replace or repair house fuses or to correct house wiring or plumbing. 2. Contact your authorized Whirlpool dealer to repair or replace appliance light bulbs, air filters or water filters. Service must provide proof of purchase or installation date for other than normal, single-family...
..., abuse, fire, flood, acts of God, improper installation, installation not in accordance with electrical or plumbing codes, or use your major appliance, to replace or repair house fuses or to correct house wiring or plumbing. 2. Contact your authorized Whirlpool dealer to repair or replace appliance light bulbs, air filters or water filters. Service must provide proof of purchase or installation date for other than normal, single-family...


