Whirlpool RF367LXSQ Support and Manuals
Get Help and Manuals for this Whirlpool item
View All Support Options Below
Free Whirlpool RF367LXSQ manuals!
Problems with Whirlpool RF367LXSQ?
Ask a Question
Free Whirlpool RF367LXSQ manuals!
Problems with Whirlpool RF367LXSQ?
Ask a Question
Most Recent Whirlpool RF367LXSQ Questions

Bake Temp Will Not Adjust
When I hit the Bake button on the unit the temp defaults to 350 and will not adjust.
When I hit the Bake button on the unit the temp defaults to 350 and will not adjust.
(Posted by ads870 8 years ago)

Popular Whirlpool RF367LXSQ Manual Pages
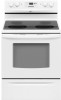
Use and Care Guide - Page 4
... THESE INSTRUCTIONS
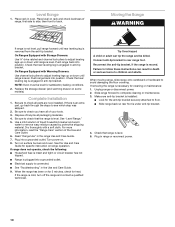
4 Do not repair or replace any part of the range. Areas near units until they have had sufficient time to direct contact and may result in ignition of clothing. Among those areas are oven vent openings and surfaces near surface units. s Make Sure Reflector Pans or Drip Bowls Are in Manual. Improper installation of these...
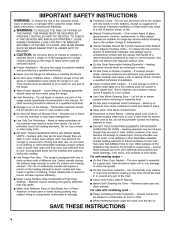
Use and Care Guide - Page 10
... from both front corners until the supports lock into the receptacle. 3. On coil element models, the installation of a Canning Unit Kit is not installed, the life of the coil element... manufacturer's instructions.
To Lift:
Lift the cooktop by both sides while pressing the support rods back to medium heat settings. Cast iron
s s s
Ceramic or Ceramic glass
s s s
To Replace:
1. Lift...
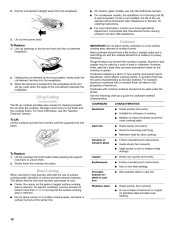
Use and Care Guide - Page 11
...M. Oven light P. Electronic Oven Control (on some models) D. Temperature J. Clock E. Start I
H
G
A. Warming drawer (on some models)
A
B
C
D
E
F
BROIL CHOICE
CONVECT BAKE WARM
REVIEW PROGRAM 1 2 3 4
SET TIMER
PM AM
MIN HR SEC MIN
STEP
DELAY
FC COOK TIME
ON
WARM DRAWER
DOOR LOCKED
START TIME STOP TIME
P
O
N
M
L
F. Off/cancel H. Auto clean B. ...
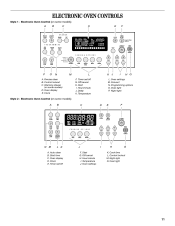
Use and Care Guide - Page 14
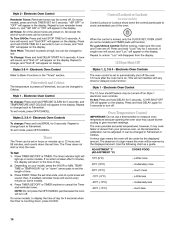
...(ADJUSTMENT °C) 10°F (5°C) 20°F (10°C) 30°F (15°C) -10°F (-5°C) -20°F (-10°C) -30°F (-15°C) COOKS FOOD
Styles 2, 3 & 4 -
When...
The Timer can be set time. The timer indicator light will light up on some models. Press and hold PRECISE CLEAN for 5 seconds. Use the following chart as a guide. then, if enabled,...
Use and Care Guide - Page 17
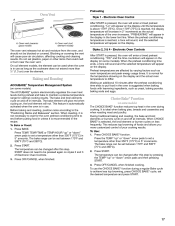
... cause poor air circulation, affecting cooking and cleaning results. When the preheat conditioning temperature is selected, the broil element or burner cycles on some models).
Choice Bake® Function
(on less frequently.
The bake range can be set between 170°F and 500°F (75°C and 260°C). 2. Press OFF/CANCEL when finished...
Use and Care Guide - Page 18
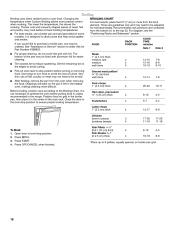
...be adjusted for Part Number 4396923. Changing the temperature when Custom Broiling allows more from the broil element. The ... with foil. Position food on some models). Close the door to the broil stop position. Press OFF/CANCEL when... Pull out oven rack to the Broiling Chart. See "Assistance or Service" section to cook food. Broiling
Broiling uses direct radiant heat to order....
Use and Care Guide - Page 23
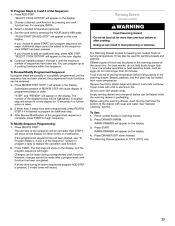
...BROIL. 3. Warming Drawer
(on the display for more than 30 minutes.
Food must be at the same time. Do not cover with a lid or aluminum foil. Subsequent presses of REVIEW STEP will be canceled, then STEP 1 will show on some models...can result in warming drawer. 2. Set the cook time by pressing any ...section to program a step to replace the canceled cook function. 2. The...
Use and Care Guide - Page 24
...function during the Self-Cleaning cycle to follow these instructions can be set at one touch" step that uses very high temperatures...etc. Remove all items from the oven. RANGE CARE
Self-Cleaning Cycle (on some models)
)
WARNING
How the Cycle Works
IMPORTANT...Suggested clean times are 2 hours 30 minutes for light soil and between 3 hours 30 minutes 4 hours 30 minutes for more smoke.
Once ...
Use and Care Guide - Page 25
... or "down " arrow pad to set between 2 hours 30 minutes and 4 hours 30 minutes. 4. The door will automatically lock at the set a clean time other than 3 hours 30 minutes. Style 2 - When the ...Press DELAY. 3. The start time is reached, the oven will automatically turn on some models)
1. When the start time is automatically calculated and displayed. The DOOR LOCKED oven ...
Use and Care Guide - Page 30
... cooking area, element or surface burner. See "Cookware" section. See the Installation Instructions. Make sure batter is normal for service. Move rack to higher position in the pan? See "Oven Temperature Control" section. On some models, is the "Control Lockout" or "Lockout" set correctly?
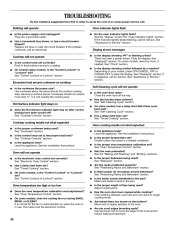
Self-Cleaning cycle will not operate
s
Is the electronic oven control...
Use and Care Guide - Page 32
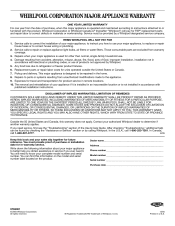
... installation, installation not in accordance with electrical or plumbing codes, or use your major appliance, to instruct you need service, first see the "Troubleshooting" section of the Use & Care Guide. Service calls to correct the installation of your major appliance, to replace or repair house fuses or to be repaired in accordance with the product, Whirlpool Corporation or Whirlpool...
Installation Instructions - Page 1

..." or "WARNING." IMPORTANT: Installer: Leave installation instructions with the homeowner. INSTALLATION INSTRUCTIONS 30" (76 CM) FREESTANDING ELECTRIC RANGES
Table of Contents
RANGE SAFETY 1 INSTALLATION REQUIREMENTS 2
Tools and Parts 2 Location Requirements 2 Electrical Requirements 4 INSTALLATION INSTRUCTIONS 4 Unpack Range 4 Install Anti-Tip Bracket 5 Electrical Connection 6 Verify Anti...
Installation Instructions - Page 2

Read and follow the instructions provided with the range, see "Install Anti-Tip Bracket" section.
Anti-tip bracket B. Parts needed
s Tape measure
s ³⁄₈" drive ratchet
s Flat-blade screwdriver
s ¼" nut driver
s Level
s ³⁄₈" and nut driver
s Hammer s Hand or electric drill s Channel lock pliers s Marker or pencil
s ¹⁄₈" (3.2 mm) ...
Installation Instructions - Page 10
... of /recycle all packaging materials. 4. Turn on some models).
s Slide range back so rear foot is installed:
s Look for satisfactory baking conditions.
2. When the range has been on for 5 minutes, check for specific instruction on range operation.
Place rack in the range Use and Care Guide. 7.
See "Level Range." 5. Turn power on rack and check levelness of liquid...
Dimensions - Page 1
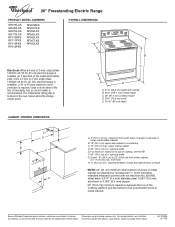
...for planning purposes only. upper cabinet depth D. 30" (76.2 cm) min. F. 30" (76.2 cm) min. opening width E. ®
30" Freestanding Electric Range
PRODUCT MODEL NUMBERS
GR516LXS GR563LXS GR673LXS GR773LXS RF110AXS RF111PXS RF114PXS RF212PXS
RF260BXS RF261PXS RF262LXS RF264LXS RF362LXS RF367LXS RF462LXS
OVERALL DIMENSIONS A
B
Electrical: When a 4-wire or 3-wire, single phase 120...
Whirlpool RF367LXSQ Reviews
We have not received any reviews for Whirlpool yet.