
Use and Care Guide
Page 5
... about the part or feature you are setting) Oven light switch (Some models) 82 Left front Left rear control knob control knob Oven temperature control dial Right rear Right front control knob control knob -4 Use the page references to learn where all parts and features are interested in surface unit with one piece reflector...
... about the part or feature you are setting) Oven light switch (Some models) 82 Left front Left rear control knob control knob Oven temperature control dial Right rear Right front control knob control knob -4 Use the page references to learn where all parts and features are interested in surface unit with one piece reflector...
Use and Care Guide
Page 6
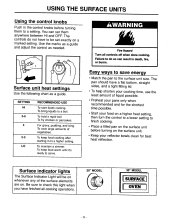
... cooking after starting it 's ready to be on the surface unit before turning them anywhere between HI and OFF. You can result in the control knobs before turning on the surface unit. • Keep your food on a higher heat setting, then turn the control to a lower setting to finish ...pan on whenever any of vegetables. OF 0 Ito Surface unit heat settings Use the following chart as needed. USING THE SURFACE UNITS Using the control knobs Push in death, fire, or burns. The controls do so can set exactly on a marked setting. For gravy, pudding, and icing. To fry...
... cooking after starting it 's ready to be on the surface unit before turning them anywhere between HI and OFF. You can result in the control knobs before turning on the surface unit. • Keep your food on a higher heat setting, then turn the control to a lower setting to finish ...pan on whenever any of vegetables. OF 0 Ito Surface unit heat settings Use the following chart as needed. USING THE SURFACE UNITS Using the control knobs Push in death, fire, or burns. The controls do so can set exactly on a marked setting. For gravy, pudding, and icing. To fry...
Use and Care Guide
Page 15
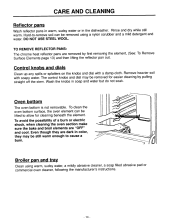
...soil can be removed for cleaning beneath the element. TO REMOVE REFLECTOR PANS: The chrome heat reflector pans are "OFF" and cool. Wash the knobs in the dishwasher. Even though they are dark in color, they may be lifted to cause a burn. Remove heavier soil with a damp cloth...the stem. CARE AND CLEANING Reflector pans Wash reflector pans in warm, sudsy water or in soap and water but do not soak. The control knobs and dial may be removed using warm, sudsy water, a mildly abrasive cleaner, a soap filled abrasive pad or commercial oven cleaner, following the manufacturer...
...soil can be removed for cleaning beneath the element. TO REMOVE REFLECTOR PANS: The chrome heat reflector pans are "OFF" and cool. Wash the knobs in the dishwasher. Even though they are dark in color, they may be lifted to cause a burn. Remove heavier soil with a damp cloth...the stem. CARE AND CLEANING Reflector pans Wash reflector pans in warm, sudsy water or in soap and water but do not soak. The control knobs and dial may be removed using warm, sudsy water, a mildly abrasive cleaner, a soap filled abrasive pad or commercial oven cleaner, following the manufacturer...
Parts List
Page 1
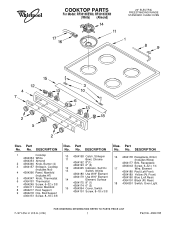
.... No. Part No. No. No. Front) 4364190 Blue (Left Rear) 4364191 Black (Rt. DESCRIPTION 1 Cooktop 4364352 White 4364353 Almond 2 4364346 Knob, Burner (4) 3 4364157 Strikepin, Cooktop (Includes Nut) 4 4364366 Panel, Manifold (Includes #7) 5 4364347 Knob, Thermostat 6 4364181 Thermostat 4364249 Screw, 6−32 x 3/8 7 4364111 Decal, Manifold 8 4364217 Rod, Support 9 4364218 Clip, Rod Support 4364151 Screw...
.... No. Part No. No. No. Front) 4364190 Blue (Left Rear) 4364191 Black (Rt. DESCRIPTION 1 Cooktop 4364352 White 4364353 Almond 2 4364346 Knob, Burner (4) 3 4364157 Strikepin, Cooktop (Includes Nut) 4 4364366 Panel, Manifold (Includes #7) 5 4364347 Knob, Thermostat 6 4364181 Thermostat 4364249 Screw, 6−32 x 3/8 7 4364111 Decal, Manifold 8 4364217 Rod, Support 9 4364218 Clip, Rod Support 4364151 Screw...


