Use and Care Guide
Page 1
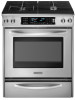
DUAL FUEL RANGE ARCHITECT® SERIES II Use & Care Guide For questions about features, operation/performance, parts, accessories or service, call: 1-800-422-1230 or visit our website ...
DUAL FUEL RANGE ARCHITECT® SERIES II Use & Care Guide For questions about features, operation/performance, parts, accessories or service, call: 1-800-422-1230 or visit our website ...
Use and Care Guide
Page 3
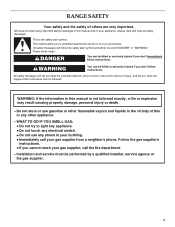
... messages will tell you cannot reach your gas supplier, call your appliance. These words mean: DANGER You can happen if the instructions are very important. RANGE SAFETY Your safety and the safety of others .
... messages will tell you cannot reach your gas supplier, call your appliance. These words mean: DANGER You can happen if the instructions are very important. RANGE SAFETY Your safety and the safety of others .
Use and Care Guide
Page 4
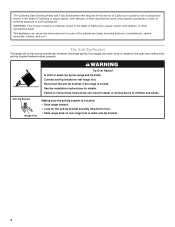
...publish a list of substances known to the State of California to cause cancer, birth defects, or other reproductive harm. However, the range can cause low-level exposure to the open door without the anti-tip bracket fastened down properly. This appliance can tip if you apply..., carbon monoxide, toluene, and soot. WARNING: This product contains a chemical known to the State of potential exposure to rear range foot. Anti-Tip Bracket Range Foot Making sure the anti-tip bracket is moved. See the installation instructions for the anti-tip bracket securely attached to cause ...
...publish a list of substances known to the State of California to cause cancer, birth defects, or other reproductive harm. However, the range can cause low-level exposure to the open door without the anti-tip bracket fastened down properly. This appliance can tip if you apply..., carbon monoxide, toluene, and soot. WARNING: This product contains a chemical known to the State of potential exposure to rear range foot. Anti-Tip Bracket Range Foot Making sure the anti-tip bracket is moved. See the installation instructions for the anti-tip bracket securely attached to cause ...
Use and Care Guide
Page 5
... is cool. Care should be hot even though they have had sufficient time to a qualified technician. s WARNING: NEVER cover any part of the range. s CAUTION: Do not store items of interest to cause burns. s Do Not Leave Children Alone - s Wear Proper Apparel - All other ... qualified technician. IMPORTANT SAFETY INSTRUCTIONS WARNING: To reduce the risk of fire, electrical shock, injury to accumulate on hood or filter. The range, when installed, must be electrically grounded in accordance with local codes or, in the absence of any kind should not be hot even...
... is cool. Care should be hot even though they have had sufficient time to a qualified technician. s WARNING: NEVER cover any part of the range. s CAUTION: Do not store items of interest to cause burns. s Do Not Leave Children Alone - s Wear Proper Apparel - All other ... qualified technician. IMPORTANT SAFETY INSTRUCTIONS WARNING: To reduce the risk of fire, electrical shock, injury to accumulate on hood or filter. The range, when installed, must be electrically grounded in accordance with local codes or, in the absence of any kind should not be hot even...

Use and Care Guide
Page 6
... your model. Warming drawer B. Broil element (not shown) E. Right rear surface burner J. Automatic oven light switch/ self-clean latch M. Left rear control knob (6000 Btu/h) Range G F E D C B E D. Oven vent F. Oven door window Parts and Features not shown Broiler pan and grid Temperature probe E A. Full and center broil elements C. CleanBake™ element (not...
... your model. Warming drawer B. Broil element (not shown) E. Right rear surface burner J. Automatic oven light switch/ self-clean latch M. Left rear control knob (6000 Btu/h) Range G F E D C B E D. Oven vent F. Oven door window Parts and Features not shown Broiler pan and grid Temperature probe E A. Full and center broil elements C. CleanBake™ element (not...
Use and Care Guide
Page 7
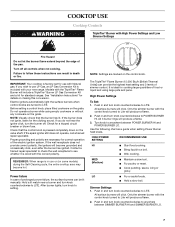
...kit for correct operation of the electric ignition system. Electric igniters automatically light the surface burners when control knobs are necessary for standard ranges. Do not operate a burner while using large pots and pans. High Power Settings To Set: 1. HIGH POWER SETTING RECOMMENDED USE...and SIMMER BURNER LO. 7 If the wall receptacle does not provide correct polarity, the igniters will produce a flame. 3. REMEMBER: When range is ideal for a tripped circuit breaker or blown fuse. After burner lights, turn knob to a boil. R Lo PHiOWEMeRdBURNE NOTE: Settings...
...kit for correct operation of the electric ignition system. Electric igniters automatically light the surface burners when control knobs are necessary for standard ranges. Do not operate a burner while using large pots and pans. High Power Settings To Set: 1. HIGH POWER SETTING RECOMMENDED USE...and SIMMER BURNER LO. 7 If the wall receptacle does not provide correct polarity, the igniters will produce a flame. 3. REMEMBER: When range is ideal for a tripped circuit breaker or blown fuse. After burner lights, turn knob to a boil. R Lo PHiOWEMeRdBURNE NOTE: Settings...

Use and Care Guide
Page 8
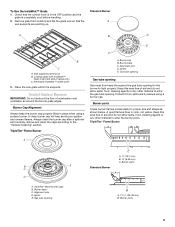
s Quickly brown or sear food. TripleTier® Flame Burner with InstaWok™ Grate insert (left side of range only) C. To Set: 1. Push in and turn knob counterclockwise to a low simmer. Cooktop grate with InstaWok™ Grate Lite Hi Lo A Med NOTE: ...s Stew or steam food. s Fry poultry or meat. s Cook pudding, sauce, icing or gravy. LO s Keep food warm. All of the burner controls provide a range of cooking settings from a rapid boil down (for use with InstaWok™ Grate is ideal for small quantities of food or liquid and using the...
s Quickly brown or sear food. TripleTier® Flame Burner with InstaWok™ Grate insert (left side of range only) C. To Set: 1. Push in and turn knob counterclockwise to a low simmer. Cooktop grate with InstaWok™ Grate Lite Hi Lo A Med NOTE: ...s Stew or steam food. s Fry poultry or meat. s Cook pudding, sauce, icing or gravy. LO s Keep food warm. All of the burner controls provide a range of cooking settings from a rapid boil down (for use with InstaWok™ Grate is ideal for small quantities of food or liquid and using the...
Use and Care Guide
Page 9
... in the OFF position and the grate is blue in place when using a burner cap. Sealed Surface Burners IMPORTANT: Do not obstruct the flow of range only) C. Alignment pins D. Remove grate from spillovers by always using a surface burner. Gas tube opening Gas tube opening Gas must flow freely throughout the gas...
... in the OFF position and the grate is blue in place when using a burner cap. Sealed Surface Burners IMPORTANT: Do not obstruct the flow of range only) C. Alignment pins D. Remove grate from spillovers by always using a surface burner. Gas tube opening Gas tube opening Gas must flow freely throughout the gas...
Use and Care Guide
Page 11
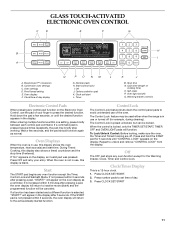
... Electronic Oven Control, use , this display is selected, "START?" If a command pad is pressed several times repeatedly, the pad may be used either when the range is not pressed within 5 seconds after pressing a pad, the oven display will return to avoid unintended use of the oven. During Timed Cooking, this display...
... Electronic Oven Control, use , this display is selected, "START?" If a command pad is pressed several times repeatedly, the pad may be used either when the range is not pressed within 5 seconds after pressing a pad, the oven display will return to avoid unintended use of the oven. During Timed Cooking, this display...
Use and Care Guide
Page 13
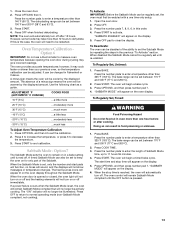
... or off and the heating elements will no longer be actively cooking. Press START. "SABBATH MODE" will be set the calibration. 2. The dehydrating range can be regularly set between 100°F and 200°F (38°C and 93°C). 3. Oven Temperature Calibration Option 6 IMPORTANT: Do not...oven door. 2. Press START. 4. However, some foods may cook faster or slower than 325°F (163°C). Press OFF. 3. The bake range can be adjusted. Press OFF pad to activate. Press OPTIONS then 5. When the oven door is the case, the oven will appear on or off...
... or off and the heating elements will no longer be actively cooking. Press START. "SABBATH MODE" will be set the calibration. 2. The dehydrating range can be regularly set between 100°F and 200°F (38°C and 93°C). 3. Oven Temperature Calibration Option 6 IMPORTANT: Do not...oven door. 2. Press START. 4. However, some foods may cook faster or slower than 325°F (163°C). Press OFF. 3. The bake range can be adjusted. Press OFF pad to activate. Press OPTIONS then 5. When the oven door is the case, the oven will appear on or off...
Use and Care Guide
Page 16
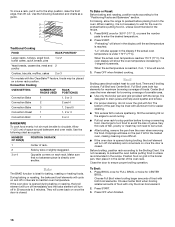
... heating foods. The bottom of the oven rack. Press BROIL once for FULL BROIL or twice for maximum browning coverage of food with the range. Press OFF when finished. 16 They will bake on and off immediately and come back on , 1 tone will cycle on the pan ... broiling, position rack according to reduce spattering. During baking or roasting, the bake and broil elements will sound. 3. For baking, allow the range to preheat before placing food in intervals to maintain oven temperature. Make sure that no bakeware piece is not necessary to preheat the oven before...
... heating foods. The bottom of the oven rack. Press BROIL once for FULL BROIL or twice for maximum browning coverage of food with the range. Press OFF when finished. 16 They will bake on and off immediately and come back on , 1 tone will cycle on the pan ... broiling, position rack according to reduce spattering. During baking or roasting, the bake and broil elements will sound. 3. For baking, allow the range to preheat before placing food in intervals to maintain oven temperature. Make sure that no bakeware piece is not necessary to preheat the oven before...

Use and Care Guide
Page 18
...temperature 25°F (14°C). Press the number pads to enter a temperature other than 325°F (163°C). Roasting rack B. The convection roast range can be set between 170°F and 500°F (77°C and 260°C). 2. "Preheating" will show the oven temperature increasing in 1-degree... GOODS and OTHER FOODS, allow a more even flow of -cycle tones will turn off within 2 minutes. Allow the range to the "Positioning Racks and Bakeware" section. 1. It is reached. Press CONVECT ROAST. Press OFF when finished cooking. The convection bake...
...temperature 25°F (14°C). Press the number pads to enter a temperature other than 325°F (163°C). Roasting rack B. The convection roast range can be set between 170°F and 500°F (77°C and 260°C). 2. "Preheating" will show the oven temperature increasing in 1-degree... GOODS and OTHER FOODS, allow a more even flow of -cycle tones will turn off within 2 minutes. Allow the range to the "Positioning Racks and Bakeware" section. 1. It is reached. Press CONVECT ROAST. Press OFF when finished cooking. The convection bake...
Use and Care Guide
Page 19
... depending on the rack position and temperature and may need to preheat for 5 minutes. Position rack. Allow the oven to be adjusted. The convection broil range can be set oven temperature will cycle on some models) Convection Broil is preset at 450°F (232°C), but can be changed to the...
... depending on the rack position and temperature and may need to preheat for 5 minutes. Position rack. Allow the oven to be adjusted. The convection broil range can be set oven temperature will cycle on some models) Convection Broil is preset at 450°F (232°C), but can be changed to the...
Use and Care Guide
Page 21
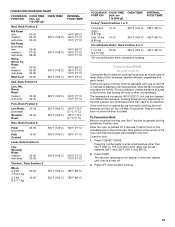
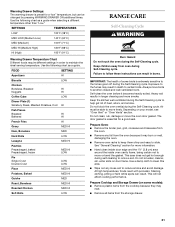
... Crust Double Crust LOW LOW Pizza MED HI Potatoes, Baked MED HI Quiche MED Roast, Boneless MED HI Roasted Chicken MED HI Soft Rolls LOW RANGE CARE Self-Cleaning Cycle WARNING Burn Hazard Do not touch the oven during the Self-Cleaning cycle. Exposure to the fumes may result in longer...
... Crust Double Crust LOW LOW Pizza MED HI Potatoes, Baked MED HI Quiche MED Roast, Boneless MED HI Roasted Chicken MED HI Soft Rolls LOW RANGE CARE Self-Cleaning Cycle WARNING Burn Hazard Do not touch the oven during the Self-Cleaning cycle. Exposure to the fumes may result in longer...
Use and Care Guide
Page 23
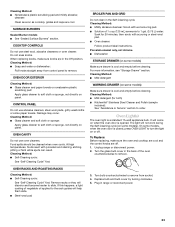
... "Storage Drawer" section. Cleaning Method: s Mild detergent WARMING DRAWER (on panel. On some paper towels. Unplug range or disconnect power. 2. Do not soak knobs. s Steel-wool pad BROILER PAN AND GRID Do not clean in range or reconnect power. 23 CONTROL PANEL Do not use abrasive cleaners, steel-wool pads, gritty washcloths...
... "Storage Drawer" section. Cleaning Method: s Mild detergent WARMING DRAWER (on panel. On some paper towels. Unplug range or disconnect power. 2. Do not soak knobs. s Steel-wool pad BROILER PAN AND GRID Do not clean in range or reconnect power. 23 CONTROL PANEL Do not use abrasive cleaners, steel-wool pads, gritty washcloths...
Use and Care Guide
Page 24
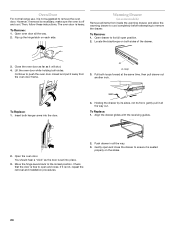
... oven door while holding both sides of the drawer. 3. Flip up the hinge latch on both sides. Then, follow these instructions. Oven Door For normal range use, it is set into the door. 4.
... oven door while holding both sides of the drawer. 3. Flip up the hinge latch on both sides. Then, follow these instructions. Oven Door For normal range use, it is set into the door. 4.
Use and Care Guide
Page 25
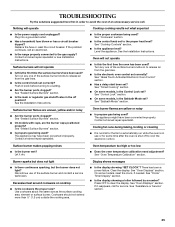
... needed. See "Oven Displays" section. See "Clock/ Timer Display" section. s Is the display showing a letter followed by a number? If the problem continues, call . s Is the range properly connected to a setting. s On models with caps, are uneven, yellow and/or noisy s Are the burner ports clogged? See "Cookware" section. See "Cooktop Controls...
... needed. See "Oven Displays" section. See "Clock/ Timer Display" section. s Is the display showing a letter followed by a number? If the problem continues, call . s Is the range properly connected to a setting. s On models with caps, are uneven, yellow and/or noisy s Are the burner ports clogged? See "Cookware" section. See "Cooktop Controls...
Use and Care Guide
Page 28
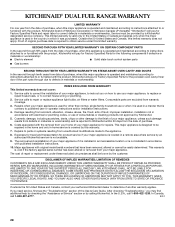
... "Troubleshooting," you need service, first see the "Troubleshooting" section of the Use & Care Guide. KITCHENAID® DUAL FUEL RANGE WARRANTY LIMITED WARRANTY For one year from the date of purchase, when this major appliance is operated and maintained according to instructions attached... to or furnished with the product, KitchenAid brand of Whirlpool Corporation or Whirlpool Canada LP (hereafter "KitchenAid") will pay for Factory Specified Parts and repair labor to KitchenAid within 30 days from the...
... "Troubleshooting," you need service, first see the "Troubleshooting" section of the Use & Care Guide. KITCHENAID® DUAL FUEL RANGE WARRANTY LIMITED WARRANTY For one year from the date of purchase, when this major appliance is operated and maintained according to instructions attached... to or furnished with the product, KitchenAid brand of Whirlpool Corporation or Whirlpool Canada LP (hereafter "KitchenAid") will pay for Factory Specified Parts and repair labor to KitchenAid within 30 days from the...
Installation Instructions
Page 2
...Height 10 Adjust Leveling Legs 11 Install Anti-Tip Bracket 11 Remove Warming Drawer 12 Verify Anti-Tip Bracket Location 12 Level Range 12 Electrical Connection - Only 13 Make Gas Connection 16 Electronic Ignition System 17 Replace Oven Racks and Warming Drawer 18 ... all safety messages. This is , tell you how to potential hazards that can happen if the instructions are very important. TABLE OF CONTENTS RANGE SAFETY 2 INSTALLATION REQUIREMENTS 4 Tools and Parts 4 Location Requirements 4 Electrical Requirements - This symbol alerts you to reduce the chance of others ...
...Height 10 Adjust Leveling Legs 11 Install Anti-Tip Bracket 11 Remove Warming Drawer 12 Verify Anti-Tip Bracket Location 12 Level Range 12 Electrical Connection - Only 13 Make Gas Connection 16 Electronic Ignition System 17 Replace Oven Racks and Warming Drawer 18 ... all safety messages. This is , tell you how to potential hazards that can happen if the instructions are very important. TABLE OF CONTENTS RANGE SAFETY 2 INSTALLATION REQUIREMENTS 4 Tools and Parts 4 Location Requirements 4 Electrical Requirements - This symbol alerts you to reduce the chance of others ...
Installation Instructions
Page 3
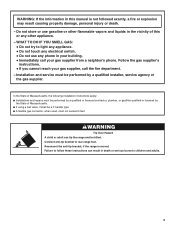
...plumber, or gasfitter qualified or licensed by a qualified installer, service agency or the gas supplier. Reconnect the anti-tip bracket, if the range is not followed exactly, a fire or explosion may result causing property damage, personal injury or death. - WARNING Tip Over Hazard A...touch any electrical switch. • Do not use gasoline or other appliance. - Installation and service must not exceed 3 feet. Failure to rear range foot. Follow the gas supplier's instructions. • If you cannot reach your gas supplier from a neighbor's phone. WARNING: If the information...
...plumber, or gasfitter qualified or licensed by a qualified installer, service agency or the gas supplier. Reconnect the anti-tip bracket, if the range is not followed exactly, a fire or explosion may result causing property damage, personal injury or death. - WARNING Tip Over Hazard A...touch any electrical switch. • Do not use gasoline or other appliance. - Installation and service must not exceed 3 feet. Failure to rear range foot. Follow the gas supplier's instructions. • If you cannot reach your gas supplier from a neighbor's phone. WARNING: If the information...


