
Use and Care Guide
Page 2
... Bracket 3 PARTS AND FEATURES 5 COOKTOP USE 6 Cooktop Controls 6 ACCUSIMMER™ Feature 6 Dual Cooking Zone 6 Ceramic Glass 6 Home Canning 7 Cookware 7 ELECTRONIC OVEN CONTROL 8 Display 8 Start 8 Stop Cancel 8 Clock 8 Tones 8 Fahrenheit and Celsius 9 Timer 9 Control Lock 9 12-Hour Shutoff 9 Oven Temperature Control 9 Meat Thermometer 10 Oven Vent with Removable Deflector 10 Oven Door Vent 11 REFRIGERATED OVEN USE 11 Cool Function 11 Sequence Programming 11 Bake 12 Broil 12 Convection Cooking 13 Convection Baking 13 Warm Hold Feature 14 Timed Cooking 15 RANGE...
... Bracket 3 PARTS AND FEATURES 5 COOKTOP USE 6 Cooktop Controls 6 ACCUSIMMER™ Feature 6 Dual Cooking Zone 6 Ceramic Glass 6 Home Canning 7 Cookware 7 ELECTRONIC OVEN CONTROL 8 Display 8 Start 8 Stop Cancel 8 Clock 8 Tones 8 Fahrenheit and Celsius 9 Timer 9 Control Lock 9 12-Hour Shutoff 9 Oven Temperature Control 9 Meat Thermometer 10 Oven Vent with Removable Deflector 10 Oven Door Vent 11 REFRIGERATED OVEN USE 11 Cool Function 11 Sequence Programming 11 Bake 12 Broil 12 Convection Cooking 13 Convection Baking 13 Warm Hold Feature 14 Timed Cooking 15 RANGE...

Use and Care Guide
Page 4
... ARE INSTALLED PROPERLY, SLIDE RANGE FORWARD, LOOK FOR ANTI-TIP BRACKET SECURELY ATTACHED TO FLOOR, AND SLIDE RANGE BACK SO REAR RANGE FOOT IS UNDER ANTI-TIP BRACKET. s Do Not Leave Children Alone - They should break, cleaning solutions and spillovers may penetrate the broken cooktop and create a risk of electric shock. Do not repair or replace any part of the heating element to burner will expose a portion of the range. s Storage in the manual...
... ARE INSTALLED PROPERLY, SLIDE RANGE FORWARD, LOOK FOR ANTI-TIP BRACKET SECURELY ATTACHED TO FLOOR, AND SLIDE RANGE BACK SO REAR RANGE FOOT IS UNDER ANTI-TIP BRACKET. s Do Not Leave Children Alone - They should break, cleaning solutions and spillovers may penetrate the broken cooktop and create a risk of electric shock. Do not repair or replace any part of the heating element to burner will expose a portion of the range. s Storage in the manual...
Use and Care Guide
Page 5
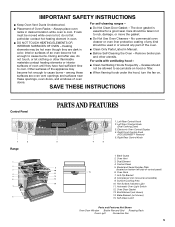
...Left Front Control Knob (Dual Cooking Zone) 3. Anti-Tip Bracket 8. Hot Surface Indicator Light 11. Bake Element (not shown) 15. elements may s Before Self-Cleaning the Oven - During and after use, do not let s Do Not Clean Door Gasket - For units with ventilating hood - Left Rear Control Knob 2. Model and Serial Number Plate (located on bottom left side of the oven. Automatic Oven Light Switch 12. Self-Clean Latch Parts and Features Not Shown Oven Door Window Broiler Pan and Grid Roasting Rack Oven Light Convection Fan 5 IMPORTANT SAFETY INSTRUCTIONS s Keep Oven Vent Ducts...
...Left Front Control Knob (Dual Cooking Zone) 3. Anti-Tip Bracket 8. Hot Surface Indicator Light 11. Bake Element (not shown) 15. elements may s Before Self-Cleaning the Oven - During and after use, do not let s Do Not Clean Door Gasket - For units with ventilating hood - Left Rear Control Knob 2. Model and Serial Number Plate (located on bottom left side of the oven. Automatic Oven Light Switch 12. Self-Clean Latch Parts and Features Not Shown Oven Door Window Broiler Pan and Grid Roasting Rack Oven Light Convection Fan 5 IMPORTANT SAFETY INSTRUCTIONS s Keep Oven Vent Ducts...

Use and Care Guide
Page 6
The control knobs can be used as a guide when setting heat levels. s Quickly brown or sear food. 5 [MED] s Maintain a slow boil. s Simmer. ACCUSIMMER™ Feature MAX MIN s Precise simmer control. REMEMBER: When range is on some models) during the Self-Cleaning cycle, the entire cooktop area may become trapped between HI and LO. 2. The indicator light will glow when the ACCUSIMMER feature setting is in use will help keep it...
The control knobs can be used as a guide when setting heat levels. s Quickly brown or sear food. 5 [MED] s Maintain a slow boil. s Simmer. ACCUSIMMER™ Feature MAX MIN s Precise simmer control. REMEMBER: When range is on some models) during the Self-Cleaning cycle, the entire cooktop area may become trapped between HI and LO. 2. The indicator light will glow when the ACCUSIMMER feature setting is in use will help keep it...
Use and Care Guide
Page 8
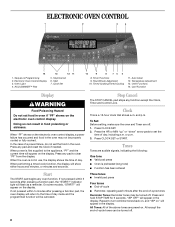
... display. ELECTRONIC OVEN CONTROL 1 2 3 4 ACCUBAKE FIRST STEP/ NEXT STEP REVIEW STEPS 1,2,3,4 UNDO PROGRAMMING C OOL CONVECT BAKE BAKE BROIL WARM AUTO CLEAN TEMP H E AT I N G O P T I O N S OVEN LIGHT B SA C E TIMER SET TIMER OFF CLOCK SET START TIME ST OP TIME MIN HR STOP CANCEL START TIMING OPTIONS 14 1. If not pressed within 5 minutes after pressing a function pad, the oven display will return to the time of day mode and the programmed function will be turned off. 8 On some models, "START?" will flash as a reminder. Press CLOCK SET or START...
... display. ELECTRONIC OVEN CONTROL 1 2 3 4 ACCUBAKE FIRST STEP/ NEXT STEP REVIEW STEPS 1,2,3,4 UNDO PROGRAMMING C OOL CONVECT BAKE BAKE BROIL WARM AUTO CLEAN TEMP H E AT I N G O P T I O N S OVEN LIGHT B SA C E TIMER SET TIMER OFF CLOCK SET START TIME ST OP TIME MIN HR STOP CANCEL START TIMING OPTIONS 14 1. If not pressed within 5 minutes after pressing a function pad, the oven display will return to the time of day mode and the programmed function will be turned off. 8 On some models, "START?" will flash as a reminder. Press CLOCK SET or START...
Use and Care Guide
Page 9
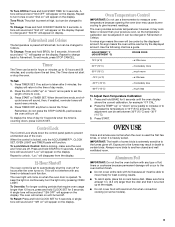
... Adjust Oven Temperature Calibration: 1. The adjustment can be changed to unlock. s Do not cover entire rack with any timed or delayed cook function. To Turn Off/On: Press and hold BROIL for 5 seconds. Repeat to cancel the Timer. Press START or TIMER SET. Press TIMER OFF anytime to turn tones on and "Snd on" will function. A single tone will sound and "Loc" will remain on the display. The oven will appear on the display. Oven Temperature Control...
... Adjust Oven Temperature Calibration: 1. The adjustment can be changed to unlock. s Do not cover entire rack with any timed or delayed cook function. To Turn Off/On: Press and hold BROIL for 5 seconds. Repeat to cancel the Timer. Press START or TIMER SET. Press TIMER OFF anytime to turn tones on and "Snd on" will function. A single tone will sound and "Loc" will remain on the display. The oven will appear on the display. Oven Temperature Control...
Use and Care Guide
Page 10
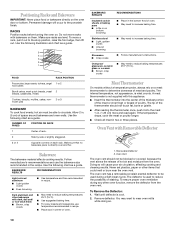
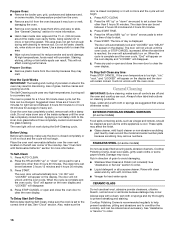
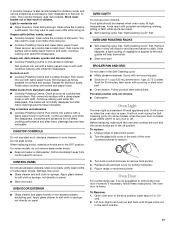
... the oven vent. s Use suggested baking time. s For pies, breads and casseroles, use the bakeware size recommended in the bottom third of oven. s May need to reduce baking temperatures 25°F (15°C). Stoneware s Crisp crusts s Follow manufacturer's instructions. A meat thermometer is used during any other items that no bottom browning s Place in the recipe. The tip of hot air and moisture from the oven vent. s Check...
... the oven vent. s Use suggested baking time. s For pies, breads and casseroles, use the bakeware size recommended in the bottom third of oven. s May need to reduce baking temperatures 25°F (15°C). Stoneware s Crisp crusts s Follow manufacturer's instructions. A meat thermometer is used during any other items that no bottom browning s Place in the recipe. The tip of hot air and moisture from the oven vent. s Check...
Use and Care Guide
Page 12
... Sequence: 1. "STEP" and "RECALL" will appear on the display. Changing the stop time of a step will cause display of all subsequent programmed cook functions. Press START. Bake ACCUBAKE® DUO SYSTEM™ Temperature Management The ACCUBAKE DUO SYSTEM electronically regulates the oven heat levels during preheat and bake to maintain the most uniform temperature control by varying factors such as room temperature and peak energy usage times. This feature is automatically activated...
... Sequence: 1. "STEP" and "RECALL" will appear on the display. Changing the stop time of a step will cause display of all subsequent programmed cook functions. Press START. Bake ACCUBAKE® DUO SYSTEM™ Temperature Management The ACCUBAKE DUO SYSTEM electronically regulates the oven heat levels during preheat and bake to maintain the most uniform temperature control by varying factors such as room temperature and peak energy usage times. This feature is automatically activated...
Use and Care Guide
Page 13
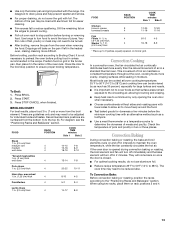
... and tastes. s For optimal cooking results, do not cover the grid with the range. To Convection Bake: Before convection baking or roasting, position the racks according to reduce spattering. To Broil: 1. Convection Cooking In a convection oven, the fan-circulated hot air continually distributes heat more evenly, crisping surfaces while sealing in two or three places. s Use a meat thermometer or a temperature probe to be shortened by only opening the oven door when necessary. The bottom...
... and tastes. s For optimal cooking results, do not cover the grid with the range. To Convection Bake: Before convection baking or roasting, position the racks according to reduce spattering. To Broil: 1. Convection Cooking In a convection oven, the fan-circulated hot air continually distributes heat more evenly, crisping surfaces while sealing in two or three places. s Use a meat thermometer or a temperature probe to be shortened by only opening the oven door when necessary. The bottom...
Use and Care Guide
Page 16
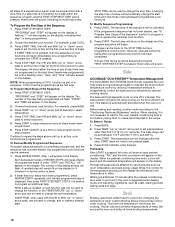
... " arrow pad to set to the correct time of day to clear the oven display. The oven light will not affect cooking performance. The door will automatically lock and "LOCKED" and "DELAY" will not begin . 1. Before Using: Before self-cleaning, make sure the clock is complete and the oven cools, "End" will appear on . s Liquid detergent or all controls are off and the oven and cooktop are suggested first...
... " arrow pad to set to the correct time of day to clear the oven display. The oven light will not affect cooking performance. The door will automatically lock and "LOCKED" and "DELAY" will not begin . 1. Before Using: Before self-cleaning, make sure the clock is complete and the oven cools, "End" will appear on . s Liquid detergent or all controls are off and the oven and cooktop are suggested first...
Use and Care Guide
Page 17
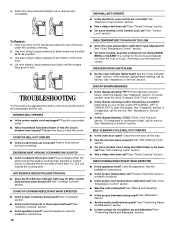
... instructions. Open oven door to slide. Hold scraper as flat as an accessory. Continue rubbing until white film disappears. Damage may want to remove from control panel to turn it is closed, press OVEN LIGHT to remove. Remove racks or they will discolor and become harder to the stop position (open . It will not totally disappear but after many cleanings become less noticeable. To replace: 1. Plug in the Self-Cleaning...
... instructions. Open oven door to slide. Hold scraper as flat as an accessory. Continue rubbing until white film disappears. Damage may want to remove from control panel to turn it is closed, press OVEN LIGHT to remove. Remove racks or they will discolor and become harder to the stop position (open . It will not totally disappear but after many cleanings become less noticeable. To replace: 1. Plug in the Self-Cleaning...
Use and Care Guide
Page 18
... heat level? Plug into the slots as far as the surface cooking area, element or surface burner. See "Cooktop Controls" section. See the Installation Instructions. 18 OVEN WILL NOT OPERATE s Is the electronic oven control set ? See "Control Lock" section. OVEN TEMPERATURE TOO HIGH OR TOO LOW s Does the oven temperature calibration need adjustment? If the indicator light(s) keeps flashing, call for the fan to flash, call . See "Assistance or Service" section. See "Self-Cleaning Cycle" section. s Is the proper oven temperature calibration set...
... heat level? Plug into the slots as far as the surface cooking area, element or surface burner. See "Cooktop Controls" section. See the Installation Instructions. 18 OVEN WILL NOT OPERATE s Is the electronic oven control set ? See "Control Lock" section. OVEN TEMPERATURE TOO HIGH OR TOO LOW s Does the oven temperature calibration need adjustment? If the indicator light(s) keeps flashing, call for the fan to flash, call . See "Assistance or Service" section. See "Self-Cleaning Cycle" section. s Is the proper oven temperature calibration set...
Use and Care Guide
Page 19
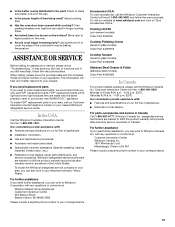
...-9991 and follow the instructions below. s Has the oven door been opened while cooking? It may save you can write to cover the edge of appliances. If you can also look in your telephone directory Yellow Pages. s Installation information. s Accessory and repair parts sales. Accessories U.S.A. Canning Unit Kit (coil element models) Order Part #242905 Cooktop Polishing Creme (ceramic glass models) Order Part #4392916 Cooktop Scraper (ceramic glass models) Order Part #3183488 Stainless Steel...
...-9991 and follow the instructions below. s Has the oven door been opened while cooking? It may save you can write to cover the edge of appliances. If you can also look in your telephone directory Yellow Pages. s Installation information. s Accessory and repair parts sales. Accessories U.S.A. Canning Unit Kit (coil element models) Order Part #242905 Cooktop Polishing Creme (ceramic glass models) Order Part #4392916 Cooktop Scraper (ceramic glass models) Order Part #3183488 Stainless Steel...
Use and Care Guide
Page 20
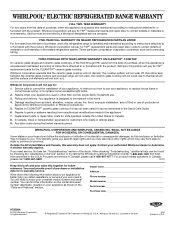
... fuses or correct house wiring, or to replace owner-accessible light bulbs. 2. Service must provide proof of purchase or installation date for in the third through fifth years from the date of purchase, when this appliance is operated and maintained according to instructions attached to or furnished with the product, Whirlpool Corporation will pay for FSP® replacement parts for the CLEANTOP® ceramic glass cooktop...
... fuses or correct house wiring, or to replace owner-accessible light bulbs. 2. Service must provide proof of purchase or installation date for in the third through fifth years from the date of purchase, when this appliance is operated and maintained according to instructions attached to or furnished with the product, Whirlpool Corporation will pay for FSP® replacement parts for the CLEANTOP® ceramic glass cooktop...

Installation Instructions
Page 1
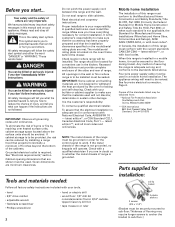
... Installation Instructions for local electrical inspector's use. IMPORTANT: Installer: Leave Installation Instructions with self-cleaning, convection oven WARNING Tip Over Hazard A child or adult can result in death or serious burns to children and adults. Save Installation Instructions for future reference. Write down the model and serial numbers before installing range. Both numbers are on the model/serial rating plate, located on the oven frame behind the door. Reconnect the anti-tip bracket, if the range is moved. Model Serial www.whirlpool.com Part...
... Installation Instructions for local electrical inspector's use. IMPORTANT: Installer: Leave Installation Instructions with self-cleaning, convection oven WARNING Tip Over Hazard A child or adult can result in death or serious burns to children and adults. Save Installation Instructions for future reference. Write down the model and serial numbers before installing range. Both numbers are on the model/serial rating plate, located on the oven frame behind the door. Reconnect the anti-tip bracket, if the range is moved. Model Serial www.whirlpool.com Part...
Installation Instructions
Page 2
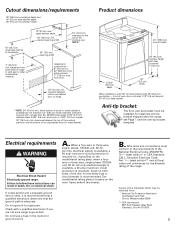
... ruler 2 Mobile home installation The installation of the range is the customer's responsibility: To contact a qualified electrical installer. See four-wire electrical connection, Page 6. This symbol alerts you have provided many important safety messages in order for baking and self-cleaning. WARNING You can happen if the instructions are in a mobile home installation. Read electrical and carpentry instructions. Make sure you to work. The range should be killed...
... ruler 2 Mobile home installation The installation of the range is the customer's responsibility: To contact a qualified electrical installer. See four-wire electrical connection, Page 6. This symbol alerts you have provided many important safety messages in order for baking and self-cleaning. WARNING You can happen if the instructions are in a mobile home installation. Read electrical and carpentry instructions. Make sure you to work. The range should be killed...
Installation Instructions
Page 3
... anti-tip bracket shipped with 25" (63.5 cm) countertop - If codes permit and a separate ground wire is used, it is recommended that a qualified electrician determine that the ground path is located on both sides of the standards listed may be installed. The model/serial rating plate is adequate. cabinet opening width 30" (76.2 cm) opening width For minimum clearance to a gas pipe. Electrical requirements WARNING Electrical Shock Hazard Electrically...
... anti-tip bracket shipped with 25" (63.5 cm) countertop - If codes permit and a separate ground wire is used, it is recommended that a qualified electrician determine that the ground path is located on both sides of the standards listed may be installed. The model/serial rating plate is adequate. cabinet opening width 30" (76.2 cm) opening width For minimum clearance to a gas pipe. Electrical requirements WARNING Electrical Shock Hazard Electrically...
Installation Instructions
Page 4
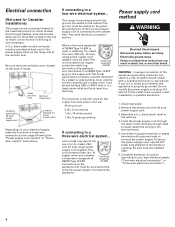
... type electrical supply ("Four-wire electrical connection" or "Three-wire electrical connection"). 4 A U.L.-listed cable conduit connector must be revised so the green grounding wire of the four-wire power supply cord is connected to connect the power supply. The minimum conductor sizes for the copper four-wire power cord are installed tight. 6. Electrically ground range. If it can be moved if servicing is ever necessary. brass terminal nuts terminal block cover knockout opening for 40 amp power supply cord knockout opening for power supply...
... type electrical supply ("Four-wire electrical connection" or "Three-wire electrical connection"). 4 A U.L.-listed cable conduit connector must be revised so the green grounding wire of the four-wire power supply cord is connected to connect the power supply. The minimum conductor sizes for the copper four-wire power cord are installed tight. 6. Electrically ground range. If it can be moved if servicing is ever necessary. brass terminal nuts terminal block cover knockout opening for 40 amp power supply cord knockout opening for power supply...
Installation Instructions
Page 7
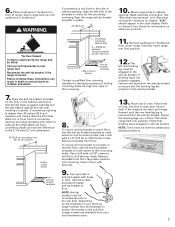
... properly in cutout shown anti-tip bracket template Contact a qualified floor covering installer for the countertop overhang. Remove cardboard or hardboard from floor. If countertop opening is moved. A 25" (63.5 cm) 10. A = Difference between countertop depth and 25" (63.5 cm). then front to side; Refer to Use and Care Guide for information on rack, first side to back. Place level on electronic controls. Carefully move range into...
... properly in cutout shown anti-tip bracket template Contact a qualified floor covering installer for the countertop overhang. Remove cardboard or hardboard from floor. If countertop opening is moved. A 25" (63.5 cm) 10. A = Difference between countertop depth and 25" (63.5 cm). then front to side; Refer to Use and Care Guide for information on rack, first side to back. Place level on electronic controls. Carefully move range into...
Installation Instructions
Page 8
... Pages of the cooktop elements and indicator lights. When you call the dealer from whom you have questions about operating, cleaning or maintaining your telephone directory under "Appliances - Both numbers are listed on the model/serial rating plate located on . Part No. 9758643 ©2004 Whirlpool Corporation Benton Harbor, Michigan 49022 Printed in and turn each surface unit control OFF LO HI knob to Use and Care Guide. ✓ Call the...
... Pages of the cooktop elements and indicator lights. When you call the dealer from whom you have questions about operating, cleaning or maintaining your telephone directory under "Appliances - Both numbers are listed on the model/serial rating plate located on . Part No. 9758643 ©2004 Whirlpool Corporation Benton Harbor, Michigan 49022 Printed in and turn each surface unit control OFF LO HI knob to Use and Care Guide. ✓ Call the...


