User Manual
Page 4
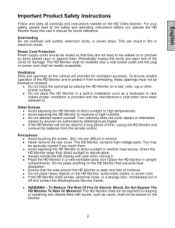
...are difficult to moisture or high humidity. Periodically inspect the cords and each end of the HD Monitor and to be walked on power cord shall be placed on the cabinet are provided for ventilation purposes. Precautions • Avoid touching the screen. Skin oils are not... is provided and the manufacturer's instruction have been adhered to reduce glare. • Always handle the HD display with care when moving it off and contact the Westinghouse Service Center. The HD Monitor contains high-voltage parts. Important Product Safety Instructions Follow and obey all the ...
...are difficult to moisture or high humidity. Periodically inspect the cords and each end of the HD Monitor and to be walked on power cord shall be placed on the cabinet are provided for ventilation purposes. Precautions • Avoid touching the screen. Skin oils are not... is provided and the manufacturer's instruction have been adhered to reduce glare. • Always handle the HD display with care when moving it off and contact the Westinghouse Service Center. The HD Monitor contains high-voltage parts. Important Product Safety Instructions Follow and obey all the ...
User Manual
Page 5
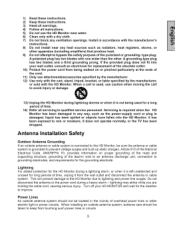
... of the cord. 11) Only use the HD Monitor near any way, such as radiators, heat registers, stoves, or other electric light or power circuits. Servicing is required when the HD Monitor has been damaged in the vicinity of time. 14) Refer all instructions. 5) Do not use ...warnings. 4) Follow all servicing to qualified service personnel. When installing an outside antenna system should be located in any heat sources such as the power-supply cord or plug is grounded to prevent voltage surges and built-up static charges. A grounding-type plug has two blades and a third...
... of the cord. 11) Only use the HD Monitor near any way, such as radiators, heat registers, stoves, or other electric light or power circuits. Servicing is required when the HD Monitor has been damaged in the vicinity of time. 14) Refer all instructions. 5) Do not use ...warnings. 4) Follow all servicing to qualified service personnel. When installing an outside antenna system should be located in any heat sources such as the power-supply cord or plug is grounded to prevent voltage surges and built-up static charges. A grounding-type plug has two blades and a third...
User Manual
Page 6
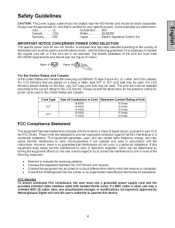
... Center or an experienced radio/Monitor technician for a Class B digital device, pursuant to correct the interference by Westinghouse Digital will not occur in a particular installation. For LCD Monitors placed directly on a desk or table, type SVT or SJT cord sets may be used in Cord Maximum Current ... and has been selected according to the country of the following guidelines if it is necessary to operate this HD Monitor is certified for power cords used . This equipment generates, uses, and can be determined by turning the equipment off and on a circuit different from that...
... Center or an experienced radio/Monitor technician for a Class B digital device, pursuant to correct the interference by Westinghouse Digital will not occur in a particular installation. For LCD Monitors placed directly on a desk or table, type SVT or SJT cord sets may be used in Cord Maximum Current ... and has been selected according to the country of the following guidelines if it is necessary to operate this HD Monitor is certified for power cords used . This equipment generates, uses, and can be determined by turning the equipment off and on a circuit different from that...
User Manual
Page 8
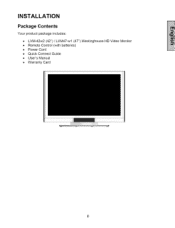
INSTALLATION Package Contents Your product package includes: • LVM-42w2 (42") / LVM47-w1 (47") Westinghouse • Remote Control (with batteries) • Power Cord • Quick Connect Guide • User's Manual • Warranty Card HD Video Monitor
INSTALLATION Package Contents Your product package includes: • LVM-42w2 (42") / LVM47-w1 (47") Westinghouse • Remote Control (with batteries) • Power Cord • Quick Connect Guide • User's Manual • Warranty Card HD Video Monitor
User Manual
Page 11
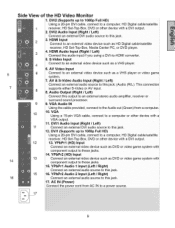
...the cable provided, connect to an external video device such as DVD or video game system with component output to these jacks. 14. AC IN (Power} Connect the power cord from a corn puter. 10 10. HD Digital cable/satellite 1 receiver. DVl2 Audio Input (Right / Left) Connect an external DVI audio ...source to a power source. HDMI Audio Input (Right / Left} Connect the audio input if you using a DVI-to an external video device such as DVD or video ...
...the cable provided, connect to an external video device such as DVD or video game system with component output to these jacks. 14. AC IN (Power} Connect the power cord from a corn puter. 10 10. HD Digital cable/satellite 1 receiver. DVl2 Audio Input (Right / Left) Connect an external DVI audio ...source to a power source. HDMI Audio Input (Right / Left} Connect the audio input if you using a DVI-to an external video device such as DVD or video ...
User Manual
Page 12
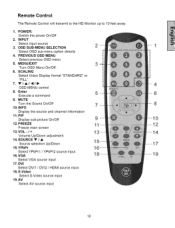
...12 Freeze main screen 13.VOL - / + 1 14 Volume Up/Down adjustment 14.SOURCE • / • ! POWER: Switch the power On/Off 2. PREVIOUS OSD MENU Select previous OSD menu 5. Enter 6 Execute a command 9. VGA 1 Select VGA source input ...11. Remote Control The Remote Control will transmit to the HD Monitor up to 10 feet away. 1. SCALING Select Video Display format "STANDARD" or "FILL" 7. MUTE Turn the Sound On/Off 7 8 10.1NFO Display...
...12 Freeze main screen 13.VOL - / + 1 14 Volume Up/Down adjustment 14.SOURCE • / • ! POWER: Switch the power On/Off 2. PREVIOUS OSD MENU Select previous OSD menu 5. Enter 6 Execute a command 9. VGA 1 Select VGA source input ...11. Remote Control The Remote Control will transmit to the HD Monitor up to 10 feet away. 1. SCALING Select Video Display format "STANDARD" or "FILL" 7. MUTE Turn the Sound On/Off 7 8 10.1NFO Display...
User Manual
Page 15
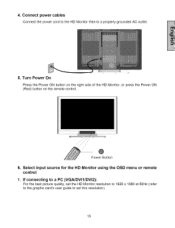
Turn Power On Press the Power ON button on the right side of the HD Monitor, or press the Power ON (Red) button on the remote control. Power Button 6. Connect power cables Connect the power cord to the HD Monitor then to set this resolution). 13 If connecting to a PC (VGA/DVI1/DVI2): For the best picture quality, set the HD Monitor resolution to 1920 x 1080 at 60Hz (refer to the graphic card's user guide to a properly grounded AC outlet. 5. Select input source for the HD Monitor using the OSD menu or remote control 7. 4.
Turn Power On Press the Power ON button on the right side of the HD Monitor, or press the Power ON (Red) button on the remote control. Power Button 6. Connect power cables Connect the power cord to the HD Monitor then to set this resolution). 13 If connecting to a PC (VGA/DVI1/DVI2): For the best picture quality, set the HD Monitor resolution to 1920 x 1080 at 60Hz (refer to the graphic card's user guide to a properly grounded AC outlet. 5. Select input source for the HD Monitor using the OSD menu or remote control 7. 4.
User Manual
Page 21
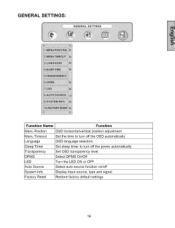
GENERAL SETTINGS: Function Name Menu Position Menu Timeout Language Sleep Timer Transparency DPMS LED Auto Source System Info Factory Reset Function OSD horizontal/vertical position adjustment Set the time to turn off the OSD automatically OSD language selection Set sleep timer to turn off the power automatically Set OSD transparency level Select DPMS On/Off Turn the LED ON or OFF Select auto source function on/off Display Input source, type and signal Restore factory default settings 19
GENERAL SETTINGS: Function Name Menu Position Menu Timeout Language Sleep Timer Transparency DPMS LED Auto Source System Info Factory Reset Function OSD horizontal/vertical position adjustment Set the time to turn off the OSD automatically OSD language selection Set sleep timer to turn off the power automatically Set OSD transparency level Select DPMS On/Off Turn the LED ON or OFF Select auto source function on/off Display Input source, type and signal Restore factory default settings 19
User Manual
Page 22
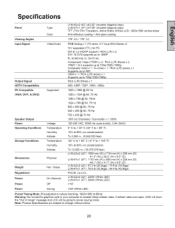
Specifications Panel Viewing Angles Input Signal Output Signal HDTV Compatibility PC Compatible (VGA, DVI1, & DVI2) Speaker Output Power Operating Conditions Storage Conditions Dimensions Weight Regulations Type Color Video/Audio Supported Voltage Temperature Humidity Altitude Temperature Humidity Altitude Physical Net / Gross LVM-42w2 (42") (42.02" viewable diagonal area) LVM-47w1 (47") (47.00" viewable diagonal area) TFT (Thin...
Specifications Panel Viewing Angles Input Signal Output Signal HDTV Compatibility PC Compatible (VGA, DVI1, & DVI2) Speaker Output Power Operating Conditions Storage Conditions Dimensions Weight Regulations Type Color Video/Audio Supported Voltage Temperature Humidity Altitude Temperature Humidity Altitude Physical Net / Gross LVM-42w2 (42") (42.02" viewable diagonal area) LVM-47w1 (47") (47.00" viewable diagonal area) TFT (Thin...
User Manual
Page 23
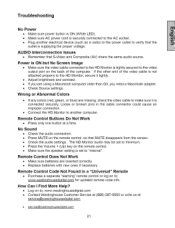
...pins in a "Universal" Remote • Purchase a separate "learning" remote control or log on to another electrical device (such as a radio) to the power outlet to make sure it tightly. • . How Can I Find More Help? Remote Control Does Not Work • Make sure batteries are using a ... to the HD Monitor, secure it is supplying the proper voltage. The HD Monitor audio may be set to : www.westinghousedigital.com Contact Westinghouse Customer Service [email protected] at (866) 287-5555 or write us at a time. Log on the remote control, so that S-Video...
...pins in a "Universal" Remote • Purchase a separate "learning" remote control or log on to another electrical device (such as a radio) to the power outlet to make sure it tightly. • . How Can I Find More Help? Remote Control Does Not Work • Make sure batteries are using a ... to the HD Monitor, secure it is supplying the proper voltage. The HD Monitor audio may be set to : www.westinghousedigital.com Contact Westinghouse Customer Service [email protected] at (866) 287-5555 or write us at a time. Log on the remote control, so that S-Video...

