
English Manual
Page 2
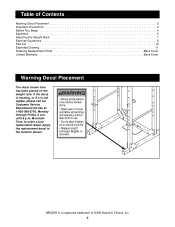
... order a free replacement decal. until 6 p.m. WEIDER is not legible, please call our Customer Service Department toll-free at 1-800-999-3756, Monday through Friday, 6 a.m. If the decal is missing, or if it is a registered trademark of Contents Warning Decal Placement 2 Important Precautions 3 Before You Begin 4 Assembly 5 Adjusting the Weight Rack 7 Exercise Guidelines...
... order a free replacement decal. until 6 p.m. WEIDER is not legible, please call our Customer Service Department toll-free at 1-800-999-3756, Monday through Friday, 6 a.m. If the decal is missing, or if it is a registered trademark of Contents Warning Decal Placement 2 Important Precautions 3 Before You Begin 4 Assembly 5 Adjusting the Weight Rack 7 Exercise Guidelines...

English Manual
Page 4
... you, please note the product model number and serial number before using the weight rack. If you for selecting the versatile WEIDER¨ PRO 400 weight rack. The serial number can be found on a decal attached to help you want. Before You Begin Thank you have...Department Before reading further, please review the drawing below and familiarize yourself with the parts that are labeled. The WEIDER¨ PRO 400 is WEBE14100. Whether your benefit, read this manual). Assembled Dimensions: Height: 81Ó Base: 49Ó x 40Ó Crossbar Small Weight Rest Weight Rest Right...
... you, please note the product model number and serial number before using the weight rack. If you for selecting the versatile WEIDER¨ PRO 400 weight rack. The serial number can be found on a decal attached to help you want. Before You Begin Thank you have...Department Before reading further, please review the drawing below and familiarize yourself with the parts that are labeled. The WEIDER¨ PRO 400 is WEBE14100. Whether your benefit, read this manual). Assembled Dimensions: Height: 81Ó Base: 49Ó x 40Ó Crossbar Small Weight Rest Weight Rest Right...

English Manual
Page 5
... Bases (1, 3). Attach the Rear Uprights (8) to do otherwise. ¥ As you have the following information and instructions: ¥ Assembly requires two people. ¥ Place all parts are oriented as shown, with the adjustment holes on the indicated side near the bottom.... (9). Do not tighten the Nylon Locknuts yet. 1 14 9 4 1 2 14 4 3 14 9 14 2 8 4 1 Adjustment Holes 8 9 2 19 9 19 15 5 3 5 Assembly Before beginning assembly, carefully read the following tools: A socket set, a set of open-end or closed-end wrenches or a set of ratchet wrenches. Attach the Right and...
... Bases (1, 3). Attach the Rear Uprights (8) to do otherwise. ¥ As you have the following information and instructions: ¥ Assembly requires two people. ¥ Place all parts are oriented as shown, with the adjustment holes on the indicated side near the bottom.... (9). Do not tighten the Nylon Locknuts yet. 1 14 9 4 1 2 14 4 3 14 9 14 2 8 4 1 Adjustment Holes 8 9 2 19 9 19 15 5 3 5 Assembly Before beginning assembly, carefully read the following tools: A socket set, a set of open-end or closed-end wrenches or a set of ratchet wrenches. Attach the Right and...

English Manual
Page 6
... (7, 8) in the Joint Plates line up , turn the Front Upright upsidedown. Do not tighten the Nylon Locknuts yet. 5. Do not tighten the Nylon Locknuts yet. Assemble the Right Frame (10) to the Left Base (3) using four M10 x 80mm Bolts (4) and four M10 Nylon Locknuts (9). Attach one of the Front Upright and...
... (7, 8) in the Joint Plates line up , turn the Front Upright upsidedown. Do not tighten the Nylon Locknuts yet. 5. Do not tighten the Nylon Locknuts yet. Assemble the Right Frame (10) to the Left Base (3) using four M10 x 80mm Bolts (4) and four M10 Nylon Locknuts (9). Attach one of the Front Upright and...


