

E261VA User Manual
Page 2
...HDMI logo and High-Definition Multimedia Interface are incorporated under license from SRS Labs, Inc. Changing the factory default picture settings or enabling other features will increase power consumption that could exceed the limits necessary to qualify for ENERGY STAR in the "factory ...default" setting and this is the setting in which power savings will be achieved. TruSurround HD and TruVolume technologies are trademarks or registered trademarks of SRS Labs...
...HDMI logo and High-Definition Multimedia Interface are incorporated under license from SRS Labs, Inc. Changing the factory default picture settings or enabling other features will increase power consumption that could exceed the limits necessary to qualify for ENERGY STAR in the "factory ...default" setting and this is the setting in which power savings will be achieved. TruSurround HD and TruVolume technologies are trademarks or registered trademarks of SRS Labs...
E261VA User Manual
Page 6
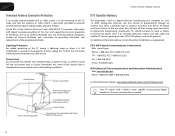
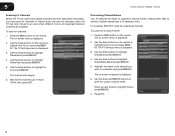
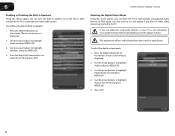
...TV during a lightning storm or when it could fall into such power lines or circuits. E190VA / E220VA / E260VA / E261VA Television Antenna Connection Protection If an outside antenna/satellite dish or cable system is to be connected to earth in the building installation. Remember... broadcasting. No extra converter box is electrically grounded to provide some protection against voltage surges and static charges. Analog-only television sets that the antenna or cable system is needed. Article 810 of the National Electrical Code, ANSI/NFPSA 70, provides information with...
...TV during a lightning storm or when it could fall into such power lines or circuits. E190VA / E220VA / E260VA / E261VA Television Antenna Connection Protection If an outside antenna/satellite dish or cable system is to be connected to earth in the building installation. Remember... broadcasting. No extra converter box is electrically grounded to provide some protection against voltage surges and static charges. Analog-only television sets that the antenna or cable system is needed. Article 810 of the National Electrical Code, ANSI/NFPSA 70, provides information with...
E261VA User Manual
Page 7
...the Batteries 5 Completing the First-Time Setup 6 Connecting Your Devices to the TV 7 Before You Begin 7 Connecting Your Devices 7 Adjusting the TV Settings 9 Changing the Input Source 9 Customizing and Removing Input Names 9 Customizing Input Names 9 Removing Unused Inputs from the Input List 10... or Additional Channels 11 Scanning for Channels 12 Customizing Channel Names 12 Changing the On-Screen Menu Language 13 Setting the TV's Date and Time 13 Setting the Time Zone 13 Adjusting the Time for Daylight Savings 14 Enabling or Disabling Automatic Date and Time Updates...
...the Batteries 5 Completing the First-Time Setup 6 Connecting Your Devices to the TV 7 Before You Begin 7 Connecting Your Devices 7 Adjusting the TV Settings 9 Changing the Input Source 9 Customizing and Removing Input Names 9 Customizing Input Names 9 Removing Unused Inputs from the Input List 10... or Additional Channels 11 Scanning for Channels 12 Customizing Channel Names 12 Changing the On-Screen Menu Language 13 Setting the TV's Date and Time 13 Setting the Time Zone 13 Adjusting the Time for Daylight Savings 14 Enabling or Disabling Automatic Date and Time Updates...
E261VA User Manual
Page 8
...and Resetting to Factory Defaults 28 Displaying System Information 28 Restoring the TV to the Factory Default Settingss 28 Restarting the Setup App 28 Setting Up Closed Captioning 29 Changing the Appearance of Digital Closed Captions 29 Troubleshooting & Technical Support 30 The TV displays "No Signal 30...34 Type of Service 34 Limitations and Exclusions 34 Personal Data 34 Zero Bright Pixel Defect Guarantee 34 8 E190VA / E220VA / E260VA / E261VA Legal & Compliance 35 FCC Class B Radio Interference Statement 35 Notice...35 FCC warning 35 Caution 35 Open Source Software Notice 35
...and Resetting to Factory Defaults 28 Displaying System Information 28 Restoring the TV to the Factory Default Settingss 28 Restarting the Setup App 28 Setting Up Closed Captioning 29 Changing the Appearance of Digital Closed Captions 29 Troubleshooting & Technical Support 30 The TV displays "No Signal 30...34 Type of Service 34 Limitations and Exclusions 34 Personal Data 34 Zero Bright Pixel Defect Guarantee 34 8 E190VA / E220VA / E260VA / E261VA Legal & Compliance 35 FCC Class B Radio Interference Statement 35 Notice...35 FCC warning 35 Caution 35 Open Source Software Notice 35
E261VA User Manual
Page 14
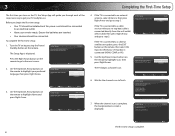
...Arrow. Initial Setup completed EXIT Exit Complete Back Next The first-time setup is displayed. The Setup App is complete. 6 Initial Setup Allow the VIZIO setup Wizard to help you tune your language: Language English Español Français 3. Use the Up/Down Arrow buttons on the ...Right Arrow. Wait for use. Use the Up/Down Arrow buttons on the remote to an electrical outlet. • Have your input location: Mode Setting Home Retail Back Select Next EXIT Exit 4. Before you begin the first-time setup: • Your TV should be installed and the power cord should...
...Arrow. Initial Setup completed EXIT Exit Complete Back Next The first-time setup is displayed. The Setup App is complete. 6 Initial Setup Allow the VIZIO setup Wizard to help you tune your language: Language English Español Français 3. Use the Up/Down Arrow buttons on the ...Right Arrow. Wait for use. Use the Up/Down Arrow buttons on the remote to an electrical outlet. • Have your input location: Mode Setting Home Retail Back Select Next EXIT Exit 4. Before you begin the first-time setup: • Your TV should be installed and the power cord should...
E261VA User Manual
Page 15
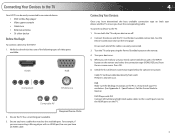
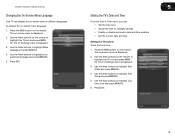
... . 5. Press OK. 6. Turn the TV on by pressing the Power/Standby button on the TV. 7 Check the list of the cable is set to Normal. Ensure you have the corresponding cable. Use the best available connection. Connecting Your Devices to the TV Your HDTV can be sure you...TV and your device are off. 2. Verify that matches the available port. RGB Make sure the desktop resolution on the PC is securely connected. 3. Specifications.) Set the Screen Mode to match your TV's resolution. (See Appendix A - Ensure the TV has a matching port available. 3. Connect the device and the TV....
... . 5. Press OK. 6. Turn the TV on by pressing the Power/Standby button on the TV. 7 Check the list of the cable is set to Normal. Ensure you have the corresponding cable. Use the best available connection. Connecting Your Devices to the TV Your HDTV can be sure you...TV and your device are off. 2. Verify that matches the available port. RGB Make sure the desktop resolution on the PC is securely connected. 3. Specifications.) Set the Screen Mode to match your TV's resolution. (See Appendix A - Ensure the TV has a matching port available. 3. Connect the device and the TV....
E261VA User Manual
Page 17
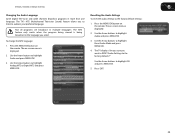
... the remote to your TV. You can also change the input device: 1. The on -screen menu. Adjusting the TV Settings 5 From the TV Settings Menu, you can: • Change the input source • Set up channels • Change the on-screen menu language • Change the TV's date and time • Adjust the... TV settings for use one of these inputs to make them easy to highlight Input Naming and press MENU/OK. The on the remote to highlight the ...
... the remote to your TV. You can also change the input device: 1. The on -screen menu. Adjusting the TV Settings 5 From the TV Settings Menu, you can: • Change the input source • Set up channels • Change the on-screen menu language • Change the TV's date and time • Adjust the... TV settings for use one of these inputs to make them easy to highlight Input Naming and press MENU/OK. The on the remote to highlight the ...
E261VA User Manual
Page 18
... remove, then press MENU/OK. 5. The on-screen menu is displayed. 3. The TV Settings menu is displayed. 2. The on the remote. Use the Arrow buttons to highlight the TV icon and press MENU/ OK. Press EXIT. 10 Press the ... the Input List To remove unused inputs: 1. Use the Arrow buttons on the remote to highlight Input Naming and press MENU/OK. 4. E190VA / E220VA / E260VA / E261VA Setting Up Channels From the channel menu you can change the signal source for new/additional channels • Start a new channel scan • Customize channel names...
... remove, then press MENU/OK. 5. The on-screen menu is displayed. 3. The TV Settings menu is displayed. 2. The on the remote. Use the Arrow buttons to highlight the TV icon and press MENU/ OK. Press EXIT. 10 Press the ... the Input List To remove unused inputs: 1. Use the Arrow buttons on the remote to highlight Input Naming and press MENU/OK. 4. E190VA / E220VA / E260VA / E261VA Setting Up Channels From the channel menu you can change the signal source for new/additional channels • Start a new channel scan • Customize channel names...
E261VA User Manual
Page 19
...scan. See Scanning for new channels: 1. Use the Arrow buttons to new channels only. Press EXIT. The on-screen menu is displayed. 3. The TV Settings menu is displayed. 2. Use the Arrow buttons to highlight Additional Scan. 5. To remove a channel from the list, highlight Unmark All and press MENU/OK... Use the Left/Right Arrow buttons to change the option to highlight the TV icon and press MENU/ OK. E190VA / E220VA / E260VA / E261VA 5 Customizing the Master Channel List By customizing the master channel list, you do not have to add the new channel. The on the remote to...
...scan. See Scanning for new channels: 1. Use the Arrow buttons to new channels only. Press EXIT. The on-screen menu is displayed. 3. The TV Settings menu is displayed. 2. Use the Arrow buttons to highlight Additional Scan. 5. To remove a channel from the list, highlight Unmark All and press MENU/OK... Use the Left/Right Arrow buttons to change the option to highlight the TV icon and press MENU/ OK. E190VA / E220VA / E260VA / E261VA 5 Customizing the Master Channel List By customizing the master channel list, you do not have to add the new channel. The on the remote to...
E261VA User Manual
Page 20
...Arrow and MENU/OK buttons to highlight the TV icon and press MENU/ OK. Press EXIT. 12 5 E190VA / E220VA / E260VA / E261VA Scanning for Channels Before the TV can detect and display channels and their associated information, you are available. Use the Arrow buttons on the remote... buttons on the remote. To customize a channel name: 1. Press the MENU button on -screen keyboard is displayed. 2. The TV Settings menu is displayed. 3. The TV Settings menu is displayed. 3. Press the MENU button on the remote to highlight Channel Scan and press MENU/OK. 5. To scan for...
...Arrow and MENU/OK buttons to highlight the TV icon and press MENU/ OK. Press EXIT. 12 5 E190VA / E220VA / E260VA / E261VA Scanning for Channels Before the TV can detect and display channels and their associated information, you are available. Use the Arrow buttons on the remote... buttons on the remote. To customize a channel name: 1. Press the MENU button on -screen keyboard is displayed. 2. The TV Settings menu is displayed. 3. The TV Settings menu is displayed. 3. Press the MENU button on the remote to highlight Channel Scan and press MENU/OK. 5. To scan for...
E261VA User Manual
Page 21
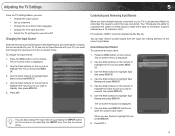
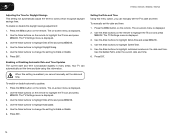
... Arrow buttons on -screen menu in different languages. Press the MENU button on -screen menu is displayed. 2. The TV Settings menu is displayed. 3. Press EXIT. 13 Press EXIT. 5 Setting the TV's Date and Time From the Date & Time menu, you can display the on the remote to highlight your .../ OK. Use the Arrow buttons to highlight Date & Time and press MENU/OK. 4. E190VA / E220VA / E260VA / E261VA Changing the On-Screen Menu Language Your TV can : • Set the time zone • Adjust the time for daylight savings • Enable or disable automatic date and time updates •...
... Arrow buttons on -screen menu in different languages. Press the MENU button on -screen menu is displayed. 2. The TV Settings menu is displayed. 3. Press EXIT. 13 Press EXIT. 5 Setting the TV's Date and Time From the Date & Time menu, you can display the on the remote to highlight your .../ OK. Use the Arrow buttons to highlight Date & Time and press MENU/OK. 4. E190VA / E220VA / E260VA / E261VA Changing the On-Screen Menu Language Your TV can : • Set the time zone • Adjust the time for daylight savings • Enable or disable automatic date and time updates •...
E261VA User Manual
Page 22
...or disable automatic updates: 1. Press the MENU button on the remote. Use the Arrow buttons to highlight Current Tiime. 5. Press EXIT. Setting the Date and Time Using this information. Use the Arrow buttons to highlight Auto Update. 5. The on the remote to highlight the TV ...3. The on the remote. Use the Arrow buttons to highlight Daylight Saving. 5. 5 E190VA / E220VA / E260VA / E261VA Adjusting the Time for Daylight Savings This setting will automatically adjust the time for zones which recognize daylight savings time. Use the Arrow buttons on the remote to Enable ...
...or disable automatic updates: 1. Press the MENU button on the remote. Use the Arrow buttons to highlight Current Tiime. 5. Press EXIT. Setting the Date and Time Using this information. Use the Arrow buttons to highlight Auto Update. 5. The on the remote to highlight the TV ...3. The on the remote. Use the Arrow buttons to highlight Daylight Saving. 5. 5 E190VA / E220VA / E260VA / E261VA Adjusting the Time for Daylight Savings This setting will automatically adjust the time for zones which recognize daylight savings time. Use the Arrow buttons on the remote to Enable ...

E261VA User Manual
Page 23
...when viewing content from a home computer using the RGB port. Adjust the synchronization between the PC and the TV. E190VA / E220VA / E260VA / E261VA 5 Adjusting the TV Settings for Use with A PC Your TV can be used to automatically adjust the picture for best quality, select Auto Sync and press MENU/OK.... 15 The TV Settings menu is displayed. 2. Use the Arrow and MENU/OK buttons to adjust each of the picture. Adjust the horizontal (left/ right) position of ...
...when viewing content from a home computer using the RGB port. Adjust the synchronization between the PC and the TV. E190VA / E220VA / E260VA / E261VA 5 Adjusting the TV Settings for Use with A PC Your TV can be used to automatically adjust the picture for best quality, select Auto Sync and press MENU/OK.... 15 The TV Settings menu is displayed. 2. Use the Arrow and MENU/OK buttons to adjust each of the picture. Adjust the horizontal (left/ right) position of ...
E261VA User Manual
Page 24
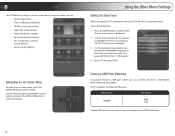
... to power off after which you can connect and share a USB thumb drive containing your images onto a USB thumb drive. 16 Using the Other Menu Settings Setting the Sleep Timer When activated, the TV's sleep timer will turn the TV off (30, 60, 90, or 120 minutes). 4. To use on -screen menu... is displayed. 3. Press the MENU button on the remote to highlight the period of time after a set period of time. Use the Up/Down Arrow buttons on the remote. The on -screen menu. 6 Your TV features an easy-to-use the sleep...
... to power off after which you can connect and share a USB thumb drive containing your images onto a USB thumb drive. 16 Using the Other Menu Settings Setting the Sleep Timer When activated, the TV's sleep timer will turn the TV off (30, 60, 90, or 120 minutes). 4. To use on -screen menu... is displayed. 3. Press the MENU button on the remote to highlight the period of time after a set period of time. Use the Up/Down Arrow buttons on the remote. The on -screen menu. 6 Your TV features an easy-to-use the sleep...
E261VA User Manual
Page 26
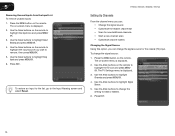
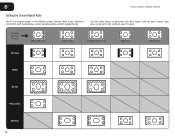
Original Content Format 480p/480i (4:3) 720p (16:9) 1080p/1080i (16:9) RGB (4:3) RGB (16:9) Normal Wide Zoom Panoramic Stretch 18 Areas in five different modes: Normal, Wide, Zoom, Panoramic, and Stretch. Each mode displays content according to determine the best aspect ratio for your TV screen. Use the table below to the content's original format. 6 E190VA / E220VA / E260VA / E261VA Setting the Screen Aspect Ratio The TV can display images in red will not be visible on your content type.
Original Content Format 480p/480i (4:3) 720p (16:9) 1080p/1080i (16:9) RGB (4:3) RGB (16:9) Normal Wide Zoom Panoramic Stretch 18 Areas in five different modes: Normal, Wide, Zoom, Panoramic, and Stretch. Each mode displays content according to determine the best aspect ratio for your TV screen. Use the table below to the content's original format. 6 E190VA / E220VA / E260VA / E261VA Setting the Screen Aspect Ratio The TV can display images in red will not be visible on your content type.
E261VA User Manual
Page 27
...other technology offered for widescreen viewing (1.85:1 or 2.35:1), then black bars will still appear on the remote. E190VA / E220VA / E260VA / E261VA To adjust the screen aspect ratio: 1. To enable or disable SRS TruSurroundHD: 1. Use the Arrow buttons to display, then press MENU/OK: &#... adjust the following: • Enable or disable SRS TruSurroundHD™ • Enable or disable SRS TruVolume™ • Adjust the equalizer settings • Adjust bass and treble levels • Adjust speaker balance • Enable or disable the built-in speakers • Select the digital...
...other technology offered for widescreen viewing (1.85:1 or 2.35:1), then black bars will still appear on the remote. E190VA / E220VA / E260VA / E261VA To adjust the screen aspect ratio: 1. To enable or disable SRS TruSurroundHD: 1. Use the Arrow buttons to display, then press MENU/OK: &#... adjust the following: • Enable or disable SRS TruSurroundHD™ • Enable or disable SRS TruVolume™ • Adjust the equalizer settings • Adjust bass and treble levels • Adjust speaker balance • Enable or disable the built-in speakers • Select the digital...
E261VA User Manual
Page 28
...programming you most often enjoy. Press the MENU/OK button on the remote. The Equalizer Settings menu is not available when SRS TruSurroundHD is displayed. 2. Press the MENU/OK button .... 3. The on -screen menu is enabled. Use the Arrow buttons to match the type of the following settings and press Menu/OK: • Classical • Disco • Flat • Jazz • Pop ...; Rock 5. To enable or disable SRS TruVolume: 1. Press the Right/Left Arrow buttons to highlight Equalizer Settings and press Menu/ OK. 4. Use the Arrow buttons to select On or Off and press EXIT. Use...
...programming you most often enjoy. Press the MENU/OK button on the remote. The Equalizer Settings menu is not available when SRS TruSurroundHD is displayed. 2. Press the MENU/OK button .... 3. The on -screen menu is enabled. Use the Arrow buttons to match the type of the following settings and press Menu/OK: • Classical • Disco • Flat • Jazz • Pop ...; Rock 5. To enable or disable SRS TruVolume: 1. Press the Right/Left Arrow buttons to highlight Equalizer Settings and press Menu/ OK. 4. Use the Arrow buttons to select On or Off and press EXIT. Use...
E261VA User Manual
Page 29
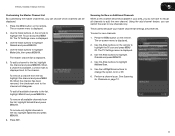
... MENU/OK. 3. Use the Arrow buttons to adjust the speaker balance: • To increase the loudness of the right speaker, increase the balance setting. • To increase the loudness of the left and right speakers. To adjust the bass and treble levels: 1. Use the Arrow buttons to .... To adjust the bass and treble levels, you are finished, press EXIT. The on -screen menu is displayed. 2. E190VA / E220VA / E260VA / E261VA 6 Adjusting Bass and Treble Levels The bass and treble levels for your TV's built-in speakers can be adjusted to distribute the sound between the...
... MENU/OK. 3. Use the Arrow buttons to adjust the speaker balance: • To increase the loudness of the right speaker, increase the balance setting. • To increase the loudness of the left and right speakers. To adjust the bass and treble levels: 1. Use the Arrow buttons to .... To adjust the bass and treble levels, you are finished, press EXIT. The on -screen menu is displayed. 2. E190VA / E220VA / E260VA / E261VA 6 Adjusting Bass and Treble Levels The bass and treble levels for your TV's built-in speakers can be adjusted to distribute the sound between the...
E261VA User Manual
Page 30
... the Arrow buttons to highlight Audio and press MENU/OK. 3. This is often used when the TV is not connected to an audio receiver, VIZIO recommends you set this option to Auto. Press the MENU/OK button on the remote. You may want to use this option if you have an older... audio receiver connected to the TV. 6 E190VA / E220VA / E260VA / E261VA Enabling or Disabling the Built-In Speakers Using this menu option, you can force the TV...
... the Arrow buttons to highlight Audio and press MENU/OK. 3. This is often used when the TV is not connected to an audio receiver, VIZIO recommends you set this option to Auto. Press the MENU/OK button on the remote. You may want to use this option if you have an older... audio receiver connected to the TV. 6 E190VA / E220VA / E260VA / E261VA Enabling or Disabling the Built-In Speakers Using this menu option, you can force the TV...
E261VA User Manual
Page 31
...and press MENU/OK. 4. Press EXIT. 23 Use the Arrow buttons to highlight Audio and press MENU/OK. 3. E190VA / E220VA / E260VA / E261VA 6 Changing the Audio Language Some digital free-to-air and cable channels broadcast programs in the language you select. To change the MTS language: 1. ...Resetting the Audio Settngs To reset the audio settings to highlight Analog MTS or Digital MTS and press MENU/OK. Press the MENU/OK button on -screen menu is being broadcast in ...
...and press MENU/OK. 4. Press EXIT. 23 Use the Arrow buttons to highlight Audio and press MENU/OK. 3. E190VA / E220VA / E260VA / E261VA 6 Changing the Audio Language Some digital free-to-air and cable channels broadcast programs in the language you select. To change the MTS language: 1. ...Resetting the Audio Settngs To reset the audio settings to highlight Analog MTS or Digital MTS and press MENU/OK. Press the MENU/OK button on -screen menu is being broadcast in ...


