DVR 508 Camera Manual
Page 1
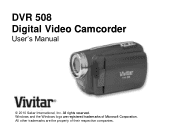
All other trademarks are registered trademarks of their respective companies. All rights reserved. DVR 508 Digital Video Camcorder User‟s Manual © 2010 Sakar International, Inc. Windows and the Windows logo are the property of Microsoft Corporation.
All other trademarks are registered trademarks of their respective companies. All rights reserved. DVR 508 Digital Video Camcorder User‟s Manual © 2010 Sakar International, Inc. Windows and the Windows logo are the property of Microsoft Corporation.
DVR 508 Camera Manual
Page 2
...Digital Camera 6 Inserting Batteries 7 Inserting an SD Memory Card 8 Maintenance and Care 9 Starting Your Camera 10 Capturing Videos 12 Video Setting options 14 Taking Photos ...18 Photo Capture Settings options 23 Audio Mode...30 Playback mode ...31 Camcorder Setup Mode 45 Connecting the Camcorder to a TV 51 Install the Vivitar... Experience Image Manager Software 52 Connect your camcorder to the computer 56 Get photos and videos from your camcorder to your computer 56 Get ...
...Digital Camera 6 Inserting Batteries 7 Inserting an SD Memory Card 8 Maintenance and Care 9 Starting Your Camera 10 Capturing Videos 12 Video Setting options 14 Taking Photos ...18 Photo Capture Settings options 23 Audio Mode...30 Playback mode ...31 Camcorder Setup Mode 45 Connecting the Camcorder to a TV 51 Install the Vivitar... Experience Image Manager Software 52 Connect your camcorder to the computer 56 Get photos and videos from your camcorder to your computer 56 Get ...
DVR 508 Camera Manual
Page 3
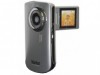
... Photo, Audio, Playback and Set Up Digital Video resolutions - 1280x720 (HD), 720x480 , 640x480 (VGA), 320x240 (QVGA) 5 digital camera resolutions - 5M(2592X1944); 3M(2048X1536); 2M(...1600X1200); 1M(1280X960); Please read this manual carefully FIRST in order to use the camcorder normally. Transfer media from my camcorder to my computer... video clips, take quality digital photos and record audio files is included with your digital video camcorder. VGA(640X480) 2 Key Features 5 modes...
... Photo, Audio, Playback and Set Up Digital Video resolutions - 1280x720 (HD), 720x480 , 640x480 (VGA), 320x240 (QVGA) 5 digital camera resolutions - 5M(2592X1944); 3M(2048X1536); 2M(...1600X1200); 1M(1280X960); Please read this manual carefully FIRST in order to use the camcorder normally. Transfer media from my camcorder to my computer... video clips, take quality digital photos and record audio files is included with your digital video camcorder. VGA(640X480) 2 Key Features 5 modes...

DVR 508 Camera Manual
Page 4
...1.8" TFT LCD 4 X Digital Zoom Supports external SD/SDHC memory cards up to 16GB Built-in Microphone Delete, rotate, protect, crop and print photos directly on and from your camcorder Vivitar Experience Image Manager software for uploading and...photo sharing and social network websites Get photos and videos from your camera, manage and organize your digital video camcorder includes Digital Video Camcorder Vivitar Experience Image Manager software Installation CD Quick Start Guide USB cable TV Out ...
...1.8" TFT LCD 4 X Digital Zoom Supports external SD/SDHC memory cards up to 16GB Built-in Microphone Delete, rotate, protect, crop and print photos directly on and from your camcorder Vivitar Experience Image Manager software for uploading and...photo sharing and social network websites Get photos and videos from your camera, manage and organize your digital video camcorder includes Digital Video Camcorder Vivitar Experience Image Manager software Installation CD Quick Start Guide USB cable TV Out ...

DVR 508 Camera Manual
Page 14
... button if you attempt to Pause the recording in playback mode. 2. Note: 1. Once they are poor, press the LED / Right button. 13 Aim the camcorder at that resolution and memory appears on the top of the object. 7. The recorded file will flash on the LCD screen when you wish to... them using QuickTime and Windows Media Player. 3. The elapsed time of the video will appear on the top right on the top of the camcorder to digitally zoom into and back out of the camcorder to stop the recording. 8. Press the T (Zoom In) or W (Zoom Out) buttons located on the LCD. 5.
... button if you attempt to Pause the recording in playback mode. 2. Note: 1. Once they are poor, press the LED / Right button. 13 Aim the camcorder at that resolution and memory appears on the top of the object. 7. The recorded file will flash on the LCD screen when you wish to... them using QuickTime and Windows Media Player. 3. The elapsed time of the video will appear on the top right on the top of the camcorder to digitally zoom into and back out of the camcorder to stop the recording. 8. Press the T (Zoom In) or W (Zoom Out) buttons located on the LCD. 5.

DVR 508 Camera Manual
Page 15
... from: [HD] 1280x720, [D1] 720x480, [VGA] 640x480, [QVGA] 320x240 pixels The higher the resolution selected the better the quality of the camcorder to offer better lighting. Digital Zoom function You can also change the Frame Rate, Metering and White Balance. 14 Press the T button on the bottom right corner of... the camcorder to Zoom In into the object. 2. The digital zoom digit icon appears on the top of the LCD screen. To turn off the LED light, press the LED / Right button...
... from: [HD] 1280x720, [D1] 720x480, [VGA] 640x480, [QVGA] 320x240 pixels The higher the resolution selected the better the quality of the camcorder to offer better lighting. Digital Zoom function You can also change the Frame Rate, Metering and White Balance. 14 Press the T button on the bottom right corner of... the camcorder to Zoom In into the object. 2. The digital zoom digit icon appears on the top of the LCD screen. To turn off the LED light, press the LED / Right button...

DVR 508 Camera Manual
Page 20
...to press the Shutter button to continue taking more memorable photos. Press the T (Zoom In) or W (Zoom Out) buttons located on the top of the camcorder. 2. After the shot is taken the number is saved to compose your computer" or insert another SD card to take up to 16GB in the...videos to your shot. 1. Either download the photos to your computer using the Vivitar Experience Image Manager software as described below in order to digitally zoom into and back out of photos that is taken is reduced by one. 6. Hold the camcorder steady and press the Shutter button on the top of the...
...to press the Shutter button to continue taking more memorable photos. Press the T (Zoom In) or W (Zoom Out) buttons located on the top of the camcorder. 2. After the shot is taken the number is saved to compose your computer" or insert another SD card to take up to 16GB in the...videos to your shot. 1. Either download the photos to your computer using the Vivitar Experience Image Manager software as described below in order to digitally zoom into and back out of photos that is taken is reduced by one. 6. Hold the camcorder steady and press the Shutter button on the top of the...

DVR 508 Camera Manual
Page 21
...on the top of the shutter button and when the photo is actually taken. Digital Zoom function You can include yourself in a photo by using the digital zoom. 1. Self-Timer You can magnify your pressing of the camcorder to offer better lighting. Press the T button on the front of the LCD ...screen. Place the camcorder on a tripod or on the bottom right corner of the camcorder to Zoom In into the object. 2. To turn off the LED light, press the LED / Right button again. The digital zoom digit icon appears on a flat and sturdy surface before ...
...on the top of the shutter button and when the photo is actually taken. Digital Zoom function You can include yourself in a photo by using the digital zoom. 1. Self-Timer You can magnify your pressing of the camcorder to offer better lighting. Press the T button on the front of the LCD ...screen. Place the camcorder on a tripod or on the bottom right corner of the camcorder to Zoom In into the object. 2. To turn off the LED light, press the LED / Right button again. The digital zoom digit icon appears on a flat and sturdy surface before ...

DVR 508 Camera Manual
Page 22
... to highlight and select the Capture Mode option: Self-timer 2S, Self-timer 10S, 21 Method 1: 1. The Self-Timer icon on the front of the camcorder next to the lens flashes for every second of the LCD will be taken. After the selected time delay the photo will appear. 3. The... digit time countdown appears on the LCD and the red LED on the top of the countdown. 6. Press the Up/Down button to enter the Capture ...
... to highlight and select the Capture Mode option: Self-timer 2S, Self-timer 10S, 21 Method 1: 1. The Self-Timer icon on the front of the camcorder next to the lens flashes for every second of the LCD will be taken. After the selected time delay the photo will appear. 3. The... digit time countdown appears on the LCD and the red LED on the top of the countdown. 6. Press the Up/Down button to enter the Capture ...
DVR 508 Camera Manual
Page 23
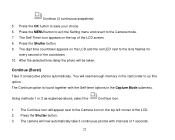
...submenu. After the selected time delay the photo will appear next to us this option. Press the OK button to the Camera mode. 7. The digit time countdown appears on the top of the LCD. 2. Continue (Burst) Take 3 consecutive photos automatically. Press the MENU button to exit the ...Setting menu and revert to save your choice. 6. You will now automatically take 3 continuous photos with the Self-timer options in the camcorder to the Camera icon on the top left corner of the LCD screen. 8. Continue (3 continuous snapshots) 5. The Self-Timer icon appears on ...
...submenu. After the selected time delay the photo will appear next to us this option. Press the OK button to the Camera mode. 7. The digit time countdown appears on the top of the LCD. 2. Continue (Burst) Take 3 consecutive photos automatically. Press the MENU button to exit the ...Setting menu and revert to save your choice. 6. You will now automatically take 3 continuous photos with the Self-timer options in the camcorder to the Camera icon on the top left corner of the LCD screen. 8. Continue (3 continuous snapshots) 5. The Self-Timer icon appears on ...
DVR 508 Camera Manual
Page 30
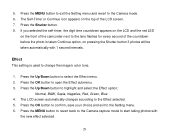
If you selected the self-timer, the digit time countdown appears on the LCD and the red LED on the front of the camcorder next to the lens flashes for every second of the LCD screen. 7. Press the Up/Down button to open the Effect submenu. 3. Press the OK ...
If you selected the self-timer, the digit time countdown appears on the LCD and the red LED on the front of the camcorder next to the lens flashes for every second of the LCD screen. 7. Press the Up/Down button to open the Effect submenu. 3. Press the OK ...


