v2 Camera Manual
Page 6
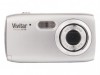
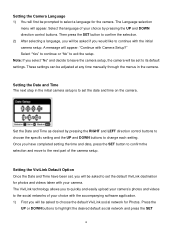
... not included.) Note: Remove the batteries from the camera when not in the direction shown on the camera (see the SD icon on the display, please check if ...the card was inserted properly. Make sure the SD card is not locked (check the lock switch on the side of the power is displayed on , an SD icon will prevent the camera... polarity shown inside the battery compartment. Push the SD card until you through the INITIAL CAMERA SETUP. If the SD card is powered on LCD as Flash, will not work if...
... not included.) Note: Remove the batteries from the camera when not in the direction shown on the camera (see the SD icon on the display, please check if ...the card was inserted properly. Make sure the SD card is not locked (check the lock switch on the side of the power is displayed on , an SD icon will prevent the camera... polarity shown inside the battery compartment. Push the SD card until you through the INITIAL CAMERA SETUP. If the SD card is powered on LCD as Flash, will not work if...
v2 Camera Manual
Page 7
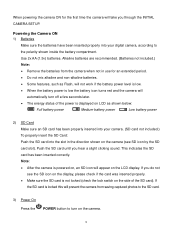
... destination for photos and videos taken with the initial camera setup. The Language selection menu will be asked to set the date and time on the camera. Select the language of your choice by pressing the RIGHT and LEFT direction control buttons to choose the specific setting and the ... setting. The ViviLink technology allows you to quickly and easily upload your camera‟s photos and videos to the social networks of the camera setup. Set the Date and Time as desired by pressing the UP and DOWN direction control buttons. Then press the SET button to confirm the selection. 2)...
... destination for photos and videos taken with the initial camera setup. The Language selection menu will be asked to set the date and time on the camera. Select the language of your choice by pressing the RIGHT and LEFT direction control buttons to choose the specific setting and the ... setting. The ViviLink technology allows you to quickly and easily upload your camera‟s photos and videos to the social networks of the camera setup. Set the Date and Time as desired by pressing the UP and DOWN direction control buttons. Then press the SET button to confirm the selection. 2)...
v2 Camera Manual
Page 13
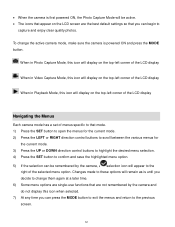
... do not display this icon will display on the LCD screen are not remembered by the camera, a selection icon will remain as is until you decide to change the active camera mode, make sure the camera is powered ON and press the MODE button. Changes made to these options will appear to the... the SET button to open the menus for the current mode. 2) Press the LEFT or RIGHT direction control buttons to scroll between the various menus for the current mode. 3) Press the UP or DOWN direction control buttons to highlight the desired menu selection. 4) Press the SET button to confirm and save the...
... do not display this icon will display on the LCD screen are not remembered by the camera, a selection icon will remain as is until you decide to change the active camera mode, make sure the camera is powered ON and press the MODE button. Changes made to these options will appear to the... the SET button to open the menus for the current mode. 2) Press the LEFT or RIGHT direction control buttons to scroll between the various menus for the current mode. 3) Press the UP or DOWN direction control buttons to highlight the desired menu selection. 4) Press the SET button to confirm and save the...
v2 Camera Manual
Page 14
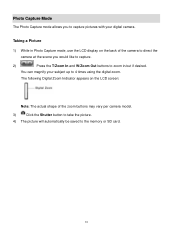
... and W/Zoom Out buttons to zoom in Photo Capture mode, use the LCD display on the LCD screen: Note: The actual shape of the camera to direct the camera at the scene you to 4 times using the digital zoom. You can magnify your subject up to capture pictures with your digital... camera. The following Digital Zoom Indicator appears on the back of the zoom buttons may vary per camera model. 3) Click the Shutter button to take the picture. 4) ...
... and W/Zoom Out buttons to zoom in Photo Capture mode, use the LCD display on the LCD screen: Note: The actual shape of the camera to direct the camera at the scene you to 4 times using the digital zoom. You can magnify your subject up to capture pictures with your digital... camera. The following Digital Zoom Indicator appears on the back of the zoom buttons may vary per camera model. 3) Click the Shutter button to take the picture. 4) ...
v2 Camera Manual
Page 15
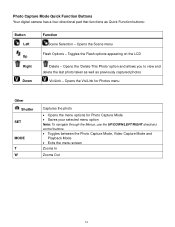
Photo Capture Mode Quick Function Buttons Your digital camera has a four-directional pad that functions as previously captured photos ViviLink - Opens the Scene menu Flash Options - Opens the „Delete This Photo‟ option and allows you ... the menu options for Photo Capture Mode Saves your selected menu option Note: To navigate through the Menus, use the UP/DOWN/LEFT/RIGHT directions control buttons. Toggles between the Photo Capture Mode, Video Capture Mode and Playback Mode Exits the menu screen Zooms In Zooms Out 14...
Photo Capture Mode Quick Function Buttons Your digital camera has a four-directional pad that functions as previously captured photos ViviLink - Opens the Scene menu Flash Options - Opens the „Delete This Photo‟ option and allows you ... the menu options for Photo Capture Mode Saves your selected menu option Note: To navigate through the Menus, use the UP/DOWN/LEFT/RIGHT directions control buttons. Toggles between the Photo Capture Mode, Video Capture Mode and Playback Mode Exits the menu screen Zooms In Zooms Out 14...
v2 Camera Manual
Page 19
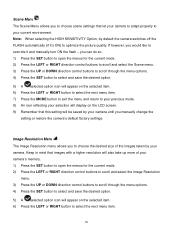
...will also take up more of your camera‟s memory. 1) Press the SET button to open the menus for the current mode. 2) Press the LEFT or RIGHT direction control buttons to scroll and select the Image Resolution menu. 3) Press the UP or DOWN direction control buttons to scroll through the ...menu options. 4) Press the SET button to select and save the desired option. 5) A selected option icon will appear on the LCD screen. 9) Remember that this setting will be saved by your camera until you manually change the setting...
...will also take up more of your camera‟s memory. 1) Press the SET button to open the menus for the current mode. 2) Press the LEFT or RIGHT direction control buttons to scroll and select the Image Resolution menu. 3) Press the UP or DOWN direction control buttons to scroll through the ...menu options. 4) Press the SET button to select and save the desired option. 5) A selected option icon will appear on the LCD screen. 9) Remember that this setting will be saved by your camera until you manually change the setting...
v2 Camera Manual
Page 20
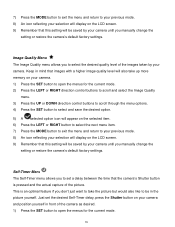
...you manually change the setting or restore the camera‟s default factory settings. Keep in mind that this setting will appear on your camera. 1) Press the SET button to open the menus for the current mode. 2) Press the LEFT or RIGHT direction control buttons to scroll and select the Image... Quality menu. 3) Press the UP or DOWN direction control buttons to scroll through the menu options. 4) Press the SET button to select and save the desired option. 5) A selected option icon will be saved by your camera until you to your previous mode. 8) An icon reflecting ...
...you manually change the setting or restore the camera‟s default factory settings. Keep in mind that this setting will appear on your camera. 1) Press the SET button to open the menus for the current mode. 2) Press the LEFT or RIGHT direction control buttons to scroll and select the Image... Quality menu. 3) Press the UP or DOWN direction control buttons to scroll through the menu options. 4) Press the SET button to select and save the desired option. 5) A selected option icon will be saved by your camera until you to your previous mode. 8) An icon reflecting ...
v2 Camera Manual
Page 21
...Balance setting to match your current environment will allow the camera to properly balance the colors in the current environment. 2) Press the LEFT or RIGHT direction control buttons to scroll and select the Self-Timer menu. 3) Press the UP or DOWN direction control buttons to scroll through the menu options. 4) Press...images depending on the type of light source in the images that are taken with your camera. 1) Press the SET button to open the menus for the current mode. 2) Press the LEFT or RIGHT direction control buttons to scroll and select the White Balance menu. 3) Press the UP or DOWN...
...Balance setting to match your current environment will allow the camera to properly balance the colors in the current environment. 2) Press the LEFT or RIGHT direction control buttons to scroll and select the Self-Timer menu. 3) Press the UP or DOWN direction control buttons to scroll through the menu options. 4) Press...images depending on the type of light source in the images that are taken with your camera. 1) Press the SET button to open the menus for the current mode. 2) Press the LEFT or RIGHT direction control buttons to scroll and select the White Balance menu. 3) Press the UP or DOWN...
v2 Camera Manual
Page 22
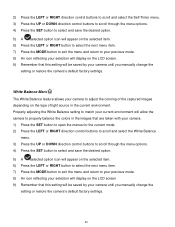
...color effect to the images taken with your camera. Color Effect Menu You can set the level of objects in the images taken with your camera. 1) Press the SET button to open the menus for the current mode. 2) Press the LEFT or RIGHT direction control buttons to scroll and select the ...Color Effect menu. 3) Press the UP or DOWN direction control buttons to scroll through the menu options....
...color effect to the images taken with your camera. Color Effect Menu You can set the level of objects in the images taken with your camera. 1) Press the SET button to open the menus for the current mode. 2) Press the LEFT or RIGHT direction control buttons to scroll and select the ...Color Effect menu. 3) Press the UP or DOWN direction control buttons to scroll through the menu options....
v2 Camera Manual
Page 23
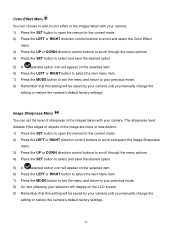
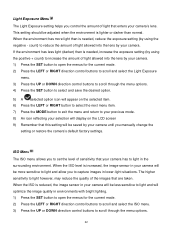
... sensitivity to light however, may reduce the quality of light allowed into the lens by your camera. 1) Press the SET button to open the menus for the current mode. 2) Press the LEFT or RIGHT direction control buttons to scroll and select the Light Exposure menu. 3) Press the UP or DOWN... direction control buttons to scroll through the menu options. 22 This setting should be adjusted when the environment is lighter or darker than is needed , reduce the exposure setting (by your camera. When the ISO level is reduced, the image sensor...
... sensitivity to light however, may reduce the quality of light allowed into the lens by your camera. 1) Press the SET button to open the menus for the current mode. 2) Press the LEFT or RIGHT direction control buttons to scroll and select the Light Exposure menu. 3) Press the UP or DOWN... direction control buttons to scroll through the menu options. 22 This setting should be adjusted when the environment is lighter or darker than is needed , reduce the exposure setting (by your camera. When the ISO level is reduced, the image sensor...
v2 Camera Manual
Page 24
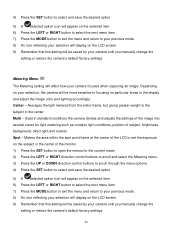
Center - Averages the light metered from the entire frame, but giving greater weight to the subject in standard conditions the camera divides and adjusts the settings of subject, brightness, background, direct light and scenes Spot - Meters the area within the spot point frame at the center of the LCD to set the exposure...
Center - Averages the light metered from the entire frame, but giving greater weight to the subject in standard conditions the camera divides and adjusts the settings of subject, brightness, background, direct light and scenes Spot - Meters the area within the spot point frame at the center of the LCD to set the exposure...
v2 Camera Manual
Page 25
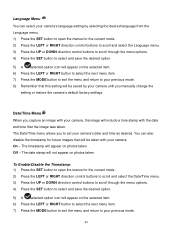
...your camera‟s language setting by your camera. Language Menu You can also disable the timestamp for future images that will be saved by selecting the desired language from the Language menu. 1) Press the SET button to open the menus for the current mode. 2) Press the LEFT or RIGHT direction ...control buttons to scroll and select the Language menu. 3) Press the UP or DOWN direction control buttons to scroll through the menu options. 4) Press the SET button to select and save the ...
...your camera‟s language setting by your camera. Language Menu You can also disable the timestamp for future images that will be saved by selecting the desired language from the Language menu. 1) Press the SET button to open the menus for the current mode. 2) Press the LEFT or RIGHT direction ...control buttons to scroll and select the Language menu. 3) Press the UP or DOWN direction control buttons to scroll through the menu options. 4) Press the SET button to select and save the ...
v2 Camera Manual
Page 26
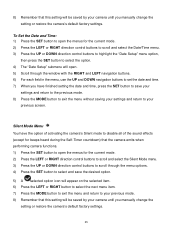
...sound effects (except for beeps heard during the Self-Timer countdown) that the camera emits when performing camera functions. 1) Press the SET button to open the menus for the current mode. 2) Press the LEFT or RIGHT direction control buttons to scroll and select the Silent Mode menu. 3) Press the UP... or DOWN direction control buttons to scroll through the menu options. 4) Press the SET ...
...sound effects (except for beeps heard during the Self-Timer countdown) that the camera emits when performing camera functions. 1) Press the SET button to open the menus for the current mode. 2) Press the LEFT or RIGHT direction control buttons to scroll and select the Silent Mode menu. 3) Press the UP... or DOWN direction control buttons to scroll through the menu options. 4) Press the SET ...
v2 Camera Manual
Page 27
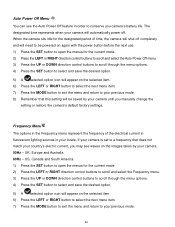
... selected option icon will be powered on the images taken by your camera until you camera‟s battery life. UK, Europe and Australia 60Hz - When the camera sits idle for the current mode. 2) Press the LEFT or RIGHT direction control buttons to scroll and select the Frequency menu. 3) Press the... UP or DOWN direction control buttons to scroll through the menu options. 4) Press the...
... selected option icon will be powered on the images taken by your camera until you camera‟s battery life. UK, Europe and Australia 60Hz - When the camera sits idle for the current mode. 2) Press the LEFT or RIGHT direction control buttons to scroll and select the Frequency menu. 3) Press the... UP or DOWN direction control buttons to scroll through the menu options. 4) Press the...
v2 Camera Manual
Page 28
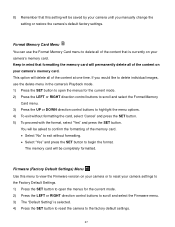
... Card menu to delete all of the content at one time. Keep in the camera‟s Playback mode. 1) Press the SET button to open the menus for the current mode. 2) Press the LEFT or RIGHT direction control buttons to scroll and select the Format Memory Card menu. 3) Press the ...the Firmware menu. 3) The "Default Setting" is currently on your camera or to reset your camera settings to the Factory Default Settings. 1) Press the SET button to open the menus for the current mode. 2) Press the LEFT or RIGHT direction control buttons to exit without formatting the card, select „Cancel...
... Card menu to delete all of the content at one time. Keep in the camera‟s Playback mode. 1) Press the SET button to open the menus for the current mode. 2) Press the LEFT or RIGHT direction control buttons to scroll and select the Format Memory Card menu. 3) Press the ...the Firmware menu. 3) The "Default Setting" is currently on your camera or to reset your camera settings to the Factory Default Settings. 1) Press the SET button to open the menus for the current mode. 2) Press the LEFT or RIGHT direction control buttons to exit without formatting the card, select „Cancel...
v2 Camera Manual
Page 30
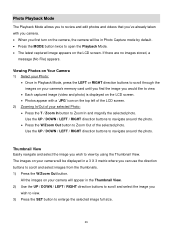
... image (video and photo) is displayed on the LCD screen. Photos appear with you camera. When you first turn on the camera, the camera will be in a 3 X 3 matrix where you can use the direction buttons to scroll and select images from the thumbnails. 1) Press the W/Zoom Out button. All ...to Zoom In and magnify the selected photo. Use the UP / DOWN / LEFT / RIGHT direction buttons to navigate around the photo. Press the W/Zoom Out button to Zoom Out of your camera will be displayed in Photo Capture mode by using the Thumbnail View. If there are no images...
... image (video and photo) is displayed on the LCD screen. Photos appear with you camera. When you first turn on the camera, the camera will be in a 3 X 3 matrix where you can use the direction buttons to scroll and select images from the thumbnails. 1) Press the W/Zoom Out button. All ...to Zoom In and magnify the selected photo. Use the UP / DOWN / LEFT / RIGHT direction buttons to navigate around the photo. Press the W/Zoom Out button to Zoom Out of your camera will be displayed in Photo Capture mode by using the Thumbnail View. If there are no images...
v2 Camera Manual
Page 31
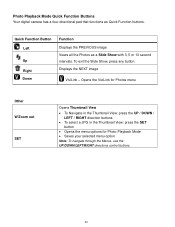
...Photos menu Other W/Zoom out SET Opens Thumbnail View To Navigate in the Thumbnail View: press the UP / DOWN / LEFT / RIGHT direction buttons To select a JPG in the Thumbnail View: press the SET button Opens the menu options for Photo Playback Mode .... 30 To exit the Slide Show, press any button. Displays the NEXT image ViviLink - Photo Playback Mode Quick Function Buttons Your digital camera has a four-directional pad that functions as a Slide Show with 3, 5 or 10 second intervals. Quick Function Button Left Up Right Down Function Displays the...
...Photos menu Other W/Zoom out SET Opens Thumbnail View To Navigate in the Thumbnail View: press the UP / DOWN / LEFT / RIGHT direction buttons To select a JPG in the Thumbnail View: press the SET button Opens the menu options for Photo Playback Mode .... 30 To exit the Slide Show, press any button. Displays the NEXT image ViviLink - Photo Playback Mode Quick Function Buttons Your digital camera has a four-directional pad that functions as a Slide Show with 3, 5 or 10 second intervals. Quick Function Button Left Up Right Down Function Displays the...
v2 Camera Manual
Page 32
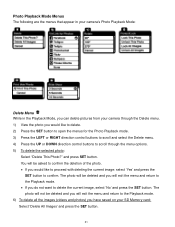
... and you will exit the menu and return to the Playback mode. 6) To delete all the images (videos and photos) you have saved on your camera through the Delete menu. 1) View the photo you would like to delete. 2) Press the SET button to open the menus for the Photo Playback mode... and select the Delete menu. 4) Press the UP or DOWN direction control buttons to scroll through the menu options. 5) To delete the selected photo: Select "Delete This Photo?" Photo Playback Mode Menus The following are the menus that appear in your camera‟s Photo Playback Mode: Delete Menu While in the Playback...
... and you will exit the menu and return to the Playback mode. 6) To delete all the images (videos and photos) you have saved on your camera through the Delete menu. 1) View the photo you would like to delete. 2) Press the SET button to open the menus for the Photo Playback mode... and select the Delete menu. 4) Press the UP or DOWN direction control buttons to scroll through the menu options. 5) To delete the selected photo: Select "Delete This Photo?" Photo Playback Mode Menus The following are the menus that appear in your camera‟s Photo Playback Mode: Delete Menu While in the Playback...
v2 Camera Manual
Page 33
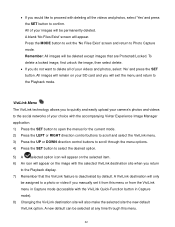
...quickly and easily upload your camera‟s photos and videos to the social networks of your choice with the accompanying Vivitar Experience Image Manager application. 1) Press the SET button to open the menus for the current mode. 2) Press the LEFT or RIGHT direction control buttons to scroll and... select the ViviLink menu. 3) Press the UP or DOWN direction control buttons to scroll ...
...quickly and easily upload your camera‟s photos and videos to the social networks of your choice with the accompanying Vivitar Experience Image Manager application. 1) Press the SET button to open the menus for the current mode. 2) Press the LEFT or RIGHT direction control buttons to scroll and... select the ViviLink menu. 3) Press the UP or DOWN direction control buttons to scroll ...
v2 Camera Manual
Page 35
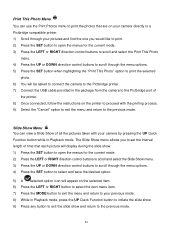
... show and return to the previous mode. 34 The Slide Show menu allows you to set the interval length of time that are on your camera directly to a Pictbridge compatible printer. 1) Scroll through your pictures and find the one you would like to print. 2) Press the SET button to open the... the Print This Photo menu. 4) Press the UP or DOWN direction control buttons to scroll through the menu options. 4) Press the SET button to select and save the desired option. 5) A selected option icon will be asked to connect the camera to the Pictbridge printer. 7) Connect the USB cable provided in ...
... show and return to the previous mode. 34 The Slide Show menu allows you to set the interval length of time that are on your camera directly to a Pictbridge compatible printer. 1) Scroll through your pictures and find the one you would like to print. 2) Press the SET button to open the... the Print This Photo menu. 4) Press the UP or DOWN direction control buttons to scroll through the menu options. 4) Press the SET button to select and save the desired option. 5) A selected option icon will be asked to connect the camera to the Pictbridge printer. 7) Connect the USB cable provided in ...


