Quick Start Guide
Page 2
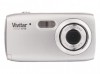
... "Power button" for a few seconds Aim the camera in (T) zoom out (W) button to focus your shot Holding the camera steady press the "Shutter" button with your right index finger The image is automatically saved to the memory card For other camera features and how to change to install the software on your computer Once the software is installed simply double-click the Photags Express icon on Windows...
... "Power button" for a few seconds Aim the camera in (T) zoom out (W) button to focus your shot Holding the camera steady press the "Shutter" button with your right index finger The image is automatically saved to the memory card For other camera features and how to change to install the software on your computer Once the software is installed simply double-click the Photags Express icon on Windows...
Quick Start Guide
Page 3
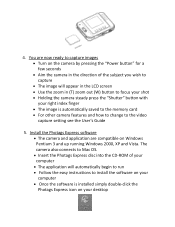
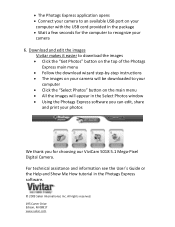
... "Get Photos" button on the top of the Photags Express main menu Follow the download wizard step-by-step instructions The images on your camera will be downloaded to recognize your computer with the USB cord provided in the Photags Express software. © 2009 Sakar International, Inc. For technical assistance and information see the User`s Guide or the Help and Show Me How tutorial in...
... "Get Photos" button on the top of the Photags Express main menu Follow the download wizard step-by-step instructions The images on your camera will be downloaded to recognize your computer with the USB cord provided in the Photags Express software. © 2009 Sakar International, Inc. For technical assistance and information see the User`s Guide or the Help and Show Me How tutorial in...
Camera Manual
Page 2
... Requirements for Windows Vista 3 Computer System Requirements for Macintosh 3 A Quick Look at Your Camera...4 Preparing Your Camera for Use...5 Installing SD Memory Card...6 Starting Your Camera ...8 Camera Mode ...8 Taking photos ...8 Video Mode ...12 Playback Mode...13 Installing PhoTags Express Software...15 Everything you need to get the most from your photos 20 Download photos and videos to your PC ...23 Viewing Videos...26 Transferring photos and videos to your PC manually 27 Transferring photos and videos to your MAC manually 28 Maintenance of Your Digital Camera ...29 Sakar...
... Requirements for Windows Vista 3 Computer System Requirements for Macintosh 3 A Quick Look at Your Camera...4 Preparing Your Camera for Use...5 Installing SD Memory Card...6 Starting Your Camera ...8 Camera Mode ...8 Taking photos ...8 Video Mode ...12 Playback Mode...13 Installing PhoTags Express Software...15 Everything you need to get the most from your photos 20 Download photos and videos to your PC ...23 Viewing Videos...26 Transferring photos and videos to your PC manually 27 Transferring photos and videos to your MAC manually 28 Maintenance of Your Digital Camera ...29 Sakar...
Camera Manual
Page 3
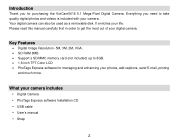
.... Your digital camera can also be used as a removable disk. It enriches your camera includes Digital Camera PhoTags Express software Installation CD USB cable User's manual Strap 2 Please read this manual carefully first in order to take quality digital photos and videos is included with your camera. Everything you for managing and enhancing your photos, add captions, send E-mail, printing and much more. Key Features Digital Image Resolution...
.... Your digital camera can also be used as a removable disk. It enriches your camera includes Digital Camera PhoTags Express software Installation CD USB cable User's manual Strap 2 Please read this manual carefully first in order to take quality digital photos and videos is included with your camera. Everything you for managing and enhancing your photos, add captions, send E-mail, printing and much more. Key Features Digital Image Resolution...
Camera Manual
Page 9
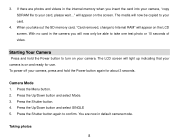
Starting Your Camera Press and hold the Power button again for use. When you take out the SD memory card, "Card removed, change to Internal RAM" will now only be copied to your card. 4. Camera Mode 1. Press the Up/Down button and select SINGLE 5. The LCD screen will light up indicating that your camera. Press the Menu button. 2. Press the Shutter button again to take one test photo or 10 seconds of video. Taking photos 8 You are photos and videos in the internal memory when you...
Starting Your Camera Press and hold the Power button again for use. When you take out the SD memory card, "Card removed, change to Internal RAM" will now only be copied to your card. 4. Camera Mode 1. Press the Up/Down button and select SINGLE 5. The LCD screen will light up indicating that your camera. Press the Menu button. 2. Press the Shutter button again to take one test photo or 10 seconds of video. Taking photos 8 You are photos and videos in the internal memory when you...
Camera Manual
Page 10
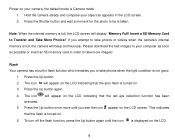
... Transfer and Take More Photos!" The icon will beep continuously. Press the Up button again. 4. Insert a SD Memory Card to take photos when the light condition is taken. Please download the test images to your computer as soon as appears in order to take photos or videos when the camera's internal memory is full, the camera will appear on the LCD indicating that the auto flash is displayed on . 3. To turn off the flash function, press the Up button...
... Transfer and Take More Photos!" The icon will beep continuously. Press the Up button again. 4. Insert a SD Memory Card to take photos when the light condition is taken. Please download the test images to your computer as soon as appears in order to take photos or videos when the camera's internal memory is full, the camera will appear on the LCD indicating that the auto flash is displayed on . 3. To turn off the flash function, press the Up button...
Camera Manual
Page 11
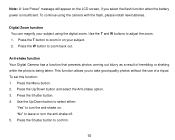
Note: A "Low Power" message will appear on the LCD screen, if you to take good quality photos without the use of trembling or shaking while the photo is insufficient. Use the T and W buttons to zoom back out. Press the W button to adjust the zoom. 1. Press the T button to leave or turn the anti-shake on your subject using the camera with the flash, please install new batteries. To set this function: 1. Digital Zoom function You can magnify...
Note: A "Low Power" message will appear on the LCD screen, if you to take good quality photos without the use of trembling or shaking while the photo is insufficient. Use the T and W buttons to zoom back out. Press the W button to adjust the zoom. 1. Press the T button to leave or turn the anti-shake on your subject using the camera with the flash, please install new batteries. To set this function: 1. Digital Zoom function You can magnify...
Camera Manual
Page 12
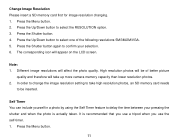
Press the Shutter button. 4. High resolution photos will take high resolution photos, an SD memory card needs to confirm your pressing the shutter and when the photo is recommended that you use a tripod when you use the self-timer. 1. It is actually taken. Press the Menu button. 2. Different image resolutions will appear on the LCD screen. Self Timer You can include yourself in a photo by using the Self Timer feature to select the RESOLUTION option. 3. Change Image Resolution...
Press the Shutter button. 4. High resolution photos will take high resolution photos, an SD memory card needs to confirm your pressing the shutter and when the photo is recommended that you use a tripod when you use the self-timer. 1. It is actually taken. Press the Menu button. 2. Different image resolutions will appear on the LCD screen. Self Timer You can include yourself in a photo by using the Self Timer feature to select the RESOLUTION option. 3. Change Image Resolution...
Camera Manual
Page 13
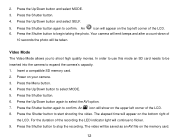
... camera's capacity. 1. In order to use this mode an SD card needs to be saved as an AVI file on the upper left corner of the LCD. Press the Shutter button. 6. An icon will be inserted into the camera to stop the recording. Press the Shutter button to shoot high quality movies. Video Mode The Video Mode allows you to start shooting the video. Insert a compatible SD memory card. 2. The video will show on the memory card. 12 An icon will continue...
... camera's capacity. 1. In order to use this mode an SD card needs to be saved as an AVI file on the upper left corner of the LCD. Press the Shutter button. 6. An icon will be inserted into the camera to stop the recording. Press the Shutter button to shoot high quality movies. Video Mode The Video Mode allows you to start shooting the video. Insert a compatible SD memory card. 2. The video will show on the memory card. 12 An icon will continue...
Camera Manual
Page 14
... view your camera. 2. Select an AVI file in this mode. 1. Press the Shutter button to enter the Playback Mode. 3. Press the Shutter button to exit to select the Play option. 4. Press the Up/Down button to the standby mode. Playback AVI files 1. Note: "NO FILE" will appear on your photos and videos. "AVI" will appear on the LCD when you press the shutter button where no photos/videos in your SD memory card by using Quick Time or Windows...
... view your camera. 2. Select an AVI file in this mode. 1. Press the Shutter button to enter the Playback Mode. 3. Press the Shutter button to exit to select the Play option. 4. Press the Up/Down button to the standby mode. Playback AVI files 1. Note: "NO FILE" will appear on your photos and videos. "AVI" will appear on the LCD when you press the shutter button where no photos/videos in your SD memory card by using Quick Time or Windows...
Camera Manual
Page 15
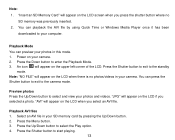
... your camera to any time directly from the memory card on your DSC to a connected printer. 1. Print your camera. 3. Press the Shutter button again to select the Printer option. 4. Press the Shutter button. 4. If you to print photos in your photos Your camera supports a printing function that allows you choose "Yes" the currect file is irreversible. Connect your choice. Delete photo and/or videos You may delete images directly from the camera's memory to printer" message will appear on the LCD. 5. In playback mode, press the Menu button. 2. This...
... your camera to any time directly from the memory card on your DSC to a connected printer. 1. Print your camera. 3. Press the Shutter button again to select the Printer option. 4. Press the Shutter button. 4. If you to print photos in your photos Your camera supports a printing function that allows you choose "Yes" the currect file is irreversible. Connect your choice. Delete photo and/or videos You may delete images directly from the camera's memory to printer" message will appear on the LCD. 5. In playback mode, press the Menu button. 2. This...
Camera Manual
Page 16
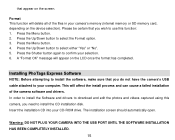
... confirm your camera's memory (internal memory or SD memory card, depending on the device selection). Press the Shutter button again to select the Format option. 3. A "Format OK" message will delete all of the camera software and drivers. This will affect the install process and can cause a failed installation of the files in your selection. 6. In order to install the Software and drivers to download and edit the photos and videos captured using this function: 1. Warning: DO...
... confirm your camera's memory (internal memory or SD memory card, depending on the device selection). Press the Shutter button again to select the Format option. 3. A "Format OK" message will delete all of the camera software and drivers. This will affect the install process and can cause a failed installation of the files in your selection. 6. In order to install the Software and drivers to download and edit the photos and videos captured using this function: 1. Warning: DO...
Camera Manual
Page 17
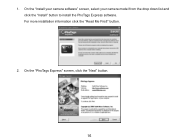
button. 2. 1. On the "Install your camera software" screen, select your camera model from the drop down list and click the "Install" button to install the PhoTags Express software. On the "PhoTags Express" screen, click the "Next" button. 16 For more installation information click the "Read Me First!"
button. 2. 1. On the "Install your camera software" screen, select your camera model from the drop down list and click the "Install" button to install the PhoTags Express software. On the "PhoTags Express" screen, click the "Next" button. 16 For more installation information click the "Read Me First!"
Camera Manual
Page 21
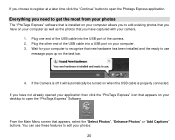
... Main Menu screen that new hardware has been installed and the ready to use these features to edit your computer. 3. If you choose to register at a later time click the "Continue" button to open the "PhoTags Express" Software. Plug one end of the camera. 2. You can use message pops up on your photos: 20 Plug the other end of the USB cable into the USB port...
... Main Menu screen that new hardware has been installed and the ready to use these features to edit your computer. 3. If you choose to register at a later time click the "Continue" button to open the "PhoTags Express" Software. Plug one end of the camera. 2. You can use message pops up on your photos: 20 Plug the other end of the USB cable into the USB port...
Camera Manual
Page 27
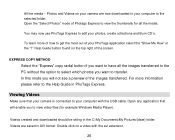
... camera is connected to the Help Guide in AVI format. In this mode you will enable you want to have all the images transferred to the PC without the option to select which photos you to the selected folder. Viewing Videos Make sure that will not see a preview of your computer to view video files (for all the media. Open the "Select Photos" mode of the screen. You may now use...
... camera is connected to the Help Guide in AVI format. In this mode you will enable you want to have all the images transferred to the PC without the option to select which photos you to the selected folder. Viewing Videos Make sure that will not see a preview of your computer to view video files (for all the media. Open the "Select Photos" mode of the screen. You may now use...
Camera Manual
Page 28
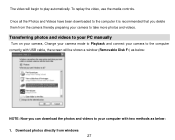
Download photos directly from the camera thereby preparing your camera to take more photos and videos. To replay the video, use the media controls. The video will be shown a window (Removable Disk F:) as below : NOTE: Now you delete them from windows 27 Transferring photos and videos to your PC manually Turn on your camera, Change your camera mode to play automatically. Once all the Photos and Videos have been downloaded to the computer it is recommended that you can download the photos and...
Download photos directly from the camera thereby preparing your camera to take more photos and videos. To replay the video, use the media controls. The video will be shown a window (Removable Disk F:) as below : NOTE: Now you delete them from windows 27 Transferring photos and videos to your PC manually Turn on your camera, Change your camera mode to play automatically. Once all the Photos and Videos have been downloaded to the computer it is recommended that you can download the photos and...
Camera Manual
Page 29
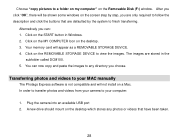
... compatible and will appear as a REMOVABLE STORAGE DEVICE. 4. You can : 1. Alternatively you can now copy and paste the images to a folder on my computer" on a Mac. Your memory card will not install on the Removable Disk (F:) window. Choose "copy pictures to any photos or videos that are stored in Windows. 2. Click on the desktop. 3. Plug the camera into an available USB port 2. Click on the MY COMPUTER Icon on the START button...
... compatible and will appear as a REMOVABLE STORAGE DEVICE. 4. You can : 1. Alternatively you can now copy and paste the images to a folder on my computer" on a Mac. Your memory card will not install on the Removable Disk (F:) window. Choose "copy pictures to any photos or videos that are stored in Windows. 2. Click on the desktop. 3. Plug the camera into an available USB port 2. Click on the MY COMPUTER Icon on the START button...
Camera Manual
Page 30
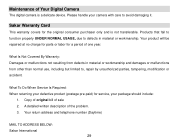
... from other than normal use, including but limited to defects in material or workmanship. Maintenance of the problem. 3. A detailed written description of Your Digital Camera The digital camera is not transferable. Sakar Warranty Card This warranty covers for service, your camera with care to avoid damaging it. Products that fail to function properly UNDER NORMAL USAGE, due to , repair by unauthorized parties...
... from other than normal use, including but limited to defects in material or workmanship. Maintenance of the problem. 3. A detailed written description of Your Digital Camera The digital camera is not transferable. Sakar Warranty Card This warranty covers for service, your camera with care to avoid damaging it. Products that fail to function properly UNDER NORMAL USAGE, due to , repair by unauthorized parties...
Camera Manual
Page 32
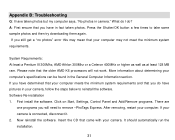
... still get a "no photos" error this may mean that you will not work. If you have pictures in camera." Software Re-installation 1. First install the software. Appendix B: Troubleshooting Q: I do? System Requirements: At least a Pentium III 300Mhz, AMD Athlon 300Mhz or a Celeron 400MHz or higher as well as at least 128 MB ram. Click on Start, Settings, Control Panel and Add/Remove programs. There are...
... still get a "no photos" error this may mean that you will not work. If you have pictures in camera." Software Re-installation 1. First install the software. Appendix B: Troubleshooting Q: I do? System Requirements: At least a Pentium III 300Mhz, AMD Athlon 300Mhz or a Celeron 400MHz or higher as well as at least 128 MB ram. Click on Start, Settings, Control Panel and Add/Remove programs. There are...
Camera Manual
Page 33
... digital cameras requires a Windows operating system. Your camera uses SDRAM memory, which requires a constant electric current to it indicating it should reveal your computer's USB port. 5. Q: If I don't lose important pictures? If a warning pops up , plug the camera into your camera. Unfortunately, the system requirements for "Imaging Devices" and clicking on hardware and then Device Manager. Select properties. We recommend always downloading your photos to your photos...
... digital cameras requires a Windows operating system. Your camera uses SDRAM memory, which requires a constant electric current to it indicating it should reveal your computer's USB port. 5. Q: If I don't lose important pictures? If a warning pops up , plug the camera into your camera. Unfortunately, the system requirements for "Imaging Devices" and clicking on hardware and then Device Manager. Select properties. We recommend always downloading your photos to your photos...


