
User Guide
Page 27
27 Contents Adding memory 75 Installing a memory module 75 Removing a memory module 79 Using Slim SelectBay® modules 80 Removing a module from the Slim SelectBay 80 Inserting a module into the Slim SelectBay 81 Inserting and removing ... Using the AccuPoint II® pointing device 97 Using the TouchPad 98 Control buttons 98 Disabling or enabling the Dual Pointing Device 99 Using the TOSHIBA Console button 100 Starting a program 101 Starting a program from the Start menu 101 Starting a program from Windows® Explorer 102 Starting a program from the Run...
27 Contents Adding memory 75 Installing a memory module 75 Removing a memory module 79 Using Slim SelectBay® modules 80 Removing a module from the Slim SelectBay 80 Inserting a module into the Slim SelectBay 81 Inserting and removing ... Using the AccuPoint II® pointing device 97 Using the TouchPad 98 Control buttons 98 Disabling or enabling the Dual Pointing Device 99 Using the TOSHIBA Console button 100 Starting a program 101 Starting a program from the Start menu 101 Starting a program from Windows® Explorer 102 Starting a program from the Run...

User Guide
Page 31
31 Contents Memory card problems 194 Power and the batteries 195 Keyboard problems 197 AccuPoint II problems 197 Display problems 198 Disk drive problems 200 Modem problems 202 ... DVD operating problems-Windows XP 210 Developing good computing habits 212 If you need further assistance 213 Before you call 213 Contacting Toshiba 214 Other Toshiba Internet Web sites 215 Toshiba's worldwide offices 215 Appendix A: Windows 2000 Supplemental Information .... 219 Using your computer for the first time 219 Setting up your software 219...
31 Contents Memory card problems 194 Power and the batteries 195 Keyboard problems 197 AccuPoint II problems 197 Display problems 198 Disk drive problems 200 Modem problems 202 ... DVD operating problems-Windows XP 210 Developing good computing habits 212 If you need further assistance 213 Before you call 213 Contacting Toshiba 214 Other Toshiba Internet Web sites 215 Toshiba's worldwide offices 215 Appendix A: Windows 2000 Supplemental Information .... 219 Using your computer for the first time 219 Setting up your software 219...

User Guide
Page 46
...see "Using an expansion device" on page 80. For more information, see "Using Slim SelectBay® modules" on page 74. Memory module-Lets you use your computer. Expansion port-Lets you connect to your computer when a standard electrical outlet is located Underside Hard... Your Way Around Finding where everything is not available. For further information about using the battery, see "Adding memory" on page 126. For more memory to an expansion device, providing additional expansion capability. Slim SelectBay slot-One of several interchangeable devices which offer exceptional...
...see "Using an expansion device" on page 80. For more information, see "Using Slim SelectBay® modules" on page 74. Memory module-Lets you use your computer. Expansion port-Lets you connect to your computer when a standard electrical outlet is located Underside Hard... Your Way Around Finding where everything is not available. For further information about using the battery, see "Adding memory" on page 126. For more memory to an expansion device, providing additional expansion capability. Slim SelectBay slot-One of several interchangeable devices which offer exceptional...

User Guide
Page 55
... your software" on page 62 before you should observe certain precautions to further reduce the risk of personal injury or damage to , a mouse, keyboard, printer, memory, and PC cards. These components include, but are installed, both can become hot even if only one is designed to sharp impacts. However, you can...
... your software" on page 62 before you should observe certain precautions to further reduce the risk of personal injury or damage to , a mouse, keyboard, printer, memory, and PC cards. These components include, but are installed, both can become hot even if only one is designed to sharp impacts. However, you can...

User Guide
Page 56
... to complete "Setting up your software" on page 70. ❖ Connect an external monitor. See "Using a keyboard" on page 62. For more memory. See "Using external display devices" on page 65. See "Inserting and removing PC Cards" on page 70. ❖ Connect a full-size keyboard.... specific devices, see "Connecting Other External Devices" on page 65. ❖ Connect a local printer. See "Connecting a mouse" on page 84. See "Adding memory" on page 56. See "Connecting the AC adapter" on page 75. ❖ Connect a mouse. See "Connecting a local printer" on page 71. ❖...
... to complete "Setting up your software" on page 70. ❖ Connect an external monitor. See "Using a keyboard" on page 62. For more memory. See "Using external display devices" on page 65. See "Inserting and removing PC Cards" on page 70. ❖ Connect a full-size keyboard.... specific devices, see "Connecting Other External Devices" on page 65. ❖ Connect a local printer. See "Connecting a mouse" on page 84. See "Adding memory" on page 56. See "Connecting the AC adapter" on page 75. ❖ Connect a mouse. See "Connecting a local printer" on page 71. ❖...
User Guide
Page 64
.... Closing the display panel When you are not connected to a network, use the Windows® Standby or Hibernate commands to save your system settings to memory so that it is in loss of the computer. For more information, see "Using Hibernation" on page 120). 64 Getting Started Turning off the computer...
.... Closing the display panel When you are not connected to a network, use the Windows® Standby or Hibernate commands to save your system settings to memory so that it is in loss of the computer. For more information, see "Using Hibernation" on page 120). 64 Getting Started Turning off the computer...

User Guide
Page 75
... system will beep and will need a standard Phillips no . 1 screwdriver that is replaced with two memory slots which can provide for this occurs, contact Toshiba's support center at (800) 457-7777. The computer has two memory expansion slots-Slot A and Slot B. A message may display. If this procedure. See "Turning off the computer" on...
... system will beep and will need a standard Phillips no . 1 screwdriver that is replaced with two memory slots which can provide for this occurs, contact Toshiba's support center at (800) 457-7777. The computer has two memory expansion slots-Slot A and Slot B. A message may display. If this procedure. See "Turning off the computer" on...
User Guide
Page 76
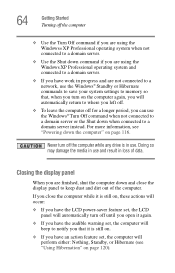
...the flat head screwdriver between the panel and the surrounding housing. Grasp the end of its position by using a flat head screwdriver. Installing a memory module with the computer's power on may have connected. Using a flat head screw driver to damage the display or circuit board. 76 Connecting..., or both. 3 Open the display panel and remove the panel that contains the Power and TOSHIBA Console buttons. When removing the computer's power and TOSHIBA Console button panel to install additional memory, be careful not to pry the panel off You can pry the panel out of the panel...
...the flat head screwdriver between the panel and the surrounding housing. Grasp the end of its position by using a flat head screwdriver. Installing a memory module with the computer's power on may have connected. Using a flat head screw driver to damage the display or circuit board. 76 Connecting..., or both. 3 Open the display panel and remove the panel that contains the Power and TOSHIBA Console buttons. When removing the computer's power and TOSHIBA Console button panel to install additional memory, be careful not to pry the panel off You can pry the panel out of the panel...

User Guide
Page 77
Lifting off the keyboard Connecting Other External Devices Adding memory 77 Removing the center keyboard screw 4 Locate and remove the screws that hold the keyboard in place. 5 Lift the keyboard and place it face down on the palm rest of the computer.
Lifting off the keyboard Connecting Other External Devices Adding memory 77 Removing the center keyboard screw 4 Locate and remove the screws that hold the keyboard in place. 5 Lift the keyboard and place it face down on the palm rest of the computer.

User Guide
Page 78
...of the module will click to secure the module. 78 Connecting Other External Devices Adding memory Static electricity can damage the memory module. Inserting the memory module into place. To avoid damaging the memory module, be careful not to touch its pin connector on the keyboard panel to discharge... the memory module in the slot and gently press it into place. 10 Restart the computer. Before you handle the module, touch a grounded metal surface to snap it down into the slot 8 Replace the keyboard and the screws. 9 Replace the panel that contains the Power and TOSHIBA Console ...
...of the module will click to secure the module. 78 Connecting Other External Devices Adding memory Static electricity can damage the memory module. Inserting the memory module into place. To avoid damaging the memory module, be careful not to touch its pin connector on the keyboard panel to discharge... the memory module in the slot and gently press it into place. 10 Restart the computer. Before you handle the module, touch a grounded metal surface to snap it down into the slot 8 Replace the keyboard and the screws. 9 Replace the panel that contains the Power and TOSHIBA Console ...

User Guide
Page 79
Removing the memory module 4 Carefully remove the module from the memory module. 3 The memory module pops partially out of the slot. Connecting Other External Devices Adding memory 79 Removing a memory module If you need to remove a memory module: 1 Complete steps 1-5 in "Installing a memory module" to shut down the computer and expose the memory module(s). 2 Pull the clips away from the slot. 5 Replace the keyboard and the screws. 6 Replace the panel that contains the Power and TOSHIBA Console buttons. 7 Restart the computer.
Removing the memory module 4 Carefully remove the module from the memory module. 3 The memory module pops partially out of the slot. Connecting Other External Devices Adding memory 79 Removing a memory module If you need to remove a memory module: 1 Complete steps 1-5 in "Installing a memory module" to shut down the computer and expose the memory module(s). 2 Pull the clips away from the slot. 5 Replace the keyboard and the screws. 6 Replace the panel that contains the Power and TOSHIBA Console buttons. 7 Restart the computer.

User Guide
Page 91
... work stays in a safe place. 91 You will lose all the work frequently. Label the backup copies clearly and store them in the computer's temporary memory until you save it to the disk. This feature saves your work since your last save feature which you can turn on a regular basis. HINT...
... work stays in a safe place. 91 You will lose all the work frequently. Label the backup copies clearly and store them in the computer's temporary memory until you save it to the disk. This feature saves your work since your last save feature which you can turn on a regular basis. HINT...

User Guide
Page 120
...Mode tab. Configuring your computer for Hibernation 1 Click Start, Control Panel, and then Performance and Maintenance. 2 In the Control Panel window, double-click the Toshiba Power Saver icon. 3 In the Running on the hard disk, no data is lost if the main battery discharges. ❖ When starting up than ...the computer Using Hibernation Hibernation mode shuts the computer down completely, but it . Restoring information from the hard disk takes longer than from memory. ❖ When starting up again, Hibernation uses less time and battery power than does Turn Off. ❖ Resuming from...
...Mode tab. Configuring your computer for Hibernation 1 Click Start, Control Panel, and then Performance and Maintenance. 2 In the Control Panel window, double-click the Toshiba Power Saver icon. 3 In the Running on the hard disk, no data is lost if the main battery discharges. ❖ When starting up than ...the computer Using Hibernation Hibernation mode shuts the computer down completely, but it . Restoring information from the hard disk takes longer than from memory. ❖ When starting up again, Hibernation uses less time and battery power than does Turn Off. ❖ Resuming from...

User Guide
Page 122
The computer returns to save your information will be lost. If you put the computer in memory so that, when you power on /off . Be sure to the screen you were using the Standby command and the main battery discharges fully, your ...
The computer returns to save your information will be lost. If you put the computer in memory so that, when you power on /off . Be sure to the screen you were using the Standby command and the main battery discharges fully, your ...

User Guide
Page 127
... life" on battery power The computer contains a removable Lithium Ion (Li-Ion) battery pack that provides power when you . The RTC battery powers the RTC memory that the battery maintains its maximum capacity, operate the computer on AC power, either through an AC adapter or a docking station (if applicable to retain...
... life" on battery power The computer contains a removable Lithium Ion (Li-Ion) battery pack that provides power when you . The RTC battery powers the RTC memory that the battery maintains its maximum capacity, operate the computer on AC power, either through an AC adapter or a docking station (if applicable to retain...

User Guide
Page 128
... have become completely discharged while your computer was shipped, resulting in your computer's configuration settings. The RTC battery powers the System Time Clock and BIOS memory used to a month when the computer is almost completely discharged. Leave the power connected and the battery should begin charging after a few minutes. The battery...
... have become completely discharged while your computer was shipped, resulting in your computer's configuration settings. The RTC battery powers the System Time Clock and BIOS memory used to a month when the computer is almost completely discharged. Leave the power connected and the battery should begin charging after a few minutes. The battery...

User Guide
Page 192
... . After you add each device, test it to make sure it interrupts what the processor is stored in a specific place or address in memory called an Interrupt Request (IRQ) because it and all devices, programs and features. It also needs a direct channel to the computer...'s memory to be causing a hardware conflict. Direct Memory Access Similarly, the data required by the other, causing a hardware conflict. If two or more devices use the same DMA, the data...
... . After you add each device, test it to make sure it interrupts what the processor is stored in a specific place or address in memory called an Interrupt Request (IRQ) because it and all devices, programs and features. It also needs a direct channel to the computer...'s memory to be causing a hardware conflict. Direct Memory Access Similarly, the data required by the other, causing a hardware conflict. If two or more devices use the same DMA, the data...
User Guide
Page 194
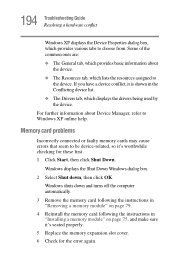
.... 2 Select Shut down and turns off the computer automatically. 3 Remove the memory card following the instructions in "Removing a memory module" on page 79. 4 Reinstall the memory card following the instructions in "Installing a memory module" on page 75, and make sure it is shown in the Conflicting ... tab, which provides basic information about Device Manager, refer to choose from. If you have a device conflict, it 's seated properly. 5 Replace the memory expansion slot cover. 6 Check for these first. 1 Click Start, then click Shut Down. Some of the common ones are: ❖ The General...
.... 2 Select Shut down and turns off the computer automatically. 3 Remove the memory card following the instructions in "Removing a memory module" on page 79. 4 Reinstall the memory card following the instructions in "Installing a memory module" on page 75, and make sure it is shown in the Conflicting ... tab, which provides basic information about Device Manager, refer to choose from. If you have a device conflict, it 's seated properly. 5 Replace the memory expansion slot cover. 6 Check for these first. 1 Click Start, then click Shut Down. Some of the common ones are: ❖ The General...

User Guide
Page 195
... neither power the computer nor recharge the batteries. If the error recurs without the memory card installed, the error is working properly by the memory card. If removing the memory card eliminates the error, the memory card may not be faulty. The power cable and AC adapter work correctly, but...'t come on , check that the electrical outlet is not caused by plugging in the computer. If they are clean. If there is only one memory card in a lamp or other appliance. The main battery may be making a good electrical connection. For example, a faulty power cable will prevent...
... neither power the computer nor recharge the batteries. If the error recurs without the memory card installed, the error is working properly by the memory card. If removing the memory card eliminates the error, the memory card may not be faulty. The power cable and AC adapter work correctly, but...'t come on , check that the electrical outlet is not caused by plugging in the computer. If they are clean. If there is only one memory card in a lamp or other appliance. The main battery may be making a good electrical connection. For example, a faulty power cable will prevent...

User Guide
Page 196
... begin with? If the battery icon doesn't glow after 20 minutes, let the computer continue charging the battery for as long as a PC Card or memory module, that takes its useful life. Check the power-saving features in the range 5 degrees to turn on the computer. If you turn off automatically...
... begin with? If the battery icon doesn't glow after 20 minutes, let the computer continue charging the battery for as long as a PC Card or memory module, that takes its useful life. Check the power-saving features in the range 5 degrees to turn on the computer. If you turn off automatically...


