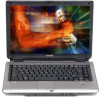
User Guide
Page 27
... memory (optional 56 Installing a memory module 56 Removing a memory module 62 Hard Drive Recovery Utilities 64 Creating Recovery CDs/DVDs 65 Hard Disk Drive Recovery using the recovery partition 67 Hard Disk Drive Recovery using the Recovery media 72 Deleting the Hard Disk Recovery Utility 75 Installing drivers and applications 76 Using the TouchPad 76 Scrolling with...
... memory (optional 56 Installing a memory module 56 Removing a memory module 62 Hard Drive Recovery Utilities 64 Creating Recovery CDs/DVDs 65 Hard Disk Drive Recovery using the recovery partition 67 Hard Disk Drive Recovery using the Recovery media 72 Deleting the Hard Disk Recovery Utility 75 Installing drivers and applications 76 Using the TouchPad 76 Scrolling with...
User Guide
Page 64
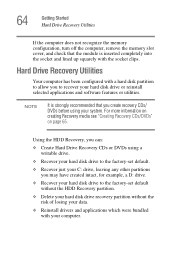
...on page 65. NOTE It is inserted completely into the socket and lined up squarely with your computer. 64 Getting Started Hard Drive Recovery Utilities If the computer does not recognize the memory configuration, turn off the computer, remove the memory slot cover, and check that ...the module is strongly recommended that you create recovery CDs/ DVDs before using a writable drive. ❖ Recover your hard disk drive to recover your hard disk drive or reinstall selected applications...
...on page 65. NOTE It is inserted completely into the socket and lined up squarely with your computer. 64 Getting Started Hard Drive Recovery Utilities If the computer does not recognize the memory configuration, turn off the computer, remove the memory slot cover, and check that ...the module is strongly recommended that you create recovery CDs/ DVDs before using a writable drive. ❖ Recover your hard disk drive to recover your hard disk drive or reinstall selected applications...
User Guide
Page 65
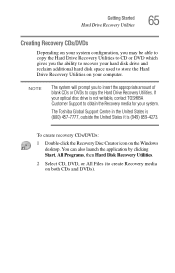
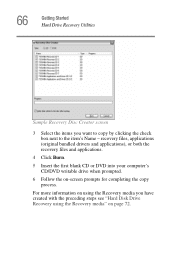
... Support Centre in the United States is (800) 457-7777, outside the United States it is not writable, contact TOSHIBA Customer Support to copy the Hard Drive Recovery Utilities. If your optical disc drive is (949) 859-4273. NOTE The system will prompt you the ability to recover your hard ...to CD or DVD which gives you to insert the appropriate amount of blank CDs or DVDs to obtain the Recovery media for your system. To create recovery CDs/DVDs: 1 Double-click the Recovery Disc Creator icon on your computer. You can also launch the application by clicking Start, All Programs, then...
... Support Centre in the United States is (800) 457-7777, outside the United States it is not writable, contact TOSHIBA Customer Support to copy the Hard Drive Recovery Utilities. If your optical disc drive is (949) 859-4273. NOTE The system will prompt you the ability to recover your hard ...to CD or DVD which gives you to insert the appropriate amount of blank CDs or DVDs to obtain the Recovery media for your system. To create recovery CDs/DVDs: 1 Double-click the Recovery Disc Creator icon on your computer. You can also launch the application by clicking Start, All Programs, then...
User Guide
Page 66
...item's Name - 66 Getting Started Hard Drive Recovery Utilities Sample Recovery Disc Creator screen 3 Select the items you have created with the preceding steps see "Hard Disk Drive Recovery using the Recovery media" on page 72. recovery files, applications (original bundled drivers and applications),... or both the recovery files and applications. 4 Click Burn. 5 Insert the first blank CD or...
...item's Name - 66 Getting Started Hard Drive Recovery Utilities Sample Recovery Disc Creator screen 3 Select the items you have created with the preceding steps see "Hard Disk Drive Recovery using the Recovery media" on page 72. recovery files, applications (original bundled drivers and applications),... or both the recovery files and applications. 4 Click Burn. 5 Insert the first blank CD or...

User Guide
Page 67
When the computer powers on, the TOSHIBA Recovery Wizard screen displays. Sample TOSHIBA Recovery Wizard screen To recover your hard disk drive using the Hard Drive Recovery partition to the factory-set default, or recovering just your C: drive and leaving other partitions (for example, a D: drive) intact, or ...the computer is turned off. 2 Press and hold the 0 (zero) key on your C: drive and then recovering it. Getting Started Hard Drive Recovery Utilities 67 Hard Disk Drive Recovery using the recovery partition You have the options of your keyboard while powering on the computer.
When the computer powers on, the TOSHIBA Recovery Wizard screen displays. Sample TOSHIBA Recovery Wizard screen To recover your hard disk drive using the Hard Drive Recovery partition to the factory-set default, or recovering just your C: drive and leaving other partitions (for example, a D: drive) intact, or ...the computer is turned off. 2 Press and hold the 0 (zero) key on your C: drive and then recovering it. Getting Started Hard Drive Recovery Utilities 67 Hard Disk Drive Recovery using the recovery partition You have the options of your keyboard while powering on the computer.
User Guide
Page 68
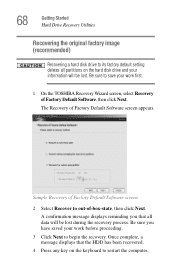
...have saved your work first. 1 On the TOSHIBA Recovery Wizard screen, select Recovery of -box-state, then click Next. Once complete, a message displays that all partitions on the keyboard to restart the computer. 68 Getting Started Hard Drive Recovery Utilities Recovering the original factory image (recommended) .... Be sure to out-of Factory Default Software, then click Next. Sample Recovery of Factory Default Software screen 2 Select Recover to save your information will be lost during the recovery process. Be sure you that the HDD has been recovered. 4 Press any...
...have saved your work first. 1 On the TOSHIBA Recovery Wizard screen, select Recovery of -box-state, then click Next. Once complete, a message displays that all partitions on the keyboard to restart the computer. 68 Getting Started Hard Drive Recovery Utilities Recovering the original factory image (recommended) .... Be sure to out-of Factory Default Software, then click Next. Sample Recovery of Factory Default Software screen 2 Select Recover to save your information will be lost during the recovery process. Be sure you that the HDD has been recovered. 4 Press any...

User Guide
Page 69
... hard disk screen 3 Select the desired method, then click Next. Be sure you to delete all data and partitions from your hard disk: 1 On the TOSHIBA Recovery Wizard screen, select Erase the hard disk, then click Next. 2 The next screen lists the two methods you that all sectors on the size of... option deletes data, then overwrites the entire HDD for security purposes. To delete the data and partitions from the hard disk. Getting Started Hard Drive Recovery Utilities 69 Erasing the hard disk The Recovery Wizard allows you have saved your HDD.
... hard disk screen 3 Select the desired method, then click Next. Be sure you to delete all data and partitions from your hard disk: 1 On the TOSHIBA Recovery Wizard screen, select Erase the hard disk, then click Next. 2 The next screen lists the two methods you that all sectors on the size of... option deletes data, then overwrites the entire HDD for security purposes. To delete the data and partitions from the hard disk. Getting Started Hard Drive Recovery Utilities 69 Erasing the hard disk The Recovery Wizard allows you have saved your HDD.

User Guide
Page 70
...drive and your C: drive: 1 Press 2 on the recovered drive will be lost during the recovery process. To recover only your information on the keyboard when the TOSHIBA HDD Recovery Utility screen displays. A confirmation message appears, reminding you have saved your work before proceeding. ...2 Click Yes to restart the computer. 70 Getting Started Hard Drive Recovery Utilities 4 Click Next to begin the ...
...drive and your C: drive: 1 Press 2 on the recovered drive will be lost during the recovery process. To recover only your information on the keyboard when the TOSHIBA HDD Recovery Utility screen displays. A confirmation message appears, reminding you have saved your work before proceeding. ...2 Click Yes to restart the computer. 70 Getting Started Hard Drive Recovery Utilities 4 Click Next to begin the ...

User Guide
Page 71
...to increase/decrease the C: drive size by 5 GB. To resize and recover your C: drive: 1 Press 3 on the keyboard when the TOSHIBA HDD Recovery Utility screen displays. A confirmation message appears, reminding you that the HDD has been recovered. 4 Press any key on your work before proceeding.... 2 Click Yes to begin the restoration. Be sure you created a D: drive, it will be deleted during the recovery process. Getting Started Hard Drive Recovery Utilities 71 Recovering the C: partition with a user specified size Resizing and recovering your C: drive to its factory default setting...
...to increase/decrease the C: drive size by 5 GB. To resize and recover your C: drive: 1 Press 3 on the keyboard when the TOSHIBA HDD Recovery Utility screen displays. A confirmation message appears, reminding you that the HDD has been recovered. 4 Press any key on your work before proceeding.... 2 Click Yes to begin the restoration. Be sure you created a D: drive, it will be deleted during the recovery process. Getting Started Hard Drive Recovery Utilities 71 Recovering the C: partition with a user specified size Resizing and recovering your C: drive to its factory default setting...
User Guide
Page 72
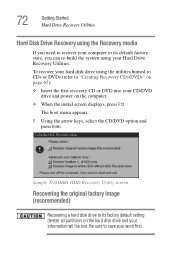
...Sample TOSHIBA HDD Recovery Utility screen Recovering the original factory image (recommended) Recovering a hard disk drive to its default factory state, you can re-build the system using the utilities burned to CDs or DVDs (refer to "Creating Recovery CDs/DVDs" on page 65): ❖ Insert the first recovery CD...DVD option and press Enter. Be sure to save your information will be lost. 72 Getting Started Hard Drive Recovery Utilities Hard Disk Drive Recovery using the Recovery media If you need to recover your computer to its factory default setting deletes all partitions on the hard disk...
...Sample TOSHIBA HDD Recovery Utility screen Recovering the original factory image (recommended) Recovering a hard disk drive to its default factory state, you can re-build the system using the utilities burned to CDs or DVDs (refer to "Creating Recovery CDs/DVDs" on page 65): ❖ Insert the first recovery CD...DVD option and press Enter. Be sure to save your information will be lost. 72 Getting Started Hard Drive Recovery Utilities Hard Disk Drive Recovery using the Recovery media If you need to recover your computer to its factory default setting deletes all partitions on the hard disk...

User Guide
Page 73
... message appears, reminding you have created other partitions (for example, a D: drive) those partitions and any key on the keyboard when the TOSHIBA HDD Recovery Utility screen displays. Be sure you that all information on them will not be affected and will remain intact. Be sure you that all ...data will be lost during the recovery process. Be sure to save your work first. Once complete, a message displays that the HDD has been recovered. 3 Press any information ...
... message appears, reminding you have created other partitions (for example, a D: drive) those partitions and any key on the keyboard when the TOSHIBA HDD Recovery Utility screen displays. Be sure you that all information on them will not be affected and will remain intact. Be sure you that all ...data will be lost during the recovery process. Be sure to save your work first. Once complete, a message displays that the HDD has been recovered. 3 Press any information ...

User Guide
Page 74
...the keyboard when the TOSHIBA HDD Recovery Utility screen displays. Recovering your C: drive to restart the computer. A confirmation message appears, reminding you that the HDD has been recovered. 3 Press any key on your keyboard to its factory default state without the recovery partition reformats all ...data will be lost during the recovery process) and your information will be lost . Checking the HDD operating status After restoring your hard disk...
...the keyboard when the TOSHIBA HDD Recovery Utility screen displays. Recovering your C: drive to restart the computer. A confirmation message appears, reminding you that the HDD has been recovered. 3 Press any key on your keyboard to its factory default state without the recovery partition reformats all ...data will be lost during the recovery process) and your information will be lost . Checking the HDD operating status After restoring your hard disk...

User Guide
Page 75
... OK to continue. 3 When the following warning screen displays, click Yes to confirm. The Delete Hard Disk Recovery Utility warning screen displays. Sample Delete Hard Disk Recovery Utility confirmation screen After the Delete Hard Disk Recovery Utility has completed, it assigns the appropriate drive letter (for example, E: drive) for the extra space and...
... OK to continue. 3 When the following warning screen displays, click Yes to confirm. The Delete Hard Disk Recovery Utility warning screen displays. Sample Delete Hard Disk Recovery Utility confirmation screen After the Delete Hard Disk Recovery Utility has completed, it assigns the appropriate drive letter (for example, E: drive) for the extra space and...
User Guide
Page 76
... Installer icon on -screen prompts to complete the installation process. 76 Getting Started Using the TouchPad™ Installing drivers and applications The TOSHIBA Application Installer allows you would like to move the cursor: ❖ To move the cursor to the top of the page, push ... the TouchPad in front of the page, slide your computer. You can also launch the application by clicking Start, All Programs, Hard Disk Recovery Utilities, and then Toshiba Application Installer. 2 Click Next. 3 Click the item(s) you to move the cursor to the right side of the keyboard, is sensitive ...
... Installer icon on -screen prompts to complete the installation process. 76 Getting Started Using the TouchPad™ Installing drivers and applications The TOSHIBA Application Installer allows you would like to move the cursor: ❖ To move the cursor to the top of the page, push ... the TouchPad in front of the page, slide your computer. You can also launch the application by clicking Start, All Programs, Hard Disk Recovery Utilities, and then Toshiba Application Installer. 2 Click Next. 3 Click the item(s) you to move the cursor to the right side of the keyboard, is sensitive ...
User Guide
Page 220
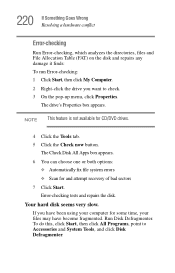
... to check. 3 On the pop-up menu, click Properties. Error-checking tests and repairs the disk. NOTE This feature is not available for and attempt recovery of bad sectors 7 Click Start. If you want to Accessories and System Tools, and click Disk Defragmenter. The drive's Properties box appears. 220 If Something...
... to check. 3 On the pop-up menu, click Properties. Error-checking tests and repairs the disk. NOTE This feature is not available for and attempt recovery of bad sectors 7 Click Start. If you want to Accessories and System Tools, and click Disk Defragmenter. The drive's Properties box appears. 220 If Something...

User Guide
Page 221
... not run correctly but others do not. Carefully inspect the diskette. The drive cannot read a diskette. Run Error-checking on the faulty diskette (for file recovery procedures. You may also be able to your network administrator. 221 If Something Goes Wrong Resolving a hardware conflict Your data files are starting the computer...
... not run correctly but others do not. Carefully inspect the diskette. The drive cannot read a diskette. Run Error-checking on the faulty diskette (for file recovery procedures. You may also be able to your network administrator. 221 If Something Goes Wrong Resolving a hardware conflict Your data files are starting the computer...


