User Guide
Page 27
... display devices 79 Directing the display output when you turn on the computer 80 Adjusting the quality of the external display......81 Using an external keyboard 81 Using a mouse 82 Connecting a printer 82 Setting up a printer 83 Connecting an optional external diskette drive........84 Connecting external speakers or headphones.........85 Connecting...
... display devices 79 Directing the display output when you turn on the computer 80 Adjusting the quality of the external display......81 Using an external keyboard 81 Using a mouse 82 Connecting a printer 82 Setting up a printer 83 Connecting an optional external diskette drive........84 Connecting external speakers or headphones.........85 Connecting...
User Guide
Page 28
... computer 95 Moving the computer 96 Using a computer lock 96 Chapter 2: Learning the Basics 98 Computing tips 98 Using the keyboard 100 Character keys 100 Making your keyboard emulate a full-size keyboard 101 Ctrl, Fn, and Alt keys 101 Function keys 102 Windows special keys 102 Overlay keys 103 Using the overlay to...
... computer 95 Moving the computer 96 Using a computer lock 96 Chapter 2: Learning the Basics 98 Computing tips 98 Using the keyboard 100 Character keys 100 Making your keyboard emulate a full-size keyboard 101 Ctrl, Fn, and Alt keys 101 Function keys 102 Windows special keys 102 Overlay keys 103 Using the overlay to...
User Guide
Page 31
... 173 SD Memory Card Format 175 Mouse Utility 177 TOSHIBA Mobile Extension 178 TOSHIBA Zooming Utility 179 TOSHIBA Button Controls 181 CD/DVD Drive Acoustic Silencer 182 Fn-esse 183 Starting Fn-esse 183 Using the keyboard or pointing device to assign keys 185 Viewing existing ...key assignments 187 Changing or removing existing key assignments 187 TOSHIBA HW Setup 187 TOSHIBA Hotkey Utility 190 Fingerprint Authentication Utility 190 Fingerprint Enrollment 191 ...
... 173 SD Memory Card Format 175 Mouse Utility 177 TOSHIBA Mobile Extension 178 TOSHIBA Zooming Utility 179 TOSHIBA Button Controls 181 CD/DVD Drive Acoustic Silencer 182 Fn-esse 183 Starting Fn-esse 183 Using the keyboard or pointing device to assign keys 185 Viewing existing ...key assignments 187 Changing or removing existing key assignments 187 TOSHIBA HW Setup 187 TOSHIBA Hotkey Utility 190 Fingerprint Authentication Utility 190 Fingerprint Enrollment 191 ...
User Guide
Page 32
... A plan of action 209 Resolving hardware conflicts on your own .....210 Fixing a problem with Device Manager ...........211 Memory problems 213 Power and the batteries 214 Keyboard problems 216 Display problems 217 Disk drive problems 219 CD-RW/DVD-ROM or multi-function drive problems 222 Sound system problems 223 PC Card...
... A plan of action 209 Resolving hardware conflicts on your own .....210 Fixing a problem with Device Manager ...........211 Memory problems 213 Power and the batteries 214 Keyboard problems 216 Display problems 217 Disk drive problems 219 CD-RW/DVD-ROM or multi-function drive problems 222 Sound system problems 223 PC Card...

User Guide
Page 33
... and system configuration backup in Windows XP 236 If you need further assistance 242 Before you contact Toshiba 242 Contacting Toshiba 243 Other Toshiba Internet Web sites 244 Toshiba's worldwide offices 244 Appendix A: Hot Keys 246 Volume Mute 246 Password security 247 Without a password... 251 Display brightness 251 Disabling or enabling the TouchPad 252 Zooming applications in/out 252 Keyboard hot keys 253 Appendix B: Using ConfigFree™ with your Toshiba Computer 254 Getting Started 255 Starting ConfigFree 255 ConfigFree Utilities 257 Connectivity Doctor 257 Search ...
... and system configuration backup in Windows XP 236 If you need further assistance 242 Before you contact Toshiba 242 Contacting Toshiba 243 Other Toshiba Internet Web sites 244 Toshiba's worldwide offices 244 Appendix A: Hot Keys 246 Volume Mute 246 Password security 247 Without a password... 251 Display brightness 251 Disabling or enabling the TouchPad 252 Zooming applications in/out 252 Keyboard hot keys 253 Appendix B: Using ConfigFree™ with your Toshiba Computer 254 Getting Started 255 Starting ConfigFree 255 ConfigFree Utilities 257 Connectivity Doctor 257 Search ...

User Guide
Page 44
... in air by creating a vacuum. To prevent possible overheating of the computer. Do not use the computer on surfaces with objects that needs to , a mouse, keyboard, printer, memory, and PC Cards. Your computer contains a rechargeable main battery that can block the air intake, preventing air from reaching the CPU.
... in air by creating a vacuum. To prevent possible overheating of the computer. Do not use the computer on surfaces with objects that needs to , a mouse, keyboard, printer, memory, and PC Cards. Your computer contains a rechargeable main battery that can block the air intake, preventing air from reaching the CPU.

User Guide
Page 47
Getting Started Adding optional external devices 47 Adding optional external devices NOTE Before adding external devices or memory, Toshiba recommends setting up your software. See "Setting up your software" on page 159) After starting your computer for the first ...(see "Adding memory (optional)" on page 56) ❖ Connect a mouse (see "Using a mouse" on page 82) ❖ Connect a full-size keyboard (see "Using an external keyboard" on page 81) ❖ Connect an external monitor (see "Using external display devices" on page 79) ❖ Connect a local printer (see "Connecting...
Getting Started Adding optional external devices 47 Adding optional external devices NOTE Before adding external devices or memory, Toshiba recommends setting up your software. See "Setting up your software" on page 159) After starting your computer for the first ...(see "Adding memory (optional)" on page 56) ❖ Connect a mouse (see "Using a mouse" on page 82) ❖ Connect a full-size keyboard (see "Using an external keyboard" on page 81) ❖ Connect an external monitor (see "Using external display devices" on page 79) ❖ Connect a local printer (see "Connecting...
User Guide
Page 56
...For more information on the base of data. Installing a memory module The main memory module is under your computer, or visit accessories.toshiba.com. An additional memory module can be installed in the memory module slot on memory options, check the accessories information that came with...of the computer. You may want to run most of today's popular applications. NOTE Before adding external devices or memory, Toshiba recommends setting up your system or visit accessories.toshiba.com. You will need a standard Phillips No. 1 screwdriver for a long time, the memory module will become hot...
...For more information on the base of data. Installing a memory module The main memory module is under your computer, or visit accessories.toshiba.com. An additional memory module can be installed in the memory module slot on memory options, check the accessories information that came with...of the computer. You may want to run most of today's popular applications. NOTE Before adding external devices or memory, Toshiba recommends setting up your system or visit accessories.toshiba.com. You will need a standard Phillips No. 1 screwdriver for a long time, the memory module will become hot...

User Guide
Page 67
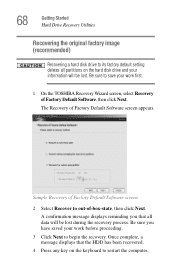
... your system using the utilities stored on your computer's HDD: 1 Make sure the computer is turned off. 2 Press and hold the 0 (zero) key on , the TOSHIBA Recovery Wizard screen displays. To recover your hard disk drive using the Hard Drive Recovery partition to the factory-set default, or recovering just your... C: drive and leaving other partitions (for example, a D: drive) intact, or changing the size of your keyboard while powering on the computer. When the computer powers on your C: drive and then recovering it. Sample...
... your system using the utilities stored on your computer's HDD: 1 Make sure the computer is turned off. 2 Press and hold the 0 (zero) key on , the TOSHIBA Recovery Wizard screen displays. To recover your hard disk drive using the Hard Drive Recovery partition to the factory-set default, or recovering just your... C: drive and leaving other partitions (for example, a D: drive) intact, or changing the size of your keyboard while powering on the computer. When the computer powers on your C: drive and then recovering it. Sample...
User Guide
Page 68
The Recovery of -box-state, then click Next. Once complete, a message displays that all partitions on the keyboard to restart the computer. Be sure you that the HDD has been recovered. 4 Press any key on the hard disk drive and your information will ...be lost during the recovery process. Be sure to save your work first. 1 On the TOSHIBA Recovery Wizard screen, select Recovery of Factory Default Software, then click Next. Sample Recovery of Factory Default Software screen 2 Select Recover to out-of Factory...
The Recovery of -box-state, then click Next. Once complete, a message displays that all partitions on the keyboard to restart the computer. Be sure you that the HDD has been recovered. 4 Press any key on the hard disk drive and your information will ...be lost during the recovery process. Be sure to save your work first. 1 On the TOSHIBA Recovery Wizard screen, select Recovery of Factory Default Software, then click Next. Sample Recovery of Factory Default Software screen 2 Select Recover to out-of Factory...

User Guide
Page 70
... Yes to restart the computer. Be sure to begin the restoration. To recover only your information on the keyboard to begin deleting the HDD. When the process is completed, a message displays informing you have created other ...partitions (for example, a D: drive) those partitions and any key on your keyboard to its factory default setting reformats your drive and your C: drive: 1 Press 2 on them will remain intact....has been recovered. 3 Press any information on the keyboard when the TOSHIBA HDD Recovery Utility screen displays.
... Yes to restart the computer. Be sure to begin the restoration. To recover only your information on the keyboard to begin deleting the HDD. When the process is completed, a message displays informing you have created other ...partitions (for example, a D: drive) those partitions and any key on your keyboard to its factory default setting reformats your drive and your C: drive: 1 Press 2 on them will remain intact....has been recovered. 3 Press any information on the keyboard when the TOSHIBA HDD Recovery Utility screen displays.

User Guide
Page 71
... restart the computer. Be sure you that the HDD has been recovered. 4 Press any key on your C: drive: 1 Press 3 on the keyboard when the TOSHIBA HDD Recovery Utility screen displays. A confirmation message appears, reminding you have saved your work first. NOTE The size of the C: drive will display on the ...
... restart the computer. Be sure you that the HDD has been recovered. 4 Press any key on your C: drive: 1 Press 3 on the keyboard when the TOSHIBA HDD Recovery Utility screen displays. A confirmation message appears, reminding you have saved your work first. NOTE The size of the C: drive will display on the ...

User Guide
Page 73
... your work first. A confirmation message displays, reminding you that the HDD has been recovered. 3 Press any key on the keyboard to begin the recovery process. Be sure to save your hard disk drive to its factory default setting reformats your drive and ...before proceeding. 2 Click Yes to restart the computer. Be sure you have saved your keyboard to begin the restoration. If you that the HDD has been recovered. 3 Press any key on the keyboard when the TOSHIBA HDD Recovery Utility screen displays. A confirmation message appears, reminding you have created other partitions ...
... your work first. A confirmation message displays, reminding you that the HDD has been recovered. 3 Press any key on the keyboard to begin the recovery process. Be sure to save your hard disk drive to its factory default setting reformats your drive and ...before proceeding. 2 Click Yes to restart the computer. Be sure you have saved your keyboard to begin the restoration. If you that the HDD has been recovered. 3 Press any key on the keyboard when the TOSHIBA HDD Recovery Utility screen displays. A confirmation message appears, reminding you have created other partitions ...

User Guide
Page 74
...Recovering the entire HDD without the HDD Recovery Area This option recovers your C: drive without the recovery partition: 1 Press 3 on the keyboard when the TOSHIBA HDD Recovery Utility screen displays. Be sure you that the HDD has been recovered. 3 Press any key on the HDD (for example,... 4 Click Disk Management. 5 Highlight the hard disk drive in the Volume list to display its status in the lower portion of your keyboard to its factory default state without creating the HDD Recovery Utilities partition. A confirmation message appears, reminding you have saved your hard disk drive,...
...Recovering the entire HDD without the HDD Recovery Area This option recovers your C: drive without the recovery partition: 1 Press 3 on the keyboard when the TOSHIBA HDD Recovery Utility screen displays. Be sure you that the HDD has been recovered. 3 Press any key on the HDD (for example,... 4 Click Disk Management. 5 Highlight the hard disk drive in the Volume list to display its status in the lower portion of your keyboard to its factory default state without creating the HDD Recovery Utilities partition. A confirmation message appears, reminding you have saved your hard disk drive,...
User Guide
Page 76
... the page, slide your finger across the TouchPad from left to right. 76 Getting Started Using the TouchPad™ Installing drivers and applications The TOSHIBA Application Installer allows you want to install. 4 Click Install. 5 Follow the on-screen prompts to complete the installation process. You can also ... 3 Click the item(s) you to reinstall the drivers and applications that were originally bundled with your finger on the TouchPad in front of the keyboard, is sensitive to touch and enables you would like to move the cursor: ❖ To move the cursor to the top of the page...
... the page, slide your finger across the TouchPad from left to right. 76 Getting Started Using the TouchPad™ Installing drivers and applications The TOSHIBA Application Installer allows you want to install. 4 Click Install. 5 Follow the on-screen prompts to complete the installation process. You can also ... 3 Click the item(s) you to reinstall the drivers and applications that were originally bundled with your finger on the TouchPad in front of the keyboard, is sensitive to touch and enables you would like to move the cursor: ❖ To move the cursor to the top of the page...

User Guide
Page 81
... TECHNICAL NOTE: You can attach one of the simultaneous modes, you may need to adjust the video settings. Getting Started Using an external keyboard 81 3 Release the Fn key. Choose the Settings tab, click the Advanced button, select Display Device, select the applicable Monitor type, ...and click Apply or OK. TECHNICAL NOTE: To use a full-size keyboard, you can also change these settings using the Display Properties Box. Set the option for additional configuration steps. The computer's USB ports support ...
... TECHNICAL NOTE: You can attach one of the simultaneous modes, you may need to adjust the video settings. Getting Started Using an external keyboard 81 3 Release the Fn key. Choose the Settings tab, click the Advanced button, select Display Device, select the applicable Monitor type, ...and click Apply or OK. TECHNICAL NOTE: To use a full-size keyboard, you can also change these settings using the Display Properties Box. Set the option for additional configuration steps. The computer's USB ports support ...

User Guide
Page 95
... the display panel. The computer returns to clean the computer. For information about taking care of your computer's battery, see "Taking care of the computer's keyboard, speaker grille, and other openings. Closing the display panel After you can start up the computer from Standby mode, press the power button until the...
... the display panel. The computer returns to clean the computer. For information about taking care of your computer's battery, see "Taking care of the computer's keyboard, speaker grille, and other openings. Closing the display panel After you can start up the computer from Standby mode, press the power button until the...

User Guide
Page 100
100 Learning the Basics Using the keyboard Using the keyboard Your computer's keyboard contains character keys, control keys, function keys, and special Windows® keys, providing all the functionality of the page. ❖ The lowercase letter l (el) and ... not interchangeable. ❖ The uppercase letter O and the number 0 are not interchangeable. F1 F2 F3 F4 F5 F6 F7 F8 F9 F10 F11 F12 Sample keyboard Character keys Typing with the character keys is very much like typing on a typewriter, except that: ❖ The space bar creates a space character instead of...
100 Learning the Basics Using the keyboard Using the keyboard Your computer's keyboard contains character keys, control keys, function keys, and special Windows® keys, providing all the functionality of the page. ❖ The lowercase letter l (el) and ... not interchangeable. ❖ The uppercase letter O and the number 0 are not interchangeable. F1 F2 F3 F4 F5 F6 F7 F8 F9 F10 F11 F12 Sample keyboard Character keys Typing with the character keys is very much like typing on a typewriter, except that: ❖ The space bar creates a space character instead of...

User Guide
Page 101
...However, some programs assign separate functions to the right and left Ctrl and Alt keys, or to simulate the Enter key on the full-sized keyboard. cursor positioning keys; A standard full-size keyboard has two Enter, Ctrl, and Alt keys; Pressing the Fn key simultaneously in combination with a standard full-size...can simulate these separate keys, as follows: ❖ Press Fn and Ctrl simultaneously to simulate the Ctrl key on the right side of the enhanced keyboard. ❖ Press Fn and Enter simultaneously to the regular and numeric pad Enter keys on the numeric pad of the enhanced...
...However, some programs assign separate functions to the right and left Ctrl and Alt keys, or to simulate the Enter key on the full-sized keyboard. cursor positioning keys; A standard full-size keyboard has two Enter, Ctrl, and Alt keys; Pressing the Fn key simultaneously in combination with a standard full-size...can simulate these separate keys, as follows: ❖ Press Fn and Ctrl simultaneously to simulate the Ctrl key on the right side of the enhanced keyboard. ❖ Press Fn and Enter simultaneously to the regular and numeric pad Enter keys on the numeric pad of the enhanced...
User Guide
Page 102
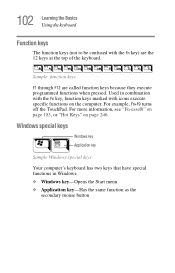
...174;" on page 183, or "Hot Keys" on the computer. Windows special keys Windows key Application key Sample Windows special keys Your computer's keyboard has two keys that have special functions in combination with the Fn key, function keys marked with the Fn key) are called function keys because... Windows key-Opens the Start menu ❖ Application key-Has the same function as the secondary mouse button 102 Learning the Basics Using the keyboard Function keys The function keys (not to be confused with icons execute specific functions on page 246. Sample function keys F1 through F12 are ...
...174;" on page 183, or "Hot Keys" on the computer. Windows special keys Windows key Application key Sample Windows special keys Your computer's keyboard has two keys that have special functions in combination with the Fn key, function keys marked with the Fn key) are called function keys because... Windows key-Opens the Start menu ❖ Application key-Has the same function as the secondary mouse button 102 Learning the Basics Using the keyboard Function keys The function keys (not to be confused with icons execute specific functions on page 246. Sample function keys F1 through F12 are ...

