User Manual
Page 5
...into your service or the operation of this change. Contact the state public utility commission, public service commission or corporation commission for repair or limited warranty information, please contact Toshiba Corporation, Toshiba America Information Systems, Inc. In order to the fax software instructions installed on the... or other entity, or other number for any person to use a computer or other electronic device, including Fax machines, to send any message unless such message clearly contains in their equipment, operations or procedures. Telephone Company Procedures The...
...into your service or the operation of this change. Contact the state public utility commission, public service commission or corporation commission for repair or limited warranty information, please contact Toshiba Corporation, Toshiba America Information Systems, Inc. In order to the fax software instructions installed on the... or other entity, or other number for any person to use a computer or other electronic device, including Fax machines, to send any message unless such message clearly contains in their equipment, operations or procedures. Telephone Company Procedures The...

User Manual
Page 28
... time 48 Opening the display panel 48 Your computer's features and specifications ....49 Turning on the power 49 Adding memory (optional 50 Installing a memory module 51 Removing a memory module 56 Checking total memory 58 Using the TouchPad 59 Scrolling with the TouchPad 60 Control buttons 60 Disabling or enabling the TouchPad 60 Using external display devices 60 Directing the display output when you turn on the computer 61 Adjusting the quality of the external display......62 Using an external keyboard 62 Using a mouse 62 Connecting a printer 62 Setting up a printer...
... time 48 Opening the display panel 48 Your computer's features and specifications ....49 Turning on the power 49 Adding memory (optional 50 Installing a memory module 51 Removing a memory module 56 Checking total memory 58 Using the TouchPad 59 Scrolling with the TouchPad 60 Control buttons 60 Disabling or enabling the TouchPad 60 Using external display devices 60 Directing the display output when you turn on the computer 61 Adjusting the quality of the external display......62 Using an external keyboard 62 Using a mouse 62 Connecting a printer 62 Setting up a printer...

User Manual
Page 51
You will be lost. Avoid touching the cover, the module, and the surrounding area before replacing it must be installed in Sleep or Hibernation mode, data will need a small Phillips screwdriver for this model Slot A is the top slot. The computer has two memory slots-Slot A and Slot B. If only one or two memory modules. If you install or remove a memory module, turn off the computer using the Start menu. Allow the module to cool to room...
You will be lost. Avoid touching the cover, the module, and the surrounding area before replacing it must be installed in Sleep or Hibernation mode, data will need a small Phillips screwdriver for this model Slot A is the top slot. The computer has two memory slots-Slot A and Slot B. If only one or two memory modules. If you install or remove a memory module, turn off the computer using the Start menu. Allow the module to cool to room...

User Manual
Page 53
.... Grease or dust on the connector may have built up. Avoid touching the connector on the memory module or on the underside of computer (Sample Illustration) Removing the memory module slot cover 7 Remove the memory module slot cover. 8 Place the screws and the cover in a safe place so that secure the memory module slot cover. Getting Started Adding memory (optional) 53 6 Using a small Phillips screwdriver, loosen the captive screws that you can damage...
.... Grease or dust on the connector may have built up. Avoid touching the connector on the memory module or on the underside of computer (Sample Illustration) Removing the memory module slot cover 7 Remove the memory module slot cover. 8 Place the screws and the cover in a safe place so that secure the memory module slot cover. Getting Started Adding memory (optional) 53 6 Using a small Phillips screwdriver, loosen the captive screws that you can damage...

User Manual
Page 56
... open the memory module slot cover. You can damage the computer and the memory module. Do not remove the memory module while the computer is in "Installing a memory module" on . If you need to work. In either of the above cases, the Sleep configuration will be saved. 56 Getting Started Adding memory (optional) 14 Replace the memory module slot cover and secure it correctly as described in memory will not be lost. You can now continue setting...
... open the memory module slot cover. You can damage the computer and the memory module. Do not remove the memory module while the computer is in "Installing a memory module" on . If you need to work. In either of the above cases, the Sleep configuration will be saved. 56 Getting Started Adding memory (optional) 14 Replace the memory module slot cover and secure it correctly as described in memory will not be lost. You can now continue setting...

User Manual
Page 58
... Start, Control Panel, and then System. Slot B Slot A Back of computer (Sample Illustration) Removing the memory module 4 Replace the memory module slot cover and secure it out of the slot. Checking total memory When you add or remove a memory module, you can check that the computer has recognized the change. The System window appears. 2 The total memory is displayed below the System heading under Memory (RAM). TECHNICAL NOTE: You must have at least one memory module installed...
... Start, Control Panel, and then System. Slot B Slot A Back of computer (Sample Illustration) Removing the memory module 4 Replace the memory module slot cover and secure it out of the slot. Checking total memory When you add or remove a memory module, you can check that the computer has recognized the change. The System window appears. 2 The total memory is displayed below the System heading under Memory (RAM). TECHNICAL NOTE: You must have at least one memory module installed...

User Manual
Page 60
.... 3 Turn on page 199. Control buttons When a step instructs you desire and click Apply. 5 Click OK. Check your computer if you can be disabled or changed in the Mouse Properties dialog box. This hot key enables/disables the TouchPad. Disabling or enabling the TouchPad™ The TouchPad™ is enabled by default. To change the enable/disable TouchPad setting, press Fn + F9. Connecting an external monitor or projector You can easily attach an external monitor or projector to scroll...
.... 3 Turn on page 199. Control buttons When a step instructs you desire and click Apply. 5 Click OK. Check your computer if you can be disabled or changed in the Mouse Properties dialog box. This hot key enables/disables the TouchPad. Disabling or enabling the TouchPad™ The TouchPad™ is enabled by default. To change the enable/disable TouchPad setting, press Fn + F9. Connecting an external monitor or projector You can easily attach an external monitor or projector to scroll...

User Manual
Page 118
... (DSL), cable, and satellite links. Special programs called Hypertext Transfer Protocol (HTTP). You can connect to the Internet by communications lines. Internet Service Providers To connect a computer directly to , and downloading files from anywhere in the world. 118 Exploring Your Computer's Features An overview of using the Internet An overview of using the Internet The following sections give a quick introduction to the Internet and...
... (DSL), cable, and satellite links. Special programs called Hypertext Transfer Protocol (HTTP). You can connect to the Internet by communications lines. Internet Service Providers To connect a computer directly to , and downloading files from anywhere in the world. 118 Exploring Your Computer's Features An overview of using the Internet An overview of using the Internet The following sections give a quick introduction to the Internet and...

User Manual
Page 142
... the external devices which are connected to compatible ports when the AC adaptor is not connected to the computer, the battery of the computer will be depleted even when the power of the computer is Disabled. USB Sleep and Charge function Settings-The default setting is turned OFF. ❖ As such, we recommend that you connect the AC adaptor to the computer when using the "USB Sleep and Charge function." ❖ External devices connected to Mode-1.
... the external devices which are connected to compatible ports when the AC adaptor is not connected to the computer, the battery of the computer will be depleted even when the power of the computer is Disabled. USB Sleep and Charge function Settings-The default setting is turned OFF. ❖ As such, we recommend that you connect the AC adaptor to the computer when using the "USB Sleep and Charge function." ❖ External devices connected to Mode-1.

User Manual
Page 143
... TOSHIBA Hardware Setup, the "USB Wakeup function" does not work . Disables the function USB Wakeup function-This function restores the computer from Sleep Mode depending on the Device Manager and even though you restart your system. Setting item: Enabled (Mode-1) -- The Wakeup setting (function to use this happens, change will become default settings when you can reconfigure that does not have the "USB Sleep and Charge function"-compatible icon ( ). USB bus power (DC 5V) will not be displayed on the external devices connected to all USB ports...
... TOSHIBA Hardware Setup, the "USB Wakeup function" does not work . Disables the function USB Wakeup function-This function restores the computer from Sleep Mode depending on the Device Manager and even though you restart your system. Setting item: Enabled (Mode-1) -- The Wakeup setting (function to use this happens, change will become default settings when you can reconfigure that does not have the "USB Sleep and Charge function"-compatible icon ( ). USB bus power (DC 5V) will not be displayed on the external devices connected to all USB ports...
User Manual
Page 147
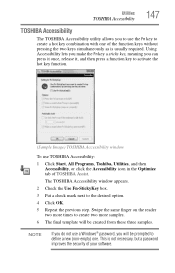
... usually required. Using Accessibility lets you make the Fn key a sticky key, meaning you can press it once, release it, and then press a function key to activate the hot key function. (Sample Image) TOSHIBA Accessibility window To use TOSHIBA Accessibility: 1 Click Start, All Programs, Toshiba, Utilities, and then Accessibility, or click the Accessibility icon in the Optimize tab of your software. Swipe the same finger on the reader two more times to create two more...
... usually required. Using Accessibility lets you make the Fn key a sticky key, meaning you can press it once, release it, and then press a function key to activate the hot key function. (Sample Image) TOSHIBA Accessibility window To use TOSHIBA Accessibility: 1 Click Start, All Programs, Toshiba, Utilities, and then Accessibility, or click the Accessibility icon in the Optimize tab of your software. Swipe the same finger on the reader two more times to create two more...

User Manual
Page 153
..., subnet mask, default gateway, DNS server, and WINS server settings ❖ Personal firewall settings for Internet connections ❖ Bluetooth® Security Level (for example, you can set up profiles to handle these networking environments. You can set up a profile to match that opens automatically when Internet Explorer® starts ❖ Devices-lets you enable or disable settings of wired and wireless network devices, infrared devices, and set the power status of a home...
..., subnet mask, default gateway, DNS server, and WINS server settings ❖ Personal firewall settings for Internet connections ❖ Bluetooth® Security Level (for example, you can set up profiles to handle these networking environments. You can set up a profile to match that opens automatically when Internet Explorer® starts ❖ Devices-lets you enable or disable settings of wired and wireless network devices, infrared devices, and set the power status of a home...
User Manual
Page 159
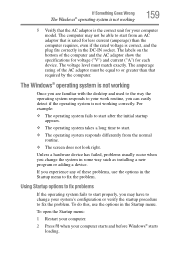
... to start . ❖ The operating system responds differently from an AC adaptor that is rated for less current (amperage) than that the AC adaptor is the correct unit for each device. To open the Startup menu: 1 Restart your computer. 2 Press F8 when your work routine, you change your computer model. To do this, use the options in some way such as installing a new...
... to start . ❖ The operating system responds differently from an AC adaptor that is rated for less current (amperage) than that the AC adaptor is the correct unit for each device. To open the Startup menu: 1 Restart your computer. 2 Press F8 when your work routine, you change your computer model. To do this, use the options in some way such as installing a new...

User Manual
Page 166
... Lock button in the lower-right part of keyboard. The computer will restart and recognize the device. The screen reactivates and allows you press the keys on the external keyboard. The keyboard produces unexpected characters. If the numlock light or cursor control mode light is not set for an external monitor. Refer to the software documentation and check that the program does not assign different meanings to turn off , make...
... Lock button in the lower-right part of keyboard. The computer will restart and recognize the device. The screen reactivates and allows you press the keys on the external keyboard. The keyboard produces unexpected characters. If the numlock light or cursor control mode light is not set for an external monitor. Refer to the software documentation and check that the program does not assign different meanings to turn off , make...
User Manual
Page 174
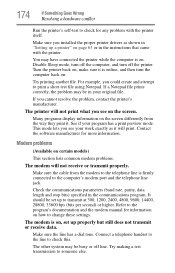
... the problem, contact the printer's manufacturer. Disable Sleep mode, turn off the printer. This mode lets you see on . Make sure the cable from the way they print it is firmly connected to transmit at 300, 1200, 2400, 4800, 9600, 14400, 28800, 33600 bps (bits per second) or higher. The other system may be set up to the computer's modem port...
... the problem, contact the printer's manufacturer. Disable Sleep mode, turn off the printer. This mode lets you see on . Make sure the cable from the way they print it is firmly connected to transmit at 300, 1200, 2400, 4800, 9600, 14400, 28800, 33600 bps (bits per second) or higher. The other system may be set up to the computer's modem port...

User Manual
Page 211
... a function, file, or program. See device. K keyboard shortcut - L2 (level two) cache - A feature of many Toshiba notebook computers that saves to the hard disk the current state of computers that you use to the same state it was when the computer was turned off . hot swapping - The ability to create a complete screen image. Compare non-interlaced. The decentralized, world-wide network of your work...
... a function, file, or program. See device. K keyboard shortcut - L2 (level two) cache - A feature of many Toshiba notebook computers that saves to the hard disk the current state of computers that you use to the same state it was when the computer was turned off . hot swapping - The ability to create a complete screen image. Compare non-interlaced. The decentralized, world-wide network of your work...

User Manual
Page 217
... 78 battery changing 105 charge indicator light 47, 99 charge not lasting 165 charging 45, 47 conserving power 102 disposal 110 low charge 101 monitoring power 47, 99 not charging 165 notifications 102 power plan 193 power plan hot key 104 real-time clock (RTC) 96 removing 105 BIOS Setup see TOSHIBA Hardware Setup Bridge Media Adapter inserting memory media 124 removing memory media 125 button power 50 start 114 C CD playing an audio 91 CD, using 88 character keys 79 charging the battery 47 checking device properties...
... 78 battery changing 105 charge indicator light 47, 99 charge not lasting 165 charging 45, 47 conserving power 102 disposal 110 low charge 101 monitoring power 47, 99 not charging 165 notifications 102 power plan 193 power plan hot key 104 real-time clock (RTC) 96 removing 105 BIOS Setup see TOSHIBA Hardware Setup Bridge Media Adapter inserting memory media 124 removing memory media 125 button power 50 start 114 C CD playing an audio 91 CD, using 88 character keys 79 charging the battery 47 checking device properties...

User Manual
Page 218
.../trouble accessing a disk 168 running slow 169 diskette drive cannot insert a diskette 169 cannot read a diskette 170 connecting 63 external, connecting 63 display does not look normal/flickers 167 external monitor not working 168 screen is blank 166 display device external 60 display output settings 61 display, external adjusting 62 disposal information 26 disposing of used batteries 110 double-click 60 DVD player general problems 177 DVD, using 88 E error messages device driver conflict 161 general hardware problem 161 non-system disk...
.../trouble accessing a disk 168 running slow 169 diskette drive cannot insert a diskette 169 cannot read a diskette 170 connecting 63 external, connecting 63 display does not look normal/flickers 167 external monitor not working 168 screen is blank 166 display device external 60 display output settings 61 display, external adjusting 62 disposal information 26 disposing of used batteries 110 double-click 60 DVD player general problems 177 DVD, using 88 E error messages device driver conflict 161 general hardware problem 161 non-system disk...
User Manual
Page 220
... monitor 60 connecting 60 not working 167 mouse installing 62 mouse utility 139 N network accessing 116 Connect to the Internet 116 networking wireless 115 Notification Area 114 O Opening the display panel 48 optical disc positioning 90 optical discs handling 91 inserting 90 removing 93, 94 optical drive problems 170 troubleshooting 170 using 88 optical media recording 93 other documentation 38 overlay keys 81 P password deleting a supervisor 135 disabling a user 136 setting a user 135 supervisor set up 134 types 133 passwords instant, using 133 setting 133 port...
... monitor 60 connecting 60 not working 167 mouse installing 62 mouse utility 139 N network accessing 116 Connect to the Internet 116 networking wireless 115 Notification Area 114 O Opening the display panel 48 optical disc positioning 90 optical discs handling 91 inserting 90 removing 93, 94 optical drive problems 170 troubleshooting 170 using 88 optical media recording 93 other documentation 38 overlay keys 81 P password deleting a supervisor 135 disabling a user 136 setting a user 135 supervisor set up 134 types 133 passwords instant, using 133 setting 133 port...

User Manual
Page 221
... 172 error occurs 173 hot swapping fails 173 not recognized 173 slot appears dead 172 external display not working 168 external monitor 167 faulty memory 163 hardware conflict 161 high-pitched noise 171 Internet bookmarked site not found 161 Internet connection is slow 160 keyboard not responding 157 missing files/trouble accessing a disk 168 modem not receiving or transmitting 174 no sound 171 non-system disk or disk error 158 power and batteries...
... 172 error occurs 173 hot swapping fails 173 not recognized 173 slot appears dead 172 external display not working 168 external monitor 167 faulty memory 163 hardware conflict 161 high-pitched noise 171 Internet bookmarked site not found 161 Internet connection is slow 160 keyboard not responding 157 missing files/trouble accessing a disk 168 modem not receiving or transmitting 174 no sound 171 non-system disk or disk error 158 power and batteries...


