User Manual
Page 5
..., or other individual sending the message and the telephone number of 1991 makes it is necessary. In order to do this equipment causes harm to the telephone network, the telephone company will notify you in their equipment, operations or procedures. or an authorized representative of Toshiba, or the Toshiba Support Centre within the United States at (800) 457...
..., or other individual sending the message and the telephone number of 1991 makes it is necessary. In order to do this equipment causes harm to the telephone network, the telephone company will notify you in their equipment, operations or procedures. or an authorized representative of Toshiba, or the Toshiba Support Centre within the United States at (800) 457...

User Manual
Page 27
... time 50 Opening the display panel 50 Your computer's features and specifications ....51 Turning on the power 51 Adding memory (optional 52 Installing a memory module 53 Removing a memory module 58 Checking total memory 61 Using the TouchPad 61 Scrolling with the TouchPad 62 Control buttons 62 Disabling or enabling the TouchPad 62 Using external display devices 64 Directing the display output when you turn on the computer 65 Adjusting the quality of the external display......66 Using an external keyboard 66 Using a mouse 67 Connecting a printer 67 Setting up a printer...
... time 50 Opening the display panel 50 Your computer's features and specifications ....51 Turning on the power 51 Adding memory (optional 52 Installing a memory module 53 Removing a memory module 58 Checking total memory 61 Using the TouchPad 61 Scrolling with the TouchPad 62 Control buttons 62 Disabling or enabling the TouchPad 62 Using external display devices 64 Directing the display output when you turn on the computer 65 Adjusting the quality of the external display......66 Using an external keyboard 66 Using a mouse 67 Connecting a printer 67 Setting up a printer...
User Manual
Page 31
31 Contents Viewing existing key assignments 161 Changing or removing existing key assignments 161 TOSHIBA Hotkey Utility 162 TOSHIBA SD™ Memory Card Format Utility .........163 TOSHIBA Power Saver 164 Preset Power Profiles 165 Quickly creating a new power profile 165 Customizing a power profile 165 Mouse Utility 166 Toshiba Hardware Setup 167 TOSHIBA Zooming Utility 169 CD/DVD Drive Acoustic Silencer 171 TOSHIBA Accessibility 172 TOSHIBA Touch and Launch Utility 173 TOSHIBA Touch and Launch Settings 175 Disabling or enabling TOSHIBA Touch and Launch 176 Fingerprint ...
31 Contents Viewing existing key assignments 161 Changing or removing existing key assignments 161 TOSHIBA Hotkey Utility 162 TOSHIBA SD™ Memory Card Format Utility .........163 TOSHIBA Power Saver 164 Preset Power Profiles 165 Quickly creating a new power profile 165 Customizing a power profile 165 Mouse Utility 166 Toshiba Hardware Setup 167 TOSHIBA Zooming Utility 169 CD/DVD Drive Acoustic Silencer 171 TOSHIBA Accessibility 172 TOSHIBA Touch and Launch Utility 173 TOSHIBA Touch and Launch Settings 175 Disabling or enabling TOSHIBA Touch and Launch 176 Fingerprint ...
User Manual
Page 53
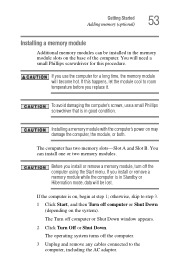
...'s power on the base of the computer. otherwise, skip to step 3. 1 Click Start, and then Turn off the computer. 3 Unplug and remove any cables connected to room temperature before you install or remove a memory module, turn off computer or Shut Down window appears. 2 Click Turn Off or Shut Down. Getting Started Adding memory (optional) 53 Installing a memory module Additional memory modules can install one or two memory modules. If the computer is in the memory module slots...
...'s power on the base of the computer. otherwise, skip to step 3. 1 Click Start, and then Turn off the computer. 3 Unplug and remove any cables connected to room temperature before you install or remove a memory module, turn off computer or Shut Down window appears. 2 Click Turn Off or Shut Down. Getting Started Adding memory (optional) 53 Installing a memory module Additional memory modules can install one or two memory modules. If the computer is in the memory module slots...

User Manual
Page 55
... up. Before you handle the module, touch a grounded metal surface to discharge any static electricity you can damage the memory module. Getting Started Adding memory (optional) 55 7 Remove the memory module slot cover. 8 Place the screw and cover in a safe place so that you may cause memory access problems. 9 Carefully remove the new memory module from its antistatic packaging, without touching its connector. 10 Locate an empty memory module slot on the underside of the computer...
... up. Before you handle the module, touch a grounded metal surface to discharge any static electricity you can damage the memory module. Getting Started Adding memory (optional) 55 7 Remove the memory module slot cover. 8 Place the screw and cover in a safe place so that you may cause memory access problems. 9 Carefully remove the new memory module from its antistatic packaging, without touching its connector. 10 Locate an empty memory module slot on the underside of the computer...
User Manual
Page 58
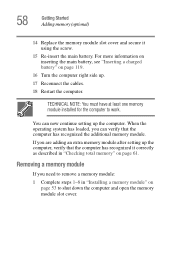
... has recognized it using the screw. 15 Re-insert the main battery. Removing a memory module If you can now continue setting up . 17 Reconnect the cables. 18 Restart the computer. 58 Getting Started Adding memory (optional) 14 Replace the memory module slot cover and secure it correctly as described in "Installing a memory module" on page 53 to work. For more information on inserting the main battery, see "Inserting a charged battery" on page...
... has recognized it using the screw. 15 Re-insert the main battery. Removing a memory module If you can now continue setting up . 17 Reconnect the cables. 18 Restart the computer. 58 Getting Started Adding memory (optional) 14 Replace the memory module slot cover and secure it correctly as described in "Installing a memory module" on page 53 to work. For more information on inserting the main battery, see "Inserting a charged battery" on page...
User Manual
Page 60
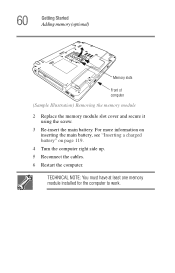
60 Getting Started Adding memory (optional) Memory slots Front of computer (Sample Illustration) Removing the memory module 2 Replace the memory module slot cover and secure it using the screw. 3 Re-insert the main battery. For more information on inserting the main battery, see "Inserting a charged battery" on page 119. 4 Turn the computer right side up. 5 Reconnect the cables. 6 Restart the computer. TECHNICAL NOTE: You must have at least one memory module installed for the computer to work.
60 Getting Started Adding memory (optional) Memory slots Front of computer (Sample Illustration) Removing the memory module 2 Replace the memory module slot cover and secure it using the screw. 3 Re-insert the main battery. For more information on inserting the main battery, see "Inserting a charged battery" on page 119. 4 Turn the computer right side up. 5 Reconnect the cables. 6 Restart the computer. TECHNICAL NOTE: You must have at least one memory module installed for the computer to work.

User Manual
Page 61
... located in the preferred direction. If the computer does not recognize the memory configuration, turn off the computer, remove the memory slot cover, and check that the computer has recognized the change. NOTE Because the TouchPad is inserted completely into the socket and lined up squarely with the stroke of the keyboard, is sensitive to touch and enables you can check that the module...
... located in the preferred direction. If the computer does not recognize the memory configuration, turn off the computer, remove the memory slot cover, and check that the computer has recognized the change. NOTE Because the TouchPad is inserted completely into the socket and lined up squarely with the stroke of the keyboard, is sensitive to touch and enables you can check that the module...
User Manual
Page 64
... the type of device you need a larger screen. To do this : 1 Connect the monitor's video cable to the RGB (monitor) port on the left side of the computer. 2 Connect the device's power cable to a live electrical outlet. 3 Turn on certain models) Before connecting an external monitor or video projector, configure your computer for your operating system and devices. 64 Getting Started Using external display devices Using external display devices Your computer comes with a built-in LCD display, but you can easily attach an external monitor or...
... the type of device you need a larger screen. To do this : 1 Connect the monitor's video cable to the RGB (monitor) port on the left side of the computer. 2 Connect the device's power cable to a live electrical outlet. 3 Turn on certain models) Before connecting an external monitor or video projector, configure your computer for your operating system and devices. 64 Getting Started Using external display devices Using external display devices Your computer comes with a built-in LCD display, but you can easily attach an external monitor or...
User Manual
Page 135
... referenced from anywhere in the world. They make it easier to connect to the Internet, many people and businesses use an Internet Service Provider (ISP). Internet Service Providers To connect a computer directly to a particular network address and send and receive information. The World Wide Web offers information as Digital Subscriber Lines (DSL), cable, and satellite links. Special programs called Hypertext Transfer Protocol...
... referenced from anywhere in the world. They make it easier to connect to the Internet, many people and businesses use an Internet Service Provider (ISP). Internet Service Providers To connect a computer directly to a particular network address and send and receive information. The World Wide Web offers information as Digital Subscriber Lines (DSL), cable, and satellite links. Special programs called Hypertext Transfer Protocol...
User Manual
Page 152
... re-entered after the supervisor password is useful if more than one person uses the computer. Prevents unauthorized users from accessing certain functions such as Toshiba Hardware Setup. A single user password supports the instant and power-on an optional USB mouse or trackball. 152 Toshiba Utilities Setting passwords Setting passwords Setting a password lets you leave your desk for a few minutes and do not want to turn off the computer. This freezes the keyboard and TouchPad, and blanks the screen...
... re-entered after the supervisor password is useful if more than one person uses the computer. Prevents unauthorized users from accessing certain functions such as Toshiba Hardware Setup. A single user password supports the instant and power-on an optional USB mouse or trackball. 152 Toshiba Utilities Setting passwords Setting passwords Setting a password lets you leave your desk for a few minutes and do not want to turn off the computer. This freezes the keyboard and TouchPad, and blanks the screen...
User Manual
Page 195
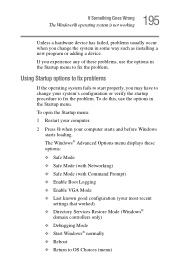
... a hardware device has failed, problems usually occur when you experience any of these options: ❖ Safe Mode ❖ Safe Mode (with Networking) ❖ Safe Mode (with Command Prompt) ❖ Enable Boot Logging ❖ Enable VGA Mode ❖ Last known good configuration (your most recent settings that worked) ❖ Directory Services Restore Mode (Windows® domain controllers only) ❖ Debugging Mode ❖ Start Windows® normally ❖ Reboot ❖ Return to fix the problem. If you change your computer starts and before Windows starts...
... a hardware device has failed, problems usually occur when you experience any of these options: ❖ Safe Mode ❖ Safe Mode (with Networking) ❖ Safe Mode (with Command Prompt) ❖ Enable Boot Logging ❖ Enable VGA Mode ❖ Last known good configuration (your most recent settings that worked) ❖ Directory Services Restore Mode (Windows® domain controllers only) ❖ Debugging Mode ❖ Start Windows® normally ❖ Reboot ❖ Return to fix the problem. If you change your computer starts and before Windows starts...

User Manual
Page 205
... the display priority to its previous setting. Using the computer's TouchPad, click Start, then either Shut Down or Turn off computer, and then Restart the Computer. If no password is not set for an external monitor. Press any key. If you press the keys on . The keyboard you to activate the screen. Display problems Here are using a different make sure the display priority is registered, press any key to continue working. If...
... the display priority to its previous setting. Using the computer's TouchPad, click Start, then either Shut Down or Turn off computer, and then Restart the Computer. If no password is not set for an external monitor. Press any key. If you press the keys on . The keyboard you to activate the screen. Display problems Here are using a different make sure the display priority is registered, press any key to continue working. If...
User Manual
Page 220
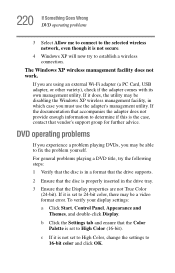
... use the adapter's management utility. To verify your display settings: a Click Start, Control Panel, Appearance and Themes, and double-click Display. If it is not secure. 4 Windows XP will now try the following steps: 1 Verify that the disc is in a format that the drive supports. 2 Ensure that the Color Palette is set to 24-bit color, there may be a video format error. If it is not set to High Color, change...
... use the adapter's management utility. To verify your display settings: a Click Start, Control Panel, Appearance and Themes, and double-click Display. If it is not secure. 4 Windows XP will now try the following steps: 1 Verify that the disc is in a format that the drive supports. 2 Ensure that the Color Palette is set to 24-bit color, there may be a video format error. If it is not set to High Color, change...
User Manual
Page 254
... to match that opens automatically when Internet Explorer starts ❖ Devices-lets you can set the power status of the connected line. A profile contains the currently configured network settings on top of Bluetooth® antennas ConfigFree profiles are useful for example, you enable or disable settings of scissors. 2 Click to the selected device will occur automatically. Similarly, users who access networks in "profiles." The following settings can switch network settings simply by selecting...
... to match that opens automatically when Internet Explorer starts ❖ Devices-lets you can set the power status of the connected line. A profile contains the currently configured network settings on top of Bluetooth® antennas ConfigFree profiles are useful for example, you enable or disable settings of scissors. 2 Click to the selected device will occur automatically. Similarly, users who access networks in "profiles." The following settings can switch network settings simply by selecting...
User Manual
Page 281
... up files 82 battery alarms 113 changing 117 charge indicator light 48, 110 charge not lasting 204 charging 46, 49 conserving power 114 disposal 122 low charge 112 monitoring power 48, 110 not charging 203 power profile 237 power profile hot key 116 real-time clock (RTC) 107 removing 117 BIOS Setup see Toshiba Hardware Setup Bridge Media Adapter inserting memory media 144 removing memory media 144 button power 52 start 127 C CD creating 101 playing an audio 99 CD, using 94 CD/DVD button functionality 97 channels...
... up files 82 battery alarms 113 changing 117 charge indicator light 48, 110 charge not lasting 204 charging 46, 49 conserving power 114 disposal 122 low charge 112 monitoring power 48, 110 not charging 203 power profile 237 power profile hot key 116 real-time clock (RTC) 107 removing 117 BIOS Setup see Toshiba Hardware Setup Bridge Media Adapter inserting memory media 144 removing memory media 144 button power 52 start 127 C CD creating 101 playing an audio 99 CD, using 94 CD/DVD button functionality 97 channels...
User Manual
Page 282
...-system disk or disk error message 194 not accessing disk drives 193 running on battery power 105 setting up 43, 53 warning resume failure message 193 computer lock 80 computing tips 81 connecting to a power source 46 connection set up 132 control buttons 62 Ctrl keys 84 D desktop creating new icon 126 major features 126 desktop exploration 125 desktop icons 126 Device Manager 200 checking properties 200 disabling a device 200 devices keyboard 66 mouse 67 disable/enable TOSHIBA Touch and...
...-system disk or disk error message 194 not accessing disk drives 193 running on battery power 105 setting up 43, 53 warning resume failure message 193 computer lock 80 computing tips 81 connecting to a power source 46 connection set up 132 control buttons 62 Ctrl keys 84 D desktop creating new icon 126 major features 126 desktop exploration 125 desktop icons 126 Device Manager 200 checking properties 200 disabling a device 200 devices keyboard 66 mouse 67 disable/enable TOSHIBA Touch and...
User Manual
Page 283
...-esse change/remove key assignments 161 starting 158 Fn-esse program 158 assigning a key 158 using drag-and-drop 159 function keys 84 H hardware conflicts 197 resolving 199 headphones using 140 Help and Support Windows XP 196 Hibernation mode 71 configuring 75 starting again from 77 hot key display brightness 239 display modes 239 Hibernation mode 238 keyboard overlays 241 password security 235 power profile 237 Standby mode 237 volume mute 234 zooming 241 hot key power profile 116 hot key utility 162...
...-esse change/remove key assignments 161 starting 158 Fn-esse program 158 assigning a key 158 using drag-and-drop 159 function keys 84 H hardware conflicts 197 resolving 199 headphones using 140 Help and Support Windows XP 196 Hibernation mode 71 configuring 75 starting again from 77 hot key display brightness 239 display modes 239 Hibernation mode 238 keyboard overlays 241 password security 235 power profile 237 Standby mode 237 volume mute 234 zooming 241 hot key power profile 116 hot key utility 162...
User Manual
Page 284
..., full-size 83 L lock computer, using 80 M main battery removing 117 memory adding 52 problem solving 202 removing expansion slot cover 55 memory module inserting 56 installation 53 removing 60 microphone 139 modem connecting to telephone line 130 determining COM port 129 problem solving 216 resetting port to default settings 129 upgrading 129 monitor 64 connecting 64 not working 206 mouse installing 67 serial 67 mouse utility 166 N network accessing 132 Dial-Up Networking Wizard 132 networking wireless 133 O opening the display panel 50 optical drive problems 210 troubleshooting 210 other...
..., full-size 83 L lock computer, using 80 M main battery removing 117 memory adding 52 problem solving 202 removing expansion slot cover 55 memory module inserting 56 installation 53 removing 60 microphone 139 modem connecting to telephone line 130 determining COM port 129 problem solving 216 resetting port to default settings 129 upgrading 129 monitor 64 connecting 64 not working 206 mouse installing 67 serial 67 mouse utility 166 N network accessing 132 Dial-Up Networking Wizard 132 networking wireless 133 O opening the display panel 50 optical drive problems 210 troubleshooting 210 other...
User Manual
Page 285
... 156 disabling a user 154 supervisor set up 155 types 152 passwords instant, using 152 setting 152 PC Card checklist 213 CIS (Card Information Structure) 212 computer stops working 214 configuring 143 errors 215 hot swapping fails 214 inserting 141 not recognized 214 problem solving 212, 213 removing 142 setting up 143 Plug and Play 199 port COM 129 Ethernet LAN 133 RGB 64 power computer will not start 192 connecting cable to...
... 156 disabling a user 154 supervisor set up 155 types 152 passwords instant, using 152 setting 152 PC Card checklist 213 CIS (Card Information Structure) 212 computer stops working 214 configuring 143 errors 215 hot swapping fails 214 inserting 141 not recognized 214 problem solving 212, 213 removing 142 setting up 143 Plug and Play 199 port COM 129 Ethernet LAN 133 RGB 64 power computer will not start 192 connecting cable to...


