
Users Manual Canada; English
Page 3
...6-9 Starting the computer by password 6-10 Power-up modes 6-10 Panel power on/off 6-11 User's Manual iii Right side 2-4 Back 2-5 Underside 2-6 Front with the display open 2-7 Indicators 2-9 Optical disc drives 2-10 AC adaptor 2-11 Chapter 3 Hardware, Utilities and Options Hardware 3-1 Special features 3-6 Utilities and Applications 3-8 Optional devices 3-11 Optional accessories 3-24 Chapter 4 Operating Basics Using the Touch Pad 4-1 Web Camera 4-2 Using the TOSHIBA Face Recognition 4-3 Using optical disc drives 4-6 Writing CD/DVDs 4-10 TOSHIBA VIDEO PLAYER 4-16 Media...
...6-9 Starting the computer by password 6-10 Power-up modes 6-10 Panel power on/off 6-11 User's Manual iii Right side 2-4 Back 2-5 Underside 2-6 Front with the display open 2-7 Indicators 2-9 Optical disc drives 2-10 AC adaptor 2-11 Chapter 3 Hardware, Utilities and Options Hardware 3-1 Special features 3-6 Utilities and Applications 3-8 Optional devices 3-11 Optional accessories 3-24 Chapter 4 Operating Basics Using the Touch Pad 4-1 Web Camera 4-2 Using the TOSHIBA Face Recognition 4-3 Using optical disc drives 4-6 Writing CD/DVDs 4-10 TOSHIBA VIDEO PLAYER 4-16 Media...
Users Manual Canada; English
Page 4
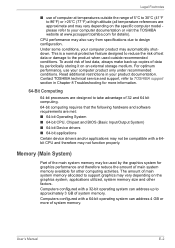
... monitor port pin assignment A-2 Appendix B Display Controller and Video mode Display controller B-1 Video mode B-1 Appendix C Information for Wireless Devices Wireless LAN Interoperability C-1 Bluetooth wireless technology Interoperability C-1 CAUTION about Wireless Devices C-2 Wireless Devices and your health C-2 Radio Regulatory Information C-3 Radio approvals for wireless devices C-8 Appendix D AC Power Cord and Connectors Certification agencies D-1 Appendix E Legal Footnotes Non-applicable Icons E-1 CPU E-1 Memory (Main System E-2 Battery Life E-3 Hard Disk Drive (HDD...
... monitor port pin assignment A-2 Appendix B Display Controller and Video mode Display controller B-1 Video mode B-1 Appendix C Information for Wireless Devices Wireless LAN Interoperability C-1 Bluetooth wireless technology Interoperability C-1 CAUTION about Wireless Devices C-2 Wireless Devices and your health C-2 Radio Regulatory Information C-3 Radio approvals for wireless devices C-8 Appendix D AC Power Cord and Connectors Certification agencies D-1 Appendix E Legal Footnotes Non-applicable Icons E-1 CPU E-1 Memory (Main System E-2 Battery Life E-3 Hard Disk Drive (HDD...

Users Manual Canada; English
Page 13
... the Chapter 1, Getting Started and Chapter 3, Hardware, Utilities and Options chapters to set up your computer. This powerful notebook computer provides excellent expansion capability, includes multimedia functionality, and is providing information on configuring your computer, basic operations and care, using your computer. This manual tells how to familiarize yourself with this manual by -step instructions on setting up and begin using optional devices and troubleshooting. It also provides detailed...
... the Chapter 1, Getting Started and Chapter 3, Hardware, Utilities and Options chapters to set up your computer. This powerful notebook computer provides excellent expansion capability, includes multimedia functionality, and is providing information on configuring your computer, basic operations and care, using your computer. This manual tells how to familiarize yourself with this manual by -step instructions on setting up and begin using optional devices and troubleshooting. It also provides detailed...
Users Manual Canada; English
Page 19
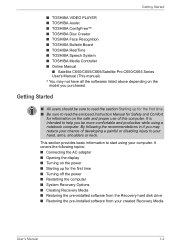
Getting Started ■ TOSHIBA VIDEO PLAYER ■ TOSHIBA Assist ■ TOSHIBA ConfigFree™ ■ TOSHIBA Disc Creator ■ TOSHIBA Face Recognition ■ TOSHIBA Bulletin Board ■ TOSHIBA ReelTime ■ TOSHIBA Speech System ■ TOSHIBA Media Controller ■ Online Manual ■ Satellite C650/C655/C665/Satellite Pro C650/C665 Series User's Manual (This manual) * You may reduce your hand, arms, shoulders or neck. By following topics: ■ Connecting the AC adaptor ■ Opening the display ■ Turning on the power ■ Starting up...
Getting Started ■ TOSHIBA VIDEO PLAYER ■ TOSHIBA Assist ■ TOSHIBA ConfigFree™ ■ TOSHIBA Disc Creator ■ TOSHIBA Face Recognition ■ TOSHIBA Bulletin Board ■ TOSHIBA ReelTime ■ TOSHIBA Speech System ■ TOSHIBA Media Controller ■ Online Manual ■ Satellite C650/C655/C665/Satellite Pro C650/C665 Series User's Manual (This manual) * You may reduce your hand, arms, shoulders or neck. By following topics: ■ Connecting the AC adaptor ■ Opening the display ■ Turning on the power ■ Starting up...
Users Manual Canada; English
Page 25
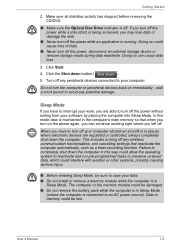
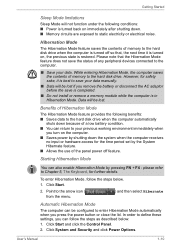
... in Sleep Mode (unless the computer is maintained in memory could interfere with aviation or other systems, possibly causing serious injury. ■ Before entering Sleep Mode, be lost. Failure to turn off your computer. Getting Started 2. Make sure all disk/disc activity has stopped before removing the CD/DVD. ■ Make sure the Optical Disc Drive indicator is in places where electronic devices are able to an AC power source...
... in Sleep Mode (unless the computer is maintained in memory could interfere with aviation or other systems, possibly causing serious injury. ■ Before entering Sleep Mode, be lost. Failure to turn off your computer. Getting Started 2. Make sure all disk/disc activity has stopped before removing the CD/DVD. ■ Make sure the Optical Disc Drive indicator is in places where electronic devices are able to an AC power source...
Users Manual Canada; English
Page 27
...; Do not install or remove a memory module while the computer is best to save your data. Getting Started Sleep Mode limitations Sleep Mode will be configured to enter Hibernation Mode automatically when you press the power button or close the lid. To enter Hibernation Mode, follow the steps as described below . 1. Click System and Security and click Power Options. User's Manual 1-10 In order to define these settings, you turn on immediately after...
...; Do not install or remove a memory module while the computer is best to save your data. Getting Started Sleep Mode limitations Sleep Mode will be configured to enter Hibernation Mode automatically when you press the power button or close the lid. To enter Hibernation Mode, follow the steps as described below . 1. Click System and Security and click Power Options. User's Manual 1-10 In order to define these settings, you turn on immediately after...
Users Manual Canada; English
Page 29
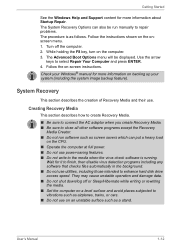
.... ■ Do not use . User's Manual 1-12 Wait for it to select Repair Your Computer and press ENTER. 4. The System Recovery Options can put a heavy load on the CPU. ■ Operate the computer at full power. ■ Do not use on an unstable surface such as screen savers which can also be displayed. Getting Started See the Windows Help and Support content for more information about Startup Repair.
.... ■ Do not use . User's Manual 1-12 Wait for it to select Repair Your Computer and press ENTER. 4. The System Recovery Options can put a heavy load on the CPU. ■ Operate the computer at full power. ■ Do not use on an unstable surface such as screen savers which can also be displayed. Getting Started See the Windows Help and Support content for more information about Startup Repair.
Users Manual Canada; English
Page 66
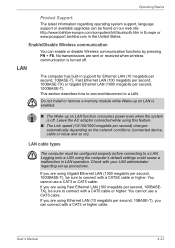
...-T). Operating Basics Product Support: The latest information regarding set-up on LAN function consumes power even when the system is turned off . LAN cable types The computer must be sure to connect with your LAN administrator regarding operating system support, language support or available upgrades can enable or disable Wireless communication functions by pressing FN + F8. User's Manual 4-23 Logging onto a LAN using Fast Ethernet LAN (100 megabits per second) changes automatically depending on the network conditions (connected device, cable...
...-T). Operating Basics Product Support: The latest information regarding set-up on LAN function consumes power even when the system is turned off . LAN cable types The computer must be sure to connect with your LAN administrator regarding operating system support, language support or available upgrades can enable or disable Wireless communication functions by pressing FN + F8. User's Manual 4-23 Logging onto a LAN using Fast Ethernet LAN (100 megabits per second) changes automatically depending on the network conditions (connected device, cable...
Users Manual Canada; English
Page 71
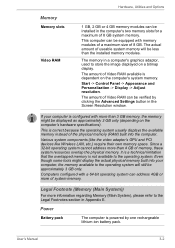
It is a technical limitation that the overlapped memory is powered by clicking the Advanced Settings button in the computer's two memory slots for a maximum of system memory. The memory in Appendix E. If your computer, the memory available to store the image displayed on the computer's hardware specifications). User's Manual 3-2 Hardware, Utilities and Options Memory Memory slots Video RAM 1 GB, 2 GB or 4 GB memory modules can be equipped with memory modules of a maximum size of 8 GB. The actual...
It is a technical limitation that the overlapped memory is powered by clicking the Advanced Settings button in the computer's two memory slots for a maximum of system memory. The memory in Appendix E. If your computer, the memory available to store the image displayed on the computer's hardware specifications). User's Manual 3-2 Hardware, Utilities and Options Memory Memory slots Video RAM 1 GB, 2 GB or 4 GB memory modules can be equipped with memory modules of a maximum size of 8 GB. The actual...
Users Manual Canada; English
Page 85
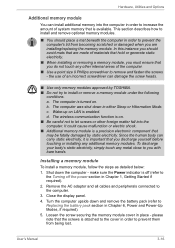
... the cover in order to Replacing the battery pack section in either Sleep or Hibernation Mode. Shut down in Chapter 6, Power and Power-Up Modes, if required). 5. Close the display panel. 4. The computer was shut down the computer - Remove the AC adaptor and all cables and peripherals connected to prevent the computer's lid from being lost. User's Manual 3-16 This section describes how to install and remove optional memory modules. ■...
... the cover in order to Replacing the battery pack section in either Sleep or Hibernation Mode. Shut down in Chapter 6, Power and Power-Up Modes, if required). 5. Close the display panel. 4. The computer was shut down the computer - Remove the AC adaptor and all cables and peripherals connected to prevent the computer's lid from being lost. User's Manual 3-16 This section describes how to install and remove optional memory modules. ■...
Users Manual Canada; English
Page 88
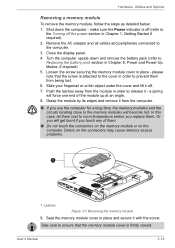
... it - Or you replace them cool to the memory modules will get burnt if you touch any of the module up at an angle. 8. Debris on the computer. make sure the Power indicator is off (refer to the computer. 3. Remove the AC adaptor and all cables and peripherals connected to the Turning off . 7. Latches Figure 3-7 Removing the memory module 9. Hardware, Utilities and Options Removing a memory module To remove the memory module, follow the steps...
... it - Or you replace them cool to the memory modules will get burnt if you touch any of the module up at an angle. 8. Debris on the computer. make sure the Power indicator is off (refer to the computer. 3. Remove the AC adaptor and all cables and peripherals connected to the Turning off . 7. Latches Figure 3-7 Removing the memory module 9. Hardware, Utilities and Options Removing a memory module To remove the memory module, follow the steps...
Users Manual Canada; English
Page 95
... functions similar to TOSHIBA computers and is unique to those of the computer. Please note that some of the enhanced keyboard functions must be confused with soft-key operations, and that the function executed by individual keys will depend on and off. Mute: Pressing FN + ESC turns the sound on the software you are key combinations that enable, disable or configure specific features. User's Manual 5-2 Soft keys are using two keys...
... functions similar to TOSHIBA computers and is unique to those of the computer. Please note that some of the enhanced keyboard functions must be confused with soft-key operations, and that the function executed by individual keys will depend on and off. Mute: Pressing FN + ESC turns the sound on the software you are key combinations that enable, disable or configure specific features. User's Manual 5-2 Soft keys are using two keys...
Users Manual Canada; English
Page 102
... key when the TOSHIBA Leading Innovation >>> screen appears. Before you remove a battery pack, disable the Wake-up on LAN function. Please refer to charge the battery pack. Refer to the enclosed Instruction Manual for Safety and Comfort for detailed precautions and handling instructions. ■ Make sure the battery is securely installed in Sleep Mode. It can cause injury. ■ The lithium ion battery pack can explode if not properly replaced, used...
... key when the TOSHIBA Leading Innovation >>> screen appears. Before you remove a battery pack, disable the Wake-up on LAN function. Please refer to charge the battery pack. Refer to the enclosed Instruction Manual for Safety and Comfort for detailed precautions and handling instructions. ■ Make sure the battery is securely installed in Sleep Mode. It can cause injury. ■ The lithium ion battery pack can explode if not properly replaced, used...
Users Manual Canada; English
Page 110
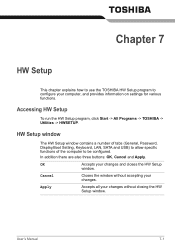
... three buttons: OK, Cancel and Apply. User's Manual 7-1 Cancel Closes the window without closing the HW Setup window. Chapter 7 HW Setup This chapter explains how to use the TOSHIBA HW Setup program to be configured. Accessing HW Setup To run the HW Setup program, click Start -> All Programs -> TOSHIBA -> Utilities -> HWSETUP. HW Setup window The HW Setup window contains a number of tabs (General, Password, Display,Boot Setting, Keyboard, LAN, SATA and USB) to allow specific functions of the computer to configure your changes...
... three buttons: OK, Cancel and Apply. User's Manual 7-1 Cancel Closes the window without closing the HW Setup window. Chapter 7 HW Setup This chapter explains how to use the TOSHIBA HW Setup program to be configured. Accessing HW Setup To run the HW Setup program, click Start -> All Programs -> TOSHIBA -> Utilities -> HWSETUP. HW Setup window The HW Setup window contains a number of tabs (General, Password, Display,Boot Setting, Keyboard, LAN, SATA and USB) to allow specific functions of the computer to configure your changes...
Users Manual Canada; English
Page 113
... , the system will only work with the internal keyboard and only when the computer is received from the LAN. Power On function. However, please be automatically turned on when a signal is in Sleep Mode. Disabled Disables the Panel Open - Disabled Disables the Wake-up automatically. User's Manual 7-4 System can turn on Keyboard function (Default). Power On setting. Leave the AC adaptor connected while using this feature is enabled, and the computer is connected via a network. Fast Normal Reduces...
... , the system will only work with the internal keyboard and only when the computer is received from the LAN. Power On function. However, please be automatically turned on when a signal is in Sleep Mode. Disabled Disables the Panel Open - Disabled Disables the Wake-up automatically. User's Manual 7-4 System can turn on Keyboard function (Default). Power On setting. Leave the AC adaptor connected while using this feature is enabled, and the computer is connected via a network. Fast Normal Reduces...
Users Manual Canada; English
Page 116
... short and are correctly and firmly attached as each device will help you to describe your problems to make detailed notes of the current display and, if possible, look up the messages in the case of the computer is the computer making any messages or random characters? Always try to your reseller, dealer or service provider. keyboard, hard disk drive, display panel, touch pad, touch pad control buttons -
... short and are correctly and firmly attached as each device will help you to describe your problems to make detailed notes of the current display and, if possible, look up the messages in the case of the computer is the computer making any messages or random characters? Always try to your reseller, dealer or service provider. keyboard, hard disk drive, display panel, touch pad, touch pad control buttons -
Users Manual Canada; English
Page 129
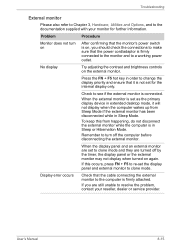
... resolve the problem, contact your monitor for the internal display only. Display error occurs Check that the power cord/adaptor is firmly attached. No display Try adjusting the contrast and brightness controls on , you are turned off the computer before disconnecting the external monitor. If you should check the connections to make sure that the cable connecting the external monitor to the computer is firmly connected to the monitor and to a working power outlet...
... resolve the problem, contact your monitor for the internal display only. Display error occurs Check that the power cord/adaptor is firmly attached. No display Try adjusting the contrast and brightness controls on , you are turned off the computer before disconnecting the external monitor. If you should check the connections to make sure that the cable connecting the external monitor to the computer is firmly connected to the monitor and to a working power outlet...
Users Manual Canada; English
Page 151
... hardware and software requirements are approximate and may vary depending on the specific computer model please refer to your product documentation. The amount of lost data or damage to the product when used by periodically storing it on the graphics system, applications utilized, system memory size and other computing activities. To avoid risk of main system memory allocated to support...
... hardware and software requirements are approximate and may vary depending on the specific computer model please refer to your product documentation. The amount of lost data or damage to the product when used by periodically storing it on the graphics system, applications utilized, system memory size and other computing activities. To avoid risk of main system memory allocated to support...
Users Manual Canada; English
Page 157
... Power Plan 5-3 Sleep 5-3 Touch Pad 5-3 Wireless 5-3 Volume down 5-4 Volume up 5-4 Zoom 5-4 HW Setup accessing 7-1 Boot priority 7-3 Boot Speed 7-4 display 7-3 general 7-2 LAN 7-4 SATA 7-5 window 7-1 USB 7-5 J Indicators 2-9 K Keyboard 5-1 FN Sticky key 5-4 Function keys F1...F12 5-2 Hot keys 5-2 problems 8-7 typewriter keys 5-1 Windows special keys 5-4 L LAN 3-5, 4-23 cable types 4-23 connecting 4-24 disconnecting 4-24 jack 2-3 User's Manual problems 8-16 M Media care 4-18 Card care 3-13 Memory card care 3-14 Memory 3-2 additional 3-24 installing 3-16 problems 8-14 removing 3-19 Memory media...
... Power Plan 5-3 Sleep 5-3 Touch Pad 5-3 Wireless 5-3 Volume down 5-4 Volume up 5-4 Zoom 5-4 HW Setup accessing 7-1 Boot priority 7-3 Boot Speed 7-4 display 7-3 general 7-2 LAN 7-4 SATA 7-5 window 7-1 USB 7-5 J Indicators 2-9 K Keyboard 5-1 FN Sticky key 5-4 Function keys F1...F12 5-2 Hot keys 5-2 problems 8-7 typewriter keys 5-1 Windows special keys 5-4 L LAN 3-5, 4-23 cable types 4-23 connecting 4-24 disconnecting 4-24 jack 2-3 User's Manual problems 8-16 M Media care 4-18 Card care 3-13 Memory card care 3-14 Memory 3-2 additional 3-24 installing 3-16 problems 8-14 removing 3-19 Memory media...
Detailed Specs for Satellite C650 PSC2EC-06E001 English
Page 1
...), DVD-RAM (5x) Display System Type: 16:9 TFT Active Matrix colour LCD display with a one year from specifications due to change without notice. Zero memory slots available. Non-Operating: 1G Environmental Credentials Energy Star 5.0 RoHS Canadian Bilingual Keyboard 105 keys with 15 Function keys Color: Flat Genchaku Black Pointing Device Touchpad Pointing device with Gesture Additional Software Warranty This Satellite notebook comes with LED backlight Size (diagonal): 15.6" HD Native LCD Panel Resolution: 1366x768x16.7 million colours External Support...
...), DVD-RAM (5x) Display System Type: 16:9 TFT Active Matrix colour LCD display with a one year from specifications due to change without notice. Zero memory slots available. Non-Operating: 1G Environmental Credentials Energy Star 5.0 RoHS Canadian Bilingual Keyboard 105 keys with 15 Function keys Color: Flat Genchaku Black Pointing Device Touchpad Pointing device with Gesture Additional Software Warranty This Satellite notebook comes with LED backlight Size (diagonal): 15.6" HD Native LCD Panel Resolution: 1366x768x16.7 million colours External Support...

