
User Guide
Page 5
...-distance transmission charges.) In order to send any message unless such message clearly contains in advance that temporary discontinuance of this information into your equipment, the telephone company will be required. If these changes might affect your service or the operation of 1991 makes it can. If Problems Arise If this equipment causes harm to the fax software instructions installed on...
...-distance transmission charges.) In order to send any message unless such message clearly contains in advance that temporary discontinuance of this information into your equipment, the telephone company will be required. If these changes might affect your service or the operation of 1991 makes it can. If Problems Arise If this equipment causes harm to the fax software instructions installed on...
User Guide
Page 28
...Opening the display panel 48 Your computer's features and specifications ....49 Turning on the power 49 Adding memory (optional 50 Installing a memory module 51 Removing a memory module 56 Checking total memory 58 Hard Drive Recovery Utilities 59 Creating Recovery CDs/DVDs 59 Hard Disk Drive Recovery options 61 Hard Disk Drive Recovery using the Recovery media 65 Installing drivers and applications 66 Using the Dual Mode Pad 66 Using Dual Mode 66 Using the TouchPad 69 Scrolling with the TouchPad 69 Control buttons 69 Disabling or enabling the TouchPad 70 Using external display...
...Opening the display panel 48 Your computer's features and specifications ....49 Turning on the power 49 Adding memory (optional 50 Installing a memory module 51 Removing a memory module 56 Checking total memory 58 Hard Drive Recovery Utilities 59 Creating Recovery CDs/DVDs 59 Hard Disk Drive Recovery options 61 Hard Disk Drive Recovery using the Recovery media 65 Installing drivers and applications 66 Using the Dual Mode Pad 66 Using Dual Mode 66 Using the TouchPad 69 Scrolling with the TouchPad 69 Control buttons 69 Disabling or enabling the TouchPad 70 Using external display...

User Guide
Page 51
To avoid damaging the computer's screws, use a small Phillips screwdriver that is in Sleep or Hibernation mode, data will need a small Phillips screwdriver for this model Slot A is the top slot. If you install or remove a memory module, turn off the computer using the Start menu. If the computer has been running recently, the memory module may also be hot. Before you install or remove a memory module while the computer is in minor...
To avoid damaging the computer's screws, use a small Phillips screwdriver that is in Sleep or Hibernation mode, data will need a small Phillips screwdriver for this model Slot A is the top slot. If you install or remove a memory module, turn off the computer using the Start menu. If the computer has been running recently, the memory module may also be hot. Before you install or remove a memory module while the computer is in minor...

User Guide
Page 53
... Started 53 Adding memory (optional) 6 Using a small Phillips screwdriver, loosen the screw(s) that you may cause memory access problems. 9 Carefully remove the new memory module from its antistatic packaging, without touching its connector. 10 Locate an empty memory module slot on the underside of the computer. Front of "Removing a memory module" on the computer. NOTE If no memory slot is available, you must remove a module by performing steps 2-3 of computer (Sample Illustration) Removing the memory module slot cover 7 Remove...
... Started 53 Adding memory (optional) 6 Using a small Phillips screwdriver, loosen the screw(s) that you may cause memory access problems. 9 Carefully remove the new memory module from its antistatic packaging, without touching its connector. 10 Locate an empty memory module slot on the underside of the computer. Front of "Removing a memory module" on the computer. NOTE If no memory slot is available, you must remove a module by performing steps 2-3 of computer (Sample Illustration) Removing the memory module slot cover 7 Remove...

User Guide
Page 56
56 Getting Started Adding memory (optional) 14 Replace the memory module slot cover and secure it correctly as described in memory will not be lost. When the operating system has loaded, you turn it on and data in "Checking total memory" on . Do not remove the memory module while the computer is in "Installing a memory module" on page 51 to remove a memory module: 1 Complete steps 1-8 in Sleep or Hibernation mode. For more information on...
56 Getting Started Adding memory (optional) 14 Replace the memory module slot cover and secure it correctly as described in memory will not be lost. When the operating system has loaded, you turn it on and data in "Checking total memory" on . Do not remove the memory module while the computer is in "Installing a memory module" on page 51 to remove a memory module: 1 Complete steps 1-8 in Sleep or Hibernation mode. For more information on...
User Guide
Page 58
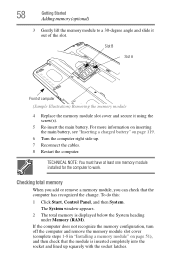
... or remove a memory module, you can check that the module is displayed below the System heading under Memory (RAM). 58 Getting Started Adding memory (optional) 3 Gently lift the memory module to work. TECHNICAL NOTE: You must have at least one memory module installed for the computer to a 30-degree angle and slide it using the screw(s). 5 Re-insert the main battery. Slot B Slot A Front of computer (Sample Illustration) Removing the memory module 4 Replace the memory module slot cover...
... or remove a memory module, you can check that the module is displayed below the System heading under Memory (RAM). 58 Getting Started Adding memory (optional) 3 Gently lift the memory module to work. TECHNICAL NOTE: You must have at least one memory module installed for the computer to a 30-degree angle and slide it using the screw(s). 5 Re-insert the main battery. Slot B Slot A Front of computer (Sample Illustration) Removing the memory module 4 Replace the memory module slot cover...
User Guide
Page 61
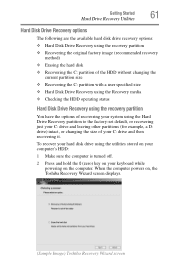
... Hard Disk Drive Recovery using the recovery partition You have the options of recovering your system using the utilities stored on your computer's HDD: 1 Make sure the computer is turned off. 2 Press and hold the 0 (zero) key on your C: drive and then recovering it. To recover your hard disk drive using the Hard Drive Recovery partition to the factory-set default, or recovering just your C: drive and leaving other partitions (for example, a D: drive) intact, or changing the size of your keyboard while powering on , the Toshiba Recovery Wizard screen displays...
... Hard Disk Drive Recovery using the recovery partition You have the options of recovering your system using the utilities stored on your computer's HDD: 1 Make sure the computer is turned off. 2 Press and hold the 0 (zero) key on your C: drive and then recovering it. To recover your hard disk drive using the Hard Drive Recovery partition to the factory-set default, or recovering just your C: drive and leaving other partitions (for example, a D: drive) intact, or changing the size of your keyboard while powering on , the Toshiba Recovery Wizard screen displays...
User Guide
Page 70
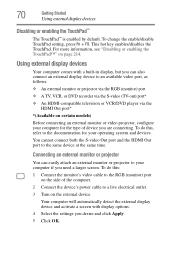
... activate a screen with a built-in display, but you can easily attach an external monitor or projector to your operating system and devices. This hot key enables/disables the TouchPad. Using external display devices Your computer comes with display options. 4 Select the settings you are connecting. You cannot connect both the S-video Out port and the HDMI Out port to a live electrical outlet. 3 Turn on the side of device you desire and click Apply. 5 Click OK. To change the enable/disable TouchPad setting...
... activate a screen with a built-in display, but you can easily attach an external monitor or projector to your operating system and devices. This hot key enables/disables the TouchPad. Using external display devices Your computer comes with display options. 4 Select the settings you are connecting. You cannot connect both the S-video Out port and the HDMI Out port to a live electrical outlet. 3 Turn on the side of device you desire and click Apply. 5 Click OK. To change the enable/disable TouchPad setting...
User Guide
Page 71
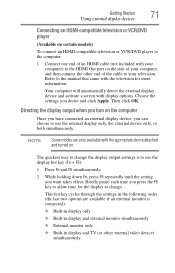
... change . Your computer will automatically detect the external display device and activate a screen with the appropriate device attached and turned on. Then click OK. NOTE Some modes are available if an external monitor is to the manual that came with the television for the display to use the display hot key (Fn + F5): 1 Press Fn and F5 simultaneously. 2 While holding down Fn, press F5 repeatedly until the setting...
... change . Your computer will automatically detect the external display device and activate a screen with the appropriate device attached and turned on. Then click OK. NOTE Some modes are available if an external monitor is to the manual that came with the television for the display to use the display hot key (Fn + F5): 1 Press Fn and F5 simultaneously. 2 While holding down Fn, press F5 repeatedly until the setting...
User Guide
Page 168
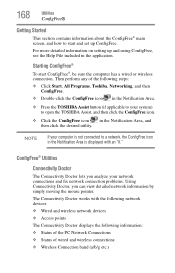
... your network connections and fix network connection problems. Using Connectivity Doctor, you can view detailed network information by simply moving the mouse pointer. The Connectivity Doctor works with the following network devices: ❖ Wired and wireless network devices ❖ Access points The Connectivity Doctor displays the following steps: ❖ Click Start, All Programs, Toshiba, Networking, and then ConfigFree. ❖ Double-click the ConfigFree icon in the Notification Area. ❖ Press the TOSHIBA Assist button (if...
... your network connections and fix network connection problems. Using Connectivity Doctor, you can view detailed network information by simply moving the mouse pointer. The Connectivity Doctor works with the following network devices: ❖ Wired and wireless network devices ❖ Access points The Connectivity Doctor displays the following steps: ❖ Click Start, All Programs, Toshiba, Networking, and then ConfigFree. ❖ Double-click the ConfigFree icon in the Notification Area. ❖ Press the TOSHIBA Assist button (if...

User Guide
Page 169
... match that opens automatically when Internet Explorer® starts ❖ Devices-lets you can set the power status of a home page that environment and connect to handle these networking environments. ConfigFree® profiles are useful for example, high or medium) ❖ Enable UAC (User Account Control) setting If you visit a client company occasionally, for example, you enable or disable settings of wired and wireless network devices, infrared devices, and set up...
... match that opens automatically when Internet Explorer® starts ❖ Devices-lets you can set the power status of a home page that environment and connect to handle these networking environments. ConfigFree® profiles are useful for example, high or medium) ❖ Enable UAC (User Account Control) setting If you visit a client company occasionally, for example, you enable or disable settings of wired and wireless network devices, infrared devices, and set up...
User Guide
Page 175
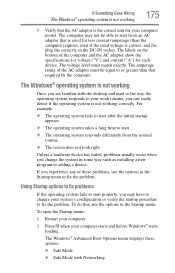
... must be able to fix the problem. To do this, use the options in the Startup menu. The Windows® Advanced Boot Options menu displays these problems, use the options in the Startup menu to start . ❖ The operating system responds differently from an AC adaptor that the AC adaptor is correct, and the plug fits correctly in some way such as installing a new program or adding a device. The computer may...
... must be able to fix the problem. To do this, use the options in the Startup menu. The Windows® Advanced Boot Options menu displays these problems, use the options in the Startup menu to start . ❖ The operating system responds differently from an AC adaptor that the AC adaptor is correct, and the plug fits correctly in some way such as installing a new program or adding a device. The computer may...
User Guide
Page 179
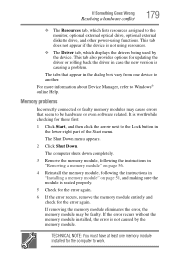
... part of the Start menu. Memory problems Incorrectly connected or faulty memory modules may be hardware or even software related. It is seated properly. 5 Check for the error again. 6 If the error recurs, remove the memory module entirely and check for the computer to the monitor, optional external optical drive, optional external diskette drive, and other power-using resources. ❖ The Driver tab, which lists resources assigned to work. TECHNICAL NOTE: You must have at least one device...
... part of the Start menu. Memory problems Incorrectly connected or faulty memory modules may be hardware or even software related. It is seated properly. 5 Check for the error again. 6 If the error recurs, remove the memory module entirely and check for the computer to the monitor, optional external optical drive, optional external diskette drive, and other power-using resources. ❖ The Driver tab, which lists resources assigned to work. TECHNICAL NOTE: You must have at least one device...
User Guide
Page 182
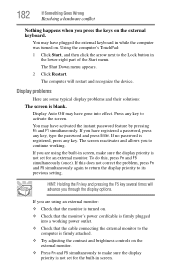
... have registered a password, press any key, type the password and press Enter. The computer will advance you have plugged the external keyboard in the lower-right part of the Start menu. Display problems Here are using an external monitor: ❖ Check that the monitor is turned on. ❖ Check that the cable connecting the external monitor to the computer is not set for an external monitor. You may have activated the instant password feature by pressing...
... have registered a password, press any key, type the password and press Enter. The computer will advance you have plugged the external keyboard in the lower-right part of the Start menu. Display problems Here are using an external monitor: ❖ Check that the monitor is turned on. ❖ Check that the cable connecting the external monitor to the computer is not set for an external monitor. You may have activated the instant password feature by pressing...
User Guide
Page 190
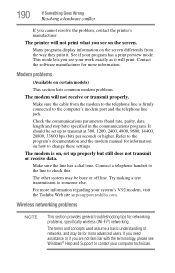
... second) or higher. Make sure the cable from the way they print it will print. Refer to the program's documentation and the modem manual for networking problems, specifically wireless (Wi-Fi®) networking. Wireless networking problems NOTE This section provides general troubleshooting tips for information on the screen differently from the modem to the computer's modem port and the telephone line jack. The printer will...
... second) or higher. Make sure the cable from the way they print it will print. Refer to the program's documentation and the modem manual for networking problems, specifically wireless (Wi-Fi®) networking. Wireless networking problems NOTE This section provides general troubleshooting tips for information on the screen differently from the modem to the computer's modem port and the telephone line jack. The printer will...
User Guide
Page 226
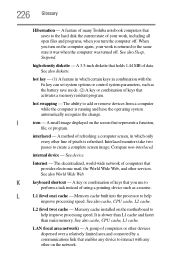
... to the hard disk the current state of computers or other services. internal device - A group of your work, including all open files and programs, when you turn on the screen that you turn the computer off . See also World Wide Web. LAN (local area network) - A feature of keys that represents a function, file, or program. Compare non-interlaced. A key or combination of many Toshiba notebook computers that activates a memory resident...
... to the hard disk the current state of computers or other services. internal device - A group of your work, including all open files and programs, when you turn on the screen that you turn the computer off . See also World Wide Web. LAN (local area network) - A feature of keys that represents a function, file, or program. Compare non-interlaced. A key or combination of many Toshiba notebook computers that activates a memory resident...

User Guide
Page 232
... battery changing 117 charge indicator light 47, 110 charge not lasting 181 charging 45, 47 conserving power 114 disposal 122 low charge 112 monitoring power 47, 110 not charging 180 232 notifications 113 power plan 208 power plan hot key 116 real-time clock (RTC) 107 removing 117 BIOS Setup see TOSHIBA Hardware Setup Bridge Media Adapter inserting memory media 136 removing memory media 137 button power 50, 60 start 126 C CD playing an audio 102 CD, using 98 character keys 90 charging the battery 47 checking device...
... battery changing 117 charge indicator light 47, 110 charge not lasting 181 charging 45, 47 conserving power 114 disposal 122 low charge 112 monitoring power 47, 110 not charging 180 232 notifications 113 power plan 208 power plan hot key 116 real-time clock (RTC) 107 removing 117 BIOS Setup see TOSHIBA Hardware Setup Bridge Media Adapter inserting memory media 136 removing memory media 137 button power 50, 60 start 126 C CD playing an audio 102 CD, using 98 character keys 90 charging the battery 47 checking device...

User Guide
Page 233
... files/trouble accessing a disk 184 running slow 185 diskette drive cannot insert a diskette 185 cannot read a diskette 185 connecting 74 external, connecting 74 display does not look normal/flickers 183 external monitor not working 183 screen is blank 182 display device external 70 display output settings 71 display, external adjusting 72 disposal information 26 disposing of used batteries 122 double-click 69 Dual Mode Pad using 66 DVD player general problems 193 DVD, using 98 E error messages device driver conflict 177 general hardware problem...
... files/trouble accessing a disk 184 running slow 185 diskette drive cannot insert a diskette 185 cannot read a diskette 185 connecting 74 external, connecting 74 display does not look normal/flickers 183 external monitor not working 183 screen is blank 182 display device external 70 display output settings 71 display, external adjusting 72 disposal information 26 disposing of used batteries 122 double-click 69 Dual Mode Pad using 66 DVD player general problems 193 DVD, using 98 E error messages device driver conflict 177 general hardware problem...

User Guide
Page 234
... using 133 Help and Support Windows® operating system 177 Hibernation mode 76 configuring 80 starting again from 82 hot key display brightness 212 Hibernation mode 210 keyboard overlays 216 Lock (Instant security) 207 Output (Display switch) 211 power plan 208 Sleep mode 209 volume mute 206 zooming 216 Hot Key Cards 202 Hot key functions 206 hot key power plan 116 http 130 I i.LINK port 137 icon 125 desktop 125 moving to desktop 125 recycle bin 125 safety 37 installation memory module...
... using 133 Help and Support Windows® operating system 177 Hibernation mode 76 configuring 80 starting again from 82 hot key display brightness 212 Hibernation mode 210 keyboard overlays 216 Lock (Instant security) 207 Output (Display switch) 211 power plan 208 Sleep mode 209 volume mute 206 zooming 216 Hot Key Cards 202 Hot key functions 206 hot key power plan 116 http 130 I i.LINK port 137 icon 125 desktop 125 moving to desktop 125 recycle bin 125 safety 37 installation memory module...
User Guide
Page 235
... monitor 70 connecting 70 not working 182 mouse installing 72 N network accessing 128 Connect to the Internet Wizard 128 networking wireless 127 Notification Area 126 O Opening the display panel 48 optical disc positioning 101 optical discs handling 102 inserting 101 removing 104, 105 optical drive problems 186 troubleshooting 186 using 98 optical media recording 104 other documentation 38 overlay keys 92 P password deleting a supervisor 147 disabling a user 148 setting a user 147 supervisor set up 146 types 145 passwords instant, using 145 setting 145 port...
... monitor 70 connecting 70 not working 182 mouse installing 72 N network accessing 128 Connect to the Internet Wizard 128 networking wireless 127 Notification Area 126 O Opening the display panel 48 optical disc positioning 101 optical discs handling 102 inserting 101 removing 104, 105 optical drive problems 186 troubleshooting 186 using 98 optical media recording 104 other documentation 38 overlay keys 92 P password deleting a supervisor 147 disabling a user 148 setting a user 147 supervisor set up 146 types 145 passwords instant, using 145 setting 145 port...


