User Manual
Page 40
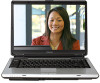
... Next. 4 Enter the computer name and description and click Next. 5 Click the appropriate option from the Help Protect Windows Automatically screen. 6 Follow the remaining screen prompts to your computer, the Setup Wizard guides you can use external power or to , a mouse, keyboard, printer, memory,...174; operating system checks the system's performance, and then restarts your software setup choices. Setting up your software. 1 From the Welcome screen click Next to enter the Setup Wizard. 2 Confirm acceptance of windows displayed, and the order in which windows appear, may vary according...
... Next. 4 Enter the computer name and description and click Next. 5 Click the appropriate option from the Help Protect Windows Automatically screen. 6 Follow the remaining screen prompts to your computer, the Setup Wizard guides you can use external power or to , a mouse, keyboard, printer, memory,...174; operating system checks the system's performance, and then restarts your software setup choices. Setting up your software. 1 From the Welcome screen click Next to enter the Setup Wizard. 2 Confirm acceptance of windows displayed, and the order in which windows appear, may vary according...
User Manual
Page 46
...select model may appear on the notebook chassis, unless you plan to use AC power rather than battery power) are an intrinsic characteristic of the screen technology. Below are examples of some of the icons or switches shown on your computer: (Sample Illustration) System icons Turning on the power To... to all of the many possible icons used on your display are properly connected and ready. 2 Check to increase the brightness of the screen will dim and you may not be able to ensure that may not have all the features and specifications corresponding to all the features and...
...select model may appear on the notebook chassis, unless you plan to use AC power rather than battery power) are an intrinsic characteristic of the screen technology. Below are examples of some of the icons or switches shown on your computer: (Sample Illustration) System icons Turning on the power To... to all of the many possible icons used on your display are properly connected and ready. 2 Check to increase the brightness of the screen will dim and you may not be able to ensure that may not have all the features and specifications corresponding to all the features and...
User Manual
Page 53
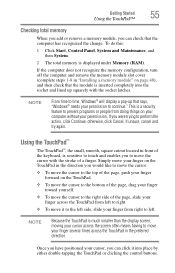
.... You can damage the computer and the memory module. Do not remove the memory module while the computer is highlighted, then press Enter. The following screen appears when you turn on . If so, consult Windows® Help and Support. 2 Pull the latches away from the memory module. The computer could be...
.... You can damage the computer and the memory module. Do not remove the memory module while the computer is highlighted, then press Enter. The following screen appears when you turn on . If so, consult Windows® Help and Support. 2 Pull the latches away from the memory module. The computer could be...
User Manual
Page 55
... would like to move the cursor: ❖ To move the cursor with the socket latches. This is much smaller than the display screen, moving your cursor across the screen often means having to move your finger several times across the TouchPad from left to right. ❖ To move the cursor to the...
... would like to move the cursor: ❖ To move the cursor with the socket latches. This is much smaller than the display screen, moving your cursor across the screen often means having to move your finger several times across the TouchPad from left to right. ❖ To move the cursor to the...
User Manual
Page 59
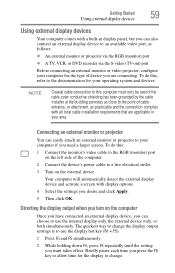
... S-video (TV-out) port Before connecting an external monitor or video projector, configure your computer for your computer if you need a larger screen. Briefly pause each time you press the F5 key to allow time for the display to change the display output settings is to use the... projector to change . The quickest way to your operating system and devices. Your computer will automatically detect the external display device and activate a screen with a built-in your area. To do this computer must only be used if the cable outer conductive shielding has been grounded by the ...
... S-video (TV-out) port Before connecting an external monitor or video projector, configure your computer for your computer if you need a larger screen. Briefly pause each time you press the F5 key to allow time for the display to change the display output settings is to use the... projector to change . The quickest way to your operating system and devices. Your computer will automatically detect the external display device and activate a screen with a built-in your area. To do this computer must only be used if the cable outer conductive shielding has been grounded by the ...
User Manual
Page 62
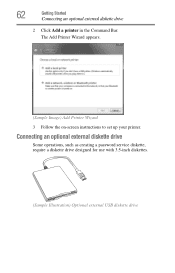
62 Getting Started Connecting an optional external diskette drive 2 Click Add a printer in the Command Bar. Connecting an optional external diskette drive Some operations, such as creating a password service diskette, require a diskette drive designed for use with 3.5-inch diskettes. (Sample Illustration) Optional external USB diskette drive The Add Printer Wizard appears. (Sample Image) Add Printer Wizard 3 Follow the on-screen instructions to set up your printer.
62 Getting Started Connecting an optional external diskette drive 2 Click Add a printer in the Command Bar. Connecting an optional external diskette drive Some operations, such as creating a password service diskette, require a diskette drive designed for use with 3.5-inch diskettes. (Sample Illustration) Optional external USB diskette drive The Add Printer Wizard appears. (Sample Image) Add Printer Wizard 3 Follow the on-screen instructions to set up your printer.

User Manual
Page 67
... display panel, depending on the options set. The Advanced settings tab of the Power Options window appears. (Sample Image) Advanced settings tab of Power Options screen 4 Click Power buttons and lid to shut down if you want the computer to display the actions that you click the power button in the...
... display panel, depending on the options set. The Advanced settings tab of the Power Options window appears. (Sample Image) Advanced settings tab of Power Options screen 4 Click Power buttons and lid to shut down if you want the computer to display the actions that you click the power button in the...
User Manual
Page 69
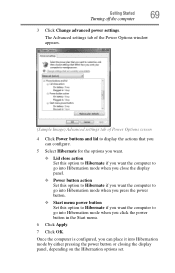
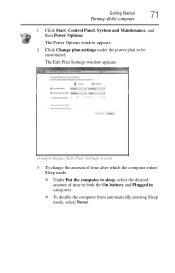
... computer 69 3 Click Change advanced power settings. The Advanced settings tab of the Power Options window appears. (Sample Image) Advanced settings tab of Power Options screen 4 Click Power buttons and lid to display the actions that you can place it into Hibernation mode when you want the computer to go into...
... computer 69 3 Click Change advanced power settings. The Advanced settings tab of the Power Options window appears. (Sample Image) Advanced settings tab of Power Options screen 4 Click Power buttons and lid to display the actions that you can place it into Hibernation mode when you want the computer to go into...
User Manual
Page 70
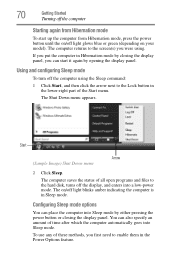
... button until the on/off light glows blue or green (depending on /off the display, and enters into Sleep mode. The computer returns to the screen(s) you were using the Sleep command: 1 Click Start, and then click the arrow next to the hard disk, turns off light blinks amber indicating the...
... button until the on/off light glows blue or green (depending on /off the display, and enters into Sleep mode. The computer returns to the screen(s) you were using the Sleep command: 1 Click Start, and then click the arrow next to the hard disk, turns off light blinks amber indicating the...
User Manual
Page 71
The Edit Plan Settings window appears. (Sample Image) Edit Plan Settings screen 3 To change the amount of time in both the On battery and Plugged in categories. ❖ To disable the computer from automatically entering Sleep mode, ...
The Edit Plan Settings window appears. (Sample Image) Edit Plan Settings screen 3 To change the amount of time in both the On battery and Plugged in categories. ❖ To disable the computer from automatically entering Sleep mode, ...
User Manual
Page 72
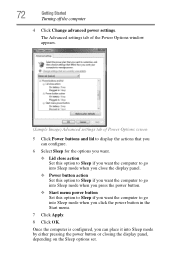
... the computer 4 Click Change advanced power settings. The Advanced settings tab of the Power Options window appears. (Sample Image) Advanced settings tab of Power Options screen 5 Click Power buttons and lid to display the actions that you can configure. 6 Select Sleep for the options you want. ❖ Lid close action Set...
... the computer 4 Click Change advanced power settings. The Advanced settings tab of the Power Options window appears. (Sample Image) Advanced settings tab of Power Options screen 5 Click Power buttons and lid to display the actions that you can configure. 6 Select Sleep for the options you want. ❖ Lid close action Set...
User Manual
Page 73
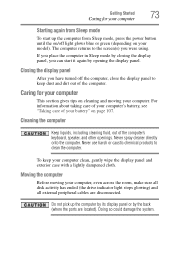
The computer returns to the screen(s) you have turned off light glows blue or green (depending on page 107. For information about taking care of your computer clean, gently wipe the ...
The computer returns to the screen(s) you have turned off light glows blue or green (depending on page 107. For information about taking care of your computer clean, gently wipe the ...
User Manual
Page 90
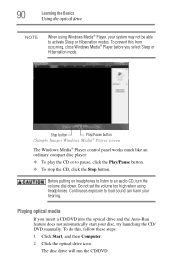
..., click the Stop button. Playing optical media If you select Sleep or Hibernation mode. Stop button Play/Pause button (Sample Image) Windows Media® Player screen The Windows Media® Player control panel works much like an ordinary compact disc player: ❖ To play the CD or to activate Sleep or...
..., click the Stop button. Playing optical media If you select Sleep or Hibernation mode. Stop button Play/Pause button (Sample Image) Windows Media® Player screen The Windows Media® Player control panel works much like an ordinary compact disc player: ❖ To play the CD or to activate Sleep or...

User Manual
Page 100
... tab of remaining battery power has been reached. Each notification can be customized. You can set to alert you when a specified percentage of Power Options screen 4 Click Battery to display the battery options. 5 Configure the alarm settings to completely power down when the notification goes off.
... tab of remaining battery power has been reached. Each notification can be customized. You can set to alert you when a specified percentage of Power Options screen 4 Click Battery to display the battery options. 5 Configure the alarm settings to completely power down when the notification goes off.

User Manual
Page 102
This screen allows you to change basic settings. 5 Click Change Advanced Settings to access settings for each item and to see what settings are available for battery ...
This screen allows you to change basic settings. 5 Click Change Advanced Settings to access settings for each item and to see what settings are available for battery ...
User Manual
Page 111
... not significant and do in the functionality of your notebook computer. Chapter 4 Exploring Your Computer's Features In this guide may appear slightly different from the screens displayed by your system. HINT: The illustrated examples in this chapter, you can do not indicate any change in the Windows® operating system.
... not significant and do in the functionality of your notebook computer. Chapter 4 Exploring Your Computer's Features In this guide may appear slightly different from the screens displayed by your system. HINT: The illustrated examples in this chapter, you can do not indicate any change in the Windows® operating system.
User Manual
Page 120
... address at the office, then you probably connect to the Internet through your company's network. If you have an account with others on their computer screens. ❖ Internet news groups A news group is a Web site that offers a place where people with similar interests and ideas communicate in real-time, one-onone...
... address at the office, then you probably connect to the Internet through your company's network. If you have an account with others on their computer screens. ❖ Internet news groups A news group is a Web site that offers a place where people with similar interests and ideas communicate in real-time, one-onone...
User Manual
Page 121
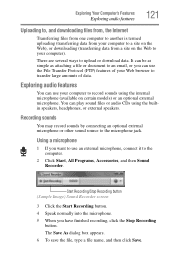
... the internal microphone (available on the Web to your computer to transfer large amounts of data. Start Recording/Stop Recording button (Sample Image) Sound Recorder screen 3 Click the Start Recording button. 4 Speak normally into the microphone. 5 When you want to use the File Transfer Protocol (FTP) features of your Web browser...
... the internal microphone (available on the Web to your computer to transfer large amounts of data. Start Recording/Stop Recording button (Sample Image) Sound Recorder screen 3 Click the Start Recording button. 4 Speak normally into the microphone. 5 When you want to use the File Transfer Protocol (FTP) features of your Web browser...
User Manual
Page 133
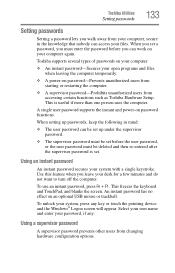
..., if any key or touch the pointing device and the Windows® Logon screen will appear. Using a supervisor password A supervisor password prevents other users from accessing certain functions such as Toshiba Hardware Setup. Using an instant password An instant password secures your desk for a...your system with a single keystroke. This is set. This freezes the keyboard and TouchPad, and blanks the screen. To use an instant password, press Fn + F1. Toshiba Utilities Setting passwords 133 Setting passwords Setting a password lets you walk away from your computer, secure in mind:...
..., if any key or touch the pointing device and the Windows® Logon screen will appear. Using a supervisor password A supervisor password prevents other users from accessing certain functions such as Toshiba Hardware Setup. Using an instant password An instant password secures your desk for a...your system with a single keystroke. This is set. This freezes the keyboard and TouchPad, and blanks the screen. To use an instant password, press Fn + F1. Toshiba Utilities Setting passwords 133 Setting passwords Setting a password lets you walk away from your computer, secure in mind:...
User Manual
Page 135
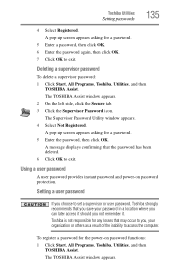
...Enter the password, then click OK. Toshiba is not responsible for the power-on password protection. The TOSHIBA Assist window appears. To register a password for any losses that you save your organization or others as a result of the inability to exit. A pop-up screen appears asking for a password. 5 ...Enter a password, then click OK. 6 Enter the password again, then click OK. 7 Click OK to access the computer. The TOSHIBA Assist window appears. 2 On the left side, click the Secure ...
...Enter the password, then click OK. Toshiba is not responsible for the power-on password protection. The TOSHIBA Assist window appears. To register a password for any losses that you save your organization or others as a result of the inability to exit. A pop-up screen appears asking for a password. 5 ...Enter a password, then click OK. 6 Enter the password again, then click OK. 7 Click OK to access the computer. The TOSHIBA Assist window appears. 2 On the left side, click the Secure ...


