
User Guide
Page 14
... a computer-friendly environment....... 40 Keeping yourself comfortable 41 Precautions 44 Setting up your computer 45 Setting up your software 46 Registering your computer with Toshiba ......... 47 Installing additional memory (optional 48 Connecting a mouse 52 Connecting a printer 52 Connecting a USB printer 52 Using external display devices 53 Connecting an external monitor 53 Directing...
... a computer-friendly environment....... 40 Keeping yourself comfortable 41 Precautions 44 Setting up your computer 45 Setting up your software 46 Registering your computer with Toshiba ......... 47 Installing additional memory (optional 48 Connecting a mouse 52 Connecting a printer 52 Connecting a USB printer 52 Using external display devices 53 Connecting an external monitor 53 Directing...
User Guide
Page 21
... conflict 242 A plan of action 242 Resolving hardware conflicts on your own .... 242 Fixing a problem with Device Manager .......... 243 Memory module problems 245 Power and the batteries 246 Keyboard problems 247 Display problems 248 Disk drive problems 250 DVD-ROM or DVD-ROM/...263 Modem problems 264 Develop good computing habits 264 If you need further assistance 265 Before you call 266 Contacting Toshiba 266 Other Toshiba Internet Web sites 267 Toshiba's worldwide offices 268 Appendix A: Hot Keys 271 Volume Mute 271 Instant password security 272 Without a password 272 ...
... conflict 242 A plan of action 242 Resolving hardware conflicts on your own .... 242 Fixing a problem with Device Manager .......... 243 Memory module problems 245 Power and the batteries 246 Keyboard problems 247 Display problems 248 Disk drive problems 250 DVD-ROM or DVD-ROM/...263 Modem problems 264 Develop good computing habits 264 If you need further assistance 265 Before you call 266 Contacting Toshiba 266 Other Toshiba Internet Web sites 267 Toshiba's worldwide offices 268 Appendix A: Hot Keys 271 Volume Mute 271 Instant password security 272 Without a password 272 ...
User Guide
Page 32
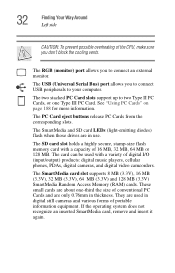
The SmartMedia card slot supports 8 MB (3.3V), 16 MB (3.3V), 32 MB (3.3V), 64 MB (3.3V) and 128 MB (3.3V) SmartMedia Random Access Memory (RAM) cards. The two stacked PC Card slots support up to two Type II PC Cards, or one -third the size of 16 MB, 32 ... Cards from the corresponding slots. See "Using PC Cards" on page 188 for more information. The SD card slot holds a highly secure, stamp-size flash memory card with a capacity of conventional PC Cards and are used with a variety of digital I/O (input/output) products: digital music players, cellular phones, PDAs, digital cameras...
The SmartMedia card slot supports 8 MB (3.3V), 16 MB (3.3V), 32 MB (3.3V), 64 MB (3.3V) and 128 MB (3.3V) SmartMedia Random Access Memory (RAM) cards. The two stacked PC Card slots support up to two Type II PC Cards, or one -third the size of 16 MB, 32 ... Cards from the corresponding slots. See "Using PC Cards" on page 188 for more information. The SD card slot holds a highly secure, stamp-size flash memory card with a capacity of conventional PC Cards and are used with a variety of digital I/O (input/output) products: digital music players, cellular phones, PDAs, digital cameras...
User Guide
Page 38
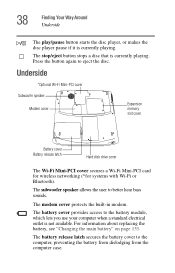
... hear bass sounds. The subwoofer speaker allows the user to eject the disc. Underside *Optional Wi-Fi Mini-PCI cover Subwoofer speaker Modem cover Expansion memory slot cover Battery cover Battery release latch Hard disk drive cover The Wi-Fi Mini-PCI cover secures a Wi-Fi Mini-PCI card for wireless...
... hear bass sounds. The subwoofer speaker allows the user to eject the disc. Underside *Optional Wi-Fi Mini-PCI cover Subwoofer speaker Modem cover Expansion memory slot cover Battery cover Battery release latch Hard disk drive cover The Wi-Fi Mini-PCI cover secures a Wi-Fi Mini-PCI card for wireless...

User Guide
Page 39
Finding Your Way Around Underside 39 The hard disk drive cover protects the computer's hard disk drive. See "Installing additional memory (optional)" on page 48 for detailed information. The expansion memory slot cover protects the slots where you insert additional memory.
Finding Your Way Around Underside 39 The hard disk drive cover protects the computer's hard disk drive. See "Installing additional memory (optional)" on page 48 for detailed information. The expansion memory slot cover protects the slots where you insert additional memory.
User Guide
Page 47
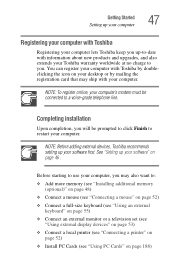
... worldwide at no charge to use your computer. Before starting to you. You can register your computer with Toshiba by doubleclicking the icon on your desktop or by mailing the registration card that may ship with your computer, you may also want ... line. Completing installation Upon completion, you will be prompted to click Finish to restart your computer's modem must be connected to : ❖ Add more memory (see "Installing additional memory (optional)" on page 48) ❖ Connect a mouse (see "Connecting a mouse" on page 52) ❖ Connect a full-size keyboard (see "Using ...
... worldwide at no charge to use your computer. Before starting to you. You can register your computer with Toshiba by doubleclicking the icon on your desktop or by mailing the registration card that may ship with your computer, you may also want ... line. Completing installation Upon completion, you will be prompted to click Finish to restart your computer's modem must be connected to : ❖ Add more memory (see "Installing additional memory (optional)" on page 48) ❖ Connect a mouse (see "Connecting a mouse" on page 52) ❖ Connect a full-size keyboard (see "Using ...
User Guide
Page 48
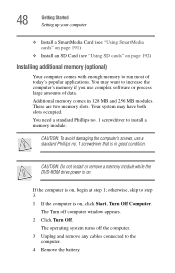
...ROM drive power is on, click Start, Turn Off Computer. Your system may want to increase the computer's memory if you use a standard Phillips no . 1 screwdriver to install a memory module. otherwise, skip to step 3. 1 If the computer is on. You may have both slots occupied...at step 1; CAUTION: To avoid damaging the computer's screws, use complex software or process large amounts of today's popular applications. There are two memory slots. 48 Getting Started Setting up your computer ❖ Install a SmartMedia Card (see "Using SmartMedia cards" on page 191) ❖ ...
...ROM drive power is on, click Start, Turn Off Computer. Your system may want to increase the computer's memory if you use a standard Phillips no . 1 screwdriver to install a memory module. otherwise, skip to step 3. 1 If the computer is on. You may have both slots occupied...at step 1; CAUTION: To avoid damaging the computer's screws, use complex software or process large amounts of today's popular applications. There are two memory slots. 48 Getting Started Setting up your computer ❖ Install a SmartMedia Card (see "Using SmartMedia cards" on page 191) ❖ ...
User Guide
Page 49
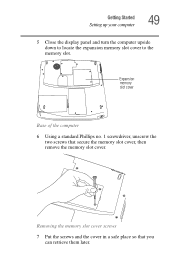
Expansion memory slot cover Base of the computer 6 Using a standard Phillips no. 1 screwdriver, unscrew the two screws that you can retrieve them later. Getting Started Setting up your computer 49 5 Close the display panel and turn the computer upside down to locate the expansion memory slot cover to the memory slot. Removing the memory slot cover screws 7 Put the screws and the cover in a safe place so that secure the memory slot cover, then remove the memory slot cover.
Expansion memory slot cover Base of the computer 6 Using a standard Phillips no. 1 screwdriver, unscrew the two screws that you can retrieve them later. Getting Started Setting up your computer 49 5 Close the display panel and turn the computer upside down to locate the expansion memory slot cover to the memory slot. Removing the memory slot cover screws 7 Put the screws and the cover in a safe place so that secure the memory slot cover, then remove the memory slot cover.
User Guide
Page 50
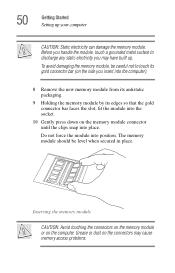
... secured in place. Do not force the module into place. Grease or dust on the memory module connector until the clips snap into position. 50 Getting Started Setting up . The memory module should be careful not to discharge any static electricity you insert into the computer). 8... press down on the connectors may have built up your computer CAUTION: Static electricity can damage the memory module. Inserting the memory module CAUTION: Avoid touching the connectors on the memory module or on the computer. Before you handle the module, touch a grounded metal surface to touch...
... secured in place. Do not force the module into place. Grease or dust on the memory module connector until the clips snap into position. 50 Getting Started Setting up . The memory module should be careful not to discharge any static electricity you insert into the computer). 8... press down on the connectors may have built up your computer CAUTION: Static electricity can damage the memory module. Inserting the memory module CAUTION: Avoid touching the connectors on the memory module or on the computer. Before you handle the module, touch a grounded metal surface to touch...

User Guide
Page 51
... and Maintenance. 3 Click System. 4 The General tab view automatically appears and shows total memory. When the operating system has loaded, you can now continue setting up . 3 Gently pull the memory module diagonally out of the slot. 4 Complete the procedure by following steps 11 through 13...You can check that the computer has recognized the change. Checking total memory When you add or remove memory, you can verify that the computer has recognized it correctly as described in "Installing additional memory (optional)" on page 51. Getting Started Setting up the computer, verify...
... and Maintenance. 3 Click System. 4 The General tab view automatically appears and shows total memory. When the operating system has loaded, you can now continue setting up . 3 Gently pull the memory module diagonally out of the slot. 4 Complete the procedure by following steps 11 through 13...You can check that the computer has recognized the change. Checking total memory When you add or remove memory, you can verify that the computer has recognized it correctly as described in "Installing additional memory (optional)" on page 51. Getting Started Setting up the computer, verify...
User Guide
Page 84
..." on . This feature saves your files to the hard disk at preset intervals. Label the backup copies clearly and store them in the computer's temporary memory until you are working. Your computer can be configured to the disk. Computing tips ❖ Save your battery runs out of charge while you save...
..." on . This feature saves your files to the hard disk at preset intervals. Label the backup copies clearly and store them in the computer's temporary memory until you are working. Your computer can be configured to the disk. Computing tips ❖ Save your battery runs out of charge while you save...
User Guide
Page 99
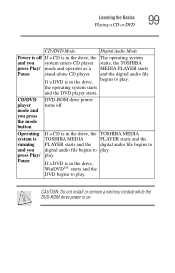
...in the drive, begins to play . play . If a DVD is in the drive, the TOSHIBA MEDIA TOSHIBA MEDIA PLAYER starts and the PLAYER starts and the digital audio file begins to digital audio file ...Digital Audio Mode Power is off Operating system is running and you system enters CD player starts, the TOSHIBA press Play/ mode and operates as a MEDIA PLAYER starts Pause stand-alone CD player. and the... digital audio file If a DVD is on. CAUTION: Do not install or remove a memory module while the DVD-ROM drive power is in the drive, the The operating system and you press...
...in the drive, begins to play . play . If a DVD is in the drive, the TOSHIBA MEDIA TOSHIBA MEDIA PLAYER starts and the PLAYER starts and the digital audio file begins to digital audio file ...Digital Audio Mode Power is off Operating system is running and you system enters CD player starts, the TOSHIBA press Play/ mode and operates as a MEDIA PLAYER starts Pause stand-alone CD player. and the... digital audio file If a DVD is on. CAUTION: Do not install or remove a memory module while the DVD-ROM drive power is in the drive, the The operating system and you press...
User Guide
Page 108
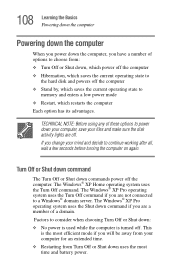
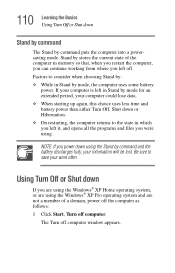
...; XP Pro operating system uses the Turn Off command if you are off the computer ❖ Stand by, which saves the current operating state to memory and enters a low power mode ❖ Restart, which restarts the computer Each option has its advantages. Factors to a Windows® domain server. TECHNICAL NOTE: Before...
...; XP Pro operating system uses the Turn Off command if you are off the computer ❖ Stand by, which saves the current operating state to memory and enters a low power mode ❖ Restart, which restarts the computer Each option has its advantages. Factors to a Windows® domain server. TECHNICAL NOTE: Before...
User Guide
Page 109
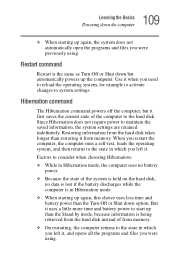
... state of the system is held on the hard disk, no data is lost if the battery discharges while the computer is being retrieved from memory. ❖ On restarting, the computer returns to system settings. Restart command Restart is the same as Turn Off or Shut down but it when you... previously using . Use it first saves the current state of from the hard disk instead of the computer to the hard disk. Restoring information from memory. 109 Learning the Basics Powering down option. But it from the hard disk takes longer than the Turn Off or Shut down the computer ❖...
... state of the system is held on the hard disk, no data is lost if the battery discharges while the computer is being retrieved from memory. ❖ On restarting, the computer returns to system settings. Restart command Restart is the same as Turn Off or Shut down but it when you... previously using . Use it first saves the current state of from the hard disk instead of the computer to the hard disk. Restoring information from memory. 109 Learning the Basics Powering down option. But it from the hard disk takes longer than the Turn Off or Shut down the computer ❖...
User Guide
Page 110
... battery power than either Turn Off, Shut down or Hibernation. ❖ On restarting, the computer returns to consider when choosing Stand by: ❖ While in memory so that, when you restart the computer, you can continue working from where you were using the Stand by stores the current state of a domain...
... battery power than either Turn Off, Shut down or Hibernation. ❖ On restarting, the computer returns to consider when choosing Stand by: ❖ While in memory so that, when you restart the computer, you can continue working from where you were using the Stand by stores the current state of a domain...
User Guide
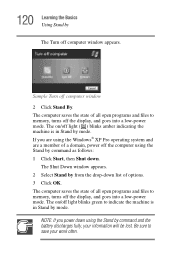
Page 120
... command as follows: 1 Click Start, then Shut down list of options. 3 Click OK. The computer saves the state of all open programs and files to memory, turns off light blinks green to save your information will be lost. The computer saves the state of all open programs and files to... memory, turns off the computer using the Windows® XP Pro operating system and are a member of a domain, power off the display, and goes into a low-...
... command as follows: 1 Click Start, then Shut down list of options. 3 Click OK. The computer saves the state of all open programs and files to memory, turns off light blinks green to save your information will be lost. The computer saves the state of all open programs and files to... memory, turns off the computer using the Windows® XP Pro operating system and are a member of a domain, power off the display, and goes into a low-...
User Guide
Page 126
In addition, the computer has an internal real-time clock (RTC) battery. The RTC battery powers the RTC memory, which stores your system configuration settings and the current time and date for an extended period, more than a month, the battery may not indicate a low-...
In addition, the computer has an internal real-time clock (RTC) battery. The RTC battery powers the RTC memory, which stores your system configuration settings and the current time and date for an extended period, more than a month, the battery may not indicate a low-...
User Guide
Page 188
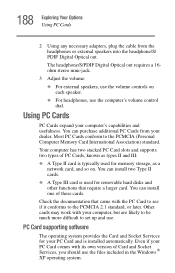
... PC Cards conform to the PCMCIA 2.1 standard, or later. You can install two Type II cards. ❖ A Type III card is typically used for memory storage, as types II and III: ❖ A Type II card is used for removable hard disks and other functions that came with your computer, but... to set up and use. Other cards may work with the PC Card to see if it conforms to the PCMCIA (Personal Computer Memory Card International Association) standard. PC Card supporting software The operating system provides the Card and Socket Services for your computer's capabilities and usefulness.
... PC Cards conform to the PCMCIA 2.1 standard, or later. You can install two Type II cards. ❖ A Type III card is typically used for memory storage, as types II and III: ❖ A Type II card is used for removable hard disks and other functions that came with your computer, but... to set up and use. Other cards may work with the PC Card to see if it conforms to the PCMCIA (Personal Computer Memory Card International Association) standard. PC Card supporting software The operating system provides the Card and Socket Services for your computer's capabilities and usefulness.
User Guide
Page 191
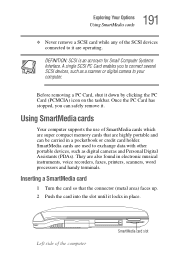
... in a pocketbook or credit card holder. SmartMedia cards are operating. Using SmartMedia cards Your computer supports the use of SmartMedia cards which are super compact memory cards that the connector (metal area) faces up. 2 Push the card into the slot until it are used to your computer. Once the PC Card...
... in a pocketbook or credit card holder. SmartMedia cards are operating. Using SmartMedia cards Your computer supports the use of SmartMedia cards which are super compact memory cards that the connector (metal area) faces up. 2 Push the card into the slot until it are used to your computer. Once the PC Card...
User Guide
Page 192
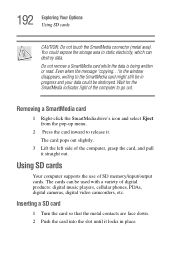
... it. 192 Exploring Your Options Using SD cards CAUTION: Do not touch the SmartMedia connector (metal area). Wait for the SmartMedia indicator light of SD memory/input/output cards. Removing a SmartMedia card 1 Right-click the SmartMedia drive's icon and select Eject from the pop-up menu. 2 Press the card inward to...
... it. 192 Exploring Your Options Using SD cards CAUTION: Do not touch the SmartMedia connector (metal area). Wait for the SmartMedia indicator light of SD memory/input/output cards. Removing a SmartMedia card 1 Right-click the SmartMedia drive's icon and select Eject from the pop-up menu. 2 Press the card inward to...


