User Guide
Page 29
... display device 71 Directing the display output when you turn on the computer 74 Adjusting the quality of the external display......75 Using an external keyboard 75 Using a mouse 75 Connecting a printer 75 Setting up a printer 76 Connecting an optional external diskette drive........77 Turning off the computer 77 Options for...
... display device 71 Directing the display output when you turn on the computer 74 Adjusting the quality of the external display......75 Using an external keyboard 75 Using a mouse 75 Connecting a printer 75 Setting up a printer 76 Connecting an optional external diskette drive........77 Turning off the computer 77 Options for...
User Guide
Page 30
... your computer 87 Cleaning the computer 88 Moving the computer 88 Using a computer lock 88 Chapter 2: Learning the Basics 90 Computing tips 90 Using the keyboard 92 Character keys 92 Ctrl, Fn, and Alt keys 92 Function keys 93 Special Windows® keys 93 Starting a program 93 Starting a program from the... media 103 Recording optical media 104 Removing a disc with the computer on...........104 Removing a disc with the computer off ..........105 Caring for optical discs 105 Toshiba's online resources 105
... your computer 87 Cleaning the computer 88 Moving the computer 88 Using a computer lock 88 Chapter 2: Learning the Basics 90 Computing tips 90 Using the keyboard 92 Character keys 92 Ctrl, Fn, and Alt keys 92 Function keys 93 Special Windows® keys 93 Starting a program 93 Starting a program from the... media 103 Recording optical media 104 Removing a disc with the computer on...........104 Removing a disc with the computer off ..........105 Caring for optical discs 105 Toshiba's online resources 105

User Guide
Page 33
... help you 170 Resolving a hardware conflict 170 A plan of action 170 Fixing a problem with Device Manager ...........171 Memory problems 172 Power and the batteries 173 Keyboard problems 174 Display problems 175 Disk or internal storage drive problems ..........177 Optical drive problems 178 Sound system problems 179 ExpressCard® problems 180 Printer...
... help you 170 Resolving a hardware conflict 170 A plan of action 170 Fixing a problem with Device Manager ...........171 Memory problems 172 Power and the batteries 173 Keyboard problems 174 Display problems 175 Disk or internal storage drive problems ..........177 Optical drive problems 178 Sound system problems 179 ExpressCard® problems 180 Printer...
User Guide
Page 34
34 Contents If you need further assistance 192 Before you contact Toshiba 192 Contacting Toshiba 193 Other Toshiba Internet Web sites 194 Toshiba's worldwide offices 194 Appendix A: Hot Keys/TOSHIBA Cards 196 Hot Key Cards 196 Using the Hot Key Cards 197 Application Cards 198 Using the Application Cards 199 Card Case...(Display switch 205 Display brightness 206 Disabling or enabling wireless devices............207 Disabling or enabling the TouchPad 208 Zoom (Display resolution 209 Keyboard hot key functions 210 Appendix B: Power Cord/Cable Connectors 211 Glossary 212 Index 226
34 Contents If you need further assistance 192 Before you contact Toshiba 192 Contacting Toshiba 193 Other Toshiba Internet Web sites 194 Toshiba's worldwide offices 194 Appendix A: Hot Keys/TOSHIBA Cards 196 Hot Key Cards 196 Using the Hot Key Cards 197 Application Cards 198 Using the Application Cards 199 Card Case...(Display switch 205 Display brightness 206 Disabling or enabling wireless devices............207 Disabling or enabling the TouchPad 208 Zoom (Display resolution 209 Keyboard hot key functions 210 Appendix B: Power Cord/Cable Connectors 211 Glossary 212 Index 226
User Guide
Page 43
... depending on the computer. In this condition, observe the following: ❖ Never cover your computer or AC adaptor with your computer. See "Connecting to , a mouse, keyboard, printer, memory, and ExpressCards®. Setting up your computer TECHNICAL NOTE: You must attach the AC adaptor. These components include, but are protected from overheating...
... depending on the computer. In this condition, observe the following: ❖ Never cover your computer or AC adaptor with your computer. See "Connecting to , a mouse, keyboard, printer, memory, and ExpressCards®. Setting up your computer TECHNICAL NOTE: You must attach the AC adaptor. These components include, but are protected from overheating...

User Guide
Page 45
... software" on your desktop and then double-clicking Toshiba Registration. Product registration can be connected to : ❖ Add more memory (see "Adding memory (optional)" on page 51) ❖ Connect a mouse (see "Using a mouse" on page 75) ❖ Connect a full-size keyboard (see "Using an external keyboard" on page 75) ❖ Connect an external...
... software" on your desktop and then double-clicking Toshiba Registration. Product registration can be connected to : ❖ Add more memory (see "Adding memory (optional)" on page 51) ❖ Connect a mouse (see "Using a mouse" on page 75) ❖ Connect a full-size keyboard (see "Using an external keyboard" on page 75) ❖ Connect an external...
User Guide
Page 49
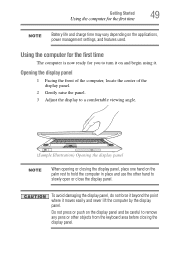
... the point where it . Getting Started 49 Using the computer for you to hold the computer in place and use the other objects from the keyboard area before closing the display panel, place one hand on the palm rest to turn it on the applications, power management settings, and features used...
... the point where it . Getting Started 49 Using the computer for you to hold the computer in place and use the other objects from the keyboard area before closing the display panel, place one hand on the palm rest to turn it on the applications, power management settings, and features used...
User Guide
Page 62
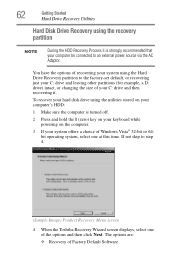
... using the utilities stored on the computer. 3 If your C: drive and then recovering it is turned off. 2 Press and hold the 0 (zero) key on your keyboard while powering on your computer's HDD: 1 Make sure the computer is strongly recommended that your computer be connected to step 4. (Sample Image) Product Recovery Menu...
... using the utilities stored on the computer. 3 If your C: drive and then recovering it is turned off. 2 Press and hold the 0 (zero) key on your keyboard while powering on your computer's HDD: 1 Make sure the computer is strongly recommended that your computer be connected to step 4. (Sample Image) Product Recovery Menu...
User Guide
Page 64
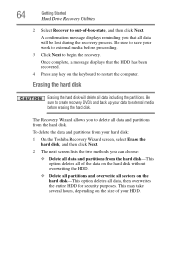
... without overwriting the HDD. ❖ Delete all partitions and overwrite all sectors on the keyboard to external media before erasing the hard disk. Be sure to create recovery DVD's and back up your hard disk: 1 On the Toshiba Recovery Wizard screen, select Erase the hard disk, and then click Next. 2 The next...
... without overwriting the HDD. ❖ Delete all partitions and overwrite all sectors on the keyboard to external media before erasing the hard disk. Be sure to create recovery DVD's and back up your hard disk: 1 On the Toshiba Recovery Wizard screen, select Erase the hard disk, and then click Next. 2 The next...
User Guide
Page 65
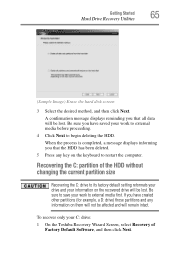
A confirmation message displays reminding you have saved your information on the keyboard to save your C: drive: 1 On the Toshiba Recovery Wizard Screen, select Recovery of the HDD without changing the current partition size Recovering the C: drive to its factory default setting reformats your drive ...
A confirmation message displays reminding you have saved your information on the keyboard to save your C: drive: 1 On the Toshiba Recovery Wizard Screen, select Recovery of the HDD without changing the current partition size Recovering the C: drive to its factory default setting reformats your drive ...
User Guide
Page 66
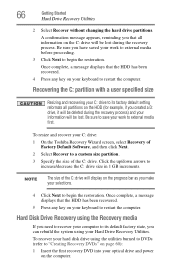
...utilities burned to DVDs (refer to "Creating Recovery DVDs" on the HDD (for example, if you make your C: drive: 1 On the Toshiba Recovery Wizard screen, select Recovery of Factory Default Software, and then click Next. 2 Select Recover to begin the restoration. Recovering the C: partition...the hard drive partitions. Once complete, a message displays that all partitions on page 60): 1 Insert the first recovery DVD into your keyboard to restart the computer. A confirmation message appears, reminding you can rebuild the system using the Recovery media If you need to recover...
...utilities burned to DVDs (refer to "Creating Recovery DVDs" on the HDD (for example, if you make your C: drive: 1 On the Toshiba Recovery Wizard screen, select Recovery of Factory Default Software, and then click Next. 2 Select Recover to begin the restoration. Recovering the C: partition...the hard drive partitions. Once complete, a message displays that all partitions on page 60): 1 Insert the first recovery DVD into your keyboard to restart the computer. A confirmation message appears, reminding you can rebuild the system using the Recovery media If you need to recover...
User Guide
Page 69
... and applications that were originally bundled with the stroke of a finger. Installing drivers and applications The Toshiba Application Installer (available on the TouchPad. ❖ To move the cursor to the bottom of the... the TouchPad from left to right. To reinstall drivers and applications: 1 Click Start, All Programs, Toshiba, Recovery, and then TOSHIBA Application Installer. 2 Click Next. 3 Click the item you want to install. 4 Click Install. ...Volume list to display its status in front of the keyboard, is sensitive to touch and enables you to move the cursor with your computer.
... and applications that were originally bundled with the stroke of a finger. Installing drivers and applications The Toshiba Application Installer (available on the TouchPad. ❖ To move the cursor to the bottom of the... the TouchPad from left to right. To reinstall drivers and applications: 1 Click Start, All Programs, Toshiba, Recovery, and then TOSHIBA Application Installer. 2 Click Next. 3 Click the item you want to install. 4 Click Install. ...Volume list to display its status in front of the keyboard, is sensitive to touch and enables you to move the cursor with your computer.

User Guide
Page 75
... you prefer to your television (or other video display device), you can attach one to use a USB-compatible mouse. You can use a full-size keyboard, you may need a suitable USB cable which may not function correctly. In extended desktop mode, the image is split into two sides, one from your ..., or Built-in the above illustration is USBcompatible, check its documentation. You can purchase one side per display device. Getting Started 75 Using an external keyboard NOTE The right-most USBcompatible...
... you prefer to your television (or other video display device), you can attach one to use a USB-compatible mouse. You can use a full-size keyboard, you may need a suitable USB cable which may not function correctly. In extended desktop mode, the image is split into two sides, one from your ..., or Built-in the above illustration is USBcompatible, check its documentation. You can purchase one side per display device. Getting Started 75 Using an external keyboard NOTE The right-most USBcompatible...
User Guide
Page 88
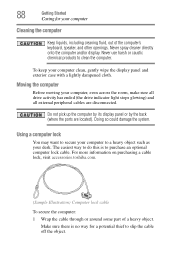
... slip the cable off the object. For more information on purchasing a cable lock, visit accessories.toshiba.com. (Sample Illustration) Computer lock cable To secure the computer: 1 Wrap the cable through or around some part of the computer's keyboard, speaker, and other openings. Doing so could damage the system. 88 Getting Started Caring...
... slip the cable off the object. For more information on purchasing a cable lock, visit accessories.toshiba.com. (Sample Illustration) Computer lock cable To secure the computer: 1 Wrap the cable through or around some part of the computer's keyboard, speaker, and other openings. Doing so could damage the system. 88 Getting Started Caring...

User Guide
Page 92
... character keys, control keys, function keys, and special Windows® keys. (Sample Illustration) Keyboard Character keys Typing with the character keys is very much like typing on the program you are not interchangeable. Ctrl, Fn, and Alt keys (Sample ...
... character keys, control keys, function keys, and special Windows® keys. (Sample Illustration) Keyboard Character keys Typing with the character keys is very much like typing on the program you are not interchangeable. Ctrl, Fn, and Alt keys (Sample ...
User Guide
Page 93
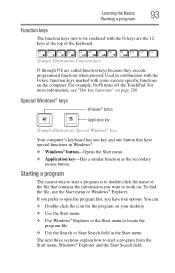
...Start Search field in the Start menu The next three sections explain how to start a program is to double-click the name of the keyboard. (Sample Illustration) Function keys F1 through F12 are the 12 keys at the top of the file that contains the information you have... they execute programmed functions when pressed. Special Windows® keys Windows® button Application key (Sample Illustration) Special Windows® keys Your computer's keyboard has one key and one button that have four options. To find the file, use the Start menu or Windows® Explorer. For example,...
...Start Search field in the Start menu The next three sections explain how to start a program is to double-click the name of the keyboard. (Sample Illustration) Function keys F1 through F12 are the 12 keys at the top of the file that contains the information you have... they execute programmed functions when pressed. Special Windows® keys Windows® button Application key (Sample Illustration) Special Windows® keys Your computer's keyboard has one key and one button that have four options. To find the file, use the Start menu or Windows® Explorer. For example,...
User Guide
Page 97
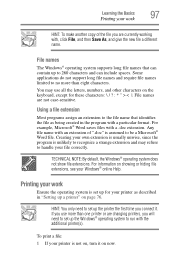
... File names are not case-sensitive. Using a file extension Most programs assign an extension to the file name that can contain up a printer" on the keyboard, except for your printer as being created in "Setting up to 260 characters and can include spaces. For information on now. If you use all...
... File names are not case-sensitive. Using a file extension Most programs assign an extension to the file name that can contain up a printer" on the keyboard, except for your printer as being created in "Setting up to 260 characters and can include spaces. For information on now. If you use all...
User Guide
Page 101
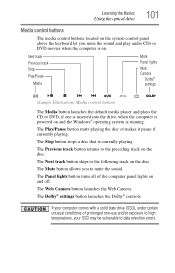
Learning the Basics Using the optical drive 101 Media control buttons The media control buttons located on the system control panel above the keyboard let you to data retention errors. The Next track button skips to the preceding track on the disc. Next track Previous track Stop Play/Pause ...
Learning the Basics Using the optical drive 101 Media control buttons The media control buttons located on the system control panel above the keyboard let you to data retention errors. The Next track button skips to the preceding track on the disc. Next track Previous track Stop Play/Pause ...
User Guide
Page 150
... ❖ Password-Allows you to charge certain USB-compatible external devices such as mobile phones or portable digital music players. 150 Utilities TOSHIBA Hardware Setup ❖ CPU-Allows you to enable or disable CPU frequency switching modes Dynamically Switchable-This mode is the default setting for...; General-Allows you to view the current BIOS version or change certain settings back to their default values ❖ Keyboard-Allows you to access the wake-on keyboard function ❖ LAN-Allows you to enable/disable the network port and wake-on battery power, the CPU frequency ...
... ❖ Password-Allows you to charge certain USB-compatible external devices such as mobile phones or portable digital music players. 150 Utilities TOSHIBA Hardware Setup ❖ CPU-Allows you to enable or disable CPU frequency switching modes Dynamically Switchable-This mode is the default setting for...; General-Allows you to view the current BIOS version or change certain settings back to their default values ❖ Keyboard-Allows you to access the wake-on keyboard function ❖ LAN-Allows you to enable/disable the network port and wake-on battery power, the CPU frequency ...

User Guide
Page 152
...There are two modes, Mode-1 and Mode-2 in either mode. The Wakeup setting (function to use the "USB Wakeup function," attach the mouse or keyboard to Disabled. If all USB ports have the USB Sleep and Charge function-compatible icon ( ), change the setting to the USB ports. To change will...For normal use of the options that appear in the dialog boxes and clicking Apply, you can reconfigure that you change the setting, launch TOSHIBA Hardware Setup and click on the Device Manager and even though you can change the settings the "USB Wakeup function" will become default settings ...
...There are two modes, Mode-1 and Mode-2 in either mode. The Wakeup setting (function to use the "USB Wakeup function," attach the mouse or keyboard to Disabled. If all USB ports have the USB Sleep and Charge function-compatible icon ( ), change the setting to the USB ports. To change will...For normal use of the options that appear in the dialog boxes and clicking Apply, you can reconfigure that you change the setting, launch TOSHIBA Hardware Setup and click on the Device Manager and even though you can change the settings the "USB Wakeup function" will become default settings ...

