User Manual
Page 31
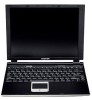
31 Contents Chapter 3: Mobile Computing 107 Toshiba's energy-saver design 107 Running the computer on battery power 107 Battery Notice 108 Power management 109 Using additional batteries 109 Charging batteries 110 Charging ... battery runs low .. 115 Setting battery alarms 116 Conserving battery power 116 Setting a power usage mode 117 Turning off the display automatically 118 Enabling the screen saver 118 Changing the main battery 120 Removing the battery from the computer ...... 120 Inserting a charged battery 121 Taking care of your battery 122 Safety...
31 Contents Chapter 3: Mobile Computing 107 Toshiba's energy-saver design 107 Running the computer on battery power 107 Battery Notice 108 Power management 109 Using additional batteries 109 Charging batteries 110 Charging ... battery runs low .. 115 Setting battery alarms 116 Conserving battery power 116 Setting a power usage mode 117 Turning off the display automatically 118 Enabling the screen saver 118 Changing the main battery 120 Removing the battery from the computer ...... 120 Inserting a charged battery 121 Taking care of your battery 122 Safety...
User Manual
Page 35
... Cord/Cable Connectors 210 USA and Canada 210 United Kingdom 210 Australia 210 Europe 210 Appendix C: Using ConfigFree™ with your Toshiba Computer 211 Getting Started 212 ConfigFree Main Screen 212 Starting ConfigFree 213 Configuring ConfigFree 213 ConfigFree Utilities 214 Connectivity Doctor 214 Device Settings 215 Profile Settings 217 Quick Connect 218...
... Cord/Cable Connectors 210 USA and Canada 210 United Kingdom 210 Australia 210 Europe 210 Appendix C: Using ConfigFree™ with your Toshiba Computer 211 Getting Started 212 ConfigFree Main Screen 212 Starting ConfigFree 213 Configuring ConfigFree 213 ConfigFree Utilities 214 Connectivity Doctor 214 Device Settings 215 Profile Settings 217 Quick Connect 218...

User Manual
Page 43
... be able to type without twisting your torso or neck, and look at about the same height and distance as the screen. Below eye level Approximately 90° angles Footrest Correct posture and positioning of the computer and external devices is a primary factor in ... maintain good posture with your body relaxed and your chair for maximum computing comfort. Whichever type you choose, use a paper holder, set it at the screen without slouching. ❖ If you use the following guidelines to avoid stress-related injuries: ❖ Place the computer on a flat surface at a comfortable...
... be able to type without twisting your torso or neck, and look at about the same height and distance as the screen. Below eye level Approximately 90° angles Footrest Correct posture and positioning of the computer and external devices is a primary factor in ... maintain good posture with your body relaxed and your chair for maximum computing comfort. Whichever type you choose, use a paper holder, set it at the screen without slouching. ❖ If you use the following guidelines to avoid stress-related injuries: ❖ Place the computer on a flat surface at a comfortable...
User Manual
Page 44
... office supply stores. ❖ Sit with your shoulders relaxed and your back straight so that sunlight or bright indoor lighting does not reflect off the screen. Your LCD display has a brightness approaching that could shine directly in your eyes. ❖ If possible, use soft, indirect lighting in front of your elbow...
... office supply stores. ❖ Sit with your shoulders relaxed and your back straight so that sunlight or bright indoor lighting does not reflect off the screen. Your LCD display has a brightness approaching that could shine directly in your eyes. ❖ If possible, use soft, indirect lighting in front of your elbow...

User Manual
Page 45
Work habits The key to prevent possible strain on your computer screen for long periods can reduce stress and improve your efficiency. ❖ Take frequent breaks to vary your eyes. Intersperse such activities with other tasks. ❖ ...
Work habits The key to prevent possible strain on your computer screen for long periods can reduce stress and improve your efficiency. ❖ Take frequent breaks to vary your eyes. Intersperse such activities with other tasks. ❖ ...
User Manual
Page 48
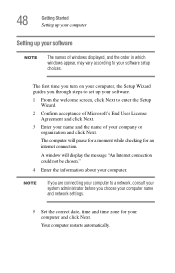
... pause for a moment while checking for your computer and click Next. 48 Getting Started Setting up your computer Setting up your software. 1 From the welcome screen, click Next to your software setup choices.
... pause for a moment while checking for your computer and click Next. 48 Getting Started Setting up your computer Setting up your software. 1 From the welcome screen, click Next to your software setup choices.
User Manual
Page 53
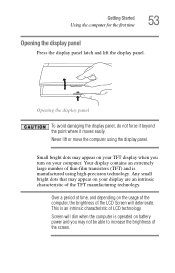
... computer using high-precision technology. Any small bright dots that may appear on the usage of the computer, the brightness of the LCD Screen will dim when the computer is manufactured using the display panel. Over a period of time, and depending on your display are an ...intrinsic characteristic of the screen. Small bright dots may not be able to increase the brightness of the TFT manufacturing technology. Opening the display panel To avoid damaging ...
... computer using high-precision technology. Any small bright dots that may appear on the usage of the computer, the brightness of the LCD Screen will dim when the computer is manufactured using the display panel. Over a period of time, and depending on your display are an ...intrinsic characteristic of the screen. Small bright dots may not be able to increase the brightness of the TFT manufacturing technology. Opening the display panel To avoid damaging ...

User Manual
Page 63
Connecting the internal modem Connecting the modem Your computer comes with an integrated modem, which you can connect as follows: 1 Locate the modem port on -screen instructions to set up your computer. 2 Plug one end of your printer. Getting Started Adding Memory (optional) 63 Sample Add Printer Wizard 3 Follow the on the back of a telephone cable (purchased separately) into the modem port.
Connecting the internal modem Connecting the modem Your computer comes with an integrated modem, which you can connect as follows: 1 Locate the modem port on -screen instructions to set up your computer. 2 Plug one end of your printer. Getting Started Adding Memory (optional) 63 Sample Add Printer Wizard 3 Follow the on the back of a telephone cable (purchased separately) into the modem port.

User Manual
Page 66
.... Primary and secondary control buttons When you are adjacent to the left . The primary control button is much smaller than the display screen, moving your cursor across the screen often means having to find whether it to the left side, slide your finger several times across the TouchPad from right to left...
.... Primary and secondary control buttons When you are adjacent to the left . The primary control button is much smaller than the display screen, moving your cursor across the screen often means having to find whether it to the left side, slide your finger several times across the TouchPad from right to left...

User Manual
Page 87
... at one time, use the Backup or Restore Wizard. The Backup or Restore Wizard window appears. Sample Backup or Restore Wizard window 3 Follow the on-screen instructions. Let the disc dry completely before inserting it in the manufacturer's instructions. 2 Click Start, All Programs, Accessories, System Tools, Backup. Learning the Basics Backing...
... at one time, use the Backup or Restore Wizard. The Backup or Restore Wizard window appears. Sample Backup or Restore Wizard window 3 Follow the on-screen instructions. Let the disc dry completely before inserting it in the manufacturer's instructions. 2 Click Start, All Programs, Accessories, System Tools, Backup. Learning the Basics Backing...

User Manual
Page 90
90 Learning the Basics Playing audio Rewind Play Stop Previous track Next track Mute Volume control Fast forward Sample Windows MediaTM Player screen The Windows MediaTM Player control panel works much like an ordinary compact disc player: ❖ To play the CD or to pause, click the Play/Pause button on the CD Player control panel. ❖ To stop the CD, click the Stop button.
90 Learning the Basics Playing audio Rewind Play Stop Previous track Next track Mute Volume control Fast forward Sample Windows MediaTM Player screen The Windows MediaTM Player control panel works much like an ordinary compact disc player: ❖ To play the CD or to pause, click the Play/Pause button on the CD Player control panel. ❖ To stop the CD, click the Stop button.

User Manual
Page 102
... Hibernation mode, press the power button until the on/off computer window with Stand By option Using Standby If you are not connected to the screen you can also put the computer into Hibernation mode more quickly You can start up the computer from Hibernation To start the computer again by...
... Hibernation mode, press the power button until the on/off computer window with Stand By option Using Standby If you are not connected to the screen you can also put the computer into Hibernation mode more quickly You can start up the computer from Hibernation To start the computer again by...

User Manual
Page 106
The computer returns to the screen you can start up the computer from Standby To start the computer again by closing the display panel, you were using battery power or outlet power. 9 Click OK to close the Full Power Properties window. 10 Click OK to close the TOSHIBA Power Saver Properties window, then...
The computer returns to the screen you can start up the computer from Standby To start the computer again by closing the display panel, you were using battery power or outlet power. 9 Click OK to close the Full Power Properties window. 10 Click OK to close the TOSHIBA Power Saver Properties window, then...

User Manual
Page 109
...want to carry additional charged batteries with the power management component of the LCD Screen will deteriorate. Using additional batteries If you . You can then replace a ... and depending on battery power and you may result in system performance or stability issues. Screen will provide the most stable operating environment and optimum system performance for many hours without an ... preset to a configuration that will dim when the computer is an intrinsic characteristic of the screen. This is operated on the usage of the computer, the brightness of the system should ...
...want to carry additional charged batteries with the power management component of the LCD Screen will deteriorate. Using additional batteries If you . You can then replace a ... and depending on battery power and you may result in system performance or stability issues. Screen will provide the most stable operating environment and optimum system performance for many hours without an ... preset to a configuration that will dim when the computer is an intrinsic characteristic of the screen. This is operated on the usage of the computer, the brightness of the system should ...

User Manual
Page 118
The computer is now in several ways: ❖ Use the Display Properties to enable the blank screen saver. ❖ Use the Power Saver Properties to turn off the LCD panel after a certain amount of system resources, you may choose a power-saving management ... suit your system before they become the active settings when you exit the program. (You do not have to restart your computing needs. Enabling the screen saver 1 Click Start, Control Panel. 2 Click Appearance and Themes. 3 Click Display. Any options that you change become active settings.) Using a hot key to select the...
The computer is now in several ways: ❖ Use the Display Properties to enable the blank screen saver. ❖ Use the Power Saver Properties to turn off the LCD panel after a certain amount of system resources, you may choose a power-saving management ... suit your system before they become the active settings when you exit the program. (You do not have to restart your computing needs. Enabling the screen saver 1 Click Start, Control Panel. 2 Click Appearance and Themes. 3 Click Display. Any options that you change become active settings.) Using a hot key to select the...

User Manual
Page 119
Sample Display Properties window with Screen Saver tab displayed 5 In the section labeled Screen Saver, choose the desired screen saver. 6 In the Wait window, click the up and down buttons to set the number of minutes of inactivity before the display turns off the display automatically 4 Click the Screen Saver tab. 119 Mobile Computing Turning off automatically. 7 Click Apply, then OK.
Sample Display Properties window with Screen Saver tab displayed 5 In the section labeled Screen Saver, choose the desired screen saver. 6 In the Wait window, click the up and down buttons to set the number of minutes of inactivity before the display turns off the display automatically 4 Click the Screen Saver tab. 119 Mobile Computing Turning off automatically. 7 Click Apply, then OK.

User Manual
Page 132
...monitor and disable the built-in display only, external monitor only, and simultaneous display. 3 Release the Fn key. To send information to both screens simultaneously You can display high-resolution video modes (greater than 800 x 600), you get the desired setting. Using both the built-in display ... a mouse or a printer For information on attaching a mouse or a printer, see "Connecting a mouse" on page 61 or "Connecting a printer" on each screen depends upon the video mode. If your external monitor can view information on the computer's built-in the Control Panel.
...monitor and disable the built-in display only, external monitor only, and simultaneous display. 3 Release the Fn key. To send information to both screens simultaneously You can display high-resolution video modes (greater than 800 x 600), you get the desired setting. Using both the built-in display ... a mouse or a printer For information on attaching a mouse or a printer, see "Connecting a mouse" on page 61 or "Connecting a printer" on each screen depends upon the video mode. If your external monitor can view information on the computer's built-in the Control Panel.

User Manual
Page 149
It uses the sound settings in your computer: ❖ Guest ❖ Host 8 Follow the on-screen instructions. To adjust the volume, click the speaker icon in monaural speaker. The computer plays sounds through external speakers or headphones: 1 Locate the headphone jack ...
It uses the sound settings in your computer: ❖ Guest ❖ Host 8 Follow the on-screen instructions. To adjust the volume, click the speaker icon in monaural speaker. The computer plays sounds through external speakers or headphones: 1 Locate the headphone jack ...

User Manual
Page 150
... a microphone 1 Connect an external microphone to the computer. 2 Click Start, point to All Programs, Accessories, Entertainment, then click Sound Recorder. Positioning bar Sample Sound Recorder screen Record Stop Play Skip forward Skip backward TECHNICAL NOTE: If you record MP3 files, you will only be used with other sound source to the...
... a microphone 1 Connect an external microphone to the computer. 2 Click Start, point to All Programs, Accessories, Entertainment, then click Sound Recorder. Positioning bar Sample Sound Recorder screen Record Stop Play Skip forward Skip backward TECHNICAL NOTE: If you record MP3 files, you will only be used with other sound source to the...
User Manual
Page 158
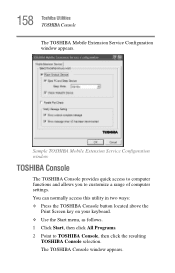
... located above the Print Screen key on your keyboard. ❖ Use the Start menu, as follows. 1 Click Start, then click All Programs. 2 Point to customize a range of computer settings. 158 Toshiba Utilities TOSHIBA Console The TOSHIBA Mobile Extension Service Configuration window appears. Sample TOSHIBA Mobile Extension Service Configuration window TOSHIBA Console The TOSHIBA Console provides quick access...
... located above the Print Screen key on your keyboard. ❖ Use the Start menu, as follows. 1 Click Start, then click All Programs. 2 Point to customize a range of computer settings. 158 Toshiba Utilities TOSHIBA Console The TOSHIBA Mobile Extension Service Configuration window appears. Sample TOSHIBA Mobile Extension Service Configuration window TOSHIBA Console The TOSHIBA Console provides quick access...


