
User Guide
Page 5
... repair or limited warranty information, please contact Toshiba Corporation, Toshiba America Information Systems, Inc. In order to make any person to use a computer or other entity, or individual. (The telephone number provided may not be necessary for which charges exceed local or long-distance transmission charges.) In order to program this information into your fax transmission, refer to the fax software instructions installed...
... repair or limited warranty information, please contact Toshiba Corporation, Toshiba America Information Systems, Inc. In order to make any person to use a computer or other entity, or individual. (The telephone number provided may not be necessary for which charges exceed local or long-distance transmission charges.) In order to program this information into your fax transmission, refer to the fax software instructions installed...
User Guide
Page 29
... Removing a memory module 56 Checking total memory 58 Hard Drive Recovery Utilities 59 Creating Recovery CDs/DVDs 59 Hard Disk Drive Recovery options 60 Hard Disk Drive Recovery using the Recovery media 65 Installing drivers and applications 66 Using the TouchPad 66 Scrolling with the TouchPad 67 Control buttons 67 Disabling or enabling the TouchPad 67 Using external display devices 67 Directing the display output when you turn on the computer 68 Adjusting the quality of the external display......69 Using an external keyboard 69 Using a mouse 69 Connecting a printer 70 Setting...
... Removing a memory module 56 Checking total memory 58 Hard Drive Recovery Utilities 59 Creating Recovery CDs/DVDs 59 Hard Disk Drive Recovery options 60 Hard Disk Drive Recovery using the Recovery media 65 Installing drivers and applications 66 Using the TouchPad 66 Scrolling with the TouchPad 67 Control buttons 67 Disabling or enabling the TouchPad 67 Using external display devices 67 Directing the display output when you turn on the computer 68 Adjusting the quality of the external display......69 Using an external keyboard 69 Using a mouse 69 Connecting a printer 70 Setting...
User Guide
Page 51
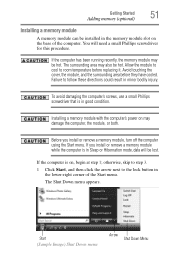
... damage the computer, the module, or both. Start (Sample Image) Shut Down menu Arrow Shut Down Menu Getting Started 51 Adding memory (optional) Installing a memory module A memory module can be hot. If the computer has been running recently, the memory module may also be installed in Sleep or Hibernation mode, data will need a small Phillips screwdriver for this procedure. If you install or remove a memory module, turn off the computer using the Start menu. To avoid damaging...
... damage the computer, the module, or both. Start (Sample Image) Shut Down menu Arrow Shut Down Menu Getting Started 51 Adding memory (optional) Installing a memory module A memory module can be hot. If the computer has been running recently, the memory module may also be installed in Sleep or Hibernation mode, data will need a small Phillips screwdriver for this procedure. If you install or remove a memory module, turn off the computer using the Start menu. To avoid damaging...
User Guide
Page 53
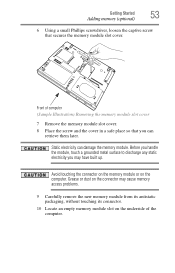
... memory module. Front of the computer. Getting Started 53 Adding memory (optional) 6 Using a small Phillips screwdriver, loosen the captive screw that you may cause memory access problems. 9 Carefully remove the new memory module from its antistatic packaging, without touching its connector. 10 Locate an empty memory module slot on the underside of computer (Sample Illustration) Removing the memory module slot cover 7 Remove the memory module slot cover. 8 Place the screw and the cover in a safe place so that secures the memory module slot cover...
... memory module. Front of the computer. Getting Started 53 Adding memory (optional) 6 Using a small Phillips screwdriver, loosen the captive screw that you may cause memory access problems. 9 Carefully remove the new memory module from its antistatic packaging, without touching its connector. 10 Locate an empty memory module slot on the underside of computer (Sample Illustration) Removing the memory module slot cover 7 Remove the memory module slot cover. 8 Place the screw and the cover in a safe place so that secures the memory module slot cover...
User Guide
Page 56
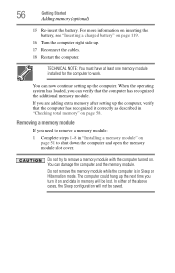
... remove a memory module with the computer turned on page 58. 56 Getting Started Adding memory (optional) 15 Re-insert the battery. For more information on inserting the battery, see "Inserting a charged battery" on page 51 to shut down the computer and open the memory module slot cover. The computer could hang up the next time you need to remove a memory module: 1 Complete steps 1-8 in Sleep or Hibernation mode. You can now continue setting...
... remove a memory module with the computer turned on page 58. 56 Getting Started Adding memory (optional) 15 Re-insert the battery. For more information on inserting the battery, see "Inserting a charged battery" on page 51 to shut down the computer and open the memory module slot cover. The computer could hang up the next time you need to remove a memory module: 1 Complete steps 1-8 in Sleep or Hibernation mode. You can now continue setting...

User Guide
Page 58
... the module is displayed below the System heading under Memory (RAM). The System window appears. 2 The total memory is inserted completely into the socket and lined up . 7 Reconnect the cables. 8 Restart the computer. 58 Getting Started Adding memory (optional) 4 Replace the memory module slot cover and secure it using the screw. 5 Re-insert the battery. This is a security feature to work. If you can check that says, "Windows® needs...
... the module is displayed below the System heading under Memory (RAM). The System window appears. 2 The total memory is inserted completely into the socket and lined up . 7 Reconnect the cables. 8 Restart the computer. 58 Getting Started Adding memory (optional) 4 Replace the memory module slot cover and secure it using the screw. 5 Re-insert the battery. This is a security feature to work. If you can check that says, "Windows® needs...
User Guide
Page 67
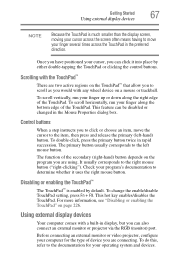
... determine whether it into place by default. To change the enable/disable TouchPad setting, press Fn + F9. This hot key enables/disables the TouchPad. Using external display devices Your computer comes with any wheel device on page 226. Getting Started 67 Using external display devices NOTE Because the TouchPad is enabled by either double-tapping the TouchPad or clicking the control buttons. This feature can click it uses the right mouse button. The primary button usually corresponds to move the...
... determine whether it into place by default. To change the enable/disable TouchPad setting, press Fn + F9. This hot key enables/disables the TouchPad. Using external display devices Your computer comes with any wheel device on page 226. Getting Started 67 Using external display devices NOTE Because the TouchPad is enabled by either double-tapping the TouchPad or clicking the control buttons. This feature can click it uses the right mouse button. The primary button usually corresponds to move the...
User Guide
Page 68
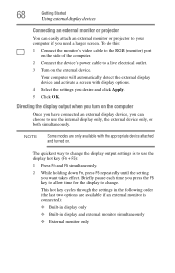
NOTE Some modes are available if an external monitor is to use the internal display only, the external device only, or both simultaneously. The quickest way to change . This hot key cycles through the settings in display and external monitor simultaneously ❖ External monitor only 68 Getting Started Using external display devices Connecting an external monitor or projector You can choose to use the display hot key (Fn + F5): 1 Press Fn and F5 simultaneously. 2 While holding down Fn, press F5...
NOTE Some modes are available if an external monitor is to use the internal display only, the external device only, or both simultaneously. The quickest way to change . This hot key cycles through the settings in display and external monitor simultaneously ❖ External monitor only 68 Getting Started Using external display devices Connecting an external monitor or projector You can choose to use the display hot key (Fn + F5): 1 Press Fn and F5 simultaneously. 2 While holding down Fn, press F5...
User Guide
Page 154
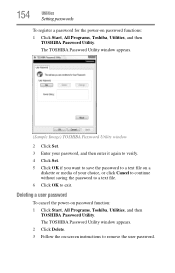
... Programs, Toshiba, Utilities, and then TOSHIBA Password Utility. The TOSHIBA Password Utility window appears. (Sample Image) TOSHIBA Password Utility window 2 Click Set. 3 Enter your choice, or click Cancel to continue without saving the password to a text file. 6 Click OK to exit. The TOSHIBA Password Utility window appears. 2 Click Delete. 3 Follow the on password functions: 1 Click Start, All Programs, Toshiba, Utilities, and then TOSHIBA Password Utility. 154 Utilities Setting passwords To register a password for the power-on -screen instructions to remove the user password.
... Programs, Toshiba, Utilities, and then TOSHIBA Password Utility. The TOSHIBA Password Utility window appears. (Sample Image) TOSHIBA Password Utility window 2 Click Set. 3 Enter your choice, or click Cancel to continue without saving the password to a text file. 6 Click OK to exit. The TOSHIBA Password Utility window appears. 2 Click Delete. 3 Follow the on password functions: 1 Click Start, All Programs, Toshiba, Utilities, and then TOSHIBA Password Utility. 154 Utilities Setting passwords To register a password for the power-on -screen instructions to remove the user password.
User Guide
Page 178
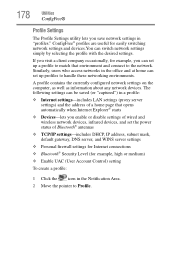
... settings can switch network settings simply by selecting the profile with the desired settings. A profile contains the currently configured network settings on the computer, as well as information about any network devices. ConfigFree® profiles are useful for example, high or medium) ❖ Enable UAC (User Account Control) setting To create a profile: 1 Click the icon in "profiles." 178 Utilities ConfigFree® Profile Settings The Profile Settings utility lets you enable or disable settings...
... settings can switch network settings simply by selecting the profile with the desired settings. A profile contains the currently configured network settings on the computer, as well as information about any network devices. ConfigFree® profiles are useful for example, high or medium) ❖ Enable UAC (User Account Control) setting To create a profile: 1 Click the icon in "profiles." 178 Utilities ConfigFree® Profile Settings The Profile Settings utility lets you enable or disable settings...

User Guide
Page 184
... model. To open the Startup menu: 1 Restart your computer. 2 Press F8 when your system's configuration or verify the startup procedure to start . ❖ The operating system responds differently from an AC adaptor that is rated for less current (amperage) than that the AC adaptor is the correct unit for each device. The Windows® Advanced Boot Options menu displays these problems, use the options in the Startup menu to start...
... model. To open the Startup menu: 1 Restart your computer. 2 Press F8 when your system's configuration or verify the startup procedure to start . ❖ The operating system responds differently from an AC adaptor that is rated for less current (amperage) than that the AC adaptor is the correct unit for each device. The Windows® Advanced Boot Options menu displays these problems, use the options in the Startup menu to start...
User Guide
Page 188
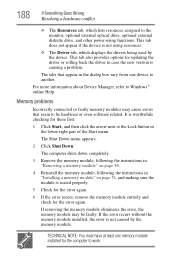
... monitor, optional external optical drive, optional external diskette drive, and other power-using resources. ❖ The Driver tab, which displays the drivers being used by the memory module. For more information about Device Manager, refer to the Lock button in the dialog box vary from one memory module installed for these first: 1 Click Start, and then click the arrow next to Windows® online Help. The computer shuts down completely. 3 Remove the memory module, following the instructions in "Removing a memory module...
... monitor, optional external optical drive, optional external diskette drive, and other power-using resources. ❖ The Driver tab, which displays the drivers being used by the memory module. For more information about Device Manager, refer to the Lock button in the dialog box vary from one memory module installed for these first: 1 Click Start, and then click the arrow next to Windows® online Help. The computer shuts down completely. 3 Remove the memory module, following the instructions in "Removing a memory module...
User Guide
Page 190
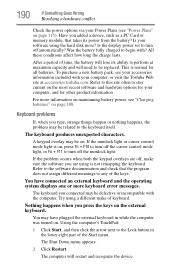
... the keys. Try using a different make sure the software you added a device, such as a PC Card or memory module, that the program does not assign different meanings to the keyboard itself. Keyboard problems If, when you type, strange things happen or nothing happens, the problem may be related to any of the Start menu. If the numlock light or cursor control mode light is on page 115). Is the display power set...
... the keys. Try using a different make sure the software you added a device, such as a PC Card or memory module, that the program does not assign different meanings to the keyboard itself. Keyboard problems If, when you type, strange things happen or nothing happens, the problem may be related to any of the Start menu. If the numlock light or cursor control mode light is on page 115). Is the display power set...
User Guide
Page 191
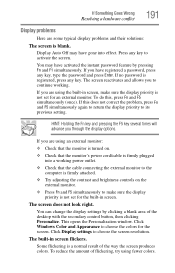
... Display problems Here are some typical display problems and their solutions: The screen is not set for the built-in screen. If you to continue working power outlet. ❖ Check that the cable connecting the external monitor to the computer is firmly attached. ❖ Try adjusting the contrast and brightness controls on . ❖ Check that the monitor is turned on the external monitor. ❖ Press Fn and F5 simultaneously to make...
... Display problems Here are some typical display problems and their solutions: The screen is not set for the built-in screen. If you to continue working power outlet. ❖ Check that the cable connecting the external monitor to the computer is firmly attached. ❖ Try adjusting the contrast and brightness controls on . ❖ Check that the monitor is turned on the external monitor. ❖ Press Fn and F5 simultaneously to make...
User Guide
Page 199
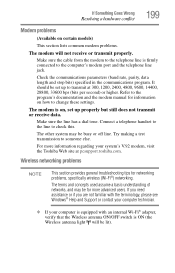
... modem manual for information on , set up properly but still does not transmit or receive data. Make sure the cable from the modem to the telephone line is firmly connected to someone else. It should be for networking problems, specifically wireless (Wi-Fi®) networking. Try making a test transmission to the computer's modem port and the telephone line jack. The terms and concepts used...
... modem manual for information on , set up properly but still does not transmit or receive data. Make sure the cable from the modem to the telephone line is firmly connected to someone else. It should be for networking problems, specifically wireless (Wi-Fi®) networking. Try making a test transmission to the computer's modem port and the telephone line jack. The terms and concepts used...
User Guide
Page 238
... to the surface of keys that activates a memory resident program. See device. It is running and have the operating system automatically recognize the change. A method of refreshing a computer screen, in which certain keys in combination with any device to interact with the Fn key can set system options or control system parameters, such as the battery save mode. (2) A key or combination of the display, creating light and dark pixels...
... to the surface of keys that activates a memory resident program. See device. It is running and have the operating system automatically recognize the change. A method of refreshing a computer screen, in which certain keys in combination with any device to interact with the Fn key can set system options or control system parameters, such as the battery save mode. (2) A key or combination of the display, creating light and dark pixels...
User Guide
Page 244
... 87 battery changing 117 charge indicator light 47, 110 charge not lasting 189 charging 45, 47 conserving power 114 disposal 122 low charge 112 monitoring power 47, 110 244 not charging 189 notification 113 power plan 220 power plan hot key 116 real-time clock (RTC) 107 removing 117 BIOS Setup see TOSHIBA Hardware Setup Bridge Media Adapter inserting memory media 141 removing memory media 142 button power 50, 60 start 126 C CD creating 103 playing an audio 101 CD, using 97 character keys 88 charging the battery...
... 87 battery changing 117 charge indicator light 47, 110 charge not lasting 189 charging 45, 47 conserving power 114 disposal 122 low charge 112 monitoring power 47, 110 244 not charging 189 notification 113 power plan 220 power plan hot key 116 real-time clock (RTC) 107 removing 117 BIOS Setup see TOSHIBA Hardware Setup Bridge Media Adapter inserting memory media 141 removing memory media 142 button power 50, 60 start 126 C CD creating 103 playing an audio 101 CD, using 97 character keys 88 charging the battery...
User Guide
Page 245
... connecting to a power source 45 connection set up 128 control buttons 67 Ctrl keys 89 D desktop creating new icon 125 major features 125 desktop exploration 124 desktop icons 125 Device Manager 187 checking properties 187 devices keyboard 69 mouse 69 Disk Defragmenter 193 disk drive corrupted/damaged data files 194 missing files/trouble accessing a disk 193 running slow 193 diskette drive cannot insert a diskette 194 cannot read a diskette 194 connecting 71 external, connecting 71 display...
... connecting to a power source 45 connection set up 128 control buttons 67 Ctrl keys 89 D desktop creating new icon 125 major features 125 desktop exploration 124 desktop icons 125 Device Manager 187 checking properties 187 devices keyboard 69 mouse 69 Disk Defragmenter 193 disk drive corrupted/damaged data files 194 missing files/trouble accessing a disk 193 running slow 193 diskette drive cannot insert a diskette 194 cannot read a diskette 194 connecting 71 external, connecting 71 display...
User Guide
Page 246
... and Support Windows® operating system 186 Hibernation mode 73 configuring 77 starting again from 79 hot key display brightness 224 display modes 223 Hibernation mode 222 keyboard overlays 228 Optical disk drive 218 password security 219 power plan 220 Sleep mode 221 volume mute 217 zooming 228 Hot Key Cards 212 Hot key functions 216 hot key power plan 116 http 130 I i.LINK port 144 icon 125 desktop 125 moving to desktop 125 recycle bin 125 safety 38 installation memory module 51 installing memory modules 50 mouse...
... and Support Windows® operating system 186 Hibernation mode 73 configuring 77 starting again from 79 hot key display brightness 224 display modes 223 Hibernation mode 222 keyboard overlays 228 Optical disk drive 218 password security 219 power plan 220 Sleep mode 221 volume mute 217 zooming 228 Hot Key Cards 212 Hot key functions 216 hot key power plan 116 http 130 I i.LINK port 144 icon 125 desktop 125 moving to desktop 125 recycle bin 125 safety 38 installation memory module 51 installing memory modules 50 mouse...
User Guide
Page 247
... monitor 67 connecting 68 not working 191 mouse installing 69 serial 69 mouse utility 161 N network accessing 128 Dial-Up Networking Wizard 128 networking wireless 127 Notification Area 126 O opening the display panel 48 optical disc positioning 100 optical discs handling 101 inserting 100 removing 103, 104 optical drive problems 194 troubleshooting 194 other documentation 39 overlay keys 90 P password disabling a user 154 setting a user 153 types 153 passwords instant, using 153 setting 153 PC Card checklist 196 computer stops working 197 configuring 140 errors 198 hot...
... monitor 67 connecting 68 not working 191 mouse installing 69 serial 69 mouse utility 161 N network accessing 128 Dial-Up Networking Wizard 128 networking wireless 127 Notification Area 126 O opening the display panel 48 optical disc positioning 100 optical discs handling 101 inserting 100 removing 103, 104 optical drive problems 194 troubleshooting 194 other documentation 39 overlay keys 90 P password disabling a user 154 setting a user 153 types 153 passwords instant, using 153 setting 153 PC Card checklist 196 computer stops working 197 configuring 140 errors 198 hot...


