
User Guide
Page 20
... could cause bodily injury, property damage, or damage to find specific information. Safety icons All of the Safety instructions contained in this Manual have been categorized according to the seriousness of contents and the index to the device. ❖ The Safety Instructions contained in death or... if not avoided, may result in death or serious injury. Indicates a potentially hazardous situation which , if not avoided, will result in this manual must be read carefully and be fully understood before you . ❖ Use the table of the potential hazards, through and stop when a ...
... could cause bodily injury, property damage, or damage to find specific information. Safety icons All of the Safety instructions contained in this Manual have been categorized according to the seriousness of contents and the index to the device. ❖ The Safety Instructions contained in death or... if not avoided, may result in death or serious injury. Indicates a potentially hazardous situation which , if not avoided, will result in this manual must be read carefully and be fully understood before you . ❖ Use the table of the potential hazards, through and stop when a ...
User Guide
Page 43
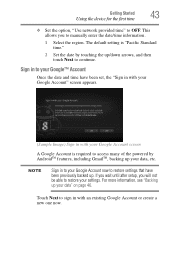
... your Google Account screen A Google Account is required to access many of the powered by touching the up/down arrows, and then touch Next to manually enter the date/time information. 1 Select the region. Touch Next to OFF. If you wait until after setup, you to continue. The default setting is...
... your Google Account screen A Google Account is required to access many of the powered by touching the up/down arrows, and then touch Next to manually enter the date/time information. 1 Select the region. Touch Next to OFF. If you wait until after setup, you to continue. The default setting is...
User Guide
Page 77
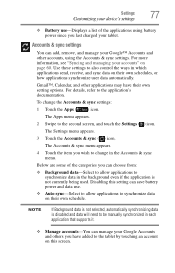
..., automatically synchronizing data is not currently being used. To change in the background even if the application is disabled and data will need to be manually synchronized in which applications send, receive, and sync data on their own schedules, or how applications synchronize user data automatically. Settings 77 Customizing your device...
..., automatically synchronizing data is not currently being used. To change in the background even if the application is disabled and data will need to be manually synchronized in which applications send, receive, and sync data on their own schedules, or how applications synchronize user data automatically. Settings 77 Customizing your device...
User Guide
Page 83
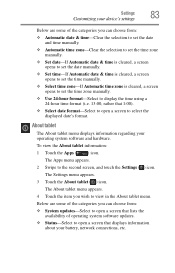
...Automatic date & time-Clear the selection to set the date and time manually. ❖ Automatic time zone-Clear the selection to set the time zone manually. ❖ Set date-If Automatic date & time is cleared, a screen opens to set the date manually. ❖ Set time-If Automatic date & time is cleared, a ...screen opens to set the time manually. ❖ Select time zone-If Automatic time zone is cleared, a screen opens to set the time zone manually. ❖ Use 24-hour format-Select to display the time using a 24-hour time format (i.e. 13:00...
...Automatic date & time-Clear the selection to set the date and time manually. ❖ Automatic time zone-Clear the selection to set the time zone manually. ❖ Set date-If Automatic date & time is cleared, a screen opens to set the date manually. ❖ Set time-If Automatic date & time is cleared, a ...screen opens to set the time manually. ❖ Select time zone-If Automatic time zone is cleared, a screen opens to set the time zone manually. ❖ Use 24-hour format-Select to display the time using a 24-hour time format (i.e. 13:00...
User Guide
Page 95
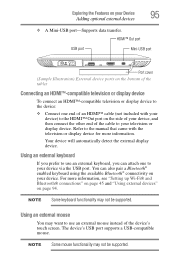
... Features on the side of your device, and then connect the other end of the cable to your television or display device. Refer to the manual that came with your device) to the HDMI™ Out port on your Device 95 Adding optional external devices ❖ A Mini-USB port-Supports data...
... Features on the side of your device, and then connect the other end of the cable to your television or display device. Refer to the manual that came with your device) to the HDMI™ Out port on your Device 95 Adding optional external devices ❖ A Mini-USB port-Supports data...
User Guide
Page 96
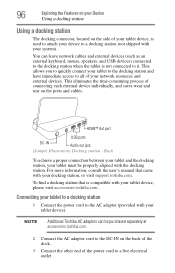
...station 1 Connect the power cord to the AC adaptor (provided with your docking station, or visit support.toshiba.com. For more information, consult the user's manual that is compatible with the docking station. This eliminates the time-consuming process of your network resources and ...external devices. NOTE Additional Toshiba AC adaptors can leave network cables and external devices (such as an external ...
...station 1 Connect the power cord to the AC adaptor (provided with your docking station, or visit support.toshiba.com. For more information, consult the user's manual that is compatible with the docking station. This eliminates the time-consuming process of your network resources and ...external devices. NOTE Additional Toshiba AC adaptors can leave network cables and external devices (such as an external ...
User Guide
Page 100
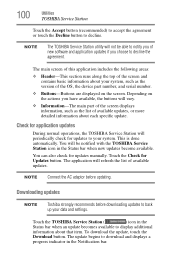
... updates. Depending on the screen. The application will periodically check for updates manually. To download the update, touch the Download button. Downloading updates NOTE Toshiba strongly recommends before updating. Touch the TOSHIBA Service Station ( ) icon in the Status bar when new updates become ... is done automatically. The update begins to decline. Check for application updates During normal operations, the TOSHIBA Service Station will refresh the list of available updates, or more detailed information about that item. Touch the Check for Updates button...
... updates. Depending on the screen. The application will periodically check for updates manually. To download the update, touch the Download button. Downloading updates NOTE Toshiba strongly recommends before updating. Touch the TOSHIBA Service Station ( ) icon in the Status bar when new updates become ... is done automatically. The update begins to decline. Check for application updates During normal operations, the TOSHIBA Service Station will refresh the list of available updates, or more detailed information about that item. Touch the Check for Updates button...


