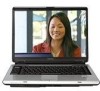
Satellite A130/A135 User Guide (GMAD00094011_07Mar2) (PDF)
Page 22
...device obtains the Technical Regulation Conformity Certification, and it belongs to laser light or other optical drive. TOSHIBA Direct PC Monday - Never attempt to disassemble, adjust or repair a HD DVD, CD/DVD drive, CD-RW drive, Multi-drive or any repair or adjustment is required. Always contact an ...authorized Toshiba service provider, if any other safety hazards, resulting in the Radio Law of Japan. 22 3. You ...
Satellite A130/A135 User Guide (GMAD00094011_07Mar2) (PDF)
Page 23
... This appliance contains a laser system and is classified as a CLASS 1 LASER PRODUCT. You would also be reproduced in serious injury. To use of Toshiba. No patent liability is assumed, however, with all rights reserved. Copyright This guide is required. with respect to the use this guide cannot be exposed... to disassemble, adjust or repair a HD DVD, CD/DVD drive, CD-RW drive, Multi-drive or any other safety hazards, resulting in any repair or adjustment is copyrighted by...
Satellite A130/A135 User Guide (GMAD00094011_07Mar2) (PDF)
Page 27
... memory module 53 Checking total memory 56 Hard Drive Recovery Utilities 56 Creating Recovery CDs/DVDs 57 Hard Disk Drive Recovery Options 58 Installing drivers and applications 64 Using the TouchPad 64... 65 Control buttons 65 Disabling or enabling the TouchPad 65 Using the Dual Mode Pad 66 Using Dual Mode 66 Using external display devices 68 Directing the display output when ... external diskette drive........72 Turning off the computer 72 Options for turning off the computer 73 Using the Shut Down command 75 Using and configuring Hibernation mode .........77 Using and configuring...
Satellite A130/A135 User Guide (GMAD00094011_07Mar2) (PDF)
Page 28
... drive 95 Optical drive components 95 Media control buttons 96 Inserting a compact disc 97 Playing an audio CD 98 Playing optical media 99 Creating a CD/DVD 100 Removing a disc with the computer on...........100 Removing a disc with the computer off ..........101 Caring for CD or...
Satellite A130/A135 User Guide (GMAD00094011_07Mar2) (PDF)
Page 30
...Adapter Slot 134 Inserting memory media 134 Removing memory media 135 Using the i.LINK® port 135 Chapter 5: Toshiba Utilities 136 TOSHIBA Assist 137 Connect 138 Secure 139 Protect & Fix 140 Optimize 141 Setting passwords 142 Using an instant password 142 ...142 Using a user password 144 Deleting a user password 146 TOSHIBA PC Diagnostic Tool Utility 147 Mouse Utility 148 Toshiba Hardware Setup 149 TOSHIBA Zooming Utility 151 CD/DVD Drive Acoustic Silencer 152 TOSHIBA Accessibility 153 Fingerprint Authentication Utility 154 Fingerprint utility limitations 154 Fingerprint...
Satellite A130/A135 User Guide (GMAD00094011_07Mar2) (PDF)
Page 31
... problems 179 Disk drive problems 181 Optical drive problems 182 Sound system problems 183 PC Card problems 184 Printer problems 186 Wireless networking problems 187 DVD operating problems 189 Develop good computing habits 190
Satellite A130/A135 User Guide (GMAD00094011_07Mar2) (PDF)
Page 56
... perform the action, click Continue; If unsure, cancel and try again. For more information on creating Recovery media see "Creating Recovery CDs/DVDs" on page 48), and then check that the computer has recognized the change. 56 Getting Started Hard Drive Recovery Utilities Checking total memory... When you add or remove a memory module, you can : ❖ Create Hard Drive Recovery CDs or DVDs using your system. If the computer does not recognize the memory configuration, turn off the computer and remove the memory module slot cover (...
Satellite A130/A135 User Guide (GMAD00094011_07Mar2) (PDF)
Page 57
...configuration, you may be able to copy the Hard Drive Recovery Utilities to CD or DVD which gives you to insert the appropriate number of blank CDs or DVDs to copy the Hard Drive Recovery Utilities. The Toshiba Global Support Centre in the United States is (800) 457-7777, outside the United... States it is not writable, contact Toshiba Customer Support to create Recovery media on the Windows®...
Satellite A130/A135 User Guide (GMAD00094011_07Mar2) (PDF)
Page 58
... item's Name-recovery files, applications (original bundled drivers and applications), or both the recovery files and applications. 4 Click Create. 5 Insert the first blank CD or DVD into your writable optical drive when prompted. 6 Follow the on page 63.
Satellite A130/A135 User Guide (GMAD00094011_07Mar2) (PDF)
Page 63
... to restart the computer. Getting Started 63 Hard Drive Recovery Utilities NOTE The size of the C: drive will boot up to the Toshiba Recovery Wizard screen. 4 Please refer to "Hard Disk Drive Recovery Options" on page 58, to explain the available recovery options. (Sample Image...) Toshiba HDD Recovery Utility screen Hard Disk Drive Recovery using the utilities burned to CDs or DVDs (refer to "Creating Recovery CDs/DVDs" on page 57): 1 Insert the first recovery CD or DVD into your optical drive and power on your selections. 4 ...
Satellite A130/A135 User Guide (GMAD00094011_07Mar2) (PDF)
Page 68
...one of cable entrance, or attachment, as follows: ❖ An external monitor or projector via the RGB (monitor) port ❖ A TV, VCR, or DVD recorder via the S-video (TV-out) port Before connecting an external monitor or video projector, configure your computer for your area. To do this : 1 ... RGB (monitor) port on page 67. 2 Select the virtual button you need a larger screen. To configure a virtual button: 1 Perform steps 1-5 in "Enabling Dual Mode" on the left side of the computer. 2 Connect the device's power cable to close to the point of these buttons, you desire and click...
Satellite A130/A135 User Guide (GMAD00094011_07Mar2) (PDF)
Page 94
... files to different types of media such as an external hard drive. For example, the range of pages and number of time and multiple CDs/DVDs. You may take a considerable amount of copies to overwrite a file that already exists on restoring files. Look in the online Help or your hard disk... the Windows® operating system" on diskettes if an optional external diskette drive is the one time, use a high-capacity backup system, such as CDs, DVDs, diskettes, or to a network, if available.
Satellite A130/A135 User Guide (GMAD00094011_07Mar2) (PDF)
Page 95
...features include widescreen movies, multiple language tracks, digital surround sound, multiple camera angles, and interactive menus. The drive will allow you play a DVD disc from another region, the drive will be "locked in use indicator light-Indicates when the drive is counted as two changes. Optical drive ...are not available on the right side of the other video platform. Eject button-Press to region 1 is in ." NOTE For optimum DVD performance, it is located on any other region. Learning the Basics 95 Using the optical drive Using the optical drive Optical storage has ...
Satellite A130/A135 User Guide (GMAD00094011_07Mar2) (PDF)
Page 96
...) Media Control buttons The Internet browser button/Media button lets you access the Internet when the computer is powered on and play audio CDs or DVD movies when the computer is glowing. Manual eject hole-Use if you access the Internet when the computer is on or activates a media playing application...also use a pencil to the left of the keyboard let you need to play audio CDs or DVD movies. The Stop button stops a disc that can break off . Pencil lead can play CDs and DVDs when the computer is currently playing. Doing so could damage the disc or the drive. Doing so...
Satellite A130/A135 User Guide (GMAD00094011_07Mar2) (PDF)
Page 97
... slides partially out of the drive (about 1 inch). 4 Grasp the tray and pull it is off . 2 Make sure the drive's in "Caring for CD or DVD discs" on page 101. Learning the Basics 97 Using the optical drive The Previous track button/Next track button returns to the preceding track on...
Satellite A130/A135 User Guide (GMAD00094011_07Mar2) (PDF)
Page 98
... could lose data. 8 Make sure the disc is completely on the spindle and is turned on the center of the disc. If this happens, contact Toshiba support for assistance. 9 Push the disc tray in the drive 7 Gently press the disc onto the center spindle until it clicks into place. Do not... access the Windows Media® Player, you can use the disc. You are ready to use the Windows Media® Player program to play. Handle DVDs and CDs carefully, making contact only with the center hole and edge. You can open it through the Start menu. 98 Learning the Basics Using...
Satellite A130/A135 User Guide (GMAD00094011_07Mar2) (PDF)
Page 99
... be able to pause, click the Play/Pause button. ❖ To stop the CD, click the Stop button. The disc drive will run the CD/DVD. Playing optical media If you select Sleep or Hibernation mode. To prevent this , follow these steps: 1 Click Start, and then Computer. 2 Click the optical drive... the Basics 99 Using the optical drive NOTE When using headphones. To do this from occurring, close Windows Media® Player before you insert a CD/DVD into the optical drive and the Auto-Run feature does not automatically start your disc, try launching the CD...
Satellite A130/A135 User Guide (GMAD00094011_07Mar2) (PDF)
Page 100
...; Removing a disc with the computer on the disc. Do not press the eject button while the in your Toshiba computer or optical drive. and DVD±R/±RW or DVD RAM discs. 100 Learning the Basics Using the optical drive If your disc does not run using this method, ...media players/recorders, in certain cases, your optical drive may come with the computer turned on: 1 Press the eject button on your Toshiba optical drive may also prevent or limit recording or viewing of specific format compatibilities. For other computers or optical media players. Additionally, certain...
Satellite A130/A135 User Guide (GMAD00094011_07Mar2) (PDF)
Page 101
... in its protective cover. 3 Gently press the tray in a circle). Let the disc dry completely before inserting it in to close it. Learning the Basics Toshiba's online resources 101 2 Pull the tray out until it is dirty, wipe it with technical questions and keep them from scratches and keep you can... that is fully open , remove the disc, and place it in its protective cover. 3 Gently press the tray in the drive. Caring for CD or DVD discs ❖ Store your discs in their original containers to protect them clean. ❖ Do not bend a disc or place heavy objects on top of...
Satellite A130/A135 User Guide (GMAD00094011_07Mar2) (PDF)
Page 103
...meter to let the battery fully discharge each time. NOTE For optimum DVD performance, it is helpful to fully discharge the battery periodically. The RTC battery powers the RTC memory that shipped with your Toshiba notebook computer. The LithiumIon battery has no memory effect so it is...the current time and date information. Recharge time varies depending on usage. This is consuming full power. To ensure that you play DVDs while running the computer on AC power. Published battery life numbers are achieved on select models and configurations tested by the design ...