
Brochure
Page 1
...blacks and more colors, finer details, less visual noise and brighter, realistic pictures. Easily connect your PC to monitor brightness and automatically adjusts backlight intensity. Versatile Connectivity Offering a full jack pack of Toshiba quality and reliability. 40E220U LCD HDTV Step up to Full HD, and full value for your ...dollar When you see the clear, crisp, 1080p Full HD2 resolution and deep colors on this TV, you'll wonder why you see more detail. The 40" E220U is set automatically...
...blacks and more colors, finer details, less visual noise and brighter, realistic pictures. Easily connect your PC to monitor brightness and automatically adjusts backlight intensity. Versatile Connectivity Offering a full jack pack of Toshiba quality and reliability. 40E220U LCD HDTV Step up to Full HD, and full value for your ...dollar When you see the clear, crisp, 1080p Full HD2 resolution and deep colors on this TV, you'll wonder why you see more detail. The 40" E220U is set automatically...
User Guide
Page 11
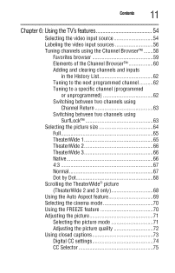
... or unprogrammed 62 Switching between two channels using Channel Return 63 Switching between two channels using Surf LockTM 63 Selecting the picture size 64 Full 65 TheaterWide 1 65 TheaterWide 2 66 TheaterWide 3 66 Native 66 4:3 67 Normal 67 Dot by Dot 68 Scrolling ...the TheaterWide ® picture (TheaterWide 2 and 3 only 68 Using the Auto Aspect feature 69 Selecting the cinema mode 70 Using the FREEZEfeature 70 Adjusting the picture 71 Selecting the picture mode 71 Adjusting the picture quality 72 Using closed captions 73 Digital CC settings 74 CC Selector 75...
... or unprogrammed 62 Switching between two channels using Channel Return 63 Switching between two channels using Surf LockTM 63 Selecting the picture size 64 Full 65 TheaterWide 1 65 TheaterWide 2 66 TheaterWide 3 66 Native 66 4:3 67 Normal 67 Dot by Dot 68 Scrolling ...the TheaterWide ® picture (TheaterWide 2 and 3 only 68 Using the Auto Aspect feature 69 Selecting the cinema mode 70 Using the FREEZEfeature 70 Adjusting the picture 71 Selecting the picture mode 71 Adjusting the picture quality 72 Using closed captions 73 Digital CC settings 74 CC Selector 75...
User Guide
Page 13
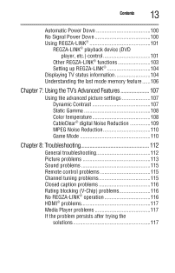
General troubleshooting 112 Picture problems 113 Sound problems 115 Remote control problems 115 Channel tuning problems 115 Closed caption problems 116 Rating blocking (V-Chip) problems 116 No REGZA-LINK&#...; playback device (DVD player, etc.) control 101 Other REGZA-LINK® functions 103 Setting up REGZA-LINK 104 Displaying TV status information 104 Understanding the last mode memory feature ...... 106 Chapter7: Usingthe TV'sAdvancedFeatures 1..07 Using the advanced picture settings 107 Dynamic Contrast 107 Static Gamma 108 Color temperature 108 CableClear® digital...
General troubleshooting 112 Picture problems 113 Sound problems 115 Remote control problems 115 Channel tuning problems 115 Closed caption problems 116 Rating blocking (V-Chip) problems 116 No REGZA-LINK&#...; playback device (DVD player, etc.) control 101 Other REGZA-LINK® functions 103 Setting up REGZA-LINK 104 Displaying TV status information 104 Understanding the last mode memory feature ...... 106 Chapter7: Usingthe TV'sAdvancedFeatures 1..07 Using the advanced picture settings 107 Dynamic Contrast 107 Static Gamma 108 Color temperature 108 CableClear® digital...

User Guide
Page 16
...for future reference. 2 To choose a location for the TV: Read "Important notes about your new Toshiba TV: o:o Integrated digital tuning (SVSB ATSC and QAM)-Eliminates the need for a separate digital converter set up your TV and begin using its many exciting features of your LCD TV" on page 92.... Secure the TV to view photo files and play music, see "Using the Media Player" on page 7. olo ColorStream --digital picture Noise Reduction, see page 4. o}o...
...for future reference. 2 To choose a location for the TV: Read "Important notes about your new Toshiba TV: o:o Integrated digital tuning (SVSB ATSC and QAM)-Eliminates the need for a separate digital converter set up your TV and begin using its many exciting features of your LCD TV" on page 92.... Secure the TV to view photo files and play music, see "Using the Media Player" on page 7. olo ColorStream --digital picture Noise Reduction, see page 4. o}o...
User Guide
Page 33
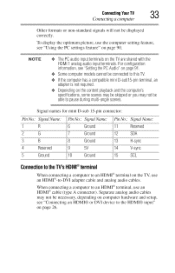
... displayed correctly. When connecting a computer to an HDMI _9terminal, use an HDMI+O-to-DVI adapter cable and analog audio cables. To display the optimum picture, use the computer setting feature, see "Connecting an HDMI® or DVI device to an HDMF >terminal on page 26. Signal names for mini D-sub 15-pin... TV, use an HDMI +_cable (type A connector). Separate analog audio cables may not be necessary, depending on computer hardware and setup, see "Using the PC settings feature" on page91. •:. ConnectinYgourTV (_mnecfing a computer ____ %,,!%,,!
... displayed correctly. When connecting a computer to an HDMI _9terminal, use an HDMI+O-to-DVI adapter cable and analog audio cables. To display the optimum picture, use the computer setting feature, see "Connecting an HDMI® or DVI device to an HDMF >terminal on page 26. Signal names for mini D-sub 15-pin... TV, use an HDMI +_cable (type A connector). Separate analog audio cables may not be necessary, depending on computer hardware and setup, see "Using the PC settings feature" on page91. •:. ConnectinYgourTV (_mnecfing a computer ____ %,,!%,,!
User Guide
Page 38
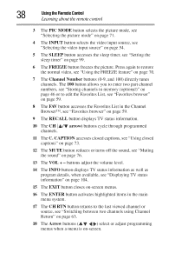
.... 11 The C. CAPTION accesses closed captions, see "Using closed captions" on page 73. 12 The MUTE button reduces or turns off the sound, see "Setting the sleep timer" on page 99. 6 The FREEZE button freezes the picture. 8 Usingthe Remote Control Learning about the remote cont/vl 3 The PIC MODE button selects the... picture mode, see "Selecting the picture mode" on page 71. 4 The INPUT button selects the video input source, see "Selecting the video input source" on page 54. 5 The SLEEP button accesses ...
.... 11 The C. CAPTION accesses closed captions, see "Using closed captions" on page 73. 12 The MUTE button reduces or turns off the sound, see "Setting the sleep timer" on page 99. 6 The FREEZE button freezes the picture. 8 Usingthe Remote Control Learning about the remote cont/vl 3 The PIC MODE button selects the... picture mode, see "Selecting the picture mode" on page 71. 4 The INPUT button selects the video input source, see "Selecting the video input source" on page 54. 5 The SLEEP button accesses ...
User Guide
Page 64
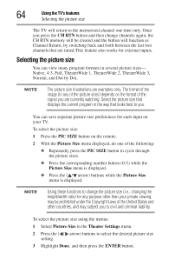
To select the picture size using the menus: 1 Select Picture Size in the Theater Settings menu. 2 Press the (4/!1_ arrow) buttons to cycle through the picture sizes. NOTE Thepicturesizeillustrationsare exampleosnly.Theformatofthe image(in several picture sizes-Native, 4:3, Full, TheaterWide 1, TheaterWide 2, TheaterWide 3, Normal, and Dot by switching ... memorized channel one of the following: o**o Repeatedly press the PIC SIZE button to select the desired picture size setting. 3 Highlight Done, and then press the ENTER button. o**o Press the corresponding number button (0-5) while the...
To select the picture size using the menus: 1 Select Picture Size in the Theater Settings menu. 2 Press the (4/!1_ arrow) buttons to cycle through the picture sizes. NOTE Thepicturesizeillustrationsare exampleosnly.Theformatofthe image(in several picture sizes-Native, 4:3, Full, TheaterWide 1, TheaterWide 2, TheaterWide 3, Normal, and Dot by switching ... memorized channel one of the following: o**o Repeatedly press the PIC SIZE button to select the desired picture size setting. 3 Highlight Done, and then press the ENTER button. o**o Press the corresponding number button (0-5) while the...
User Guide
Page 65
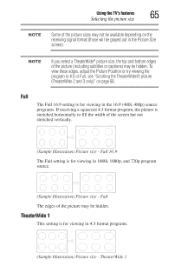
...)maybe hidden.To viewtheseedges,adjustthePicturePositionor try viewingthe programin 4:3 or Full, see"ScrollingtheTheaterWide®picture (TheaterWid2eand3 only)"on page68. UsingtheTV'sfeatures 65 Selecting the picture size NOTE Someofthe picturesizesmaynot beavailabledependingon the receivingsignalformat(thosewill begrayedoutin thePictureSize screen). Full The Full 16:9 setting is for viewing in the 16:9 (480i, 480p) source programs. If receiving a squeezed...
...)maybe hidden.To viewtheseedges,adjustthePicturePositionor try viewingthe programin 4:3 or Full, see"ScrollingtheTheaterWide®picture (TheaterWid2eand3 only)"on page68. UsingtheTV'sfeatures 65 Selecting the picture size NOTE Someofthe picturesizesmaynot beavailabledependingon the receivingsignalformat(thosewill begrayedoutin thePictureSize screen). Full The Full 16:9 setting is for viewing in the 16:9 (480i, 480p) source programs. If receiving a squeezed...
User Guide
Page 66
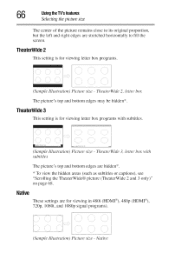
... hidden areas (such as subtitles or captions), see "Scrolling the TheaterWide® picture (TheaterWide 2 and 3 only)" on page 68. Native IiiTi!.i.!.•i..i.i.i.i!iiil (Sample Illustration) Picture size - TheaterWide 2, letter box The picture's top and bottom edges may be hidden*. TheaterWifle3 This setting is for viewing letter box programs. (Sample Illustration) Pictutz_ size - TheaterWide2 This...
... hidden areas (such as subtitles or captions), see "Scrolling the TheaterWide® picture (TheaterWide 2 and 3 only)" on page 68. Native IiiTi!.i.!.•i..i.i.i.i!iiil (Sample Illustration) Picture size - TheaterWide 2, letter box The picture's top and bottom edges may be hidden*. TheaterWifle3 This setting is for viewing letter box programs. (Sample Illustration) Pictutz_ size - TheaterWide2 This...
User Guide
Page 70
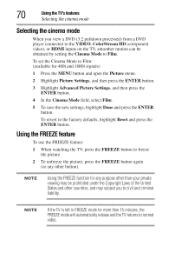
...TV, smoother motion can be obtained by setting the Cinema Mode to Film: (available for 480i and 1080i signals) 1 Press the MENU button and open the Picture menu. 2 Highlight Picture Settings, and then press the ENTER button. 3 Highlight Advanced Picture Settings, and then press the ENTER button. 4... In the Cinema Mode field, select Film. 5 To save the new settings, highlight Done and press the ENTER button. ...
...TV, smoother motion can be obtained by setting the Cinema Mode to Film: (available for 480i and 1080i signals) 1 Press the MENU button and open the Picture menu. 2 Highlight Picture Settings, and then press the ENTER button. 3 Highlight Advanced Picture Settings, and then press the ENTER button. 4... In the Cinema Mode field, select Film. 5 To save the new settings, highlight Done and press the ENTER button. ...
User Guide
Page 71
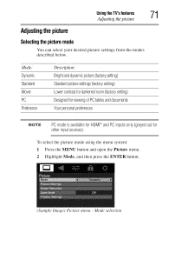
Brighat nddynamicpicture(factorysetting) Standardpicturesettings(factorysetting) Lowecr ontrasftordarkenedroom(factorysetting) DesignefdorviewingofPCtablesanddocuments Yourpersonaplreferences NOTE PC mode is available for HDMI Dynamic Standard Movie PC Preference Description." UsingtheTV'sfeatures "71 Adjusting the picture // Adjustingthe picture Selectingthe picturemode You can select your desired picture settings from the modes described below. Mode.
Brighat nddynamicpicture(factorysetting) Standardpicturesettings(factorysetting) Lowecr ontrasftordarkenedroom(factorysetting) DesignefdorviewingofPCtablesanddocuments Yourpersonaplreferences NOTE PC mode is available for HDMI Dynamic Standard Movie PC Preference Description." UsingtheTV'sfeatures "71 Adjusting the picture // Adjustingthe picture Selectingthe picturemode You can select your desired picture settings from the modes described below. Mode.
User Guide
Page 72
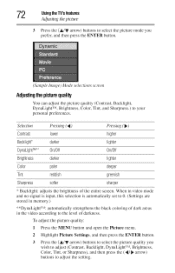
...), and then press the (4/_ arrow) buttons to your personal preferences. To adjust the picture quality: 1 Press the MENU button and open the Picture menu. 2 Highlight Picture Settings, and then press the ENTER button. 3 Press the (&/y arrow) buttons to select the picture quality you prefer, and then press the ENTER button. (Sanq)le Image) Mode selections...
...), and then press the (4/_ arrow) buttons to your personal preferences. To adjust the picture quality: 1 Press the MENU button and open the Picture menu. 2 Highlight Picture Settings, and then press the ENTER button. 3 Press the (&/y arrow) buttons to select the picture quality you prefer, and then press the ENTER button. (Sanq)le Image) Mode selections...

User Guide
Page 73
... translation of information not related to the current program, such as a starting point for adjusting the picture settings. UsingtheTV'sfeatures 7_ Using closed caption mode, and then press the EXIT button. The picture qualities you began adjusting the picture settings from, highlight Reset, and then press the ENTER button. Usingclosedcaptions Closed caption mode has two...
... translation of information not related to the current program, such as a starting point for adjusting the picture settings. UsingtheTV'sfeatures 7_ Using closed caption mode, and then press the EXIT button. The picture qualities you began adjusting the picture settings from, highlight Reset, and then press the ENTER button. Usingclosedcaptions Closed caption mode has two...
User Guide
Page 107
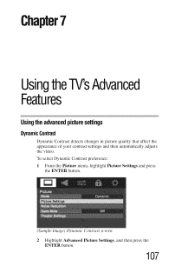
To select Dynamic Contrast preference: 1 From the Picture menu, highlight Picture Settings and press the ENTER button. (Sample Image) Dynamic Contras't screen Highlight Advanced Picture Settings, and then press the ENTER button. 107 Chapte7r UsingtheTV'sAdvanced Features Usingthe advancedpicturesettings DynamicContrast Dynamic Contrast detects changes in picture quality that affect the appearance of your contrast settings and then automatically adjusts the video.
To select Dynamic Contrast preference: 1 From the Picture menu, highlight Picture Settings and press the ENTER button. (Sample Image) Dynamic Contras't screen Highlight Advanced Picture Settings, and then press the ENTER button. 107 Chapte7r UsingtheTV'sAdvanced Features Usingthe advancedpicturesettings DynamicContrast Dynamic Contrast detects changes in picture quality that affect the appearance of your contrast settings and then automatically adjusts the video.
User Guide
Page 108
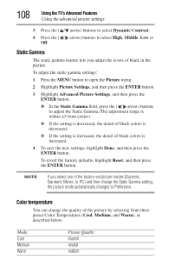
... tile (A/Y arrow) buttons to select Dynamic Contrast. 4 Press tile (,ql/_ arrow) buttons to open the Picture menu. 2 Highlight Picture Settings, and then press tile ENTER button. 3 Highlight Advanced Picture Settings, and then press tile ENTER button. To revert the factory defaults, highlight Reset, and then press the ENTER button. Colortemperature You can change the quality...
... tile (A/Y arrow) buttons to select Dynamic Contrast. 4 Press tile (,ql/_ arrow) buttons to open the Picture menu. 2 Highlight Picture Settings, and then press tile ENTER button. 3 Highlight Advanced Picture Settings, and then press tile ENTER button. To revert the factory defaults, highlight Reset, and then press the ENTER button. Colortemperature You can change the quality...

User Guide
Page 109
... signal (especially a cable channel) or playing a noisy video cassette or disc. To change the CableClear ®settings: 1 Press the MENU button and open the Picture menu. 2 Highlight Picture Settings, and then press tile ENTER button. 3 Highlight Advanced Picture Settings, and then press tile ENTER button. 4 Highlight Color Temperature, and then press the ENTER button. 5 In the...
... signal (especially a cable channel) or playing a noisy video cassette or disc. To change the CableClear ®settings: 1 Press the MENU button and open the Picture menu. 2 Highlight Picture Settings, and then press tile ENTER button. 3 Highlight Advanced Picture Settings, and then press tile ENTER button. 4 Highlight Color Temperature, and then press the ENTER button. 5 In the...
User Guide
Page 110
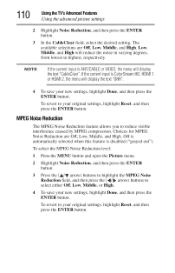
..., and then press the (_/_ arrow) buttons to select either Off, Low, Middle, or High. 4 To save your original settings, highlight Reset, and then press the ENTER button. Middle, and High. Low. Off is automatically selected when this feature is disabled...CableClear"I.fthecurrentinputis ColorStreamHD,HDMI1 or HDMI2, themenuwill displaythetext "DNR". 4 To save your original settings, highlight Reset, and then press the ENTER button. 110 UsingtheTV'sAdvancedFeatures Using the advanced picture settings 2 Highlight Noise Reduction, and then press the ENTER button. 3 In the CableClear...
..., and then press the (_/_ arrow) buttons to select either Off, Low, Middle, or High. 4 To save your original settings, highlight Reset, and then press the ENTER button. Middle, and High. Low. Off is automatically selected when this feature is disabled...CableClear"I.fthecurrentinputis ColorStreamHD,HDMI1 or HDMI2, themenuwill displaythetext "DNR". 4 To save your original settings, highlight Reset, and then press the ENTER button. 110 UsingtheTV'sAdvancedFeatures Using the advanced picture settings 2 Highlight Noise Reduction, and then press the ENTER button. 3 In the CableClear...
User Guide
Page 111
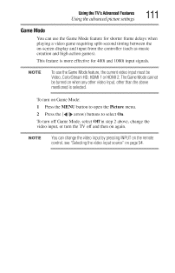
... flame delays when playing a video game requiring split-second timing between the on page54. UsingtheTV'sAdvancedFeatures Using the advanced picture settings 1 11 GameMode You can use the Game Mode feature for 480i and 1080i input signals. NOTE TOusetheGameModefeaturet,hecurrentvideoinputmustbe Video,ColorStreamHD,...turn the TV off and then on Game Mode: 1 Press the MENU button to open the Picture menu. 2 Press the (4/_ arrow) buttons to select On. TheGameModecannot beturnedon whenanyothervideoinput,otherthantheabove mentionedis selected.
... flame delays when playing a video game requiring split-second timing between the on page54. UsingtheTV'sAdvancedFeatures Using the advanced picture settings 1 11 GameMode You can use the Game Mode feature for 480i and 1080i input signals. NOTE TOusetheGameModefeaturet,hecurrentvideoinputmustbe Video,ColorStreamHD,...turn the TV off and then on Game Mode: 1 Press the MENU button to open the Picture menu. 2 Press the (4/_ arrow) buttons to select On. TheGameModecannot beturnedon whenanyothervideoinput,otherthantheabove mentionedis selected.
User Guide
Page 113
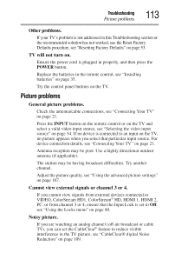
... a valid video input source, see "Selecting the video input source" on the TV. The station may be having broadcast difficulties. If no picture appears when you select that the Input Lock is plugged in properly, and then press the POWER button. Antenna reception may be poor. Cannot...connections, see "Connecting Your TV" on page 21. If you can set to Off, see "Using the Locks menu" on page 80. Noisy picture. Adjust the picture quality, see "Using the advanced picture settings" on . Ensure the power cord is set the CableClear ®feature to an input on the TV, no ...
... a valid video input source, see "Selecting the video input source" on the TV. The station may be having broadcast difficulties. If no picture appears when you select that the Input Lock is plugged in properly, and then press the POWER button. Antenna reception may be poor. Cannot...connections, see "Connecting Your TV" on page 21. If you can set to Off, see "Using the Locks menu" on page 80. Noisy picture. Adjust the picture quality, see "Using the advanced picture settings" on . Ensure the power cord is set the CableClear ®feature to an input on the TV, no ...
User Guide
Page 127
Index A advanced picture settings CableClear® digital Noise Reduction 109 Color temperature 108 Dynamic Contrast 107 MPEG Noise Reduction 110 Static Gamma 108 using 107 audio adjusting quality 78 ... muting sound 76 optical audio output format 79 stereo/SAP broadcasts 77 Auto Aspect using 69 Auto Brightness set 99 sensor auto power down set 100 Auto Start function Media Player 93 AV Input mode setting 50 g cables 3.5mm to RCA Y-cable 23 analog RGB (15-pin) 23 coaxial (F-type) 21 component video...
Index A advanced picture settings CableClear® digital Noise Reduction 109 Color temperature 108 Dynamic Contrast 107 MPEG Noise Reduction 110 Static Gamma 108 using 107 audio adjusting quality 78 ... muting sound 76 optical audio output format 79 stereo/SAP broadcasts 77 Auto Aspect using 69 Auto Brightness set 99 sensor auto power down set 100 Auto Start function Media Player 93 AV Input mode setting 50 g cables 3.5mm to RCA Y-cable 23 analog RGB (15-pin) 23 coaxial (F-type) 21 component video...


